Introduction
The tray was empty before I could even clear the table. Twice in one afternoon. The pencil sprinkles were the first to disappear, followed by sticky fingers reaching for the soft frosted sugar cookies. Honestly, I wasn’t expecting such a fuss over a simple back to school treat, but the messages started trickling in: “Can you send me the recipe?” “These are the best cookies ever!” It caught me off guard every time, mostly because I thought I was just whipping up a cozy little snack for the kids to celebrate the new school year.
It all started with a quiet Saturday morning, me testing a cookie dough that felt just right—soft but sturdy enough to hold a generous layer of frosting. The pencil-shaped sprinkles were a last-minute idea, a little nod to the school days ahead, and that touch sparked a buzz that I hadn’t planned for. The scent of vanilla and buttery sugar filled the kitchen, the kind that settles in your memory and makes you want to reach for another bite even after you know you’re full.
Looking back, I realize this recipe stuck around because it’s not just sweet; it’s a little moment of comfort and joy in the whirlwind of back-to-school chaos. It’s the kind of cookie that makes you pause, share a smile, and maybe even sneak one when no one’s watching. And that quiet feeling—that a simple cookie could bring a little warmth and connection—is why I keep coming back to this recipe.
Why You’ll Love This Recipe
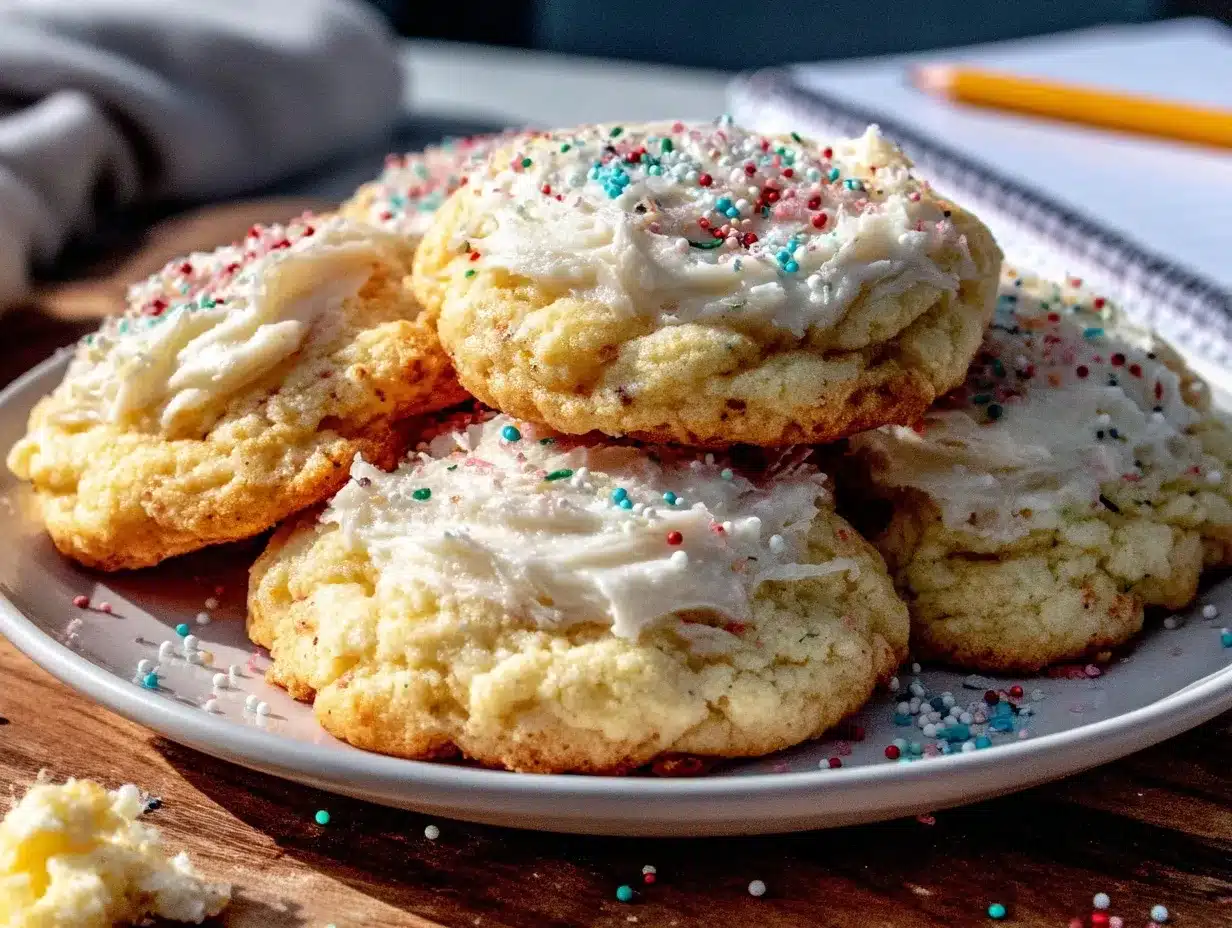
Let me tell you, this soft frosted sugar cookies recipe isn’t your run-of-the-mill cookie. After testing countless batches (some too crispy, others too bland), I landed on this one that nails that soft, melt-in-your-mouth texture every time. Plus, the frosting is just the right balance of sweet and creamy, making every bite a little celebration.
- Quick & Easy: Comes together in under 30 minutes, perfect when the school bell is about to ring and you need a last-minute treat.
- Simple Ingredients: You probably have everything already—no surprise grocery runs needed.
- Perfect for Back to School: The pencil sprinkles aren’t just cute; they make these cookies feel special and festive.
- Crowd-Pleaser: Kids, parents, even teachers have given these cookies thumbs up. Honestly, I’ve seen adults sneak an extra one when no one was looking.
- Unbelievably Delicious: The soft texture combined with creamy frosting hits that comfort food spot better than any store-bought cookie.
What makes this recipe stand apart is how it balances ease with that little extra flair. The frosting is fluffy but firm enough to hold shape, and the pencil sprinkles add a touch of whimsy without overwhelming the flavor. It’s a recipe that feels cozy but looks like you put in a ton of effort—ideal for impressing without stress, especially if you’re juggling school runs and dinner plans.
Honestly, this recipe has become my go-to when I want to make something that feels like a warm hug after a long day. It’s the kind of treat that makes you pause, smile, and remember that even small moments of sweetness matter.
What Ingredients You Will Need
This recipe uses simple, wholesome ingredients to deliver soft sugar cookies with a luscious frosting, no fuss involved. Most of these are pantry staples, and the pencil sprinkles can be swapped for any fun decor you like.
- For the Cookies:
- 2 ¾ cups (345g) all-purpose flour (I like King Arthur for consistent results)
- 1 teaspoon baking soda
- ½ teaspoon baking powder
- ½ teaspoon salt
- 1 cup (230g) unsalted butter, softened (room temperature is key for softness)
- 1 ½ cups (300g) granulated sugar
- 1 large egg, room temperature
- 2 teaspoons pure vanilla extract
- ½ cup (120ml) whole milk
- For the Frosting:
- 1 cup (230g) unsalted butter, softened
- 3-4 cups (360-480g) powdered sugar, sifted
- 2 teaspoons pure vanilla extract
- 2-3 tablespoons (30-45ml) whole milk or heavy cream
- Pinch of salt (balances sweetness)
- For Decoration:
- Pencil-shaped sprinkles or any fun back-to-school themed sprinkles (found at specialty baking stores or online)
If you’re looking for gluten-free options, swapping all-purpose flour with a 1:1 gluten-free baking blend works well here. For a dairy-free twist, I’ve used coconut oil in place of butter and almond milk in the frosting with surprisingly great results.
Equipment Needed
- Mixing bowls (at least two, one for dry ingredients and one for wet)
- Electric hand mixer or stand mixer (trust me, it makes frosting so much easier)
- Measuring cups and spoons (precision matters for soft cookies)
- Spatula for mixing and scraping down bowls
- Baking sheets lined with parchment paper or silicone mats (prevents sticking and helps even baking)
- Cooling racks (essential for letting cookies cool properly before frosting)
- Offset spatula or butter knife for spreading frosting evenly
If you don’t have a stand mixer, a sturdy hand mixer works just fine. I once tried mixing frosting by hand—well, let’s say my arm got a serious workout but the texture wasn’t quite as smooth. For budget-friendly baking, parchment paper and basic mixing bowls are all you really need to nail this recipe.
Preparation Method
- Preheat your oven to 375°F (190°C). Line two baking sheets with parchment paper or silicone mats to prevent sticking.
- Mix dry ingredients: In a medium bowl, whisk together 2 ¾ cups (345g) flour, 1 teaspoon baking soda, ½ teaspoon baking powder, and ½ teaspoon salt. Set aside.
- Cream butter and sugar: In a large bowl, beat 1 cup (230g) softened butter and 1 ½ cups (300g) granulated sugar using an electric mixer on medium speed until light and fluffy—about 3 to 4 minutes. This step really sets the stage for soft cookies.
- Add egg and vanilla: Beat in 1 large room temperature egg and 2 teaspoons vanilla extract until combined.
- Alternate adding dry ingredients and milk: With the mixer on low, add the dry ingredients in three parts, alternating with ½ cup (120ml) whole milk. Begin and end with the dry ingredients. Mix until just combined—don’t overmix or cookies will turn tough.
- Scoop dough: Use a cookie scoop or tablespoon to drop rounded balls about 2 inches apart on the prepared baking sheets.
- Bake: Bake for 8-10 minutes until edges are set but centers look slightly underbaked. This is the secret to softness—don’t wait for them to brown.
- Cool completely: Transfer cookies to a wire rack and allow to cool fully before frosting. Patience here pays off; frosting melts if cookies are too warm.
- Make the frosting: Beat 1 cup (230g) softened butter until creamy. Gradually add 3 cups (360g) sifted powdered sugar, beating on low until combined. Add 2 teaspoons vanilla, 2 tablespoons (30ml) milk, and a pinch of salt. Beat on high for 2-3 minutes until light and fluffy. Add more powdered sugar or milk to reach desired consistency.
- Frost and decorate: Spread frosting generously on each cooled cookie using an offset spatula or butter knife. Sprinkle pencil-shaped sprinkles on top immediately before frosting sets.
Pro tip: If you want perfectly even cookies, chill the dough for 15 minutes before scooping. Also, if your kitchen is warm, pop the frosting in the fridge for 10 minutes to firm up before spreading.
Cooking Tips & Techniques
One of the trickiest parts of this recipe is getting that perfect soft texture. You know, the kind that almost melts in your mouth but still holds together like a proper cookie. The key is not to overbake. I’ve learned the hard way—cookies left in a minute too long turn from soft to dry pretty quickly.
Another tip is creaming the butter and sugar long enough. It takes a few minutes of mixing for air to get incorporated, which gives the dough a lighter texture. Rushing this step leads to dense cookies, and honestly, no one wants that.
When mixing the dough, I always add the flour in parts, alternating with milk. This keeps the dough from getting too stiff and helps keep moisture balanced. It’s a little step that makes a big difference in softness.
For the frosting, I recommend beating it well until it’s fluffy but spreadable. If it’s too thick, add a splash more milk; too thin, a little more powdered sugar. Also, frosting cold cookies will just melt it into a mess, so cooling time is crucial.
Lastly, don’t skimp on the sprinkles! They add a festive, fun vibe that turns these cookies into a little celebration, perfect for back-to-school excitement. If you ever want a different look, swapping in funfetti sprinkles works beautifully.
Variations & Adaptations
- Gluten-Free Version: Use a 1:1 gluten-free baking flour blend. The cookies come out just as soft and delicious.
- Vegan Adaptation: Replace butter with vegan margarine or coconut oil, use a flax egg (1 tablespoon ground flax + 3 tablespoons water), and swap milk for almond or oat milk. The frosting can be made with vegan butter and plant-based milk too.
- Flavor Twists: Add lemon zest to the dough for a fresh citrus note, or mix in a teaspoon of almond extract instead of vanilla for a subtle nutty flavor.
- Alternative Decorations: Instead of pencil sprinkles, try edible markers to draw fun school-themed designs on the frosting for a personal touch.
- Texture Variation: For a slightly chewy edge, chill the dough overnight before baking. It also deepens the flavor.
One time, I swapped out the pencil sprinkles for mini chocolate chips, and while it was a hit with the kids, the classic look with the sprinkles always wins the charm contest. If you’re curious about other cozy treats, you might enjoy the pancakes and bacon breakfast guide I put together for those busy mornings.
Serving & Storage Suggestions
These cookies are best served at room temperature with frosting soft and creamy. They pair wonderfully with a glass of cold milk or a cozy cup of chai tea, especially when you want that quiet back-to-school moment to feel a little special.
If you’re serving them at a party or school event, arrange them on a colorful platter to show off those pencil sprinkles. They bring a little charm that kids and adults both appreciate.
To store, place cookies in an airtight container layered with parchment paper. They keep well at room temperature for up to 3 days, but if you want to make them ahead, fridge storage for up to a week works fine. Just bring them back to room temp before serving.
For longer storage, freeze unfrosted cookies in a single layer for up to 3 months. Thaw completely, then frost just before serving. This tip saves time when preparing for big events or busy weeks.
Reheating isn’t really necessary, but if you want that fresh-baked feel, a quick 10-second zap in the microwave softens the cookie and frosting beautifully.
Nutritional Information & Benefits
Each soft frosted sugar cookie has approximately 180-220 calories, depending on the size and amount of frosting. They provide a comforting treat rather than a nutrition powerhouse, but here’s the scoop:
- Butter provides a little vitamin A and healthy fats (in moderation, of course)
- Vanilla extract adds flavor without calories or additives
- Using whole milk gives a touch of calcium and protein
- For those with dietary restrictions, gluten-free and vegan options keep everyone included
These cookies contain common allergens such as dairy, eggs, and wheat, so keep that in mind if you’re baking for a crowd. Personally, I appreciate having a treat that feels indulgent but still made from simple, honest ingredients.
Conclusion
Soft frosted sugar cookies with pencil sprinkles have quietly become a back-to-school staple around here—not just for their sweetness, but for the little moments they create. Whether it’s a quick afternoon snack or a special treat to celebrate a new chapter, this recipe hits the spot with ease and charm.
Feel free to tweak the flavors or decorations to suit your vibe. That’s the beauty of this recipe—it’s cozy, customizable, and always ready to bring a bit of warmth to busy days.
Honestly, these cookies remind me that sometimes the simplest things—a soft cookie, a sprinkle here and there—can bring the most joy. If you try them, I’d love to hear how you make them your own.
Happy baking and smooth transitions into the school year!
FAQs
How do I keep sugar cookies soft?
Don’t overbake them—take them out when the edges are just set but the centers still look slightly underbaked. Also, store them in an airtight container with parchment paper between layers.
Can I make these cookies ahead of time?
Yes! You can bake the cookies up to 3 days in advance and store them unfrosted in an airtight container. Frost them just before serving for the best results.
What if I don’t have pencil sprinkles?
Any fun sprinkle or edible decoration works. You can also use mini chocolate chips, colored sugar, or even draw on the frosting with edible markers for a personalized touch.
How do I make the frosting less sweet?
Try adding a pinch of salt or a drop of lemon juice to balance the sweetness. You can also reduce the powdered sugar slightly, but keep an eye on consistency.
Can I freeze these cookies?
Yes, freeze unfrosted cookies in a single layer for up to 3 months. Thaw completely before frosting and serving.
Pin This Recipe!

Soft Frosted Sugar Cookies

Soft frosted sugar cookies with a creamy frosting and festive pencil sprinkles, perfect for cozy back-to-school treats that are quick and easy to make.
- Prep Time: 15 minutes
- Cook Time: 10 minutes
- Total Time: 25 minutes
- Yield: 24 cookies 1x
- Category: Dessert
- Cuisine: American
Ingredients
- 2 ¾ cups (345g) all-purpose flour
- 1 teaspoon baking soda
- ½ teaspoon baking powder
- ½ teaspoon salt
- 1 cup (230g) unsalted butter, softened
- 1 ½ cups (300g) granulated sugar
- 1 large egg, room temperature
- 2 teaspoons pure vanilla extract
- ½ cup (120ml) whole milk
- 1 cup (230g) unsalted butter, softened (for frosting)
- 3–4 cups (360-480g) powdered sugar, sifted
- 2 teaspoons pure vanilla extract (for frosting)
- 2–3 tablespoons (30-45ml) whole milk or heavy cream
- Pinch of salt (for frosting)
- Pencil-shaped sprinkles or any fun back-to-school themed sprinkles
Instructions
- Preheat your oven to 375°F (190°C). Line two baking sheets with parchment paper or silicone mats to prevent sticking.
- In a medium bowl, whisk together 2 ¾ cups (345g) flour, 1 teaspoon baking soda, ½ teaspoon baking powder, and ½ teaspoon salt. Set aside.
- In a large bowl, beat 1 cup (230g) softened butter and 1 ½ cups (300g) granulated sugar using an electric mixer on medium speed until light and fluffy, about 3 to 4 minutes.
- Beat in 1 large room temperature egg and 2 teaspoons vanilla extract until combined.
- With the mixer on low, add the dry ingredients in three parts, alternating with ½ cup (120ml) whole milk. Begin and end with the dry ingredients. Mix until just combined; do not overmix.
- Use a cookie scoop or tablespoon to drop rounded balls about 2 inches apart on the prepared baking sheets.
- Bake for 8-10 minutes until edges are set but centers look slightly underbaked. Do not wait for them to brown.
- Transfer cookies to a wire rack and allow to cool fully before frosting.
- To make the frosting, beat 1 cup (230g) softened butter until creamy. Gradually add 3 cups (360g) sifted powdered sugar, beating on low until combined.
- Add 2 teaspoons vanilla, 2 tablespoons (30ml) milk, and a pinch of salt. Beat on high for 2-3 minutes until light and fluffy. Adjust consistency with more powdered sugar or milk as needed.
- Spread frosting generously on each cooled cookie using an offset spatula or butter knife.
- Sprinkle pencil-shaped sprinkles on top immediately before frosting sets.
Notes
Do not overbake cookies to keep them soft; edges should be set but centers slightly underbaked. Cool cookies completely before frosting to prevent melting. For perfectly even cookies, chill dough for 15 minutes before scooping. If frosting is too thick, add a splash of milk; if too thin, add more powdered sugar. Store cookies in an airtight container with parchment paper between layers. Freeze unfrosted cookies for up to 3 months.
Nutrition
- Serving Size: 1 cookie
- Calories: 200
- Sugar: 18
- Sodium: 120
- Fat: 10
- Saturated Fat: 6
- Carbohydrates: 28
- Fiber: 0.5
- Protein: 2
Keywords: soft sugar cookies, frosted sugar cookies, back to school treats, easy cookies, pencil sprinkles, soft cookies recipe


