My neighbor, a retired baker named Rose, watched me trying to entertain my toddler and preschooler during a rainy spring afternoon. She didn’t say anything at first. Then she disappeared into her house and came back with a small bowl of something that looked like cookie dough but smelled even better. “For the little ones,” she said, handing it over with a wink. “No eggs, and I heat-treated the flour so it’s safe.” I was skeptical, honestly. Cookie dough without the risk? It sounded too good to be true. But my kids devoured it, and I found myself sneaking spoonfuls long after they’d lost interest in their toys.
The conversation that followed—standing on my porch while the rain tapped on the roof—was as important as the recipe itself. Rose told me about her granddaughter who had celiac disease, about the years she spent perfecting a dough that everyone could enjoy. She didn’t teach me formally; she just shared, like one cook to another. I adapted her method over time, tweaking the sweetness and texture until it felt like mine. Maybe you’ve been there, looking for a treat that feels indulgent but won’t keep you up worrying about raw flour or eggs. That’s exactly where this recipe comes in.
This kid-approved edible cookie dough dip is the kind of recipe that saves a rainy afternoon, a playdate, or a movie night. It’s creamy, loaded with chocolate chips, and completely safe to eat by the spoonful. I keep making it because it brings that same feeling I had on the porch—simple joy, shared with the people you love. Let me tell you, once you try it, you’ll wonder why you ever settled for store-bought alternatives.
Why You’ll Love This Recipe
This isn’t just another edible cookie dough recipe. I’ve tested this version more times than I can count, and I can say with confidence that it delivers on every front. Here’s what makes it stand out:
- Quick & Easy : Ready in under 10 minutes, with no baking required. Perfect for those moments when the kids are asking for a snack and you need something fast.
- Simple Ingredients : You probably have everything in your pantry right now. No fancy extracts, no hard-to-find items. Just basic baking staples.
- Perfect for Family Fun : Great for birthday parties, after-school treats, or a weekend movie night. It’s a crowd-pleaser that both kids and adults fight over.
- Crowd-Pleaser : I’ve brought this to potlucks and playdates, and it always gets rave reviews. People can’t believe it’s safe to eat raw.
- Unbelievably Delicious : The texture is creamy, the flavor is spot-on classic cookie dough, and the chocolate chips add that perfect pop of sweetness. It’s comfort food at its finest.
What makes this recipe different from the rest? It’s the heat-treated flour method that eliminates any worry without changing the taste or texture. I’ve tried other versions that use alternative flours or complicated techniques, but this one is the simplest and most reliable. It’s not just another version—it’s the best version I’ve ever made.
This recipe isn’t just good—it’s the kind that makes you close your eyes after the first bite. It’s safe, it’s fast, and it brings that same nostalgic cookie dough joy without the stress. Perfect for impressing guests without any effort, or turning a simple afternoon into something memorable.
What Ingredients You Will Need
This recipe uses simple, wholesome ingredients to deliver that classic cookie dough flavor without any fuss. Most of these are pantry staples, so you can whip this up anytime the craving hits.
- All-purpose flour, 1 ½ cups (180g) – This is the base of the dough. I recommend using unbleached flour for the best texture. You’ll need to heat-treat this before using.
- Unsalted butter, ½ cup (113g), softened – Adds richness and that creamy mouthfeel. I prefer using a high-quality brand like Kerrygold for the best flavor, but any unsalted butter works.
- Light brown sugar, ½ cup (100g), packed – This gives the dough that classic caramel-like sweetness. Make sure it’s firmly packed for accurate measurement.
- Granulated sugar, ¼ cup (50g) – Balances the sweetness and adds a bit of texture.
- Vanilla extract, 1 teaspoon (5ml) – Pure vanilla extract makes a difference here. Avoid imitation vanilla if you can.
- Milk, 2-3 tablespoons (30-45ml) – Helps bring the dough together. Use whole milk for the creamiest result, or any milk alternative you prefer.
- Salt, ¼ teaspoon – Enhances the sweetness and balances the flavors. Don’t skip this!
- Mini chocolate chips, ½ cup (90g) – I prefer mini chips because they distribute evenly and give you chocolate in every bite. Use semi-sweet or dark chocolate for the best balance.
Ingredient Selection Tips: For the best texture, make sure your butter is truly softened to room temperature—it should be soft enough to leave an indent when pressed but not melted. I’ve found that using a digital scale for measuring flour gives the most consistent results, especially since you’re heat-treating it.
Substitution Guidance: If you need a dairy-free version, use plant-based butter and your favorite milk alternative. For a gluten-free option, use a 1:1 gluten-free flour blend, but make sure to heat-treat it the same way. You can also swap the chocolate chips for white chocolate, butterscotch, or even chopped nuts if your kids aren’t sensitive to them.
Equipment Needed
You don’t need a lot of fancy tools for this recipe, which is part of why I love it. Here’s what you’ll need:
- Microwave-safe bowl or a small baking sheet – For heat-treating the flour. A glass bowl works perfectly.
- Mixing bowls – One large bowl for the dough and one small bowl for the flour treatment.
- Electric hand mixer or stand mixer – Makes creaming the butter and sugars much easier, but you can do it by hand with a wooden spoon if you prefer.
- Spatula – For scraping down the sides and folding in the chocolate chips.
- Measuring cups and spoons – Accurate measurements are key for the right texture.
- Kitchen thermometer – Optional but highly recommended for checking the flour temperature. A simple instant-read thermometer works great.
I’ve made this recipe with just a bowl and a whisk when I was staying at a vacation rental, and it still turned out great. The hand mixer just makes it creamier and faster. For the heat-treating step, a microwave is the quickest method, but you can also use the oven if you’re already using it for something else. Honestly, the microwave method is my go-to because it’s done in under a minute.
Preparation Method
- Heat-treat the flour. Place the 1 ½ cups of all-purpose flour in a microwave-safe bowl. Microwave on high for 30 seconds, then stir well. Repeat for another 30 seconds. Check the temperature with a kitchen thermometer—it should reach at least 165°F (74°C) to be safe. If it hasn’t reached that temperature, continue in 15-second intervals until it does. Let the flour cool completely before using. This step is non-negotiable for safety!
- Cream the butter and sugars. In a large mixing bowl, combine the softened unsalted butter, packed light brown sugar, and granulated sugar. Beat with an electric hand mixer on medium speed for about 2-3 minutes, until the mixture is light, fluffy, and pale in color. Scrape down the sides of the bowl with a spatula halfway through.
- Add the vanilla and milk. Pour in the vanilla extract and 2 tablespoons of milk. Beat on low speed until just combined. The mixture should look smooth and creamy. If it seems too thick, add the remaining tablespoon of milk. The dough should be soft but not runny.
- Mix in the cooled flour. Gradually add the cooled heat-treated flour to the wet mixture. Beat on low speed until just combined. Be careful not to overmix, or the dough can become tough. Stop as soon as you don’t see any more streaks of flour.
- Fold in the chocolate chips. Add the mini chocolate chips and fold them in gently with a spatula. Make sure they’re evenly distributed throughout the dough. At this point, the dough should be thick and scoopable.
- Taste and adjust. Give the dough a taste—this is the fun part! If you want it sweeter, add a tablespoon more brown sugar. If it’s too thick, add another splash of milk. Adjust the salt if needed.
- Chill for best texture. For the best flavor and texture, cover the bowl and refrigerate the dough for at least 30 minutes before serving. This allows the flavors to meld and the dough to firm up slightly. But honestly, if you can’t wait, it’s delicious right away too.
Sensory Cues: When you’re creaming the butter and sugars, you’re looking for a texture that’s light and almost airy—it should look like wet sand at first, then become fluffy. When you add the flour, the dough should come together into a soft, pliable mass that holds its shape when scooped. The chocolate chips should be evenly distributed, with no bare patches.
Personal Tip: I’ve learned the hard way not to skip the cooling step after heat-treating the flour. One time, I added warm flour to the butter mixture, and it melted the butter into a greasy mess. Let it cool completely—it takes about 10 minutes, but it’s worth the wait.
Cooking Tips & Techniques
Here are some of the lessons I’ve learned from making this recipe more times than I can count:
Don’t overmix the dough. This is the most common mistake. Once you add the flour, mix just until it disappears. Overmixing develops gluten, which can make the dough tough and less scoopable. You want it tender and creamy, not chewy.
Temperature matters. Make sure your butter is truly softened but not melted. If it’s too cold, it won’t cream properly with the sugars. If it’s melted, the dough will be greasy. I leave my butter out on the counter for about an hour before starting. In a pinch, you can microwave it in 5-second intervals, but be careful—it goes from solid to liquid very quickly.
Use mini chocolate chips. Regular-sized chips can be too large and make the dough hard to scoop. Mini chips distribute more evenly and give you chocolate in every single bite. Plus, they look prettier when serving.
Chill before serving. I know it’s tempting to dig in right away, but chilling the dough for 30 minutes makes a huge difference. The flavors meld together, the texture firms up, and it becomes infinitely more scoopable. Trust me on this one.
My biggest failure: The first time I made this, I forgot to heat-treat the flour. I was so excited to serve it to my kids that I just mixed everything together and handed them spoons. Later that night, I realized my mistake and spent an hour worrying. Now I always do the heat-treating step first, before I even get the butter out. It’s become a non-negotiable part of my routine.
Variations & Adaptations
This recipe is incredibly versatile. Here are some of my favorite variations:
Chocolate Lover’s Version: Add 2 tablespoons of cocoa powder along with the flour. Reduce the all-purpose flour by 2 tablespoons to keep the texture consistent. Fold in white chocolate chips for a beautiful contrast. My kids call this “double chocolate dream.”
Birthday Cake Style: Substitute the vanilla extract with 1 teaspoon of butter extract and add 2 tablespoons of rainbow sprinkles. The sprinkles add a fun pop of color and a slight crunch. This version is always a hit at birthday parties.
Peanut Butter Swirl: After mixing the dough, drop 3 tablespoons of creamy peanut butter on top and gently swirl it through with a knife. Don’t fully incorporate it—you want ribbons of peanut butter throughout. If you have nut allergies in the house, use sunflower seed butter instead.
Vegan Adaptation: Use plant-based butter and your favorite non-dairy milk. Make sure to use dairy-free chocolate chips. The texture will be slightly different, but it’s still delicious. I’ve made this for vegan friends and they couldn’t tell the difference.
Gluten-Free Version: Substitute the all-purpose flour with a 1:1 gluten-free baking flour. Heat-treat it the same way. I’ve found that blends containing xanthan gum work best for the right texture. The dough might be slightly more crumbly, but it tastes just as good.
My personal favorite variation is the birthday cake style. I made it for my daughter’s third birthday, and the adults were sneaking spoonfuls from the kitchen when they thought no one was looking. It’s that good.
Serving & Storage Suggestions
This edible cookie dough dip is best served chilled, straight from the refrigerator. The cold temperature makes the texture firmer and more scoopable. Here are some serving ideas:
Perfect Pairings: Serve with graham crackers, vanilla wafers, pretzel sticks, or apple slices for a healthier option. My kids love dipping animal crackers in it. For a dessert board, arrange the dough in a small bowl surrounded by an assortment of dippers—it’s always the first thing to disappear.
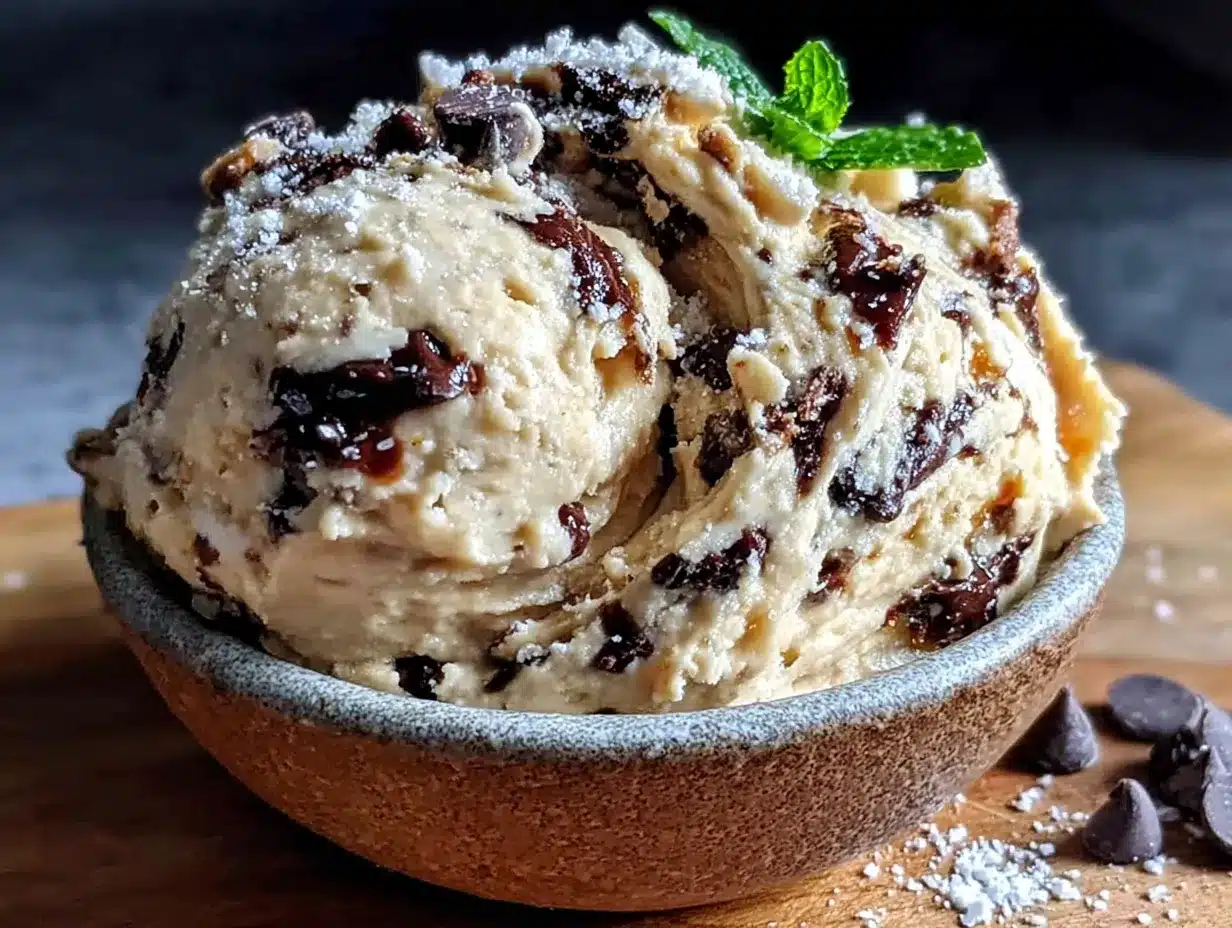
Presentation Tip: Scoop the dough into a serving bowl and top with a few extra chocolate chips and a sprinkle of sea salt. The salt enhances the sweetness and makes it look more polished. For parties, I sometimes pipe the dough into small serving cups for individual portions.
Storage Instructions: Store the dough in an airtight container in the refrigerator for up to 5 days. The flavors actually develop over time, so it tastes even better on the second day. If the dough becomes too firm after chilling, let it sit at room temperature for 10-15 minutes before serving.
Freezer Instructions: This dough freezes beautifully. Scoop it into a freezer-safe container or roll it into a log wrapped in plastic wrap. Freeze for up to 3 months. Thaw in the refrigerator overnight before serving. I always keep a batch in the freezer for unexpected guests or emergency snack cravings.
Reheating Note: This is a no-bake recipe, so there’s no reheating needed. Just scoop and enjoy! If you prefer a softer texture, let it sit at room temperature for a few minutes before serving.
Nutritional Information & Benefits
Here are the estimated nutritional values per serving (based on 12 servings):
- Calories: 210
- Total Fat: 11g
- Saturated Fat: 7g
- Cholesterol: 25mg
- Sodium: 75mg
- Total Carbohydrates: 28g
- Dietary Fiber: 1g
- Sugars: 18g
- Protein: 2g
Health Benefits: While this is definitely a treat, there are some positives. The butter provides vitamin A, and the milk adds calcium. Using dark chocolate chips can provide antioxidants. Plus, making this at home means you control the ingredients—no preservatives or artificial flavors.
Dietary Considerations: This recipe contains dairy, gluten, and (depending on your chocolate chips) may contain soy. For allergen-friendly versions, check the variations section above. It’s naturally egg-free and can be made vegan or gluten-free with simple substitutions.
From a wellness perspective, I believe in balance. This recipe is about joy and connection, not about being “healthy.” It’s okay to enjoy a sweet treat made with love. The fact that it’s safe for kids and made from real ingredients is a win in my book.
Conclusion
This heat-treated edible cookie dough dip has become a staple in my kitchen for good reason. It’s quick, safe, and absolutely delicious. Whether you’re making it for a playdate, a party, or just because it’s Tuesday and you need a little joy, this recipe delivers every single time.
I love how versatile it is—you can customize it to match any occasion or dietary need. And honestly, there’s something special about sharing a bowl of cookie dough with the people you love, knowing it’s completely safe for everyone to enjoy. It brings back that childhood feeling of sneaking a taste of the batter, but without any of the worry.
I encourage you to make this your own. Try different mix-ins, adjust the sweetness, or serve it in creative ways. And when you do, I’d love to hear about it. Drop a comment below and tell me how it turned out, or share your own variation. Your feedback helps other home cooks feel confident trying it themselves. Happy dipping!
Frequently Asked Questions
Can I eat this cookie dough raw without heat-treating the flour?
No, it’s not recommended. Raw flour can contain harmful bacteria like E. coli. Heat-treating the flour to 165°F (74°C) kills any potential pathogens and makes it safe to eat raw. It’s a simple step that takes less than a minute.
Can I use this dough as a frosting for cakes or cupcakes?
Absolutely! This dough is thick enough to pipe onto cupcakes or spread on a cake. Just make sure it’s at room temperature so it’s spreadable. It works wonderfully as a filling for cookie sandwiches too.
How long does this edible cookie dough dip last?
Stored in an airtight container in the refrigerator, it stays fresh for up to 5 days. You can also freeze it for up to 3 months. The texture is best within the first 2-3 days, but it still tastes great after that.
Can I use a different type of sugar?
Yes, but it will change the texture and flavor. You can use all brown sugar for a deeper, more caramel-like flavor, or all granulated sugar for a lighter, crisper texture. Coconut sugar works too, but the dough will be darker and less sweet.
My dough is too dry. How can I fix it?
Add milk one tablespoon at a time until the dough reaches your desired consistency. If it’s too dry after adding milk, you might have overmeasured the flour. Next time, spoon the flour into your measuring cup and level it off rather than scooping directly from the bag.
Pin This Recipe!

Heat-Treated Edible Cookie Dough Dip: The Best Easy Recipe

This kid-approved edible cookie dough dip is creamy, loaded with chocolate chips, and completely safe to eat by the spoonful. It’s quick, easy, and perfect for a rainy afternoon, playdate, or movie night.
- Prep Time: 10 minutes
- Cook Time: 0 minutes
- Total Time: 40 minutes (including chilling)
- Yield: 12 servings 1x
- Category: Dessert
- Cuisine: American
Ingredients
- 1 ½ cups (180g) all-purpose flour
- ½ cup (113g) unsalted butter, softened
- ½ cup (100g) light brown sugar, packed
- ¼ cup (50g) granulated sugar
- 1 teaspoon (5ml) vanilla extract
- 2–3 tablespoons (30-45ml) milk
- ¼ teaspoon salt
- ½ cup (90g) mini chocolate chips
Instructions
- Heat-treat the flour: Place the 1 ½ cups of all-purpose flour in a microwave-safe bowl. Microwave on high for 30 seconds, then stir well. Repeat for another 30 seconds. Check the temperature with a kitchen thermometer—it should reach at least 165°F (74°C) to be safe. If it hasn’t reached that temperature, continue in 15-second intervals until it does. Let the flour cool completely before using.
- Cream the butter and sugars: In a large mixing bowl, combine the softened unsalted butter, packed light brown sugar, and granulated sugar. Beat with an electric hand mixer on medium speed for about 2-3 minutes, until the mixture is light, fluffy, and pale in color. Scrape down the sides of the bowl with a spatula halfway through.
- Add the vanilla and milk: Pour in the vanilla extract and 2 tablespoons of milk. Beat on low speed until just combined. The mixture should look smooth and creamy. If it seems too thick, add the remaining tablespoon of milk. The dough should be soft but not runny.
- Mix in the cooled flour: Gradually add the cooled heat-treated flour to the wet mixture. Beat on low speed until just combined. Be careful not to overmix, or the dough can become tough. Stop as soon as you don’t see any more streaks of flour.
- Fold in the chocolate chips: Add the mini chocolate chips and fold them in gently with a spatula. Make sure they’re evenly distributed throughout the dough. At this point, the dough should be thick and scoopable.
- Taste and adjust: Give the dough a taste—this is the fun part! If you want it sweeter, add a tablespoon more brown sugar. If it’s too thick, add another splash of milk. Adjust the salt if needed.
- Chill for best texture: For the best flavor and texture, cover the bowl and refrigerate the dough for at least 30 minutes before serving. This allows the flavors to meld and the dough to firm up slightly. But honestly, if you can’t wait, it’s delicious right away too.
Notes
Do not skip cooling the heat-treated flour before adding to the butter mixture, or the butter will melt. For best texture, chill the dough for at least 30 minutes before serving. The dough can be stored in an airtight container in the refrigerator for up to 5 days or frozen for up to 3 months.
Nutrition
- Serving Size: 1 serving (about 1/1
- Calories: 210
- Sugar: 18
- Sodium: 75
- Fat: 11
- Saturated Fat: 7
- Carbohydrates: 28
- Fiber: 1
- Protein: 2
Keywords: edible cookie dough, cookie dough dip, no-bake dessert, heat-treated flour, kid-friendly, easy dessert, chocolate chip cookie dough