“Hey, can you bring something for the potluck?” That text popped up on a Friday afternoon when my week was already spiraling out of control. Honestly, I wasn’t in the mood to cook anything complicated or spend hours in the kitchen. But then I remembered this recipe for easy freezer-friendly chicken enchiladas that I’d stumbled on during a late-night recipe hunt. It wasn’t fancy or glamorous—just straightforward, comforting, and perfect for feeding a crowd without the usual chaos. I figured, why not give it a shot?
So there I was, surrounded by grocery bags and a ticking clock, throwing together this batch with little hope but a lot of trust in the simplicity of the process. The smell of warming sauce and bubbling cheese felt like a warm hug after a rough day. When I pulled them from the oven, the golden, bubbly surface was enough to make me forget the stress for a bit. And the best part? I made enough to freeze some for later, which felt like a secret weapon for the next busy week. It’s funny how a simple dish like chicken enchiladas can turn a hectic evening into a moment of calm, you know?
This recipe stuck with me not just because it’s easy or crowd-pleasing, but because it’s one of those few meals that feels like a genuine lifesaver. Whether you’re juggling family, friends, or just a mountain of to-dos, these enchiladas fit right in—ready when you need them, delicious every time. I’m convinced that once you try this version, you’ll find yourself making it again and again, just like I did.
Why You’ll Love This Recipe
I’ve made this easy freezer-friendly chicken enchiladas recipe more times than I can count, and it still surprises me how well it holds up, both fresh and straight from the freezer. It’s genuinely one of my go-to meals when feeding a crowd or preparing ahead for busy days.
- Quick & Easy: From start to finish, it takes around 45 minutes to prep and bake. Perfect for last-minute gatherings or when you want dinner without fuss.
- Simple Ingredients: No need for specialty stores—most items are pantry staples or easy to find. I usually grab my enchilada sauce from a trusted brand like Old El Paso for consistency.
- Perfect for Crowd Pleasers: Whether it’s a family reunion, potluck, or casual game night, these enchiladas disappear fast. Kids and adults alike ask for seconds.
- Freezer Friendly: Make a double batch and freeze half for a stress-free meal later. Honestly, the flavor only gets better after a day or two in the fridge or freezer.
- Balanced Flavor: The blend of tender shredded chicken, melty cheese, and the smoky enchilada sauce hits just the right notes without being overpowering.
This isn’t just another chicken enchiladas recipe. What sets it apart is the way the filling stays juicy yet not soggy, thanks to a little trick I learned about draining the chicken well and layering the sauce thoughtfully. Plus, the tortillas hold up beautifully even after freezing, which is a game changer. You get all the comfort food vibes without the usual soggy mess that sometimes comes with make-ahead dishes.
It’s the kind of recipe that invites you to relax and enjoy your company, not worry about last-minute cooking drama. And if you’re curious about other quick and satisfying meals, you might find inspiration in my spicy cajun shrimp and sausage sheet pan meal or my easy one-pan garlic butter salmon with asparagus recipes, both of which are favorites for easy entertaining.
What Ingredients You Will Need
This recipe uses straightforward, wholesome ingredients to deliver a bold flavor and satisfying texture without fuss. Most of these are pantry staples, and the chicken filling can easily be tweaked to fit what you have on hand.
- For the Chicken Filling:
- 3 cups cooked shredded chicken (rotisserie chicken works great here)
- 1 cup shredded cheddar cheese (sharp for extra flavor)
- 1 cup shredded Monterey Jack cheese (melts beautifully)
- 1/2 cup diced onions (adds sweetness and texture)
- 2 cloves garlic, minced (fresh is best for that punch)
- 1/2 cup canned black beans, rinsed and drained (optional, adds heartiness)
- 1/4 cup chopped fresh cilantro (brightens the flavor)
- 1 teaspoon ground cumin (warm, earthy spice)
- 1 teaspoon chili powder (adjust for heat preference)
- Salt and black pepper to taste
- For the Enchilada Sauce:
- 2 cups red enchilada sauce (store-bought or homemade; I like La Victoria for a nice balance)
- For Assembly:
- 12 large flour tortillas (10-inch size works best; use corn tortillas for gluten-free option but soften first)
- 1 1/2 cups shredded cheese (combo of cheddar and Monterey Jack to top)
You can swap the chicken for shredded turkey or even cooked ground beef if you prefer. For a dairy-free version, use vegan cheese and check your tortillas—some contain lard. I’ve found that fresh, firm chicken gives the best texture, but leftover roast chicken works perfectly when you’re short on time. The cheese mix keeps the enchiladas gooey but balanced, avoiding that greasy overload you sometimes get.
Equipment Needed
- Large mixing bowl – to combine the filling ingredients easily.
- Baking dish (9×13 inches / 23×33 cm) – ideal size for layering enchiladas; glass or metal works fine.
- Skillet or frying pan – for softening tortillas if needed and warming the sauce.
- Sharp knife and cutting board – for prepping onions, garlic, and cilantro.
- Measuring cups and spoons – to keep seasoning balanced.
- Aluminum foil or plastic wrap – for covering before freezing or baking.
If you don’t have a 9×13 inch pan, a similar-sized casserole dish works well. Avoid using non-stick pans for baking since you want the edges to crisp up a little. I once tried baking these in a round dish and the corners didn’t cook evenly, so stick with a rectangle for best results.
Preparation Method
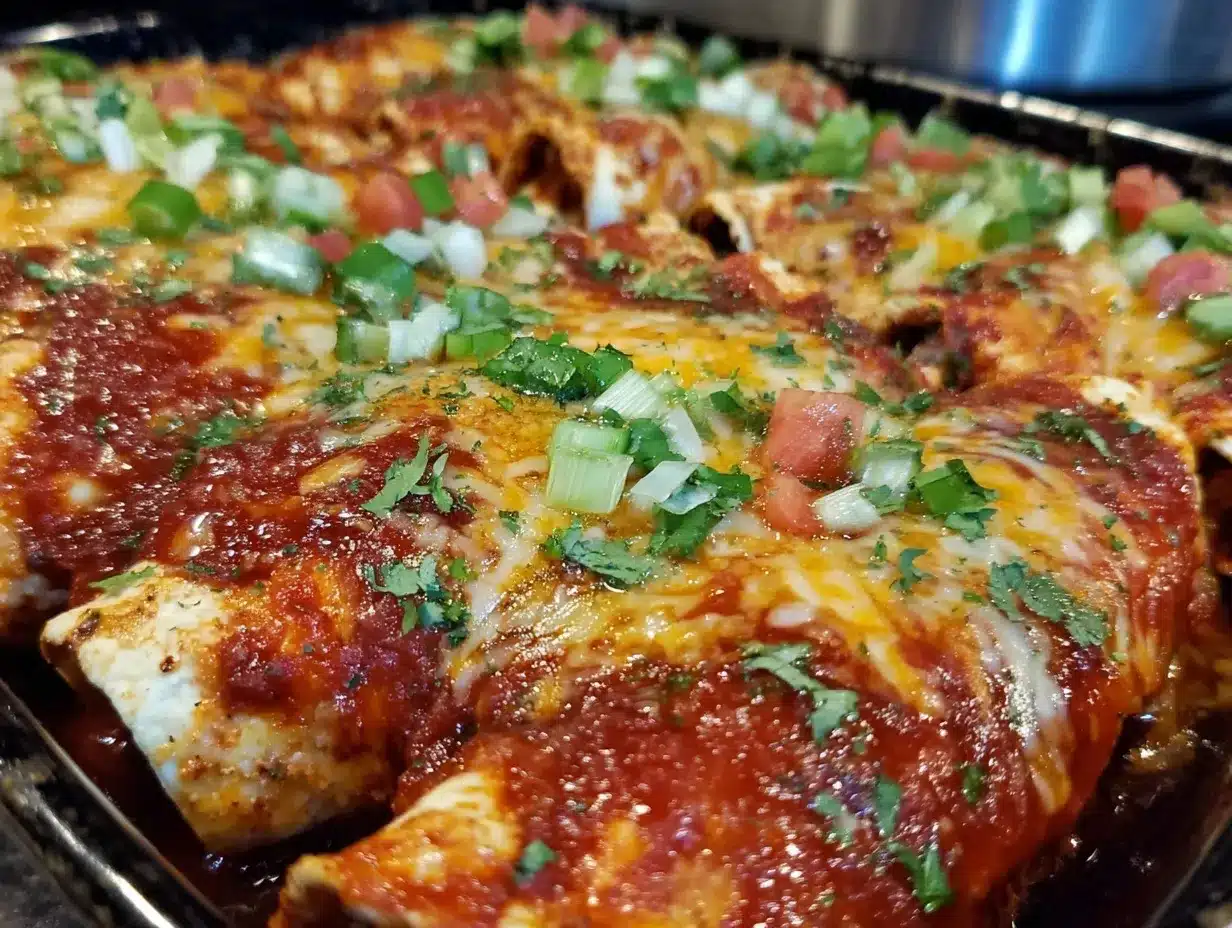
- Prepare the chicken filling: In a large bowl, combine the shredded chicken, both cheeses (1 cup total), diced onions, minced garlic, black beans (if using), cilantro, cumin, chili powder, salt, and pepper. Mix well until everything is evenly distributed. This takes about 5 minutes.
- Warm the enchilada sauce: Pour the enchilada sauce into a skillet over medium heat and warm for 3–5 minutes, stirring occasionally. This step helps the sauce coat the tortillas better and prevents them from tearing.
- Soften the tortillas: Quickly warm each tortilla in the skillet for about 10 seconds per side or wrap a stack in foil and heat in the oven at 350°F (175°C) for 10 minutes. This makes rolling easier and stops cracking.
- Assemble the enchiladas: Spread about 1/2 cup of the warmed enchilada sauce evenly on the bottom of your baking dish. Place about 1/3 cup of the chicken filling in the center of each tortilla, roll it tightly, and place seam side down in the dish. Repeat for all tortillas.
- Top with the remaining sauce and cheese: Pour the rest of the sauce evenly over the rolled enchiladas, then sprinkle the remaining 1 1/2 cups of shredded cheese on top.
- Bake or freeze: If baking immediately, cover the dish with foil and bake in a preheated oven at 375°F (190°C) for 25 minutes. Remove foil and bake an additional 10 minutes until cheese is bubbly and slightly browned.
For freezing, cover tightly with foil and freeze for up to 3 months. When ready to bake, thaw overnight in the fridge and bake as directed.
Pro tip: Don’t overstuff the tortillas or they’ll burst during baking. Also, if your sauce feels too thick, stir in a splash of chicken broth to thin it out. The aroma when they’re baking is the best kind of tease—cheesy, spicy, and totally inviting.
Cooking Tips & Techniques
Getting the perfect texture in freezer-friendly chicken enchiladas can be tricky, but a few things I’ve learned make all the difference. First, always shred the chicken finely and drain any excess liquid before mixing it with the other filling ingredients. This keeps the filling moist but not soggy.
Another tip: warming the tortillas before assembling prevents cracking and makes rolling easier. I usually warm a stack in the oven wrapped in foil if I’m making a big batch.
When it comes to sauce, not all enchilada sauces are created equal. I recommend tasting yours first—if it’s too salty or spicy, dilute with a bit of chicken broth or tomato sauce. You want a balance that complements the filling but doesn’t overpower it.
And don’t skip the step of baking covered with foil. This traps steam and keeps the tortillas soft while melting the cheese. Removing the foil for the last 10 minutes gives it that nice bubbly, slightly crisp top.
I once skipped warming the sauce before assembly and ended up with ripped tortillas and uneven flavor. Lesson learned: those little details matter. Also, if you’re making these for a crowd, assembling the day before and refrigerating for a few hours before baking really helps flavors meld beautifully.
Variations & Adaptations
These enchiladas are a great base for switching things up depending on your mood or dietary needs. Here are some variations I’ve tried and loved:
- Vegetarian: Swap the chicken for roasted sweet potatoes and black beans, seasoned with the same spices. Add some sautéed bell peppers for extra color and flavor.
- Spicy Kick: Add diced jalapeños or a splash of hot sauce to the filling. You can also use a spicy enchilada sauce for more heat.
- Low-Carb Option: Use low-carb tortillas or even large collard green leaves as wraps. The filling stays the same, just a lighter shell.
- Dairy-Free: Use a vegan cheese alternative and check your enchilada sauce to avoid dairy ingredients.
- Different Protein: I once made these with shredded turkey leftover from Thanksgiving, and they turned out fantastic. Ground beef or pork can also work well here.
One personal favorite twist is adding a layer of sautéed mushrooms inside for an earthier flavor. It’s subtle, but it adds a nice depth that guests often ask about. If you’re curious about other meal prep ideas with chicken, you might enjoy my easy flavor-packed Greek chicken and rice meal prep recipe—another crowd-friendly classic.
Serving & Storage Suggestions
These enchiladas are best served hot and fresh from the oven, paired with simple sides like a crisp green salad or Mexican rice. A dollop of sour cream, some sliced avocado, or fresh salsa on the side really rounds out the meal.
If you’ve frozen a batch, thaw overnight in the fridge before reheating in a 350°F (175°C) oven for 20–25 minutes covered with foil. For a quicker option, microwave individual portions on medium power in 1-2 minute increments until heated through—though the oven method keeps the texture better.
Leftovers keep well in the fridge for 3-4 days. The flavors actually get richer after a day, so sometimes I prefer them reheated the next day. Just cover well to keep moisture in.
For longer storage, freeze tightly wrapped for up to 3 months. When thawed, you might notice the sauce thickens a bit; adding a splash of water or broth before reheating helps revive it.
Nutritional Information & Benefits
Per serving (based on 12 servings): approximately 350 calories, 28g protein, 15g fat, and 20g carbohydrates. This recipe offers a good balance of macronutrients, especially protein from the chicken and cheese.
Chicken provides lean protein essential for muscle repair and satiety, while beans add fiber and additional protein. The spices contribute antioxidants and anti-inflammatory benefits.
Using flour tortillas means this recipe isn’t gluten-free by default, but swapping for corn tortillas can make it so. It’s naturally low in added sugars and can be adapted for dairy-free diets with suitable cheese alternatives.
From a wellness standpoint, this recipe hits that sweet spot of comfort food that doesn’t leave you feeling weighed down or overly processed. It’s a satisfying meal that fits well into a balanced diet.
Conclusion
This easy freezer-friendly chicken enchiladas recipe has become a stalwart in my kitchen for feeding crowds without the usual stress. It’s flexible, forgiving, and downright tasty, making it perfect for busy weeknights, potlucks, or anytime you want a homemade meal that’s ready when you are.
Feel free to tweak the filling, spice level, or cheese to suit your tastes. I love how this recipe lets you make a big batch and enjoy it fresh or frozen, which honestly takes so much pressure off meal planning.
It’s one of those recipes that’s both practical and satisfying, so I hope you find as much comfort in it as I do. If you give it a try, I’d love to hear how you customize it or what sides you serve alongside! Sharing makes it feel like we’re all cooking together, even from afar.
FAQs about Easy Freezer-Friendly Chicken Enchiladas
Can I use rotisserie chicken for this recipe?
Absolutely! Rotisserie chicken is a great shortcut and adds great flavor. Just shred it well and drain any excess liquid before mixing.
How long can I freeze the assembled enchiladas?
You can freeze them for up to 3 months. Make sure they’re tightly wrapped to prevent freezer burn.
Can I make these gluten-free?
Yes, by swapping the flour tortillas for corn tortillas or gluten-free wraps. Just soften them gently before rolling to avoid cracking.
Is it okay to freeze the enchiladas after baking?
It’s better to freeze before baking for best texture. If you freeze after baking, they may lose some crispness but are still tasty.
What’s the best way to reheat leftover enchiladas?
Reheat in the oven at 350°F (175°C) covered with foil for 20–25 minutes or microwave in short bursts until warm.
Pin This Recipe!
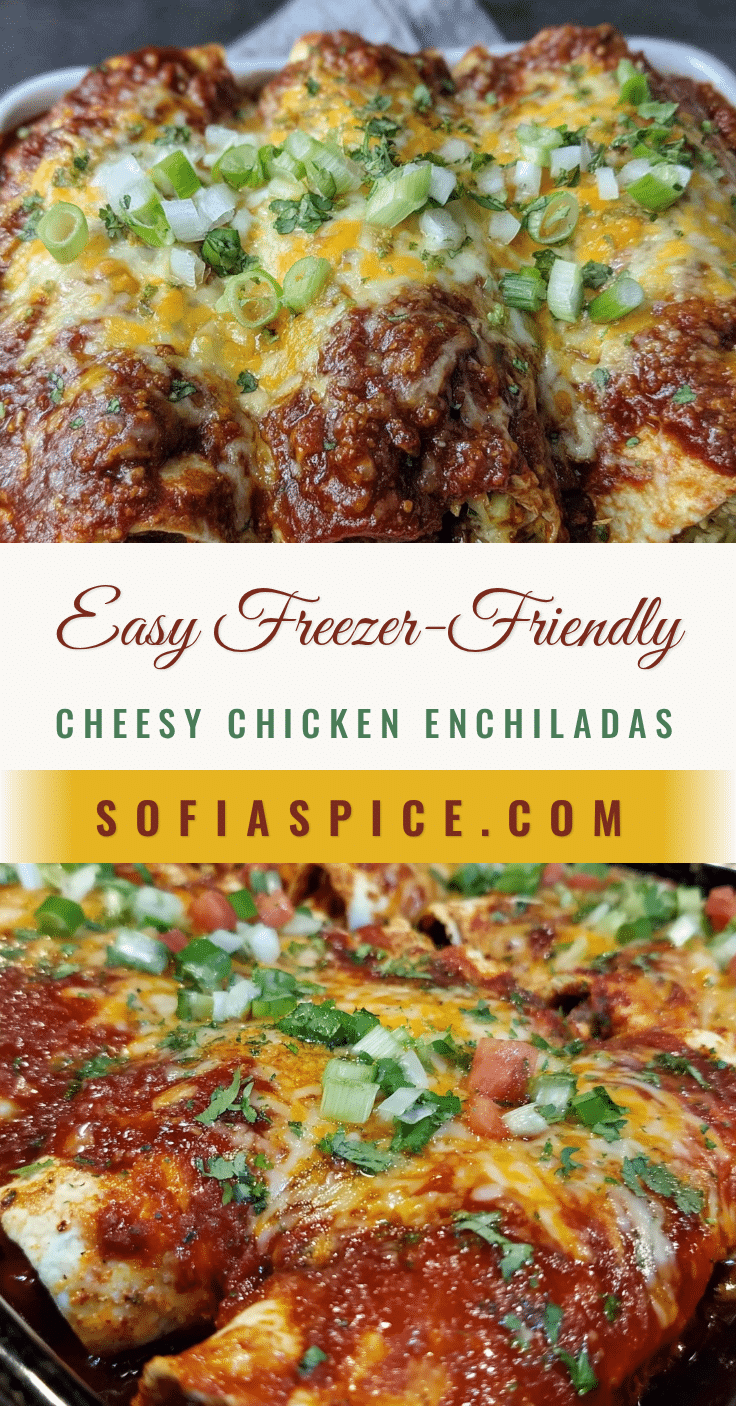
Easy Freezer-Friendly Chicken Enchiladas Recipe Perfect for a Crowd
A straightforward and comforting chicken enchiladas recipe that’s perfect for feeding a crowd and freezer-friendly for easy meal prep.
- Prep Time: 20 minutes
- Cook Time: 35 minutes
- Total Time: 55 minutes
- Yield: 12 servings 1x
- Category: Main Course
- Cuisine: Mexican
Ingredients
- 3 cups cooked shredded chicken (rotisserie chicken works great)
- 1 cup shredded cheddar cheese (sharp for extra flavor)
- 1 cup shredded Monterey Jack cheese (melts beautifully)
- 1/2 cup diced onions
- 2 cloves garlic, minced
- 1/2 cup canned black beans, rinsed and drained (optional)
- 1/4 cup chopped fresh cilantro
- 1 teaspoon ground cumin
- 1 teaspoon chili powder
- Salt and black pepper to taste
- 2 cups red enchilada sauce (store-bought or homemade)
- 12 large flour tortillas (10-inch size; use corn tortillas for gluten-free option)
- 1 1/2 cups shredded cheese (combo of cheddar and Monterey Jack to top)
Instructions
- In a large bowl, combine shredded chicken, 1 cup total of cheddar and Monterey Jack cheese, diced onions, minced garlic, black beans (if using), cilantro, cumin, chili powder, salt, and pepper. Mix well.
- Pour enchilada sauce into a skillet over medium heat and warm for 3–5 minutes, stirring occasionally.
- Warm each tortilla quickly in the skillet for about 10 seconds per side or wrap a stack in foil and heat in the oven at 350°F for 10 minutes.
- Spread about 1/2 cup of warmed enchilada sauce evenly on the bottom of a 9×13 inch baking dish.
- Place about 1/3 cup of chicken filling in the center of each tortilla, roll tightly, and place seam side down in the dish. Repeat for all tortillas.
- Pour the remaining sauce evenly over the rolled enchiladas and sprinkle with the remaining 1 1/2 cups shredded cheese.
- Cover the dish with foil and bake in a preheated oven at 375°F for 25 minutes.
- Remove foil and bake an additional 10 minutes until cheese is bubbly and slightly browned.
- For freezing, cover tightly with foil and freeze for up to 3 months. Thaw overnight in the fridge before baking as directed.
Notes
Do not overstuff tortillas to prevent bursting. Warm tortillas before assembling to avoid cracking. If sauce is too thick, thin with chicken broth. Bake covered with foil to keep tortillas soft, remove foil last 10 minutes for bubbly cheese. Assemble day before and refrigerate for better flavor melding. Freeze before baking for best texture.
Nutrition
- Serving Size: 1 enchilada
- Calories: 350
- Fat: 15
- Carbohydrates: 20
- Protein: 28
Keywords: chicken enchiladas, freezer-friendly, easy recipe, crowd-pleaser, make-ahead, Mexican, comfort food


