I burned the cucumbers more times than I care to admit when I first tried making dill pickles. Not literally burned with fire, but over-soaked and soggy—those sad, limp pickles that almost tasted like flavored water. Honestly, I wasn’t even a huge fan of pickles back then, and I thought homemade pickling was just a fancy hassle that never quite paid off. But something about those jars of Easy Crisp Old Fashioned Refrigerator Dill Pickles kept pulling me back.
One evening, I was fiddling around with a batch, trying to get that perfect crunch and just the right tang. The kitchen smelled sharp and herbal with fresh dill and garlic, and the sound of the jars clinking in the fridge was oddly satisfying. After a few days, I tentatively popped one out and bit in—crisp, flavorful, and exactly like the kind you’d hope grandma would have made if she lived next door.
It wasn’t just the crunch or the tang that got me hooked; it was the quiet magic of making something simple from scratch that felt honest and real. These pickles didn’t require fancy equipment or weird chemicals—just patience and a few humble ingredients from the pantry. That’s why this recipe stuck with me, and why I still make them whenever I want a snack that feels like a small, homemade victory.
Why You’ll Love This Recipe
Making these Easy Crisp Old Fashioned Refrigerator Dill Pickles has been a game-changer in my kitchen, and here’s why I think you’ll love them just as much:
- Quick & Easy: From start to fridge, it takes about 15 minutes of hands-on time, perfect for busy weeknights or last-minute cravings.
- Simple Ingredients: No need for fancy spices or hard-to-find items—just good old cucumbers, dill, garlic, vinegar, and salt.
- Perfect for Snacking or Gifts: These pickles make a great crunchy snack, and the jars also make thoughtful homemade gifts for friends and family.
- Crowd-Pleaser: Kids and adults alike love the satisfying crunch and balanced flavor—never too sour or too salty.
- Unbelievably Delicious: The combination of fresh dill and garlic with a touch of sugar and vinegar creates a flavor profile that’s nostalgic yet fresh.
- Old-Fashioned Technique: Instead of canning, this refrigerator method keeps the cucumbers crisp and the process foolproof.
What sets this recipe apart from other dill pickles is the attention to the brining time and the balance of acidity and seasoning. I’ve tweaked the salt and sugar ratios after countless batches to get that perfect crunch and flavor that wakes up your taste buds without overwhelming them. Plus, this recipe doesn’t require boiling water baths or complicated sterilization, so it’s approachable even if you’re new to pickling.
Honestly, these pickles are the kind you reach for when you want something comforting but not complicated. They’re a little crunchy break in your day, a bright zing on your sandwich, or a nostalgic bite that makes you pause and smile. That’s why I keep coming back to this recipe, and I think you will too.
What Ingredients You Will Need
This recipe uses simple, wholesome ingredients that come together to deliver bold flavor and satisfying crunch without fuss. Almost everything is a pantry staple, and substitutions are easy if needed.
- Fresh Cucumbers: 4-5 medium Kirby cucumbers or pickling cucumbers, sliced into spears or rounds (Kirby cucumbers hold their crunch best)
- Fresh Dill: 3-4 sprigs of fresh dill (you want the feathery fronds and stems for that classic flavor)
- Garlic Cloves: 3-4 cloves, peeled and lightly crushed (adds savory depth)
- White Vinegar: 2 cups (use distilled white vinegar for a clean tang; apple cider vinegar works but changes color and flavor slightly)
- Water: 2 cups (filtered if possible for purity)
- Pickling Salt or Kosher Salt: 2 tablespoons (important to use pickling or kosher salt—table salt can make the pickles cloudy)
- Sugar: 1 tablespoon (balances the acidity just right—don’t skip it!)
- Black Peppercorns: 1 teaspoon (whole, for subtle peppery warmth)
- Optional Add-ins: Mustard seeds, red pepper flakes, or bay leaves for a flavor twist
If you can’t find fresh dill, dried dill weed works, but fresh makes a noticeable difference. And if you’re avoiding vinegar, you could try lemon juice as a partial substitute, but the flavor will shift. For a gluten-free version, this recipe already fits the bill, so no worries there.
For best results, I recommend using Diamond Crystal kosher salt or Morton pickling salt. I’ve found these brands keep the brine clear and the flavor true. If you’re using bottled garlic, adjust the amount since it’s more concentrated.
Equipment Needed
- Large Mixing Bowl: For combining brine ingredients and soaking cucumbers.
- Measuring Cups and Spoons: Accuracy matters for salt and vinegar balance.
- Sharp Knife and Cutting Board: To slice cucumbers evenly for consistent pickling.
- Clean Mason Jars or Glass Containers: Wide-mouth jars work best for packing cucumbers and easy access.
- Small Saucepan: To gently heat the vinegar, water, salt, and sugar mixture.
- Fork or Tongs: For handling cucumbers without bruising.
If you don’t have mason jars, any glass container with a tight lid will do—the key is airtight storage in the fridge. I once used a repurposed pasta sauce jar in a pinch, and it worked fine as long as it sealed well. Just avoid plastic containers as vinegar can react with them.
Also, keep your knives sharp! A dull blade can crush the cucumbers and make your pickles soggy. A basic chef’s knife or a serrated knife works well here.
Preparation Method
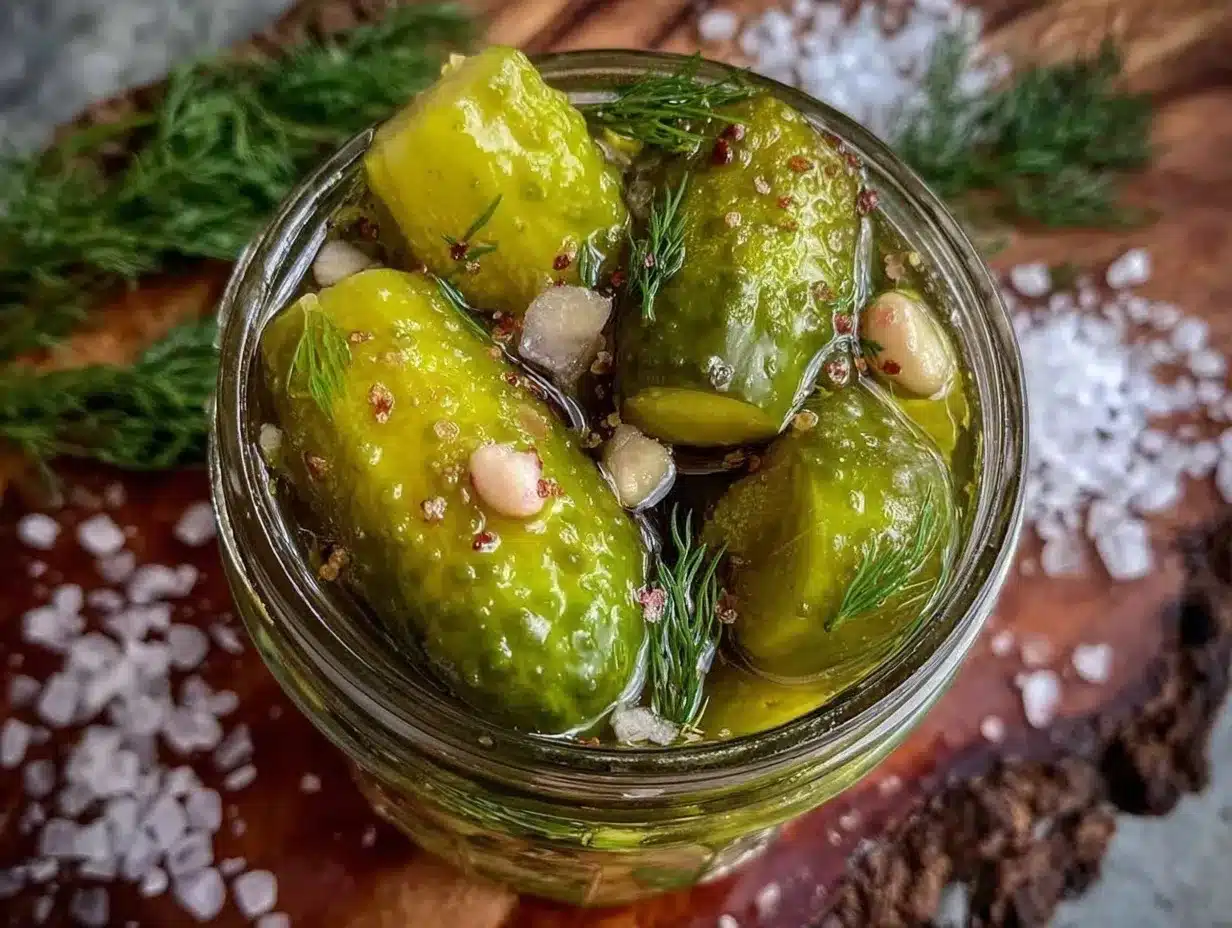
- Prepare the Cucumbers: Wash 4-5 medium Kirby cucumbers thoroughly. Trim off the blossom ends (this part can cause softening). Slice into spears about 3-4 inches long or into ¼-inch thick rounds depending on your preference. Set aside.
- Make the Brine: In a small saucepan, combine 2 cups white vinegar, 2 cups water, 2 tablespoons pickling salt, and 1 tablespoon sugar. Warm the mixture over medium heat, stirring occasionally just until the salt and sugar dissolve (about 3-5 minutes). Do not boil. Remove from heat and let cool slightly.
- Pack the Jars: Place 3-4 sprigs of fresh dill, 3-4 lightly crushed garlic cloves, and 1 teaspoon whole black peppercorns into each clean mason jar or glass container. You can add optional spices like mustard seeds or red pepper flakes here if desired.
- Add Cucumbers: Pack the cucumber spears or slices tightly into the jars, but don’t crush them. Leave about ½ inch of headspace at the top.
- Pour Brine: Carefully pour the warm brine over the cucumbers, filling the jar and covering them completely. Tap jars gently on the counter to release air bubbles. Add more brine if needed.
- Seal and Chill: Close the jars with lids and place in the refrigerator. Let them chill for at least 48 hours before tasting. The flavor deepens over 3-5 days—if you’re impatient, you can try one sooner, but the pickles will be milder.
- Enjoy and Store: Keep the pickles refrigerated and consume within 2-3 weeks for best flavor and crunch.
Pro Tip: If your cucumbers start to look a little cloudy in the brine after a few days, don’t worry—it’s normal and won’t affect the taste. Just give the jar a gentle shake before opening.
When slicing, I like to keep my cuts uniform so each pickle has the same texture and pickling time. Also, I always remove the blossom end, a trick I learned the hard way after mushy pickles showed up in my first attempts.
Cooking Tips & Techniques
Pickling is as much art as science, and a few tips can save you from soggy or bland results:
- Salt Matters: Use pickling or kosher salt. Table salt contains additives that cloud the brine and affect flavor.
- Don’t Boil the Brine: Just warm enough to dissolve salt and sugar. Boiling can break down flavors and toughen cucumbers.
- Pack Cucumbers Firmly but Gently: Too tight and they bruise; too loose and they float, resulting in uneven pickling.
- Remove Blossom Ends: That tiny yellow end contains enzymes that cause softening—cut it off for crisp results.
- Patience is Key: Let the pickles chill at least 2 days. The flavor intensifies over time, and the crunch improves.
- Keep Cool: Always store in the refrigerator to maintain crispness and prevent fermentation.
Once, I tried speeding up the process by microwaving the jars to heat the brine inside. Big mistake—that mushy pickle batch taught me that slow and steady wins the crunch. Also, timing is everything: prepping your cucumbers just before making the brine keeps them fresh and firm.
Variations & Adaptations
This Easy Crisp Old Fashioned Refrigerator Dill Pickles recipe is versatile and welcomes creative twists:
- Spicy Kick: Add red pepper flakes or sliced jalapeños to the jar for a fiery version.
- Garlic Lovers: Double the garlic cloves or add roasted garlic for a mellow, sweet note.
- Herb Mix: Swap or mix dill with fresh tarragon, thyme, or bay leaves for a unique flavor profile.
- Low-Sodium: Reduce salt by 25% and increase chilling time slightly to maintain flavor.
- Vinegar Alternatives: Use apple cider vinegar for a fruitier tang or rice vinegar for a milder taste.
Personally, I once tried adding a splash of pickle juice to my crispy honey mustard BBQ chicken drumsticks marinade, and it gave the dish a surprising brightness and complexity—so don’t hesitate to experiment.
Serving & Storage Suggestions
These pickles are best served chilled straight from the fridge, though you can let them sit at room temperature for 10 minutes to soften the chill if you prefer. They’re perfect alongside sandwiches, burgers, or as a zesty snack on their own.
Pair them with rich or creamy dishes like potato salad or deviled eggs to cut through the richness. They also make a crunchy contrast on a fresh Mediterranean mezze platter, complementing creamy hummus and olives beautifully.
Store pickles in airtight glass jars in the refrigerator. They’ll keep fresh and crisp for up to 3 weeks. Avoid leaving jars out at room temperature for long periods to prevent softening or fermentation. When reheating or serving warm dishes, add pickles last to preserve their crunch and tang.
Over time, the flavor will deepen and mellow, so if you like pickles on the tart side, enjoy them sooner rather than later. For a party snack, consider pairing them with a fresh tropical fruit grazing board to balance sweet and sour notes.
Nutritional Information & Benefits
A typical serving of these refrigerator dill pickles (about 1 ounce or 28 grams) contains roughly:
| Calories | 5 |
|---|---|
| Carbohydrates | 1 g |
| Protein | 0 g |
| Fat | 0 g |
| Sodium | 300 mg |
Pickles are low in calories and carbs, making them a guilt-free snack. The cucumbers provide small amounts of antioxidants and vitamins, while the vinegar may support digestion. Keep in mind the sodium content is moderate, so enjoy in balance if watching salt intake.
This recipe is naturally gluten-free, vegan, and dairy-free, suitable for most diets. I appreciate how these pickles add flavor and crunch without extra calories or allergens, making them a wholesome addition to meals or snacks.
Conclusion
Easy Crisp Old Fashioned Refrigerator Dill Pickles are one of those recipes that feel like a small, satisfying accomplishment every time you make them. They bring a fresh, tangy crunch to any meal and are surprisingly simple to prepare with just a handful of ingredients.
What I love most is how forgiving and adaptable the recipe is—you can tweak it to your taste or dietary needs without losing that classic pickle charm. Plus, it’s a fun way to bring a bit of homemade goodness into your kitchen without fuss.
Give this recipe a try and see how those crunchy, flavorful pickles can brighten your snacks and meals. When you do, I’d love to hear how you made them your own, or what dishes you paired them with. There’s something special about sharing food stories, don’t you think?
Frequently Asked Questions
How long do refrigerator dill pickles last in the fridge?
They stay fresh and crisp for about 2-3 weeks when stored in airtight glass jars in the refrigerator.
Can I use regular cucumbers instead of Kirby cucumbers?
Kirby cucumbers are best for pickling due to their firm texture, but you can use other cucumbers if that’s what you have. Just expect a slightly softer pickle.
Do I need to sterilize the jars for refrigerator pickles?
Since these pickles are stored in the fridge and not canned, thorough cleaning of jars is sufficient—no need to sterilize like with traditional canning.
Can I make these pickles spicy?
Absolutely! Add red pepper flakes or sliced jalapeños when packing the jars to give your pickles a spicy kick.
Why do my pickles turn out soggy sometimes?
Common reasons include not removing the cucumber blossom ends, boiling the brine, or packing the cucumbers too loosely or too tightly. Following the recipe’s tips helps keep them crisp.
Pin This Recipe!
Easy Crisp Old Fashioned Refrigerator Dill Pickles
A simple and quick recipe for homemade refrigerator dill pickles that are crisp, flavorful, and perfect for snacking or gifting.
- Prep Time: 15 minutes
- Cook Time: 5 minutes
- Total Time: 48 hours to 5 days (including chilling time)
- Yield: 4-5 servings 1x
- Category: Condiment
- Cuisine: American
Ingredients
- 4–5 medium Kirby cucumbers, sliced into spears or rounds
- 3–4 sprigs fresh dill
- 3–4 garlic cloves, peeled and lightly crushed
- 2 cups white vinegar (distilled preferred)
- 2 cups water (filtered if possible)
- 2 tablespoons pickling salt or kosher salt
- 1 tablespoon sugar
- 1 teaspoon whole black peppercorns
- Optional: mustard seeds, red pepper flakes, or bay leaves
Instructions
- Wash 4-5 medium Kirby cucumbers thoroughly. Trim off the blossom ends and slice into spears about 3-4 inches long or into ¼-inch thick rounds.
- In a small saucepan, combine 2 cups white vinegar, 2 cups water, 2 tablespoons pickling salt, and 1 tablespoon sugar. Warm over medium heat, stirring occasionally until salt and sugar dissolve (3-5 minutes). Do not boil. Remove from heat and let cool slightly.
- Place 3-4 sprigs of fresh dill, 3-4 lightly crushed garlic cloves, and 1 teaspoon whole black peppercorns into each clean mason jar or glass container. Add optional spices if desired.
- Pack cucumber spears or slices tightly into jars without crushing. Leave about ½ inch headspace at the top.
- Pour the warm brine over cucumbers, filling jars completely. Tap jars gently to release air bubbles and add more brine if needed.
- Seal jars with lids and refrigerate. Chill for at least 48 hours before tasting. Flavor deepens over 3-5 days.
- Keep pickles refrigerated and consume within 2-3 weeks for best flavor and crunch.
Notes
Use pickling or kosher salt to keep brine clear and flavor true. Do not boil the brine, just warm it to dissolve salt and sugar. Remove cucumber blossom ends to prevent softening. Store pickles in airtight glass jars in the refrigerator. Flavor improves after 2-3 days and pickles keep for up to 3 weeks. Optional spices can be added for flavor variations.
Nutrition
- Serving Size: 1 ounce (28 grams)
- Calories: 5
- Sodium: 300
- Carbohydrates: 1
Keywords: dill pickles, refrigerator pickles, homemade pickles, easy pickles, crisp pickles, old fashioned pickles, quick pickling


