That sharp crunch against my teeth—the kind that snaps and echoes through a quiet kitchen—still pulls me back to my grandmother’s cramped but cozy pantry. It wasn’t just any crunch, though; it was the unmistakable sound of her homemade dill pickles, brined just right, with a subtle garlic punch and a peppercorn kick dancing in the background. I remember the faint scent of vinegar mingling with fresh dill and crushed garlic hanging in the air like a quiet promise of something delicious waiting to be savored.
She never followed a strict recipe, more like a rhythm she knew by heart, tossing in peppercorns until it felt right, slicing cucumbers thick enough to hold that perfect snap. I was always the impatient one, hovering around the jar, eager for the first taste, the crispness that felt like summer’s coolness bottled up. Years later, making my own batch of these crispy refrigerator dill pickles with garlic and peppercorn, I realized it’s that simple, soulful method that makes these pickles stand apart—no fancy canning, just honest ingredients and time doing its magic in the fridge.
These pickles remind me that sometimes the best flavors come from the quiet moments—the waiting, the anticipation, and the small rituals that connect us to past kitchens and simpler times. It’s not just about the bite; it’s about the memory it carries. And honestly, that’s why this recipe stuck with me: it’s not just a pickle, it’s a crunchy little portal back to those slow, comforting afternoons.
Why You’ll Love This Crispy Refrigerator Dill Pickles Recipe
Having made refrigerator pickles more times than I can count, I’ve learned what really makes a good batch stand out. This recipe is one of those gems that balances ease and flavor without fuss. Here’s what makes it my go-to:
- Quick & Easy: You can have these pickles ready to nibble on in just a couple of days, perfect for when you crave something tangy but don’t want to wait weeks like traditional canning.
- Simple Ingredients: No need to hunt down specialty items. Garlic, peppercorns, cucumbers, vinegar—chances are you have these staples already.
- Perfect for Snacking or Side Dishes: Whether you’re packing lunches, setting up for a picnic, or craving a crunchy side for dinner, these pickles always hit the spot.
- Crowd-Pleaser: The subtle garlic warmth and peppercorn bite make these pickles a favorite across generations—kids love the crunch, and adults appreciate the nuanced flavors.
- Unbelievably Delicious: The texture is just right: crispy, not soggy, with that classic dill tang that feels like a hug in a jar.
This recipe isn’t just another pickle method. What sets it apart is the careful balance of garlic and whole peppercorns that slowly infuse the cucumbers, creating a flavor that’s complex but never overpowering. Plus, I’ve found that slicing the cucumbers thicker gives a satisfying crunch that lasts—as opposed to thin slices that can get mushy quickly.
It’s the kind of pickle you’ll reach for when you want a little something special without the fuss, and honestly, it’s a recipe that makes you feel like you’re carrying on a small tradition—one jar at a time.
What Ingredients You Will Need
This recipe uses simple, wholesome ingredients to deliver bold flavor and that signature satisfying crunch without fuss. Most are pantry staples, and if you don’t have something, there’s usually an easy swap to keep you going.
- Cucumbers: About 4 medium Kirby or pickling cucumbers, washed and sliced into 1/4-inch thick rounds (Kirby cucumbers are best for their firmness and crunch)
- Fresh Dill: 4-5 sprigs, including the feathery tops (adds authentic dill aroma)
- Garlic Cloves: 3-4 cloves, peeled and lightly smashed (the star of the show for that aromatic kick)
- Whole Black Peppercorns: 1 tablespoon (these lend a gentle heat and depth; avoid ground pepper to keep pickles clear)
- White Vinegar: 1 cup (use distilled white vinegar for a clean brine)
- Water: 1 cup (balances the acidity)
- Kosher Salt: 1 tablespoon (non-iodized is best to avoid cloudiness)
- Granulated Sugar: 1 teaspoon (optional, to balance the tanginess slightly)
Ingredient Notes: I recommend using fresh Kirby cucumbers from your local farmers’ market if possible—they hold up beautifully in the brine. For those seeking a lower sodium option, you can reduce the salt slightly, but keep in mind it might affect shelf life. If you don’t have fresh dill, dried dill can be used in a pinch, but the flavor won’t be as vibrant.
For an allergen-friendly twist, this recipe is naturally gluten-free and dairy-free, making it a versatile snack for many diets.
Equipment Needed
- Mason Jar or Glass Container: A quart-sized jar with a tight-fitting lid works perfectly for the pickles to marinate in the fridge.
- Measuring Cups and Spoons: For precise brine ratios, so your pickles turn out consistent every time.
- Sharp Knife and Cutting Board: To slice the cucumbers evenly, which helps with texture and flavor absorption.
- Small Saucepan: To bring the brine ingredients to a quick simmer.
- Mixing Bowl: Optional, for tossing cucumbers with salt before packing the jar.
If you don’t have a mason jar, a clean, food-safe plastic container with a secure lid will do, but glass is preferred to avoid any flavor interference. I’ve tried using different jars over the years, and it’s worth investing in a few quality ones—they’re great for everything from preserving jams to making pickles like these crispy refrigerator dill pickles with garlic and peppercorn.
Preparation Method
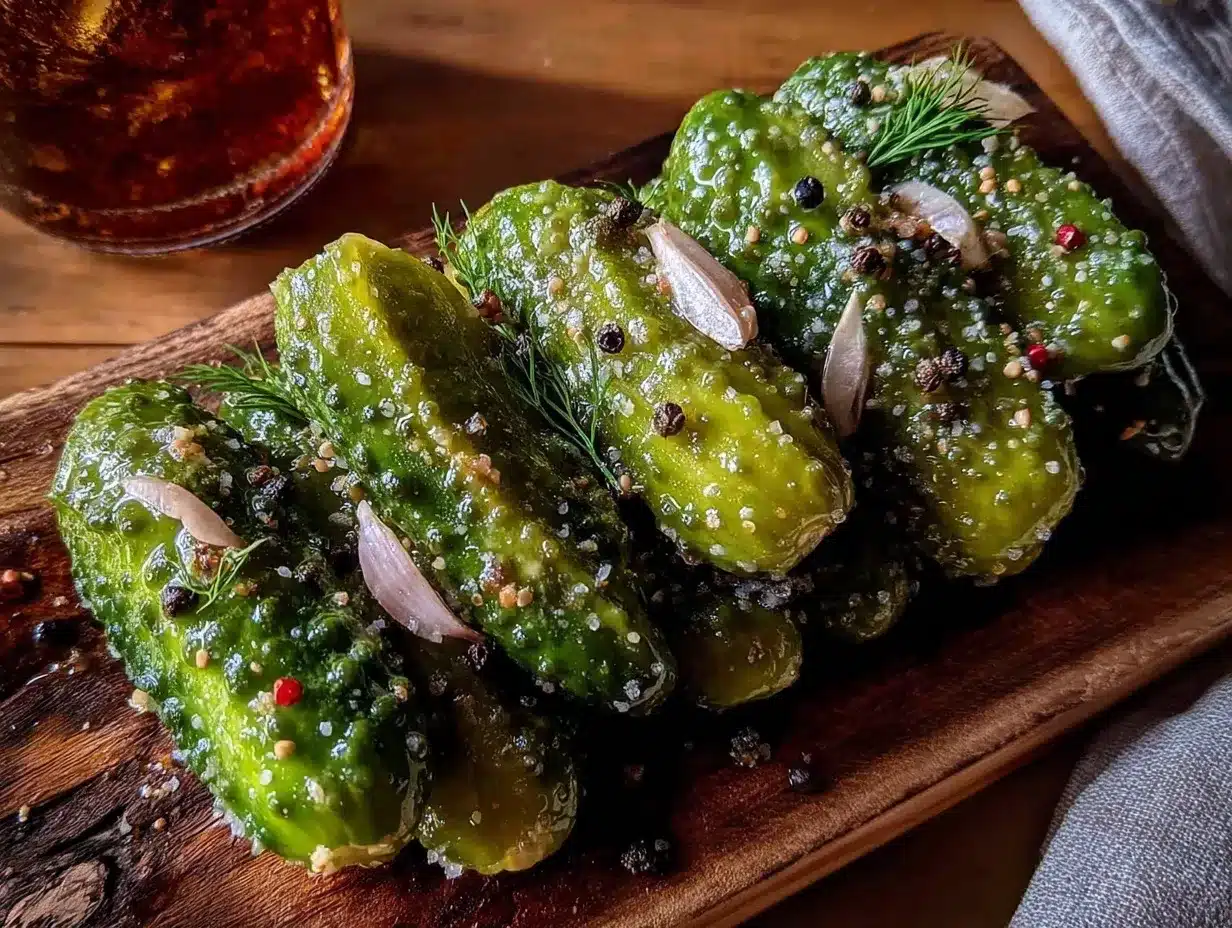
- Prepare the Cucumbers: Wash 4 medium Kirby cucumbers thoroughly. Slice into 1/4-inch thick rounds—thick enough to retain crunch but thin enough to soak up the brine (about 1/4 inch or 6mm). You want the slices uniform so they pickle evenly. (10 minutes)
- Salt the Cucumbers: Place sliced cucumbers in a mixing bowl. Sprinkle 1 tablespoon of kosher salt over them and toss gently. Let sit for 30 minutes to draw out excess moisture, which helps keep the pickles crisp. Drain any liquid but don’t rinse the salt off. (30 minutes)
- Make the Brine: In a small saucepan, combine 1 cup white vinegar, 1 cup water, 1 teaspoon granulated sugar, and 1 tablespoon kosher salt. Heat gently and stir until the salt and sugar dissolve. Let the brine cool to room temperature before pouring over cucumbers. (10 minutes)
- Pack the Jar: Into a clean quart-sized mason jar, layer the drained cucumber slices with 4-5 sprigs of fresh dill, 3-4 smashed garlic cloves, and 1 tablespoon whole black peppercorns. Press gently to fit but avoid crushing. (5 minutes)
- Add the Brine: Pour the cooled brine over the cucumbers, ensuring they’re fully submerged. Leave a little space at the top of the jar to allow for expansion. Seal the jar tightly. (2 minutes)
- Refrigerate and Wait: Store the jar in the refrigerator for at least 48 hours before tasting. The pickles will develop their full flavor after about 3 days and stay fresh for up to 3 weeks. (Minimum 2 days)
Pro Tip: If you notice any floating cucumbers, press them down with a clean fermentation weight or a small zip-top bag filled with brine to keep everything submerged. This prevents spoilage and ensures even pickling.
When you open the jar, the aroma of garlic and dill should greet you first, followed by that satisfying crunch and peppercorn warmth. If you want a little extra zing, add more peppercorns or even a pinch of red pepper flakes during packing.
Cooking Tips & Techniques
Honestly, making crispy refrigerator dill pickles with garlic and peppercorn is more about patience than technique, but here are some nuggets I’ve picked up after a few (okay, many) batches:
- Choose the Right Cucumber: Kirby cucumbers are the gold standard for pickling thanks to their firm texture and thin skin. Avoid regular slicing cucumbers—they tend to get mushy.
- Don’t Skip the Salting Step: Salting draws out excess water and keeps the pickles crispy. I used to rush this part and ended up with soggy slices—lesson learned the hard way!
- Use Whole Spices: Whole black peppercorns infuse flavor slowly and keep the brine clear. Ground pepper clouds the liquid and can taste bitter.
- Let the Brine Cool: Pouring hot brine over cucumbers can soften them too much. Patience here preserves that ideal crunch.
- Seal and Refrigerate: These are refrigerator pickles, so no canning needed. Just keep them chilled to enjoy fresh-tasting pickles with minimal fuss.
Timing-wise, you can start tasting after 48 hours, but if you wait three days, the flavors develop beautifully. I usually make a jar on Sunday evening, and by Tuesday afternoon, it’s already my secret snack during work breaks.
Variations & Adaptations
One of the joys of this recipe is how easy it is to tweak according to what you like or what you have on hand. Here are a few ideas I’ve played with:
- Spicy Kick: Add a small dried chili pepper or 1/2 teaspoon crushed red pepper flakes to the jar for some heat.
- Herb Swap: Try replacing fresh dill with fresh tarragon or a mix of dill and fresh thyme for a different aromatic profile.
- Garlic Variations: Roasted garlic cloves add a mellow sweetness, while raw garlic gives a sharper bite. I sometimes use a mix depending on my mood.
- Vinegar Options: Use apple cider vinegar instead of white vinegar for a fruitier note, but keep the salt and sugar amounts the same.
- Low-Sodium Version: Reduce salt to 2 teaspoons and add a splash of lemon juice for brightness. Just eat those pickles sooner to avoid spoilage.
For a fun twist, I once tried adding a few slices of fresh ginger—it gave the pickles a subtle zing that was unexpectedly refreshing. Also, if you’re interested in a no-cook meal pairing, these pickles go brilliantly alongside creamy chicken alfredo pasta or even some crispy air fryer chicken thighs I love making for quick dinners.
Serving & Storage Suggestions
These pickles are best served cold straight from the fridge. The crisp texture and bright flavors make them a perfect side to sandwiches, burgers, or charcuterie boards. I often slice a few and toss them into salads or serve alongside hearty dishes like Tuscan chicken pasta for a refreshing contrast.
Store the pickles in their sealed jar in the refrigerator. They keep well for up to 3 weeks, but honestly, they rarely last that long in my house! If you notice the pickles softening, it usually means they’re past their peak, so enjoy them sooner next time.
When reheating meals paired with these pickles, keep them chilled and add just before serving to maintain their snap. Over time, the flavors meld and mellow, so if you like a more intense garlic and peppercorn taste, wait a few days before digging in.
Nutritional Information & Benefits
These crispy refrigerator dill pickles make a low-calorie, flavorful snack or condiment. A 1-ounce (28g) serving typically contains about 5-10 calories, with negligible fat and protein, making it a guilt-free crunch.
Key benefits include:
- Hydrating and Low-Calorie: Cucumbers are mostly water, which keeps you refreshed.
- Digestive Aid: The vinegar and garlic have natural antimicrobial properties that may support gut health.
- Gluten-Free & Vegan: Suitable for a wide range of dietary needs.
If you’re watching sodium intake, just remember these pickles contain salt, so enjoy in moderation. Personally, I appreciate how they add flavor without extra fats or sugars, unlike many processed snacks.
Conclusion
Making these crispy refrigerator dill pickles with garlic and peppercorn feels like bringing a little piece of kitchen heritage into my home, every time. They’re simple yet packed with bright, punchy flavors that remind me of the best kind of comfort—honest, crunchy, and made with care. Whether you’re new to pickling or a seasoned pro, this recipe offers a straightforward way to enjoy homemade pickles without the wait or complexity.
I hope you find as much joy in making and sharing these pickles as I do. Don’t hesitate to tweak the garlic and peppercorn to match your taste buds—it’s all about making these your own. And if you ever want a perfect snack to pair them with, I can’t recommend enough trying them alongside the creamy chicken alfredo pasta or the crispy air fryer chicken thighs from my recipe collection. Happy pickling!
Frequently Asked Questions About Crispy Refrigerator Dill Pickles
How long do refrigerator dill pickles last in the fridge?
They typically last about 3 weeks when stored in a sealed jar in the refrigerator. Always check for any off smells or mold before eating.
Can I use regular cucumbers instead of Kirby cucumbers?
You can, but Kirby cucumbers are best for their firm texture. Regular slicing cucumbers may become soft faster.
Do I need to boil the brine for refrigerator pickles?
Boiling helps dissolve the salt and sugar, but you should let it cool before pouring over cucumbers to keep them crispy.
Can I add other spices or herbs?
Absolutely! Mustard seeds, red pepper flakes, or fresh thyme can add interesting flavors. Just keep the core ingredients for balance.
Why are my pickles not crispy?
Common reasons include skipping the salting step, using cucumbers that are too ripe, or pouring hot brine over the slices. Try salting and cooling the brine next time to improve crispness.
Pin This Recipe!

Crispy Refrigerator Dill Pickles Recipe Easy Homemade with Garlic and Peppercorn

A simple and soulful recipe for crispy refrigerator dill pickles infused with garlic and whole peppercorns, ready to enjoy in just a few days without any canning.
- Prep Time: 10 minutes
- Cook Time: 10 minutes
- Total Time: 2 days 20 minutes
- Yield: About 1 quart jar (approximately 4 servings) 1x
- Category: Side Dish
- Cuisine: American
Ingredients
- 4 medium Kirby cucumbers, washed and sliced into 1/4-inch thick rounds
- 4–5 sprigs fresh dill, including feathery tops
- 3–4 garlic cloves, peeled and lightly smashed
- 1 tablespoon whole black peppercorns
- 1 cup white vinegar (distilled)
- 1 cup water
- 1 tablespoon kosher salt (non-iodized)
- 1 teaspoon granulated sugar (optional)
Instructions
- Wash 4 medium Kirby cucumbers thoroughly and slice into 1/4-inch thick rounds.
- Place sliced cucumbers in a mixing bowl. Sprinkle 1 tablespoon kosher salt over them and toss gently. Let sit for 30 minutes to draw out excess moisture. Drain any liquid but do not rinse the salt off.
- In a small saucepan, combine 1 cup white vinegar, 1 cup water, 1 teaspoon granulated sugar, and 1 tablespoon kosher salt. Heat gently and stir until salt and sugar dissolve. Let the brine cool to room temperature.
- Into a clean quart-sized mason jar, layer the drained cucumber slices with 4-5 sprigs fresh dill, 3-4 smashed garlic cloves, and 1 tablespoon whole black peppercorns. Press gently to fit but avoid crushing.
- Pour the cooled brine over the cucumbers, ensuring they are fully submerged. Leave a little space at the top of the jar. Seal the jar tightly.
- Store the jar in the refrigerator for at least 48 hours before tasting. The pickles develop full flavor after about 3 days and stay fresh for up to 3 weeks.
Notes
Use Kirby cucumbers for best crunch. Do not skip the salting step to keep pickles crispy. Use whole peppercorns to keep brine clear and flavorful. Let brine cool before pouring over cucumbers. Store pickles in the fridge and consume within 3 weeks. Press down floating cucumbers with a fermentation weight or small bag filled with brine to keep submerged.
Nutrition
- Serving Size: 1 ounce (28 grams)
- Calories: 5
- Sodium: 300
- Carbohydrates: 1
Keywords: refrigerator pickles, dill pickles, homemade pickles, garlic pickles, peppercorn pickles, easy pickles, quick pickles, crunchy pickles, no canning pickles


