“You brought the Oreo cheesecake cups? No way!” That was my friend’s text right after our last potluck. Honestly, I wasn’t expecting much when I threw together these creamy no-bake Oreo cheesecake cups one busy afternoon. It started as a quick fix — I had unexpected guests and zero time to bake anything fancy, but still wanted to offer something sweet and homemade. No oven, no fuss, just a few pantry staples and some crushed Oreos.
At first, I was skeptical about how a no-bake dessert could taste as good as the traditional cheesecake I usually make. But after that first bite, the smooth, velvety cream filling combined with the crunchy Oreo base made me pause. It reminded me of those quiet moments when you find a simple pleasure that feels like a little indulgence without any stress. I ended up making these Oreo cheesecake cups several times that week — each time tweaking just a bit, adding more cookie crumbs here, a little extra cream there.
There’s something about the individual serving style that makes this recipe stick with me. It’s perfect for those evenings when you want a personal treat without leftovers staring back at you the next day. Plus, it’s the kind of dessert you can whip up while prepping dinner — maybe alongside a comforting bowl of creamy loaded baked potato soup or after savoring some twice-baked potatoes with bacon and cheddar. It’s those little pairings that make home feel cozy, you know?
In the end, these no-bake Oreo cheesecake cups aren’t just a quick dessert fix. They became my go-to when the day’s been long, and all I want is something creamy, sweet, and effortless. They’re proof that sometimes, the easiest recipes leave the biggest impressions.
Why You’ll Love This Recipe
After testing this recipe more times than I can count (okay, maybe four or five times in one week), I can say it’s a winner for several reasons. It’s the kind of dessert that makes you feel like a dessert pro without breaking a sweat or heating up the kitchen.
- Quick & Easy: Ready in about 20 minutes plus chilling time, these cups are perfect for busy weeknights or last-minute dessert emergencies.
- Simple Ingredients: No need for fancy ingredients — just cream cheese, whipped topping, Oreos, and a few pantry staples. You probably already have everything on hand.
- Perfect for Any Occasion: Whether it’s a casual dinner, a potluck, or just a sweet treat for yourself, these individual desserts fit the bill.
- Crowd-Pleaser: Kids and adults alike can’t get enough of the creamy filling paired with that classic Oreo crunch.
- Unbelievably Delicious: The texture is silky smooth with just the right amount of cookie crumble — not too soft, not too crunchy.
What sets this recipe apart? Well, instead of the usual crust, I love folding in crushed Oreos directly into the filling for an extra cookie punch throughout the dessert. Plus, using whipped topping lightens things up, so it never feels heavy or overwhelming. Honestly, it’s that balance of richness and lightness that makes you close your eyes and savor every bite.
These cups are a little slice of comfort that’s fuss-free and crowd-approved — not to mention easy to customize if you want to try swapping out the classic Oreos for a mint or peanut butter version. It’s a simple recipe with a bit of magic, perfect for impressing guests without the stress.
What Ingredients You Will Need
This recipe relies on straightforward ingredients that come together to build deep, creamy flavor and satisfy that Oreo craving without any fuss. Most are pantry staples, and you can tweak a few to suit dietary needs or flavor preferences.
- Oreos, crushed – about 24 cookies (reserve some whole for garnish). I usually stick with the classic brand, but feel free to try mint or golden Oreos.
- Cream cheese, softened – 8 ounces (225 g). Using full-fat gives the best creamy texture.
- Powdered sugar – 1 cup (120 g), sifted for smoothness. This sweetens the filling without graininess.
- Heavy whipping cream – 1 cup (240 ml), chilled. Whipped to soft peaks, it lightens the cheesecake filling beautifully.
- Vanilla extract – 1 teaspoon for that classic cheesecake note.
- Butter, melted – 1/4 cup (56 g) to bind the crust crumbs if you prefer a firmer base, though optional here since we fold crumbs into filling.
For substitutions: use dairy-free cream cheese and coconut cream whipped if you want a vegan version. Almond flour or gluten-free cookies work for gluten sensitivities. When I’m in a pinch, I’ve swapped out whipped cream for store-bought whipped topping — it’s not quite the same but still hits the spot.
In summer, I sometimes add fresh raspberries on top instead of Oreos for a fruity twist, but the classic combo is what I come back to again and again.
Equipment Needed
- Mixing bowls: A medium bowl for the cream cheese mixture and a large one for whipping the cream.
- Electric mixer or hand mixer: Essential for whipping cream and beating cream cheese smooth. Although whisking by hand is possible, it’s quite a workout!
- Spatula: For folding ingredients gently without deflating the whipped cream.
- Measuring cups and spoons: For accuracy in sweetness and texture.
- Serving cups or jars: I like using small glass jars or clear plastic cups for that pretty individual presentation.
If you don’t have an electric mixer, a sturdy whisk and some elbow grease can get you there, but I recommend borrowing a handheld mixer for the best texture. I’ve tried this in silicone muffin liners for a fun twist, but jars or plastic cups hold up better in the fridge.
Preparation Method
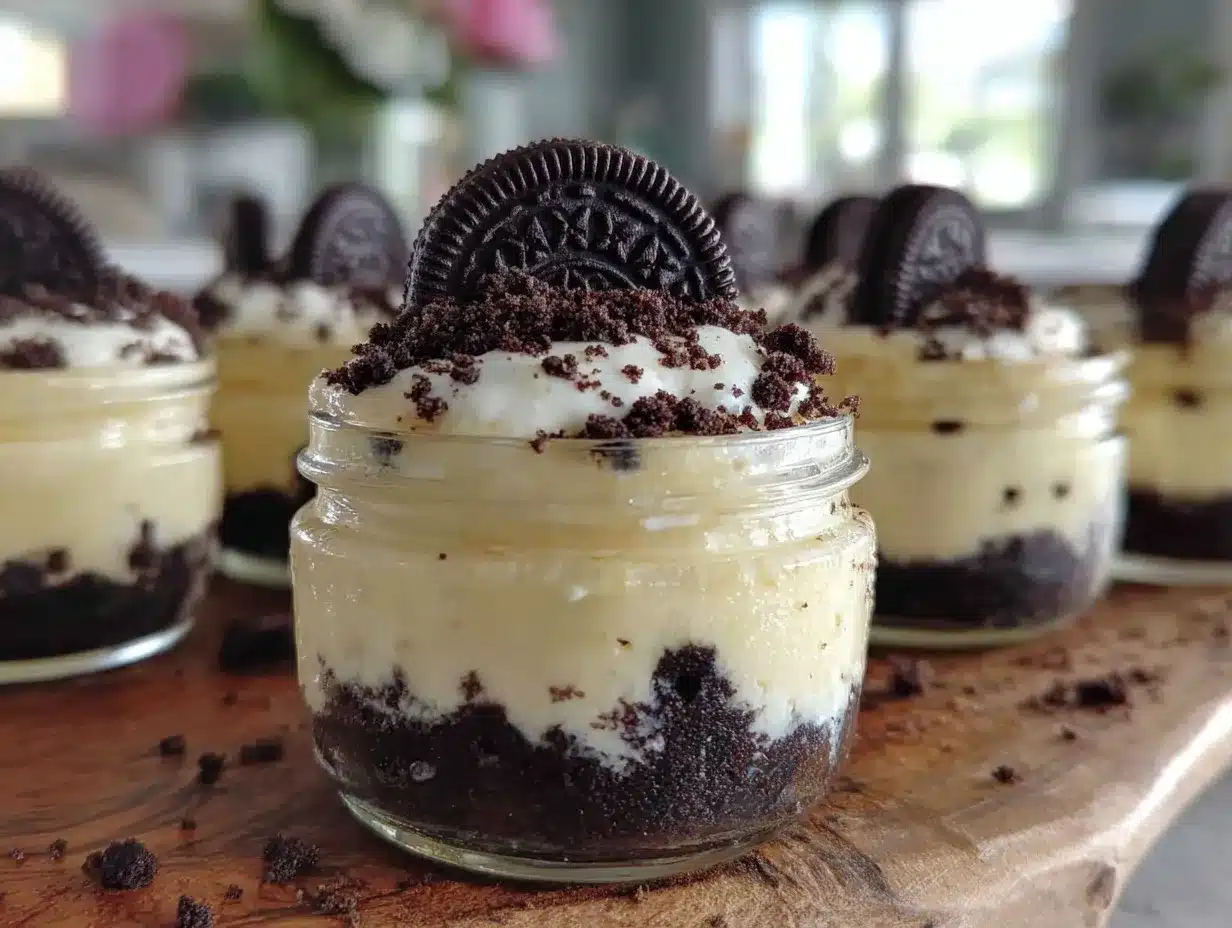
- Prepare the Oreos: Crush about 24 Oreos into fine crumbs using a food processor or by placing them in a ziplock bag and smashing with a rolling pin. Reserve 6-8 whole or halved Oreos for garnish. (5 minutes)
- Make the crust base (optional): If you want a firmer base, mix 1/4 cup melted butter with 1 cup of the crushed Oreos. Press about a tablespoon into the bottom of each serving cup. Otherwise, you can skip this step and fold crumbs directly into the filling. (5 minutes)
- Beat the cream cheese: In a medium bowl, beat 8 ounces softened cream cheese with 1 cup powdered sugar until smooth and creamy, about 2-3 minutes. Scrape down the sides as needed to avoid lumps. (5 minutes)
- Whip the cream: In a separate large bowl, whip 1 cup chilled heavy cream with 1 teaspoon vanilla extract until soft peaks form. Don’t overwhip or it will turn grainy. (5-7 minutes)
- Combine crumbs and cream cheese: Fold the remaining crushed Oreos (about 1 cup) into the cream cheese mixture gently. You want even distribution without breaking the crumbs too much. (2 minutes)
- Fold whipped cream into cream cheese mixture: Carefully fold the whipped cream into the cream cheese and Oreo crumb mixture until smooth and light. This gives the filling its signature fluffy texture. (3 minutes)
- Assemble the cups: Spoon or pipe the filling over the Oreo crust layer if used, or just into the cups if not. Smooth the tops with a spatula. Garnish each with reserved Oreo pieces or crumbs. (10 minutes)
- Chill: Refrigerate the cups for at least 3 hours, preferably overnight, to let the cheesecake cups set and flavors meld. (3+ hours)
- Serve: These creamy no-bake Oreo cheesecake cups are best enjoyed chilled straight from the fridge.
Watch for your filling to look fluffy yet thick enough to hold shape. If it’s too runny, check that your cream cheese was fully softened but not melted. Also, don’t rush the chilling — patience here really pays off.
Cooking Tips & Techniques
Since this no-bake dessert leans heavily on texture, here are some key tips from my trial and error:
- Softened Cream Cheese is Key: Let your cream cheese sit at room temp for about 30 minutes before mixing. Too cold and you’ll get lumps, too warm and it’ll be runny.
- Whip Cream to Soft Peaks: Stop whipping as soon as the cream holds gentle peaks. Overwhipping can turn it grainy or into butter, which ruins the texture.
- Fold, Don’t Stir: When combining whipped cream with cream cheese, use a spatula and fold gently. Stirring vigorously deflates the mixture.
- Chill Long Enough: The cups need at least 3 hours to firm up. If you rush this, the filling can be too soft and messy.
- Use Fresh Oreos: Stale cookies lose crunch and flavor, which dulls the cups. I always grab a fresh pack for the best texture contrast.
I once tried speeding up chilling by popping the cups in the freezer for 30 minutes — it worked but made the texture a bit icy, so I stick to fridge chilling now. Also, using a handheld mixer cut my prep time in half compared to whisking by hand.
Variations & Adaptations
This recipe is a fantastic base for all sorts of tweaks depending on your cravings or dietary needs.
- Mint Oreo Cheesecake Cups: Swap the classic Oreos for mint-flavored ones and add a drop of peppermint extract to the filling for a refreshing twist.
- Peanut Butter Oreo Cups: Mix 2 tablespoons creamy peanut butter into the cream cheese before folding in whipped cream and Oreo crumbs. It’s a kid favorite!
- Gluten-Free Option: Use gluten-free chocolate sandwich cookies in place of Oreos. The filling stays the same, so no other changes needed.
- Fruit Topping: Add fresh raspberries or strawberries on top for a pop of color and bright flavor contrast.
- Dairy-Free Version: Use vegan cream cheese and coconut whipped cream. Texture is slightly different but still delicious.
One time, I baked the crust base for 5 minutes at 350°F (175°C) before layering the filling, which gave a subtle toasted flavor and firmer bite. It’s not necessary but a nice option if you want a more classic cheesecake feel.
Serving & Storage Suggestions
These individual cheesecake cups are best served chilled, straight from the fridge. The creamy texture and Oreo crunch are at their peak when cold but not frozen solid.
For serving, try a simple garnish of whole Oreo halves or a dusting of crushed crumbs. If you want to get fancy, a drizzle of chocolate sauce or a few fresh berries add a nice touch.
Store leftovers tightly covered in the refrigerator for up to 4 days. The flavors actually deepen overnight, making the dessert even richer the next day.
If you need to store longer, these cups freeze well for up to 1 month. Thaw in the fridge overnight before serving. I don’t recommend microwaving as it changes the texture.
These cups pair nicely with a cup of coffee or a light dessert wine if you’re thinking of entertaining. After a hearty meal like sheet pan flank steak with chimichurri, they’re a sweet finish without weighing you down.
Nutritional Information & Benefits
Each serving of these no-bake Oreo cheesecake cups clocks in around 300-350 calories, depending on portion size and ingredient brands. They offer a satisfying mix of fat and protein from the cream cheese and cream, balanced by the sweetness of the Oreos.
Key ingredients like cream cheese provide calcium and some vitamin A, while the whipped cream adds richness. Of course, this is a treat dessert, so it’s best enjoyed in moderation.
If you need a gluten-free or dairy-free version, the recipe adapts well, making it accessible for various dietary needs. The no-bake method also means no added oils or processed crusts — just simple ingredients coming together.
Personally, I like that this dessert feels indulgent yet homemade, without the heavy sugar or preservatives found in many store-bought options.
Conclusion
These creamy no-bake Oreo cheesecake cups have become my go-to easy dessert for those moments when I want something sweet, homemade, and fuss-free. Their rich, smooth filling with Oreo bits throughout is just the kind of comforting treat that makes any day feel a bit better.
The best part is how flexible this recipe is — you can tweak flavors, swap ingredients, or dress them up for special occasions. Whether you’re serving a crowd or just craving a personal indulgence, these cups fit the bill without stress.
Honestly, they’ve saved me more than once when I needed a quick dessert fix, and I think they’ll do the same for you. If you give them a try, I’d love to hear how you made them your own or what toppings you added!
FAQs About Creamy No-Bake Oreo Cheesecake Cups
Can I make these cheesecake cups ahead of time?
Absolutely! In fact, chilling them overnight helps the flavors meld and the filling set perfectly. Just keep them covered in the fridge.
What’s the best way to crush Oreos for this recipe?
A food processor works best for fine crumbs, but you can also place Oreos in a ziplock bag and crush them with a rolling pin or heavy pan.
Can I use low-fat cream cheese or whipped topping?
You can, but the texture and richness might be lighter or less creamy. Full-fat cream cheese and real whipped cream deliver the best results.
Is it possible to double or triple the recipe?
Yes, just multiply the ingredients accordingly. Using a larger mixing bowl helps with folding and whipping.
How do I store leftover cheesecake cups?
Keep them in an airtight container or cover tightly in the fridge for up to 4 days. Freeze for longer storage, thawing overnight in the fridge before serving.
Pin This Recipe!
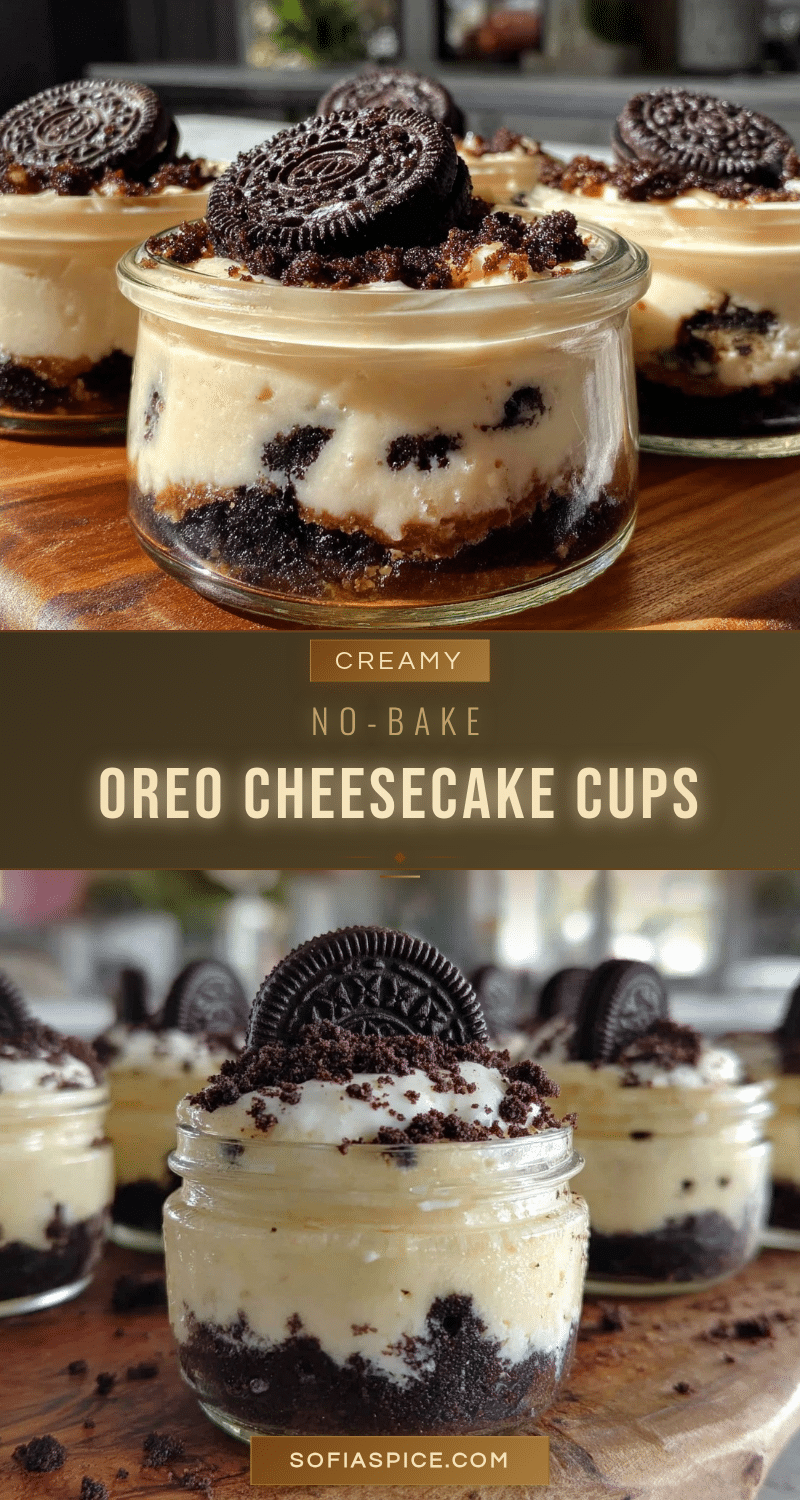
Creamy No-Bake Oreo Cheesecake Cups
These creamy no-bake Oreo cheesecake cups are quick, easy, and perfect individual desserts with a smooth filling and crunchy Oreo bits throughout. Ideal for busy days or last-minute sweet treats without any baking.
- Prep Time: 20 minutes
- Cook Time: 0 minutes
- Total Time: 3 hours 20 minutes
- Yield: 8 servings 1x
- Category: Dessert
- Cuisine: American
Ingredients
- 24 Oreos, crushed (reserve 6–8 whole or halved for garnish)
- 8 ounces (225 g) cream cheese, softened (full-fat recommended)
- 1 cup (120 g) powdered sugar, sifted
- 1 cup (240 ml) heavy whipping cream, chilled
- 1 teaspoon vanilla extract
- 1/4 cup (56 g) butter, melted (optional for firmer crust base)
Instructions
- Crush about 24 Oreos into fine crumbs using a food processor or by placing them in a ziplock bag and smashing with a rolling pin. Reserve 6-8 whole or halved Oreos for garnish. (5 minutes)
- If using a firmer base, mix 1/4 cup melted butter with 1 cup of the crushed Oreos. Press about a tablespoon into the bottom of each serving cup. Otherwise, skip this step and fold crumbs directly into the filling. (5 minutes)
- In a medium bowl, beat 8 ounces softened cream cheese with 1 cup powdered sugar until smooth and creamy, about 2-3 minutes. Scrape down the sides as needed to avoid lumps. (5 minutes)
- In a separate large bowl, whip 1 cup chilled heavy cream with 1 teaspoon vanilla extract until soft peaks form. Do not overwhip. (5-7 minutes)
- Fold the remaining crushed Oreos (about 1 cup) into the cream cheese mixture gently for even distribution. (2 minutes)
- Carefully fold the whipped cream into the cream cheese and Oreo crumb mixture until smooth and light. (3 minutes)
- Spoon or pipe the filling over the Oreo crust layer if used, or just into the cups if not. Smooth the tops with a spatula. Garnish each with reserved Oreo pieces or crumbs. (10 minutes)
- Refrigerate the cups for at least 3 hours, preferably overnight, to let the cheesecake cups set and flavors meld. (3+ hours)
- Serve chilled straight from the fridge.
Notes
Use softened cream cheese at room temperature to avoid lumps. Whip cream to soft peaks only to prevent graininess. Fold whipped cream gently into cream cheese mixture to keep fluffy texture. Chill at least 3 hours for best results. Fresh Oreos provide best texture contrast. Optional firmer crust base can be made with melted butter and Oreo crumbs. Variations include mint Oreos, peanut butter addition, gluten-free cookies, or dairy-free cream cheese and coconut whipped cream.
Nutrition
- Serving Size: 1 cheesecake cup
- Calories: 325
- Sugar: 22
- Sodium: 210
- Fat: 22
- Saturated Fat: 13
- Carbohydrates: 28
- Fiber: 1
- Protein: 4
Keywords: no-bake, Oreo, cheesecake, individual desserts, easy dessert, creamy, quick dessert, no oven, Oreo cheesecake cups


