“You really don’t need a water bath for this cheesecake,” my friend insisted the first time I tried baking this New York-style cheesecake without the usual fuss. Honestly, I was skeptical—I’ve always tiptoed around water baths, convinced they were essential for that smooth, crack-free finish. But that day, juggling a crammed schedule and a slightly cracked springform pan (don’t ask), I decided to throw caution to the wind. The result? A luxuriously creamy cheesecake with that classic New York tang and a golden top that didn’t crack one bit. It was like finding a secret shortcut in baking that felt almost like a personal victory. Since then, this recipe has been my go-to when I want impressive dessert vibes without the extra stress or mess. The truth is, sometimes the best recipes come from a pinch of frustration and a dash of experimentation.
That moment of realizing you can get silky, dense, and perfectly baked cheesecake without the usual water bath ritual stuck with me. It’s a little reminder that perfection doesn’t always mean complication. If you’ve ever hesitated to bake cheesecake because of the water bath or feared a cracked surface, this recipe is a gentle nudge that you can have your creamy cake and eat it too. Let’s be honest—who doesn’t want that kind of satisfying win in the kitchen?
Why You’ll Love This Recipe
After making this creamy New York-style baked cheesecake without water bath multiple times and sharing it with friends and family, I can vouch for why it’s become a staple. It’s not just easier; it’s downright reliable and delicious every single time.
- Quick & Easy: No water bath means less prep and cleanup, and it bakes beautifully in about 1 hour and 15 minutes—perfect for a weekend treat or a last-minute dessert.
- Simple Ingredients: You don’t need anything fancy—just quality cream cheese, eggs, and a few pantry staples you likely have on hand.
- Perfect for Any Occasion: Whether it’s a family dinner, holiday celebration, or just a cozy night in, this cheesecake hits the spot.
- Crowd-Pleaser: The rich, creamy texture and subtle vanilla flavor always get compliments from kids and adults alike.
- Unbelievably Delicious: The texture is dense yet silky smooth, with a buttery graham cracker crust that’s just the right balance.
What sets this cheesecake apart is the no-water-bath method that still delivers that iconic New York dense and creamy texture without the usual moisture worries. Plus, the crust-to-filling ratio is just right—thanks to my little tweak of using melted butter instead of cold butter, which gives the crust a perfect hold. Honestly, it’s the kind of dessert that makes you close your eyes after the first bite and savor that classic tang and creaminess without fussing over technique.
What Ingredients You Will Need
This cheesecake uses straightforward, wholesome ingredients to create a bold flavor and satisfyingly creamy texture without any complicated steps or hard-to-find items. The ingredients mostly come from pantry staples or your local grocery store.
- For the Crust:
- 1 ½ cups (150g) graham cracker crumbs (I prefer Honey Maid for consistent texture)
- 5 tablespoons (70g) unsalted butter, melted (helps bind the crust perfectly)
- 2 tablespoons granulated sugar (balances the buttery crust)
- For the Filling:
- 4 (8 oz / 226g each) packages full-fat cream cheese, softened (room temperature is key for smooth batter)
- 1 cup (200g) granulated sugar
- 1 cup (240ml) sour cream (adds tang and creaminess, but plain Greek yogurt works too)
- 4 large eggs, room temperature (helps prevent cracks)
- 1 tablespoon pure vanilla extract (quality matters—use Nielsen-Massey if possible)
- 2 tablespoons all-purpose flour (stabilizes filling without affecting flavor)
Ingredient Tips: Using full-fat cream cheese is essential for that classic creamy texture. Avoid low-fat versions as they can make the cheesecake grainy. If you want a gluten-free crust, swap the graham crackers with gluten-free crumbs or crushed nuts. For sour cream substitutes, Greek yogurt provides a similar tang but can make the texture slightly denser.
Equipment Needed
- 9-inch (23 cm) springform pan – crucial for easy release without messing up the crust or edges.
- Electric mixer or stand mixer – to beat the cream cheese smooth and avoid lumps.
- Mixing bowls – a large one for the filling and a smaller one for the crust.
- Measuring cups and spoons – for precise measurements (baking is a science!).
- Rubber spatula – for scraping down the sides of the bowl and folding ingredients gently.
- Oven thermometer (optional but helpful) – ovens can be tricky, and cheesecake likes steady heat.
If you don’t have a springform pan, a regular 9-inch cake pan lined with parchment paper and greased generously can work but be extra gentle when removing the cheesecake. I’ve tried silicone pans too, but I find the crust doesn’t crisp as well there. For budget-friendly options, look for secondhand springform pans or affordable brands—you don’t need anything fancy, just something that seals well.
Preparation Method
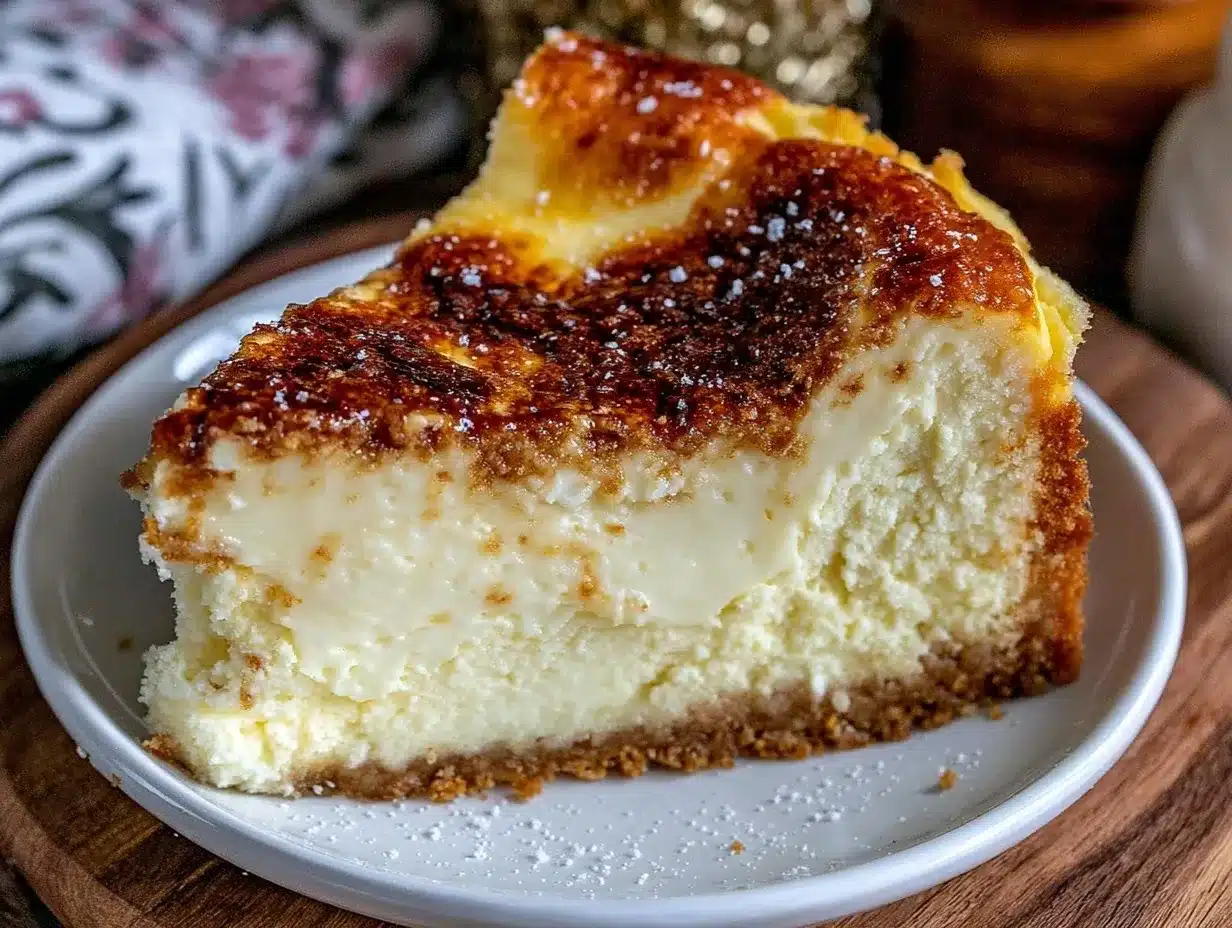
- Prep the Crust (10 minutes): Preheat your oven to 325°F (160°C). In a medium bowl, combine graham cracker crumbs, melted butter, and sugar. Mix until the crumbs are evenly coated and resemble wet sand. Press the mixture firmly into the bottom (and slightly up the edges) of the springform pan. Use the bottom of a glass or measuring cup to compact it tightly. Bake for 10 minutes, then remove from oven and set aside to cool.
- Make the Filling (15 minutes): In a large mixing bowl, beat the softened cream cheese with an electric mixer on medium speed until smooth and creamy (about 2-3 minutes). Scrape down the sides with a rubber spatula as needed to avoid lumps. Gradually add sugar and continue beating until fully combined.
- Add Sour Cream and Eggs (5 minutes): Mix in the sour cream and vanilla extract until just combined. Add eggs one at a time, beating on low speed after each addition to incorporate but not overmix. Overbeating eggs can trap air and cause cracks.
- Incorporate Flour (1 minute): Sprinkle the flour over the batter and gently fold it in with a spatula to add stability to the filling.
- Pour and Smooth: Pour the filling over the cooled crust in the springform pan. Tap the pan gently on the counter to release any air bubbles and smooth the surface with a spatula.
- Bake (70-75 minutes): Place the cheesecake in the center of your preheated oven. Bake at 325°F (160°C) for about 1 hour and 10-15 minutes. The edges should look set, but the center will still have a slight jiggle when you gently shake the pan.
- Cool Gradually (3+ hours): Turn off the oven and crack the oven door open. Let the cheesecake cool inside for about an hour—this helps prevent cracks by cooling it slowly. Then, remove it from the oven and let it cool at room temperature for another hour before refrigerating.
- Chill (at least 4 hours, preferably overnight): Refrigerate uncovered for the first hour, then cover loosely with foil or plastic wrap. Chilling overnight is best for flavor and texture.
Pro Tip: If you notice cracks forming, don’t panic. A little sour cream or whipped cream topping can hide imperfections nicely. Also, resist the urge to open the oven door too often during baking—it can cause temperature fluctuations that crack the surface.
Cooking Tips & Techniques
Cheesecake can be intimidating, but here are some tricks I’ve learned over many bakes to help you get it right every time:
- Room Temperature Ingredients: This is key. Cold cream cheese or eggs can cause lumps or uneven baking. Take them out 30-60 minutes before starting.
- Don’t Overmix: Once eggs go in, mix on low and just until combined. Too much air incorporated means cracks or a sponge-like texture.
- Use a Light Hand: When folding in flour or sour cream, be gentle to keep the batter smooth and dense, not airy.
- Oven Temperature Matters: If your oven runs hot, consider lowering the temp by 10-15°F to avoid browning too fast.
- Slow Cooling: Leaving the cheesecake in the oven with the door cracked helps it cool evenly, reducing cracks.
- Crust Compression: Firmly pack the crust to prevent sogginess. I like using the bottom of a glass for this step.
In the early days, I struggled with cracked cheesecakes and dry edges until I realized that a water bath isn’t the only way to control moisture. This method proves that with good ingredient temperatures and slow cooling, you can skip the water bath entirely and still get that creamy texture. For more easy weeknight success meals that don’t require fuss, check out my one-pan garlic butter salmon with asparagus—simple, comforting, and just like this cheesecake, fuss-free.
Variations & Adaptations
- Fruit-Topped Cheesecake: Add a fresh berry compote or sliced strawberries on top after chilling for a pop of color and brightness.
- Chocolate Swirl: Before baking, swirl in some melted semi-sweet chocolate or Nutella for a decadent twist.
- Gluten-Free: Use gluten-free graham cracker crumbs or crushed almonds for the crust to make this cheesecake gluten-free friendly.
- Dairy-Free: Swap cream cheese and sour cream with vegan cream cheese and coconut yogurt, but expect a slightly different texture.
- Spiced Crust: Mix ½ teaspoon cinnamon or pumpkin pie spice into the crust crumbs for subtle warmth and aroma.
I once tried adding a lemon zest to the filling for a brighter note, which was a nice change for springtime. Another time, a friend brought a homemade caramel sauce to drizzle, turning it into a showstopper. Don’t be afraid to experiment with your favorite flavors. If you enjoy creamy protein-packed treats, you might also like my creamy protein-packed blueberry cheesecake overnight oats for a lighter, breakfast-friendly cheesecake flavor.
Serving & Storage Suggestions
This creamy New York-style cheesecake shines best served chilled or at room temperature. For serving, let it sit out for about 15-20 minutes after removing from the fridge to soften slightly, which makes slicing cleaner and enhances the velvety mouthfeel.
- Serve plain or topped with fresh berries, a dollop of whipped cream, or a drizzle of chocolate or caramel sauce.
- Pairs beautifully with coffee, a crisp dessert wine, or a simple cup of tea.
- For a refreshing twist, try it alongside a citrus fruit salad for contrast.
Store leftovers in the refrigerator tightly wrapped or in an airtight container for up to 5 days. Cheesecake freezes well too—wrap tightly in plastic wrap and foil, then freeze for up to 2 months. Thaw overnight in the fridge before serving.
Flavors actually deepen after a day or two, so if you can resist, letting it rest overnight is worth it. I often make this cheesecake a day ahead when hosting, similar to how I prep my spicy Cajun shrimp and sausage sheet pan meal—both keep well and impress with minimal day-of effort.
Nutritional Information & Benefits
Per serving (based on 12 servings): approximately 380 calories, 30g fat, 18g protein, 18g carbohydrates.
This cheesecake packs a solid protein punch thanks to the cream cheese and eggs, which can help keep you fuller compared to lighter desserts. The full-fat dairy adds richness but also provides essential fat-soluble vitamins like A and D. Using sour cream adds a bit of probiotics if unheated, and the graham cracker crust provides some fiber from the whole grains. It’s definitely a treat dessert, but with straightforward, wholesome ingredients and no artificial additives.
For those watching carbs, you can reduce sugar slightly or try a sugar substitute, but keep in mind it may affect texture. If dairy is a concern, try the dairy-free adaptation mentioned earlier.
Conclusion
This creamy New York-style baked cheesecake without water bath is proof that you don’t need complicated setups to create a dessert that feels special and tastes incredible. It’s approachable for bakers of all skill levels and forgiving enough to become your trusty go-to for celebrations or just treating yourself.
Feel free to tweak the flavors or make it your own by adding toppings or spices. I love how this recipe brings that classic cheesecake comfort with less hassle—something I’ve come back to time and again, whether for a casual dinner or a holiday gathering.
Give it a try, and don’t be shy to share your own twists or experiences in the comments below. Baking, after all, should be fun, rewarding, and a little bit deliciously imperfect.
FAQs About This Cheesecake Recipe
Can I make this cheesecake without a springform pan?
Yes, you can use a regular 9-inch cake pan lined with parchment paper, but removing the cheesecake will be trickier. Be very gentle when slicing and serving.
Why don’t I need a water bath for this cheesecake?
The low baking temperature, slow cooling, and proper mixing prevent cracks and dryness, making a water bath unnecessary for this recipe.
Can I use low-fat cream cheese?
For best results, use full-fat cream cheese. Low-fat versions can alter texture and make the cheesecake less creamy.
How long should I chill the cheesecake before serving?
At least 4 hours in the fridge is recommended, but overnight chilling is ideal to develop flavors and texture.
Can I add fruit or toppings before baking?
It’s best to add fresh fruit or toppings after baking and chilling to prevent excess moisture from affecting the crust and texture.
Pin This Recipe!
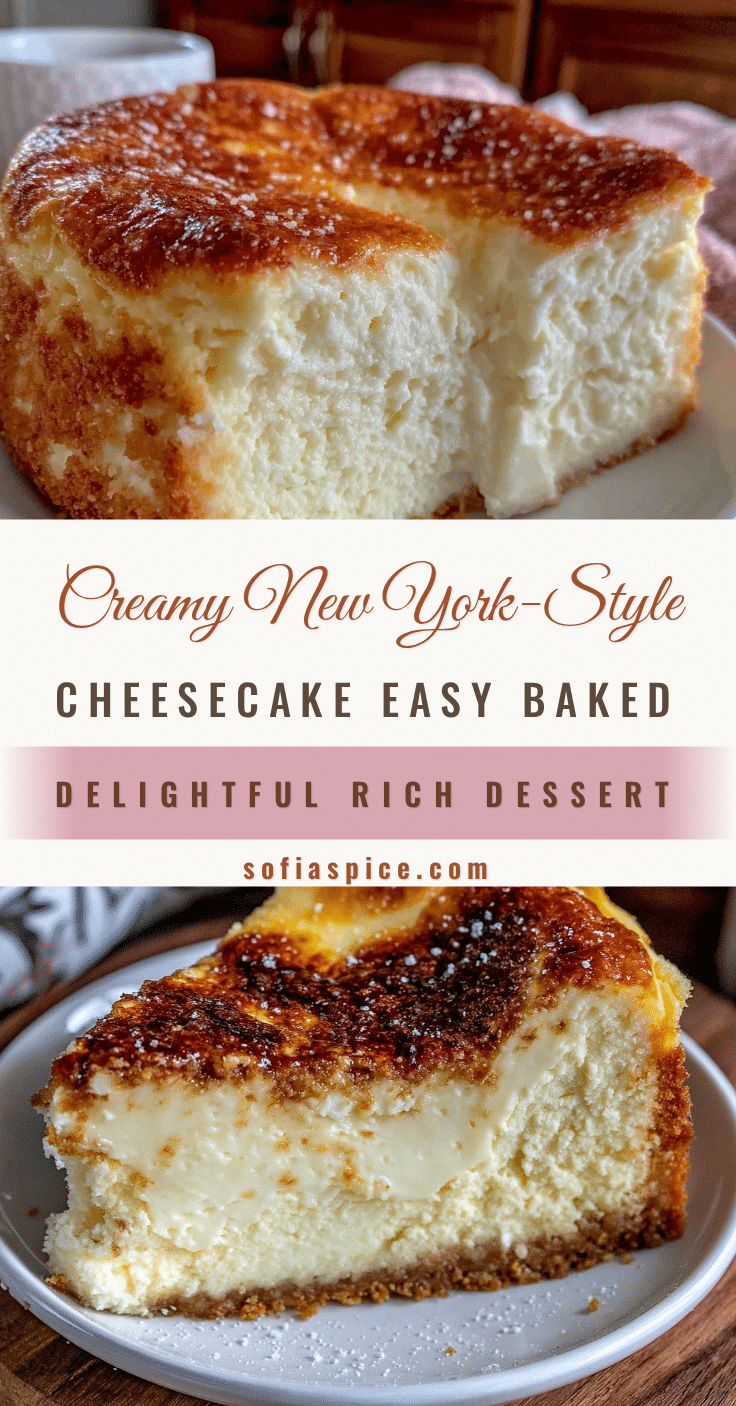
Creamy New York-Style Baked Cheesecake Recipe Without Water Bath Easy and Perfect
A creamy, dense New York-style baked cheesecake that requires no water bath, making it easier and less messy while delivering a smooth, crack-free finish with classic tang.
- Prep Time: 30 minutes
- Cook Time: 1 hour 15 minutes
- Total Time: 5 hours 0 minutes
- Yield: 12 servings 1x
- Category: Dessert
- Cuisine: American
Ingredients
- 1 ½ cups (150g) graham cracker crumbs
- 5 tablespoons (70g) unsalted butter, melted
- 2 tablespoons granulated sugar
- 4 (8 oz / 226g each) packages full-fat cream cheese, softened
- 1 cup (200g) granulated sugar
- 1 cup (240ml) sour cream
- 4 large eggs, room temperature
- 1 tablespoon pure vanilla extract
- 2 tablespoons all-purpose flour
Instructions
- Preheat oven to 325°F (160°C). In a medium bowl, combine graham cracker crumbs, melted butter, and sugar. Mix until evenly coated and press firmly into the bottom and slightly up the edges of a 9-inch springform pan. Compact tightly using the bottom of a glass or measuring cup. Bake for 10 minutes, then remove and cool.
- In a large mixing bowl, beat softened cream cheese on medium speed until smooth and creamy (2-3 minutes). Scrape down sides as needed.
- Gradually add sugar and continue beating until fully combined.
- Mix in sour cream and vanilla extract until just combined.
- Add eggs one at a time, beating on low speed after each addition to incorporate without overmixing.
- Sprinkle flour over batter and gently fold in with a spatula.
- Pour filling over cooled crust in springform pan. Tap pan gently to release air bubbles and smooth surface.
- Bake at 325°F (160°C) for 70-75 minutes until edges are set and center has slight jiggle.
- Turn off oven and crack door open. Cool cheesecake inside oven for about 1 hour.
- Remove from oven and cool at room temperature for 1 hour.
- Refrigerate uncovered for 1 hour, then cover loosely and chill at least 4 hours or overnight before serving.
Notes
Use full-fat cream cheese for best texture. Avoid overmixing eggs to prevent cracks. Slow cooling in the oven with door cracked helps prevent cracks. If cracks appear, cover with sour cream or whipped cream topping. Room temperature ingredients are key. For gluten-free crust, substitute graham crackers with gluten-free crumbs or nuts. For dairy-free, use vegan cream cheese and coconut yogurt but expect texture differences.
Nutrition
- Serving Size: 1 slice (1/12 of che
- Calories: 380
- Fat: 30
- Carbohydrates: 18
- Protein: 18
Keywords: New York cheesecake, baked cheesecake, no water bath cheesecake, creamy cheesecake, easy cheesecake recipe, graham cracker crust


