Early September mornings, and the kitchen smells of ripe peaches that have lingered on the counter overnight. The kind of peaches that almost melt under your fingertips, their skin warm from the late summer sun. It’s the quiet hour before the day picks up, and the only thing I want is to capture that fleeting sweetness in a jar, a freezer bag, anything that feels like a pause button for peach season. This easy freezer-friendly peach pie filling recipe has been my little ritual these past years—an act of saving summer’s last breath so I can bake it into cozy pies come winter nights.
There’s a soft hum in the background, the sound of bubbling sugar syrup thickening gently on the stove while the peaches soften just enough, not too mushy. I remember the first time I made this filling, wary of overcooking or ruining the delicate fruit. But this recipe, tested over countless batches, balances that perfect texture and fresh flavor that doesn’t scream “frozen.” It’s the kind of preparation that feels slow but purposeful, like folding a cherished memory into every pie crust later on.
What keeps me coming back to this peach pie filling isn’t just convenience—it’s trust. Knowing I’ve got homemade peaches ready to turn into a warm slice that fills the room with a buttery crust aroma, that’s a quiet comfort. It reminds me that sometimes, the best parts of cooking aren’t rushed or flashy, but the ones patiently waiting in the freezer for their moment. And honestly, that simple act of freezing fresh peaches this way has made baking feel less like a chore and more like a thoughtful pause in my busy week.
So, if you’ve ever wished you could bottle up summer’s sweetness without fuss or fancy equipment, this recipe might just become your own quiet ritual too.
Why You’ll Love This Recipe
This easy freezer-friendly peach pie filling recipe is my go-to for capturing the essence of summer peaches with minimal effort and maximum flavor. Over the years, I’ve tweaked it so it works every time, even if you’re not a seasoned baker.
- Quick & Easy: Comes together in about 30 minutes, perfect for those moments when you want to prep ahead without spending hours in the kitchen.
- Simple Ingredients: Uses pantry staples plus fresh peaches — no fancy syrups or preservatives.
- Perfect for Future Baking: Makes pie assembly a breeze when you’re ready to bake, especially handy for holiday seasons or unexpected guests.
- Crowd-Pleaser: This filling has a natural sweetness and a velvety texture that always gets compliments, whether in pies, crisps, or cobblers.
- Unbelievably Delicious: The peaches hold their shape beautifully without turning mushy after freezing — that’s the secret to this recipe.
What sets this peach pie filling apart is the balance between sugar and a hint of cinnamon and vanilla, which adds depth without overpowering the fruit. Plus, the method of cooking the peaches just enough to thicken the syrup before freezing ensures you get that fresh-picked flavor later on. It’s not just another canned filling; it’s homemade with care and a bit of patience.
Honestly, this recipe feels like a quiet triumph every time I pull a frozen bag from the freezer, ready to make a pie that tastes like the end of August, no matter the season.
What Ingredients You Will Need
This recipe uses simple, wholesome ingredients to deliver a bold yet balanced flavor and satisfying texture without fuss. Most of these are pantry staples, and the peaches are the star, of course.
- Fresh peaches: About 6 cups sliced (roughly 1.5 kg). Firm but ripe peaches work best — they hold up better through the cooking and freezing process.
- Granulated sugar: 1 cup (200 g). Adjust based on peach sweetness or personal preference.
- Light brown sugar: ¼ cup (50 g). Adds a subtle caramel note that deepens the flavor.
- Lemon juice: 2 tablespoons (30 ml), fresh if possible. Provides brightness and balances the sweetness.
- Cornstarch: 3 tablespoons (24 g). This thickens the syrup nicely without cloudiness.
- Ground cinnamon: ½ teaspoon (optional). Just a whisper for warmth.
- Pure vanilla extract: 1 teaspoon (5 ml). Adds complexity and rounds out the flavor.
- Water: ½ cup (120 ml). Helps create the syrup base.
For best results, I like to use peaches from local farmers’ markets when in season — they tend to be juicier and more flavorful than store-bought. If you want to make this filling gluten-free, cornstarch is already a great choice, but you could swap it with arrowroot powder if you prefer. And if fresh peaches aren’t available, frozen sliced peaches can work too, just thaw and drain excess liquid first.
Equipment Needed
- Large heavy-bottomed saucepan – to cook the peach filling evenly without burning.
- Mixing bowls – for tossing peaches with sugar and lemon juice.
- Measuring cups and spoons – exact measurements really help with consistency.
- Wooden spoon or heatproof spatula – for gentle stirring.
- Freezer-safe bags or containers – I prefer zip-top freezer bags because they save space, but airtight plastic containers work fine too.
- Sharp paring knife and cutting board – to slice peaches efficiently.
If you don’t have cornstarch, a fine mesh sieve and whisk are useful if you want to mix arrowroot or tapioca starch without lumps. Personally, I keep a silicone spatula handy for scraping the saucepan clean — it makes the job less sticky and easier to transfer the filling.
Preparation Method
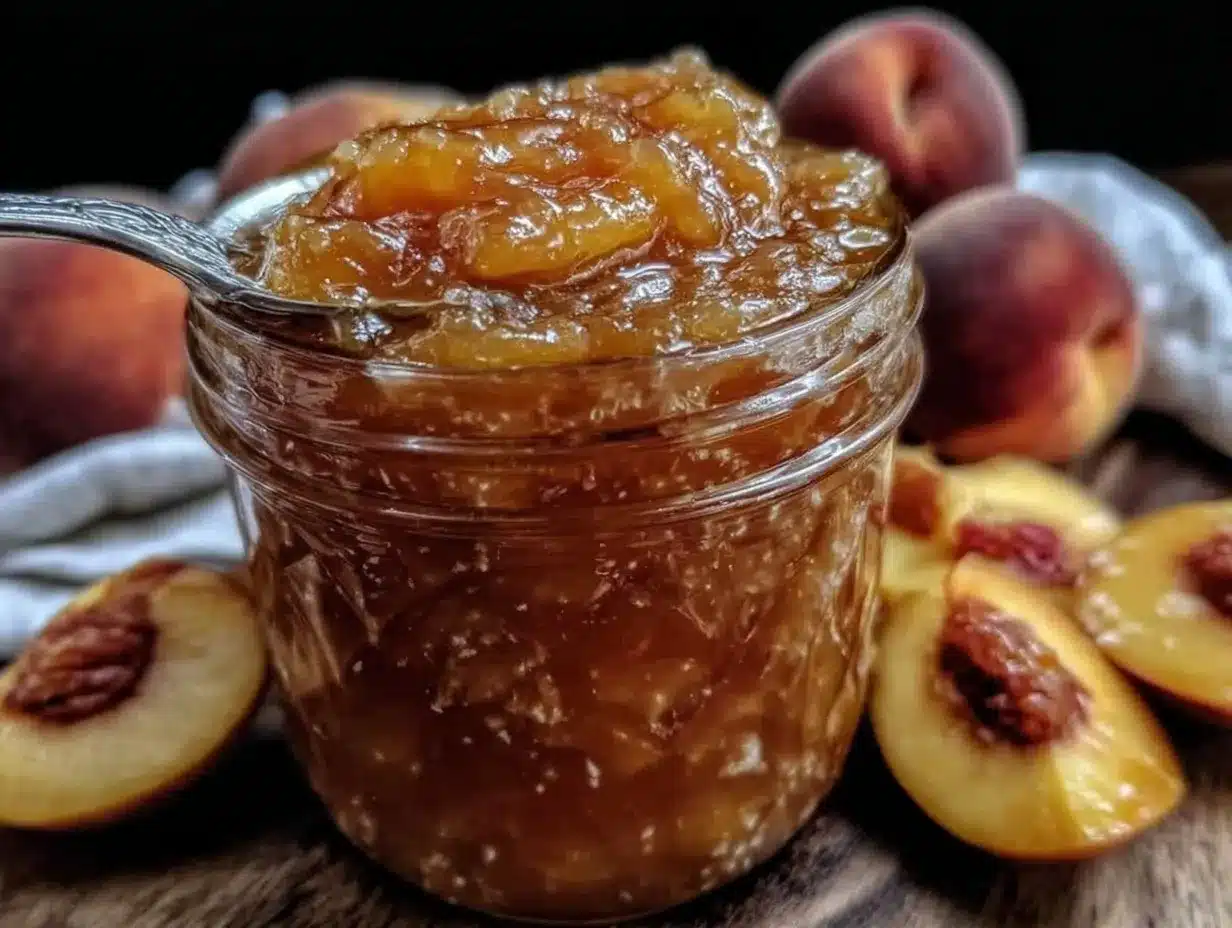
- Prepare the peaches: Wash, peel (optional), pit, and slice about 6 cups (1.5 kg) of fresh peaches into roughly ½-inch thick slices. Peeling is optional — I usually leave the skin on for texture and color, but it depends on your preference. (Time: 15 minutes)
- Toss peaches with sugar and lemon juice: In a large bowl, combine peaches with 1 cup (200 g) granulated sugar, ¼ cup (50 g) light brown sugar, and 2 tablespoons (30 ml) fresh lemon juice. Toss gently to coat evenly. This step helps macerate the fruit and infuse it with brightness. Let it sit for 10 minutes while you prep the other ingredients.
- Mix cornstarch slurry: In a small bowl, whisk together 3 tablespoons (24 g) cornstarch with ½ cup (120 ml) cold water until smooth. Set aside.
- Cook the filling: Heat a large saucepan over medium heat and add the peach mixture along with ½ teaspoon ground cinnamon and 1 teaspoon vanilla extract. Stir constantly as the peaches begin to release their juices. Slowly pour in the cornstarch slurry while stirring continuously to avoid lumps.
- Simmer until thickened: Continue cooking, stirring gently, until the syrup thickens and coats the peaches nicely — about 5 to 7 minutes. The mixture should be glossy and slightly syrupy but not too stiff. If it gets too thick, add a splash of water.
- Cool completely: Remove from heat and let the peach pie filling cool to room temperature. This usually takes around 30 minutes. Cooling is important before freezing to prevent ice crystals and sogginess later.
- Package for freezing: Transfer the cooled filling into freezer-safe bags or containers, leaving about ½ inch (1.5 cm) of headspace to allow for expansion. Flatten bags to remove air, seal tightly, and label with the date.
- Freeze: Lay the bags flat in the freezer for easy stacking. The filling will keep well for up to 6 months.
When you’re ready to bake, just thaw the filling overnight in the refrigerator and pour it into your favorite pie crust. This filling pairs beautifully with a classic buttery crust or a crumbly topping like in my savory bug bites recipe where the crust texture really shines.
Cooking Tips & Techniques
Getting the peach pie filling just right takes a bit of attention, but here are a few tips I’ve picked up over countless batches:
- Don’t overcook the peaches: The goal is to soften them slightly while maintaining their shape. Overcooking leads to mushy filling after freezing and baking.
- Use fresh lemon juice: It’s key for balancing the sweetness and helps prevent the peaches from browning during preparation.
- Mix cornstarch slurry thoroughly: Adding it slowly and stirring continuously prevents lumps and gives a smooth syrup.
- Cool filling completely before freezing: This prevents condensation and ice crystals, which can ruin texture.
- Label your freezer bags: Include the date and quantity so you know when to use them. I learned this the hard way when I found a forgotten bag from two years ago!
- Don’t skip the vanilla and cinnamon: Even in small amounts, these add a warm depth that makes the filling taste homemade rather than just sweetened fruit.
In busy weeks, I like to prep this filling while making other dishes, like the sweet peach preserves I keep on hand for toast. It’s a little multitasking that pays off later.
Variations & Adaptations
This peach pie filling recipe is wonderfully flexible. Here are some ways I’ve adapted it:
- Spice it up: Add a pinch of ground nutmeg or cardamom for a fall twist.
- Lower sugar: Reduce the granulated sugar by ¼ cup (50 g) if you prefer a tarter filling or are using very sweet peaches.
- Gluten-free thickener: Swap cornstarch with arrowroot powder or tapioca starch if you’re avoiding gluten.
- Mix fruits: Try blending in a cup of fresh or frozen berries (blueberries or raspberries work well) for a mixed fruit pie filling.
- Dairy-free option: This recipe is naturally dairy-free, which makes it great if you want to avoid added butter or creams.
Once, I experimented by adding a splash of bourbon to the cooked filling before freezing — it gave a subtle warmth that was surprisingly lovely in a winter pie. Just a heads up, the alcohol cooks off mostly during baking, but it’s a fun twist for adult gatherings.
Serving & Storage Suggestions
When you’re ready to bake, thaw the peach pie filling overnight in the fridge. This gentle thaw helps the filling reabsorb any separated juices and keeps the peaches plump. Pour it directly into a chilled pie crust for best results.
Serve your peach pie warm, ideally with a scoop of vanilla ice cream or a dollop of whipped cream. The contrast of cold cream and warm filling is pure comfort. For a lighter option, try pairing the pie with a fresh fruit salad or a simple herbal tea.
If you have leftovers, store any baked pie tightly covered in the fridge for up to 4 days. The pie filling itself can be kept frozen for up to 6 months; just make sure it’s well-sealed to avoid freezer burn. Reheat slices gently in the oven or microwave — a quick 10-minute warm-up at 350°F (175°C) revives the crust and filling nicely.
Flavors actually deepen a bit after a day or two in the fridge, so if you’re not in a rush, letting the pie rest can make it taste even better. This slow development of flavor reminds me why homemade is worth the wait.
Nutritional Information & Benefits
This peach pie filling recipe is naturally low in fat and packed with vitamins from fresh peaches. Each serving (about ½ cup or 125 g) contains roughly:
| Calories | Carbohydrates | Fiber | Sugar | Vitamin C |
|---|---|---|---|---|
| 90 kcal | 23 g | 2 g | 19 g | 10% DV |
Peaches are a good source of antioxidants and vitamin C, which support immune health. Using fresh fruit and minimal added sugars keeps this filling closer to whole food than many canned alternatives.
This recipe is gluten-free and dairy-free, making it suitable for various dietary needs. Just watch the sugar if you’re monitoring intake — you can always reduce it or swap sugars for natural sweeteners like honey or maple syrup.
Conclusion
This easy freezer-friendly peach pie filling has quietly become one of my favorite ways to hold on to a little summer magic. It’s straightforward, forgiving, and perfectly suited for anyone who loves baking but struggles to find the time when peaches are in season.
Feel free to customize the sweetness or spices to your liking — that’s part of what makes it so satisfying. For me, it’s more than a recipe; it’s a small, reliable joy waiting in the freezer, ready to bring a slice of warmth and nostalgia whenever I need it.
If you give it a try, I’d love to hear how your pies turn out or any special tweaks you make. Baking is always better when shared, even quietly across kitchen counters.
FAQs About Easy Freezer-Friendly Peach Pie Filling
Can I use frozen peaches for this filling?
Yes, but thaw and drain them well before cooking to avoid excess liquid. This helps maintain a thicker filling.
How long can I store the peach pie filling in the freezer?
Up to 6 months is ideal for best flavor and texture. Beyond that, the quality may decline.
Do I need to peel the peaches?
Peeling is optional. Leaving skins on adds texture and nutrients, but peeled peaches give a smoother filling.
Can I make this filling ahead for a large batch?
Absolutely. This recipe scales well, and freezing in portioned bags makes future baking easy and convenient.
What’s the best thickener for this filling?
Cornstarch works great, but arrowroot or tapioca starch are good gluten-free alternatives that give a glossy finish.
Pin This Recipe!

Easy Freezer-Friendly Peach Pie Filling Recipe for Perfect Baking

This easy freezer-friendly peach pie filling recipe captures the essence of summer peaches with minimal effort and maximum flavor, perfect for baking cozy pies any time of year.
- Prep Time: 25 minutes
- Cook Time: 10 minutes
- Total Time: 35 minutes
- Yield: About 6 cups filling (approximately 8 servings) 1x
- Category: Dessert
- Cuisine: American
Ingredients
- 6 cups sliced fresh peaches (about 1.5 kg or 3.3 lbs)
- 1 cup granulated sugar (200 g)
- 1/4 cup light brown sugar (50 g)
- 2 tablespoons fresh lemon juice (30 ml)
- 3 tablespoons cornstarch (24 g)
- 1/2 teaspoon ground cinnamon (optional)
- 1 teaspoon pure vanilla extract (5 ml)
- 1/2 cup water (120 ml)
Instructions
- Wash, peel (optional), pit, and slice about 6 cups (1.5 kg or 3.3 lbs) of fresh peaches into roughly 1/2-inch thick slices.
- In a large bowl, combine peaches with 1 cup granulated sugar, 1/4 cup light brown sugar, and 2 tablespoons fresh lemon juice. Toss gently to coat evenly and let sit for 10 minutes.
- In a small bowl, whisk together 3 tablespoons cornstarch with 1/2 cup cold water until smooth. Set aside.
- Heat a large heavy-bottomed saucepan over medium heat and add the peach mixture along with 1/2 teaspoon ground cinnamon and 1 teaspoon vanilla extract. Stir constantly as peaches release their juices.
- Slowly pour in the cornstarch slurry while stirring continuously to avoid lumps.
- Continue cooking and stirring gently until the syrup thickens and coats the peaches nicely, about 5 to 7 minutes. Add a splash of water if too thick.
- Remove from heat and let the filling cool completely to room temperature, about 30 minutes.
- Transfer the cooled filling into freezer-safe bags or containers, leaving about 1/2 inch of headspace. Flatten bags to remove air, seal tightly, and label with the date.
- Lay the bags flat in the freezer for easy stacking. The filling keeps well for up to 6 months.
Notes
Do not overcook peaches to avoid mushy texture after freezing. Use fresh lemon juice to prevent browning. Mix cornstarch slurry thoroughly and add slowly to avoid lumps. Cool filling completely before freezing to prevent ice crystals. Label freezer bags with date and quantity. Vanilla and cinnamon add warm depth to flavor.
Nutrition
- Serving Size: 1/2 cup (125 g)
- Calories: 90
- Sugar: 19
- Carbohydrates: 23
- Fiber: 2
Keywords: peach pie filling, freezer-friendly, peach recipe, pie filling, homemade peach filling, easy peach filling, gluten-free peach filling, dairy-free peach filling


