There used to be a little takeout spot called Lin’s Kitchen tucked into a strip mall on the corner of 5th and Main that made the most incredible sticky chicken. When they suddenly closed their doors two summers ago, I actually drove by three times hoping it was just a renovation. I’m not proud of that, honestly. After my fourth attempt to recreate their signature dish — which involved a burnt pan, a smoke detector, and a very patient husband — I finally got it. And let me tell you, this version might actually be better than the original.
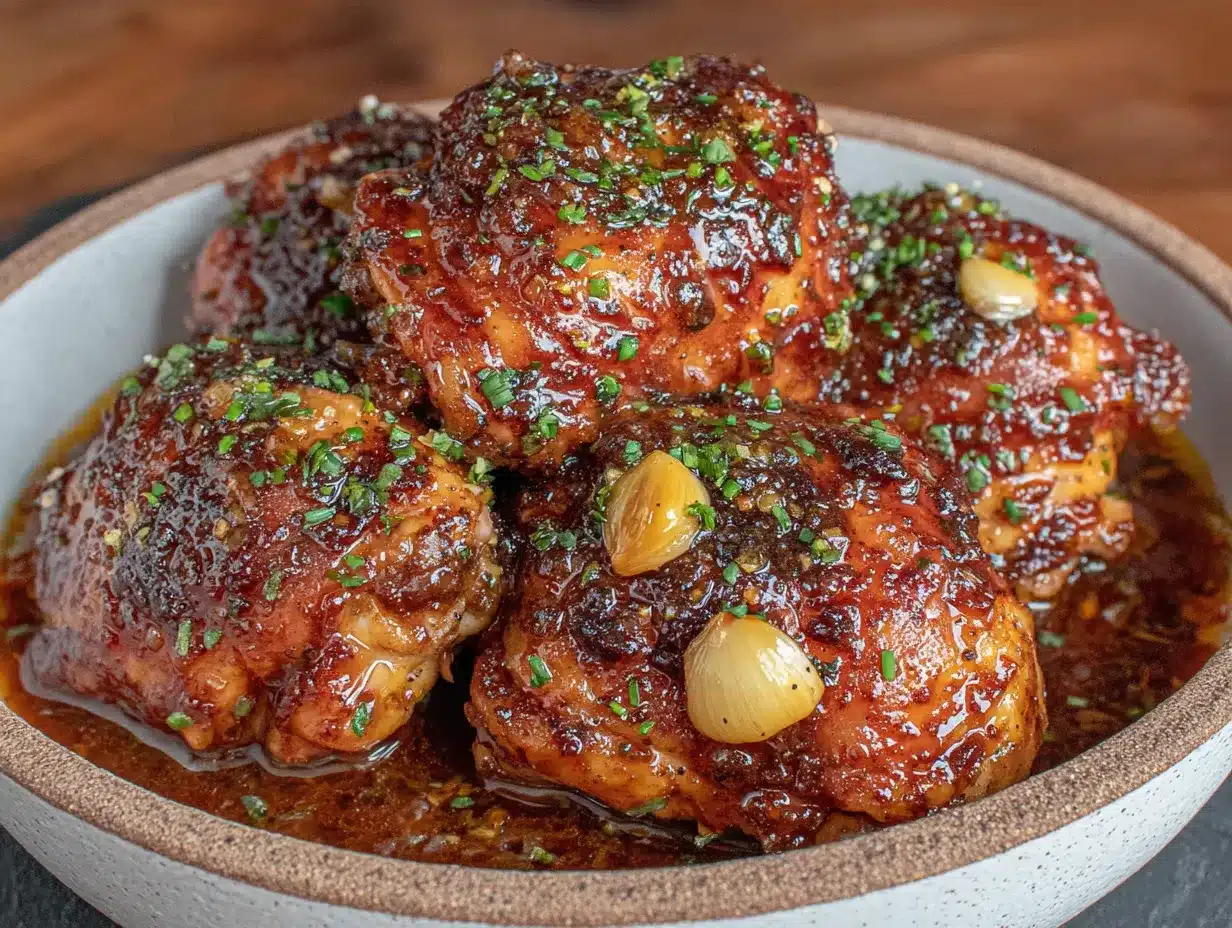
The secret? Letting the crockpot do all the heavy lifting. You know that feeling when you walk into a kitchen that smells like someone’s been cooking for hours, but you barely lifted a finger? That’s exactly what happens here. The chicken thighs come out fall-apart tender, coated in this glossy, sweet-and-savory sauce that clings to every bite. I mean, it’s the kind of sticky that makes you want to lick your fingers after every piece — and I absolutely do.
Maybe you’ve been there, chasing a flavor memory from a restaurant that no longer exists. Or maybe you just want dinner to be easy without sacrificing that “wow” factor. Either way, this recipe delivers. It’s become my go-to for busy weeknights when I need something that feels special but requires almost zero effort. The first time I made it, my neighbor Karen texted me at 7 PM asking what smelled so good. That’s when I knew I’d cracked the code.
Why You’ll Love This Recipe
Let me tell you why this sticky honey garlic chicken has earned a permanent spot in my weekly rotation. After testing this recipe at least eight times — yes, eight — I can confidently say it’s the best version you’ll find.
- Set It and Forget It: The crockpot does everything. You literally dump, stir, and walk away. Dinner is ready when you are.
- Pantry-Friendly Ingredients: No exotic grocery store trips. Honey, soy sauce, garlic, ketchup — you probably have everything right now.
- Perfect for Meal Prep: Make a batch on Sunday and enjoy it all week. The flavors actually get better by day two or three.
- Crowd-Pleaser Approved: I’ve served this to picky kids, skeptical in-laws, and hungry neighbors. Empty plates every single time.
- Unbelievably Sticky and Tender: The chicken thighs cook low and slow until they literally fall apart. That honey garlic glaze? Pure magic.
What makes this different from every other honey garlic chicken recipe out there? It’s the balance. Most versions are either too sweet or too salty. I spent weeks tweaking the ratios — adding a splash of rice vinegar for brightness, using fresh garlic instead of powder, and finishing with a cornstarch slurry that gives the sauce that perfect glossy thickness. It’s not just another recipe; it’s the one I’d serve to company without apologizing.
This is the kind of meal that makes you close your eyes after the first bite. Honestly, it’s comfort food reimagined — healthier than takeout, faster than delivery, and so much more satisfying. Perfect for those nights when you want something that feels indulgent but fits into your real life.
What Ingredients You Will Need
This recipe uses simple, wholesome ingredients to create that signature sticky-sweet glaze and tender chicken. Most of these are pantry staples, which makes this dish perfect for last-minute dinner decisions.
For the Chicken
- 2 pounds boneless, skinless chicken thighs (about 6-8 thighs) — I prefer thighs over breasts here because they stay juicy during the long cook time. Look for thighs that are similar in size so they cook evenly.
- Salt and black pepper — to season the chicken before cooking. Don’t skip this step; it builds the foundation of flavor.
- 1 tablespoon olive oil — for searing the chicken. This step is optional but highly recommended for deeper flavor and color.
For the Sticky Honey Garlic Sauce
- 1/3 cup honey — use a good-quality honey for the best flavor. I like local wildflower honey when I can find it.
- 1/4 cup low-sodium soy sauce — regular soy sauce works too, but low-sodium lets you control the saltiness better. Tamari or coconut aminos work if you’re gluten-free.
- 4 cloves garlic, minced — fresh garlic is non-negotiable here. The jarred stuff just doesn’t deliver the same punch. Trust me on this one.
- 2 tablespoons ketchup — adds a subtle tang and helps thicken the sauce naturally. Sounds weird, I know, but it works.
- 1 tablespoon rice vinegar — brightens everything up and cuts through the sweetness. Apple cider vinegar works in a pinch.
- 1 tablespoon sriracha or chili garlic sauce — optional, but I love the little kick it adds. Leave it out if you’re feeding kids or spice-averse folks.
- 1 teaspoon sesame oil — that nutty, toasty flavor is what makes this taste like takeout. Don’t skip it.
- 1/2 teaspoon ground ginger — or 1 teaspoon fresh grated ginger if you have it. Adds warmth without being overpowering.
For Thickening (The Secret Step)
- 2 tablespoons cornstarch — mixed with 3 tablespoons cold water to make a slurry. This is what gives you that gorgeous, glossy, sticky finish.
For Garnish
- 2 green onions, sliced — for color and freshness
- 1 tablespoon sesame seeds — toasted, if you have time. Adds a nice crunch.
I recommend using Heinz ketchup for consistency and Lee Kum Kee soy sauce for that authentic umami depth. For the honey, try to avoid the stuff that comes in a plastic bear — splurge on something local if you can. It really does make a difference in the final flavor.
Equipment Needed
You don’t need a fancy kitchen to pull this off. Here’s what you’ll actually use:
- 6-quart slow cooker — this is the sweet spot size. Too small and the chicken will be crowded; too large and the sauce might evaporate too quickly. I use my trusty Crock-Pot brand one that’s at least a decade old.
- Large skillet — for searing the chicken. A cast iron skillet works beautifully here, but any heavy-bottomed pan will do.
- Small mixing bowl — for whisking together the sauce ingredients
- Measuring cups and spoons — accuracy matters with the cornstarch slurry
- Whisk — for smoothing out the sauce and slurry
- Tongs — for flipping the chicken during searing and transferring it to the crockpot
- Sharp knife and cutting board — for mincing garlic and slicing green onions
If you don’t have a skillet, you can skip the searing step entirely. The chicken will still be delicious, just slightly paler in color. And if your crockpot runs hot, keep an eye on the cooking time — some models cook faster than others. I learned that the hard way when my first batch came out dry because I trusted the timer blindly.
Preparation Method
Alright, let’s get cooking. This method has been tested and tweaked so you don’t have to learn the hard way like I did.
- Season and sear the chicken (optional but worth it). Pat the chicken thighs dry with paper towels. Season both sides generously with salt and black pepper. Heat the olive oil in a large skillet over medium-high heat until it shimmers. Add the chicken thighs in a single layer — don’t crowd the pan. Sear for 3-4 minutes per side until golden brown. The chicken won’t be cooked through, and that’s fine. Transfer the seared thighs to the crockpot. Pro tip: Those brown bits stuck to the pan are pure flavor. Deglaze the pan with a splash of water or chicken broth and pour that liquid into the crockpot too.
- Make the sauce. In a small bowl, whisk together the honey, soy sauce, minced garlic, ketchup, rice vinegar, sriracha (if using), sesame oil, and ground ginger. Taste it — it should be sweet, salty, and a little tangy. Adjust if needed. Pour the sauce over the chicken thighs in the crockpot, making sure each piece is coated.
- Cook low and slow. Cover the crockpot and cook on LOW for 4-5 hours or on HIGH for 2-3 hours. I strongly recommend LOW — the longer, gentler cooking makes the chicken more tender. About 30 minutes before serving, use tongs to gently shred the chicken thighs into bite-sized pieces right in the pot. They should be so tender that they fall apart with minimal effort. If they’re still holding together, give them another 30 minutes.
- Thicken the sauce. In a small bowl, whisk together the cornstarch and cold water until smooth. Remove about 1/2 cup of the hot liquid from the crockpot and whisk it into the cornstarch mixture — this tempers the slurry so it doesn’t clump. Pour the tempered slurry back into the crockpot and stir gently. Turn the heat to HIGH, cover, and cook for 15-20 minutes until the sauce has thickened and turned glossy. Your sauce should coat the back of a spoon. If it’s still thin, mix another tablespoon of cornstarch with 2 tablespoons of water and repeat.
- Finish and serve. Taste the sauce and adjust seasoning if needed — a pinch more salt, a drizzle more honey, or a squeeze of lime juice if it feels too heavy. Sprinkle with sliced green onions and sesame seeds. Serve immediately over steamed rice, noodles, or with a side of roasted vegetables.
The first time I made this, I forgot to temper the cornstarch slurry and ended up with lumpy sauce. Don’t be like me. Take the extra 30 seconds to temper it properly. Your sauce will be silky smooth, and you’ll feel like a pro.
Cooking Tips & Techniques
After making this recipe more times than I care to count, here are the things I wish someone had told me from the start.
Don’t skip the sear. I know it’s an extra step, but that golden-brown crust adds so much depth. The Maillard reaction — that browning process — creates complex flavors that you just can’t get from dumping raw chicken into a crockpot. If you’re truly short on time, at least pat the chicken dry and season it well before adding it to the pot.
Watch your cooking time. Every crockpot runs differently. My old one cooks hot, so 4 hours on LOW is plenty. My friend’s newer model needs a full 5 hours. Check the chicken at the 3-hour mark if you’re unsure. Overcooked chicken thighs can still be dry, even in a slow cooker.
Double the sauce if you love it. I always make 1.5 times the sauce recipe because we like ours extra saucy. The extra sauce is amazing drizzled over rice or used as a dip for steamed broccoli.
Patience with the thickening step. Don’t rush the cornstarch slurry. It needs those full 15-20 minutes to cook out the raw cornstarch taste and reach that perfect sticky consistency. If you pull it too early, you’ll have thin, watery sauce. I’ve done it. It’s sad.
One mistake I made: I once used chicken breasts instead of thighs because that’s what I had in the freezer. They came out dry and stringy. Chicken thighs have more fat and connective tissue, which breaks down beautifully during slow cooking. Save the breasts for a quick weeknight stir-fry.
Variations & Adaptations
This recipe is incredibly forgiving. Here are some ways to make it your own.
Spicy Honey Garlic Version: Double the sriracha and add 1/2 teaspoon red pepper flakes. The heat balances the sweetness beautifully. My brother-in-law requests this version every time he visits.
Gluten-Free Adaptation: Use tamari or coconut aminos instead of soy sauce. Make sure your ketchup is gluten-free (most are, but check the label). Everything else is naturally gluten-free.
Sheet Pan Finish: For extra caramelization, transfer the cooked chicken and sauce to a parchment-lined baking sheet after shredding. Broil for 3-5 minutes until the edges get crispy and dark. This gives you those gorgeous charred bits that taste like barbecue.
Slow Cooker Whole Chicken: Use 4 bone-in, skin-on chicken thighs instead of boneless. Cook on LOW for 5-6 hours, then remove the skin before shredding. The bone-in version has even more flavor.
Vegetarian Twist: Swap the chicken for 2 cans of drained chickpeas or 1 large head of cauliflower cut into florets. Reduce cooking time to 2-3 hours on LOW. The sauce works beautifully with both options.
I tried the cauliflower version last month when my daughter decided to go vegetarian for a week. Honestly, I almost liked it as much as the original. Almost.
Serving & Storage Suggestions
This sticky honey garlic chicken is incredibly versatile when it comes to serving.
Serving Temperature: Serve hot, straight from the crockpot. The sauce thickens as it cools, so don’t let it sit too long before serving. If you’re hosting, keep the crockpot on the “Warm” setting.
Best Pairings: Steamed jasmine rice is the classic choice — the fluffy grains soak up that gorgeous sauce. For a low-carb option, serve over cauliflower rice or zucchini noodles. A simple cucumber salad with rice vinegar and sesame seeds makes a refreshing side. And don’t forget steamed broccoli or snap peas to round out the meal.
Storage Instructions: Store leftovers in an airtight container in the refrigerator for up to 4 days. The flavors actually deepen overnight — I often like this dish even more the next day. Reheat gently in the microwave or in a skillet with a splash of water to loosen the sauce.
Freezer Tips: This freezes beautifully. Let the chicken cool completely, then transfer to freezer-safe containers or zip-top bags. Freeze for up to 3 months. Thaw overnight in the refrigerator and reheat in a skillet over medium heat, adding a splash of water or chicken broth to restore the saucy consistency.
Make-Ahead Note: You can prep the sauce up to 3 days in advance and store it in the refrigerator. When you’re ready to cook, just pour it over the seared chicken and go. This is my favorite trick for busy mornings.
Nutritional Information & Benefits
Here’s the estimated nutrition per serving (based on 6 servings, without rice or sides):
- Calories: 385
- Protein: 32g
- Fat: 18g
- Carbohydrates: 22g
- Fiber: 0g
- Sugar: 18g
- Sodium: 680mg
Chicken thighs are rich in B vitamins, particularly B6 and B12, which support energy metabolism and brain function. The honey provides natural sweetness with trace antioxidants, while garlic offers immune-supporting compounds. Using low-sodium soy sauce helps keep the salt content in check, and the sesame oil adds healthy fats.
This recipe fits well into a balanced diet — it’s protein-packed and satisfying without being overly heavy. If you’re watching your sugar intake, you can reduce the honey to 1/4 cup and add an extra tablespoon of rice vinegar for tang. The dish will still be delicious, just slightly less sticky.
Please note that these values are estimates and can vary based on specific ingredients and portion sizes. Always consult with a healthcare provider for personalized dietary advice.
Conclusion
This sticky honey garlic chicken has become one of those recipes I can make with my eyes closed — and I almost have, on those nights when exhaustion hits but dinner still needs to happen. It’s proof that you don’t need complicated techniques or fancy ingredients to create something truly memorable.
What I love most about this recipe is how it brings people together. Every time I make it, someone asks for the recipe. It’s the kind of meal that makes you slow down, take a breath, and actually enjoy the moment. And honestly, isn’t that what cooking should be about?
I’d love to hear how this turns out for you. Did you add your own twist? Serve it with something unexpected? Drop a comment below and let me know — your version might just inspire my next kitchen experiment. And if you loved it, share it with a friend who needs an easy win on a busy weeknight.
Happy cooking, friends. May your sauce always be sticky and your chicken always be tender.
Frequently Asked Questions
Can I use chicken breasts instead of thighs?
You can, but I don’t recommend it. Chicken breasts tend to dry out during the longer cooking time. If you must use breasts, check them at the 2-hour mark on LOW and reduce the cooking time to 3 hours total. Shred them carefully — they’ll be less forgiving than thighs.
Can I cook this on HIGH instead of LOW?
Yes, but the texture won’t be quite as tender. Cook on HIGH for 2-3 hours. The sauce might reduce more quickly, so check it at the 2-hour mark. I always prefer LOW for the best results, but HIGH works in a pinch.
How do I make this less sweet?
Reduce the honey to 1/4 cup and add an extra tablespoon of rice vinegar. You can also add a squeeze of fresh lime juice before serving — the acidity cuts through the sweetness beautifully.
Can I double this recipe?
Absolutely. Use a 6-7 quart slow cooker and double all the ingredients. The cooking time remains about the same, though you might need an extra 30 minutes if the crockpot is very full.
What if my sauce is too thin at the end?
Mix another tablespoon of cornstarch with 2 tablespoons of cold water, temper it with hot liquid from the pot, and stir it in. Cook on HIGH for another 10-15 minutes. The sauce should coat the back of a spoon when it’s ready.
Pin This Recipe!

Best Easy Sticky Honey Garlic Crockpot Chicken Thighs

Fall-apart tender chicken thighs coated in a glossy, sweet-and-savory honey garlic sauce, made effortlessly in the crockpot. This easy recipe delivers takeout-level flavor with minimal effort, perfect for busy weeknights.
- Prep Time: 15 minutes
- Cook Time: 4 hours 30 minutes
- Total Time: 4 hours 45 minutes
- Yield: 6 servings 1x
- Category: Main Course
- Cuisine: Asian
Ingredients
- 2 pounds boneless, skinless chicken thighs (about 6–8 thighs)
- Salt and black pepper, to taste
- 1 tablespoon olive oil
- 1/3 cup honey
- 1/4 cup low-sodium soy sauce
- 4 cloves garlic, minced
- 2 tablespoons ketchup
- 1 tablespoon rice vinegar
- 1 tablespoon sriracha or chili garlic sauce (optional)
- 1 teaspoon sesame oil
- 1/2 teaspoon ground ginger
- 2 tablespoons cornstarch
- 3 tablespoons cold water
- 2 green onions, sliced
- 1 tablespoon sesame seeds
Instructions
- Season and sear the chicken (optional but worth it). Pat the chicken thighs dry with paper towels. Season both sides generously with salt and black pepper. Heat the olive oil in a large skillet over medium-high heat until it shimmers. Add the chicken thighs in a single layer and sear for 3-4 minutes per side until golden brown. Transfer the seared thighs to the crockpot. Deglaze the pan with a splash of water or chicken broth and pour that liquid into the crockpot too.
- Make the sauce. In a small bowl, whisk together the honey, soy sauce, minced garlic, ketchup, rice vinegar, sriracha (if using), sesame oil, and ground ginger. Taste and adjust if needed. Pour the sauce over the chicken thighs in the crockpot, making sure each piece is coated.
- Cook low and slow. Cover the crockpot and cook on LOW for 4-5 hours or on HIGH for 2-3 hours. About 30 minutes before serving, use tongs to gently shred the chicken thighs into bite-sized pieces right in the pot. If they are still holding together, give them another 30 minutes.
- Thicken the sauce. In a small bowl, whisk together the cornstarch and cold water until smooth. Remove about 1/2 cup of the hot liquid from the crockpot and whisk it into the cornstarch mixture to temper it. Pour the tempered slurry back into the crockpot and stir gently. Turn the heat to HIGH, cover, and cook for 15-20 minutes until the sauce has thickened and turned glossy. If still thin, mix another tablespoon of cornstarch with 2 tablespoons of water and repeat.
- Finish and serve. Taste the sauce and adjust seasoning if needed. Sprinkle with sliced green onions and sesame seeds. Serve immediately over steamed rice, noodles, or with a side of roasted vegetables.
Notes
For best results, do not skip searing the chicken. Use chicken thighs instead of breasts for tenderness. Double the sauce if you like extra. The sauce thickens as it cools, so serve hot. Leftovers keep in the refrigerator for up to 4 days and freeze for up to 3 months.
Nutrition
- Serving Size: 1 serving (without r
- Calories: 385
- Sugar: 18
- Sodium: 680
- Fat: 18
- Carbohydrates: 22
- Protein: 32
Keywords: sticky honey garlic chicken, crockpot chicken thighs, slow cooker chicken, honey garlic chicken, easy chicken recipe