My neighbor wasn’t trying to impress anyone. I’d stopped by to borrow a ladder — honestly, a pretty mundane errand — and the smell hit me before I even got to her front door. It was warm, nutty, and so deeply autumnal that I actually paused on her porch step, trying to place it. Something was browning in butter, and there was a whisper of ginger and cinnamon in the air. She opened the door holding a pie dish, still warm, with a crumbly, dark crust that looked nothing like the usual pastry situation. “Oh, this?” she said when I asked, practically shoving it at me. “Just something I threw together. The secret’s in the butter.” She was so casual about it, like she hadn’t just created the most incredible-smelling thing I’d ever encountered. I mean, I practically had to wrestle her for a slice, and let me tell you — that first bite stopped me cold. It wasn’t just pumpkin pie. It was better. It was brown butter pumpkin pie with a gingersnap crust, and I knew, right then, I was never going back to the regular version.
Maybe you’ve been there — that moment when a recipe you thought you knew inside and out gets completely reinvented by someone who doesn’t even realize they’re doing something special. That’s this pie. It’s the kind of thing you bring to a dinner party and watch people’s eyes go wide after the first forkful. It’s the pie that gets texted about the next day. And honestly? It’s so much easier to pull off than you’d think. The brown butter adds this deep, toasty richness that regular butter just can’t touch, and the gingersnap crust — forget about it. It’s crunchy, spicy, and the perfect counterpoint to the silky pumpkin filling. I’ve made this for Friendsgiving, for Thanksgiving, and for a random Tuesday in November when I just needed something that felt like a hug. It always, always delivers.
Why You’ll Love This Recipe
Look, I’ve tested a lot of pumpkin pie recipes over the years. Some are too sweet, some are too bland, and most have a crust that’s just… there. This one is different. It’s the result of several Thanksgivings’ worth of trial and error, a few burnt batches of butter, and one very memorable conversation with a neighbor who didn’t realize she was a culinary genius. Here’s why this recipe is going to become your new go-to:
- Unforgettable Flavor: Browning the butter is a game-changer. It adds a nutty, caramelized depth that transforms the filling from ordinary to extraordinary. You’ll never go back.
- The Perfect Crust: A gingersnap cookie crust is not only easier than rolling out pastry dough, but it also brings a warm, spicy crunch that complements the creamy pumpkin filling beautifully.
- Stress-Free for Hosting: This pie is a lifesaver when you’re entertaining. The crust is no-roll, and the filling comes together in one bowl. You can even make it a day ahead — it actually gets better with time.
- Crowd-Pleaser Guaranteed: I’ve served this to pumpkin pie purists and skeptics alike, and it wins everyone over. The combination of flavors is just that good. It’s the kind of dessert that gets that little moment of silence after the first bite.
- Impressive Without the Fuss: It looks like you spent hours in the kitchen, but honestly, the hardest part is not eating all the gingersnaps before they make it into the crust. It’s the perfect showstopper for a holiday table or a festive gathering.
This isn’t just another pumpkin pie recipe. It’s the one that makes you close your eyes after the first bite. It’s comfort food, reimagined — richer, spicier, and with a texture that’s just right. Whether you’re hosting a big Thanksgiving dinner or a cozy Friendsgiving, this pie is the star of the show.
What Ingredients You Will Need
This recipe relies on a handful of simple, high-quality ingredients to build layers of flavor. Most of these are pantry staples, especially during the fall, but a few key players do the heavy lifting. Let’s break down what you’ll need and why each one matters.
For the Gingersnap Crust
- 2 cups (about 8 oz / 225g) gingersnap cookies, finely crushed: This is the heart of the crust. I strongly recommend using a good-quality brand like Nabisco or Anna’s Ginger Thins. The key is to get a fine, even crumb — you can do this in a food processor or by sealing the cookies in a zip-top bag and going to town with a rolling pin. Don’t use pre-made graham cracker crumbs; the ginger and molasses flavor of the gingersnaps is non-negotiable here.
- 6 tablespoons (85g) unsalted butter, melted: This binds the crumbs together. I use unsalted so I can control the salt level, but if you only have salted, just skip the pinch of salt in the crust.
- 2 tablespoons (25g) granulated sugar: Just a touch to balance the spice of the gingersnaps.
- Pinch of salt: To enhance all the flavors.
For the Brown Butter Pumpkin Filling
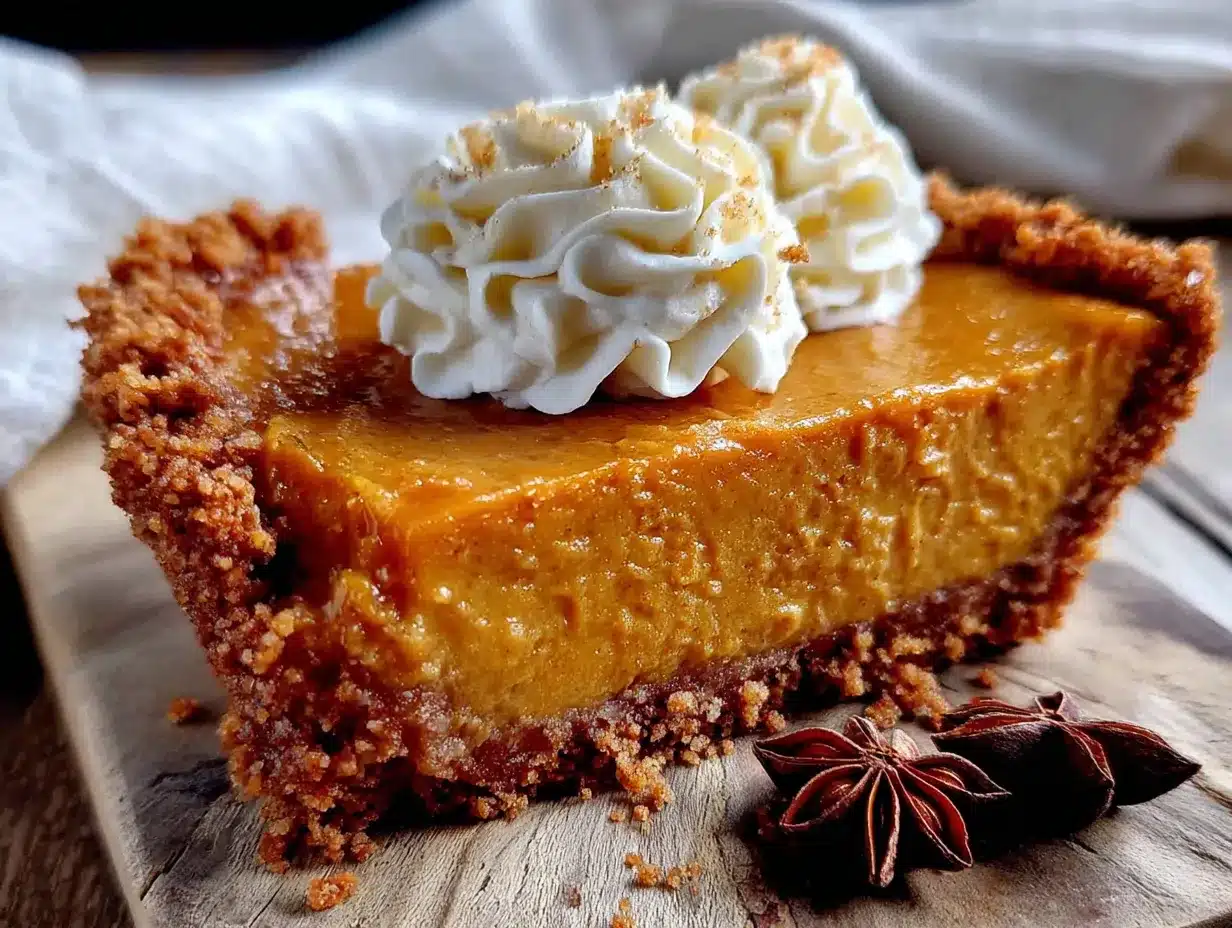
- 1/2 cup (1 stick / 113g) unsalted butter: This is where the magic happens. You’ll be browning this butter, so don’t try to substitute margarine or shortening — the flavor comes from the milk solids toasting in the butter.
- 1 (15-ounce / 425g) can pumpkin puree: Make sure you’re getting 100% pure pumpkin puree, not pumpkin pie filling. Libby’s is my go-to brand; it has the best texture and flavor. (If you’re feeling ambitious, you can roast and puree your own sugar pumpkin, but the canned stuff works perfectly here.)
- 3/4 cup (150g) packed light brown sugar: Brown sugar adds moisture and a deeper, molasses-like sweetness that pairs beautifully with the brown butter and spices.
- 1/4 cup (50g) granulated sugar: For a bit of straightforward sweetness.
- 2 large eggs, at room temperature: Room-temperature eggs emulsify into the filling much more smoothly than cold ones, giving you a silky, crack-free top. (Take them out of the fridge about 30 minutes before you start.)
- 1 teaspoon vanilla extract: Pure vanilla extract adds warmth and rounds out the flavors.
- 1 1/2 teaspoons ground cinnamon: The backbone of pumpkin pie spice.
- 1 teaspoon ground ginger: To echo the crust and add a little warmth.
- 1/2 teaspoon ground nutmeg: Freshly grated is always best if you have it.
- 1/4 teaspoon ground cloves: Just a pinch for that classic holiday flavor.
- 1/2 teaspoon salt: Essential for balancing the sweetness and bringing out the pumpkin’s flavor.
- 1 cup (240ml) heavy cream: This gives the filling its luxurious, velvety texture. For a slightly lighter option, you can use half-and-half, but the pie won’t be quite as rich.
For Serving (Optional but Recommended)
- Freshly whipped cream: A dollop of lightly sweetened whipped cream is the perfect finishing touch. It cuts through the richness of the pie beautifully.
- Ground cinnamon or candied ginger, for garnish: A little sprinkle on top makes it look extra special.
Equipment Needed
You don’t need a lot of fancy gadgets for this pie, which is part of its charm. Here’s what you’ll need to have on hand:
- 9-inch pie plate: A standard metal or glass pie plate works perfectly. I prefer a glass one because you can see when the crust is golden brown on the bottom.
- Medium saucepan: For browning the butter. A light-colored saucepan is actually helpful here because you can see the butter solids turn amber.
- Large mixing bowls: One for the crust ingredients and one for the filling.
- Whisk: For combining the filling ingredients smoothly.
- Food processor or rolling pin and zip-top bag: For crushing the gingersnaps. A food processor is faster and gives you a more consistent crumb, but a rolling pin and some elbow grease works just as well.
- Measuring cups and spoons: For accuracy, especially with the spices.
- Rubber spatula: For scraping every last bit of that brown butter into the bowl.
- Cooling rack: Essential for letting the pie cool properly so the filling sets.
If you don’t have a food processor, don’t sweat it. I’ve made this crust in a pinch using a sturdy glass and a lot of determination. The texture might be a little more rustic, but the flavor is all there. Just make sure those cookies are crushed evenly so the crust holds together.
Preparation Method
Alright, let’s get to it. This pie comes together in stages, but none of them are complicated. Just take your time, especially with the brown butter — it’s the star of the show.
Step 1: Make the Gingersnap Crust
Preheat your oven to 350°F (175°C). In your food processor, pulse the gingersnap cookies until they turn into fine crumbs. You should have about 2 cups. If you’re going the manual route, put the cookies in a zip-top bag, squeeze out the air, and crush them with a rolling pin until they’re as fine as you can get them. Transfer the crumbs to a medium bowl. Add the melted butter, sugar, and a pinch of salt. Stir with a fork until all the crumbs are evenly moistened — the mixture should look like wet sand.
Pour the crumb mixture into your 9-inch pie plate. Using the bottom of a measuring cup or a flat-bottomed glass, press the crumbs firmly and evenly into the bottom and up the sides of the plate. Don’t skimp on this step — a well-packed crust is a crust that won’t crumble when you slice the pie. Bake the crust for 10 minutes, until it’s fragrant and set. Set it aside to cool slightly while you make the filling. (Leave the oven on.)
Step 2: Brown the Butter
This is where the patience pays off. Place the stick of butter in your medium saucepan over medium heat. Let it melt completely, then keep cooking, swirling the pan occasionally. The butter will start to foam and sputter — that’s normal. After a few minutes, the foam will subside, and you’ll see little brown specks forming at the bottom of the pan. The butter will smell intensely nutty and toasty. As soon as it turns a golden-amber color and you see those brown bits, remove it from the heat immediately. (It can go from browned to burnt in about 10 seconds, so keep a close eye on it.) Pour the browned butter into a small heatproof bowl to stop the cooking process. Let it cool for a few minutes.
Step 3: Make the Filling
In a large bowl, whisk together the pumpkin puree, both sugars, eggs, and vanilla extract until smooth. In a small separate bowl, stir together the cinnamon, ginger, nutmeg, cloves, and salt. Add the spice mixture to the pumpkin mixture and whisk until fully incorporated. Now, slowly pour in the browned butter — make sure you scrape in all those delicious brown bits from the bottom of the bowl — and whisk again. Finally, pour in the heavy cream and whisk until the filling is completely smooth and glossy. Give the bottom of the bowl a scrape with your spatula to make sure everything is combined.
Step 4: Assemble and Bake
Place the pre-baked crust on a baking sheet (this makes it easier to get in and out of the oven and catches any potential drips). Pour the filling into the crust. It will fill the pie plate right to the brim — that’s perfect. Carefully transfer the baking sheet to the oven. Bake at 350°F (175°C) for 50 to 60 minutes. The pie is done when the edges are set and slightly puffed, but the center still has a slight jiggle — like Jell-O, not like soup. If the crust starts to brown too quickly, you can tent the edges with foil or a pie shield halfway through baking.
Step 5: Cool and Set
This is the hardest part: waiting. Transfer the pie to a wire rack and let it cool completely at room temperature. This takes about 2 hours. The filling will continue to set as it cools. Once it’s completely cool, you can serve it at room temperature or refrigerate it for a few hours to firm it up even more. I actually prefer it after it’s been chilled overnight — the flavors meld together and the texture becomes incredibly silky.
Cooking Tips & Techniques
I’ve made this pie more times than I can count, and I’ve definitely learned a few things the hard way. Here are my best tips for getting it perfect every time.
Don’t Rush the Brown Butter. This is the most important tip. Use a light-colored pan so you can see the color change, and keep the heat at medium. Swirl the pan often. The moment you see those brown specks and smell that nutty aroma, pull it off the heat. I once got distracted by a phone call and ended up with black butter. It smelled terrible and I had to start over. Learn from my mistake.
Room Temperature Ingredients Matter. I know, I know, it’s an extra step. But cold eggs and cold cream can seize up the brown butter and create a lumpy filling. Just set your eggs and cream out on the counter for 30 minutes before you start. Your pie will be silkier for it.
Watch for the Jiggle. Over-baking is the number one cause of a cracked pumpkin pie. The center should still wobble slightly when you gently shake the pan. It will finish setting as it cools. If you bake it until the center is completely firm, you’ll end up with a dry, cracked pie.
Crush Those Cookies Evenly. If you have big chunks of gingersnap in your crust, it won’t hold together well. Take the extra minute to get a fine, uniform crumb. Your future self (and your guests) will thank you.
Make It Ahead. This pie is actually better on day two. The flavors have time to deepen and meld. So if you’re hosting a big dinner, make this the day before. It’s one less thing to worry about on the day of, and your pie will taste even better.
Variations & Adaptations
One of the best things about this recipe is how adaptable it is. Here are a few ways to make it your own.
Gluten-Free Version: This one’s easy. Just use gluten-free gingersnap cookies for the crust. Everything else in the filling is naturally gluten-free. I’ve tested this with Schar’s gluten-free gingersnaps and it works beautifully.
Dairy-Free Adaptation: You can substitute the butter in the crust with a high-quality vegan butter (like Miyoko’s) and use full-fat coconut cream instead of heavy cream. The flavor will be slightly different, but it’s still delicious. For the brown butter, you can try browning vegan butter, but be aware that it doesn’t brown quite the same way as dairy butter.
Spice It Up: If you like a little heat, add a pinch of cayenne pepper or a 1/4 teaspoon of black pepper to the filling. It sounds weird, but it really brings out the pumpkin’s sweetness. I tried this on a whim one year and it was a huge hit.
Maple Twist: Swap the granulated sugar for an equal amount of maple sugar, or replace 1/4 cup of the brown sugar with pure maple syrup. Just reduce the heavy cream by 2 tablespoons to account for the extra liquid. The maple flavor pairs gorgeously with the brown butter.
Mini Pies: For a fun, portable option, press the crust into a muffin tin (lined with paper liners) and fill each cup about 3/4 full. Bake for 20-25 minutes, until set. These are perfect for a potluck or a holiday party.
Serving & Storage Suggestions
This pie is a showstopper at room temperature, but it’s also fantastic chilled. Here’s how to serve and store it.
For serving, I like to let the pie sit out for about 20 minutes after it comes out of the fridge. This takes the chill off and lets the flavors really sing. Top each slice with a generous dollop of freshly whipped cream — just heavy cream, a little powdered sugar, and a splash of vanilla, whipped to soft peaks. A sprinkle of ground cinnamon or a few pieces of candied ginger on top makes it look extra festive.
This pie pairs beautifully with a cup of hot coffee or a glass of bourbon. If you’re serving it for Thanksgiving, it’s the perfect ending to a heavy meal. It’s rich, but not too heavy, and the gingersnap crust adds a lovely textural contrast to all the soft, creamy dishes on the table.
For storage, let the pie cool completely, then cover it loosely with plastic wrap or foil and store it in the refrigerator. It will keep for up to 4 days. The flavor actually gets better after a day or two as the spices meld. You can also freeze the baked, cooled pie for up to 2 months. Wrap it tightly in plastic wrap, then a layer of foil. Thaw it overnight in the refrigerator before serving. I don’t recommend freezing the pie with whipped cream on top — add that fresh when you’re ready to serve.
Nutritional Information & Benefits
Let’s be real: this is a dessert, and it’s meant to be indulged in. But there are a few redeeming qualities worth mentioning. Pumpkin is packed with vitamin A, which is great for your eyes and immune system. It’s also a good source of fiber. The spices — cinnamon, ginger, nutmeg, and cloves — are all anti-inflammatory powerhouses. And hey, there’s calcium from the cream and eggs!
Here’s an approximate nutritional breakdown for one slice (based on 8 servings):
- Calories: 420
- Fat: 26g
- Carbohydrates: 44g
- Fiber: 3g
- Sugar: 28g
- Protein: 5g
- Vitamin A: 180% of the Daily Value
Please note that these are estimates and can vary based on the specific brands and ingredients you use. If you have specific dietary concerns, I recommend using a nutrition calculator to get exact numbers for your version.
Conclusion
This brown butter pumpkin pie with gingersnap crust is more than just a recipe — it’s a memory in the making. It’s the pie that gets requested year after year, the one that people ask you to bring to every gathering. It’s the dessert that makes you look like a hero in the kitchen, even though it’s surprisingly simple to put together. The brown butter adds a depth of flavor that regular pumpkin pie just can’t match, and the gingersnap crust is the perfect crunchy, spicy companion.
I hope you give this recipe a try. I promise, it’s worth the extra few minutes it takes to brown that butter. And when you take that first bite and see the look on your friends’ and family’s faces, you’ll know exactly why I couldn’t stop thinking about that pie my neighbor made. So go ahead, preheat your oven, and get ready to make the best pumpkin pie of your life. I can’t wait to hear how it turns out!
Have you tried this recipe? Did you add your own twist? Drop a comment below and let me know! And if you loved it, don’t forget to share it with your friends. Happy baking!
Frequently Asked Questions
Can I use a store-bought crust instead of making the gingersnap crust?
You absolutely can, but you’ll be missing out on the best part! The gingersnap crust is what makes this pie so special. If you’re really short on time, you can use a pre-made graham cracker crust and add a teaspoon of ground ginger to the filling to get some of that spice back.
My brown butter burned. Can I still use it?
Unfortunately, no. Burnt brown butter tastes bitter and acrid. It’s best to start over. This is why I recommend using a light-colored pan and keeping a close eye on it. The moment you see those brown specks and smell that nutty aroma, pull it off the heat.
Why did my pumpkin pie crack?
Pumpkin pie cracks when it’s over-baked. Remember, you want the center to still have a slight jiggle when you take it out of the oven. It will continue to set as it cools. Also, cooling the pie gradually on a wire rack (not in the fridge) helps prevent cracking.
Can I make this pie ahead of time?
Yes, and I actually recommend it! This pie tastes even better on the second day. Make it the day before you plan to serve it, let it cool completely, and then store it in the refrigerator. Just add the whipped cream right before serving.
Can I use fresh pumpkin instead of canned?
You can, but it will change the texture of the filling. Fresh pumpkin puree tends to be more watery than canned. If you want to use fresh, roast and puree a sugar pumpkin, then strain it through a cheesecloth-lined sieve for a few hours to remove excess moisture. You’ll need about 1 3/4 cups of strained puree.
Pin This Recipe!
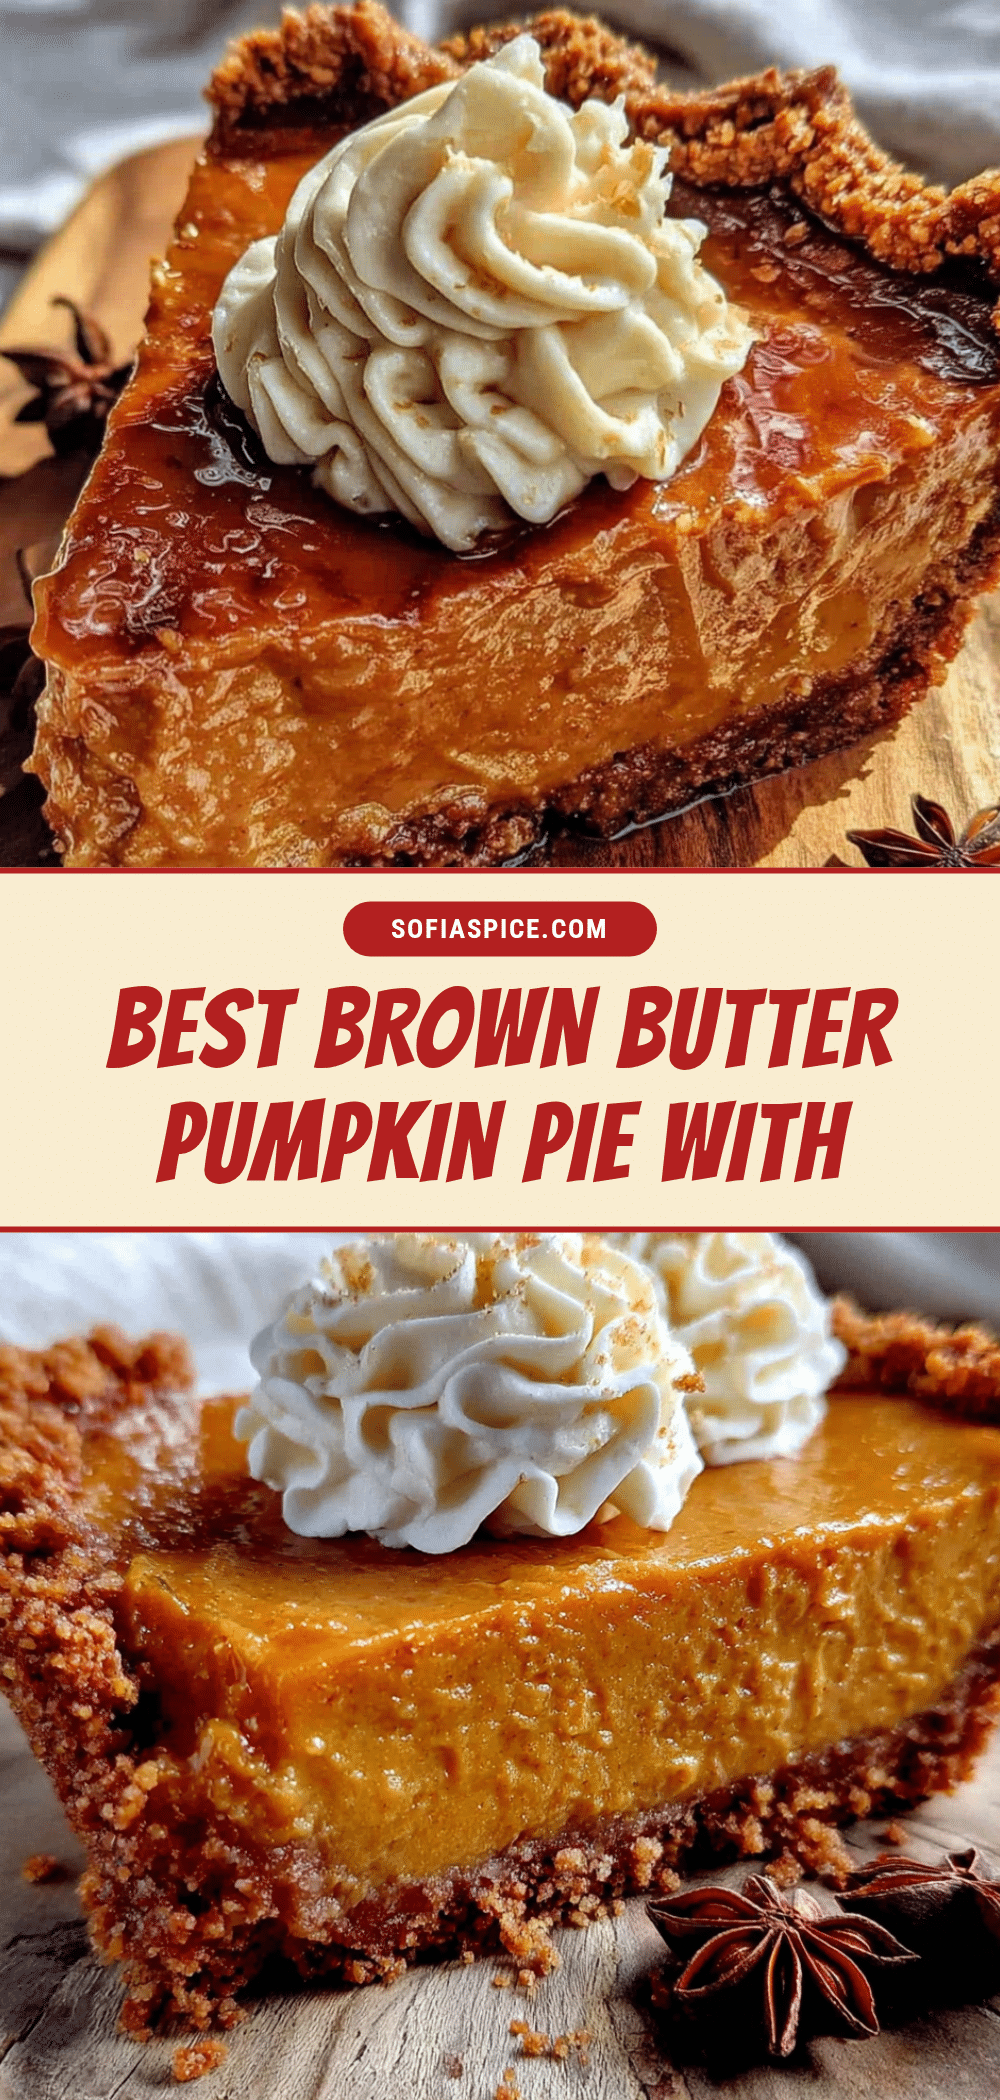
Best Brown Butter Pumpkin Pie with Gingersnap Crust
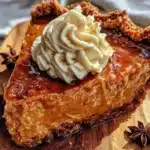
This brown butter pumpkin pie with a gingersnap crust is a game-changer. The nutty, caramelized brown butter adds deep flavor, while the crunchy, spicy crust perfectly complements the silky pumpkin filling.
- Prep Time: 20 minutes
- Cook Time: 60 minutes
- Total Time: 2 hours 20 minutes (plus cooling)
- Yield: 8 servings 1x
- Category: Dessert
- Cuisine: American
Ingredients
- 2 cups (about 8 oz / 225g) gingersnap cookies, finely crushed
- 6 tablespoons (85g) unsalted butter, melted
- 2 tablespoons (25g) granulated sugar
- Pinch of salt
- 1/2 cup (1 stick / 113g) unsalted butter
- 1 (15-ounce / 425g) can pumpkin puree
- 3/4 cup (150g) packed light brown sugar
- 1/4 cup (50g) granulated sugar
- 2 large eggs, at room temperature
- 1 teaspoon vanilla extract
- 1 1/2 teaspoons ground cinnamon
- 1 teaspoon ground ginger
- 1/2 teaspoon ground nutmeg
- 1/4 teaspoon ground cloves
- 1/2 teaspoon salt
- 1 cup (240ml) heavy cream
- Freshly whipped cream (for serving)
- Ground cinnamon or candied ginger (for garnish)
Instructions
- Preheat oven to 350°F (175°C).
- Make the crust: Pulse gingersnap cookies in a food processor until fine crumbs form. Transfer to a bowl and stir in melted butter, sugar, and salt until mixture resembles wet sand.
- Press crumb mixture firmly into the bottom and up the sides of a 9-inch pie plate. Bake for 10 minutes until fragrant and set. Set aside to cool slightly.
- Brown the butter: In a medium saucepan over medium heat, melt the butter. Continue cooking, swirling occasionally, until it foams, subsides, and turns golden-amber with brown specks and a nutty aroma. Immediately remove from heat and pour into a heatproof bowl to stop cooking.
- Make the filling: In a large bowl, whisk together pumpkin puree, brown sugar, granulated sugar, eggs, and vanilla until smooth.
- In a small bowl, stir together cinnamon, ginger, nutmeg, cloves, and salt. Add to pumpkin mixture and whisk until combined.
- Slowly pour in the browned butter (including brown bits) and whisk. Add heavy cream and whisk until smooth and glossy.
- Place pre-baked crust on a baking sheet. Pour filling into crust. Bake for 50-60 minutes, until edges are set and center has a slight jiggle. Tent edges with foil if browning too quickly.
- Cool completely on a wire rack (about 2 hours). Serve at room temperature or chilled. Top with whipped cream and garnish if desired.
Notes
Don’t rush the brown butter; use a light-colored pan and watch closely. Room temperature ingredients ensure a silky filling. The pie is better on day two; make ahead for best flavor. For a gluten-free version, use gluten-free gingersnaps. For dairy-free, use vegan butter and coconut cream.
Nutrition
- Serving Size: 1 slice
- Calories: 420
- Sugar: 28
- Fat: 26
- Carbohydrates: 44
- Fiber: 3
- Protein: 5
Keywords: pumpkin pie, brown butter, gingersnap crust, Thanksgiving, fall dessert