My brother-in-law Mark swore he hated pull-apart bread. For three years. Every Thanksgiving, he’d watch the rest of us tear into a steaming loaf of cheesy, garlicky goodness, and he’d just sit there with his plain dinner roll, looking vaguely offended. “Too messy,” he’d say. “All that butter just makes everything slippery.” Honestly, I thought it was a personal attack on my cooking. Then, last Tuesday, I made this version just for myself after a brutal day at work—the power had flickered off twice, I’d burnt my wrist on a baking sheet, and I barely had the energy to chop garlic. I threw it together in a panic, using whatever cheese was left in the drawer and some herbs that were about to wilt. I set the skillet on the counter to cool, and that’s when I caught him. Standing in the dark kitchen, tearing off a piece with his bare hands, cheese stringing from his chin to his knuckles. He didn’t even say anything. He just pointed at the pan and nodded. That’s the thing about this bread—it doesn’t beg you to like it. It just shows up, does its job, and leaves you wondering why you waited so long. If you’ve ever thought cheesy bread was more trouble than it’s worth, let me tell you—this one changes the math.
Why You’ll Love This Recipe
Let’s be real: you’re here because you want something cheesy, garlicky, and on the table before you lose your mind. This quick cheesy garlic herb pull-apart bread delivers exactly that—no complicated dough, no waiting around for yeast to proof. It’s the kind of recipe that makes you look like you tried harder than you actually did.
- Quick & Easy: From fridge to table in 30 minutes flat. I’ve timed it. This is perfect for those weeknights when you promised yourself you’d cook something nice but then the day had other plans.
- Simple Ingredients: You probably have everything already—canned biscuits, butter, garlic, cheese, and whatever herbs are hanging out in your fridge. No specialty grocery trips required.
- Perfect for Weeknights: This isn’t just a side dish; it’s a whole vibe. Serve it alongside soup, salad, pasta, or honestly, just eat it for dinner by itself. No judgment here.
- Crowd-Pleaser: I’ve brought this to three different potlucks, and every single time, someone asks for the recipe. Kids love pulling it apart. Adults love pretending they’re too sophisticated for it while reaching for a fourth piece.
- Unbelievably Delicious: The contrast between the crispy, buttery edges and the soft, gooey center is next-level comfort food. It’s the kind of bread that makes you close your eyes after the first bite—and then immediately reach for another.
What makes this version different from every other pull-apart bread recipe out there? It’s the timing. Most recipes have you fussing with homemade dough or waiting for the bread to rise. This one uses a clever shortcut—refrigerated biscuits—that saves you at least an hour without sacrificing flavor. Plus, the combination of melted mozzarella, sharp Parmesan, and fresh herbs creates a savory depth that canned biscuits have no business having. It’s comfort food reimagined: faster, easier, but with the same soul-soothing satisfaction.
What Ingredients You Will Need
This recipe uses simple, mostly pantry-staple ingredients to deliver big flavor without the fuss. The key is using good-quality butter and fresh garlic—don’t skimp on those two, because they’re doing the heavy lifting here.
- For the Garlic Herb Butter:
- 1/2 cup (1 stick) unsalted butter, melted (I like Kerrygold for the richness, but any good butter works)
- 4 cloves garlic, minced (fresh only—don’t even think about the jarred stuff)
- 2 tablespoons fresh parsley, chopped (flat-leaf or curly, both work)
- 1 tablespoon fresh chives, chopped (or 1 teaspoon dried if that’s what you have)
- 1 teaspoon dried oregano
- 1/2 teaspoon salt
- 1/4 teaspoon black pepper
- For the Bread:
- 2 cans (16.3 oz each) refrigerated buttermilk biscuits (I use Pillsbury Grands—the flaky layers make a difference)
- 1 1/2 cups shredded mozzarella cheese (low-moisture, whole milk for best melt)
- 1/2 cup grated Parmesan cheese (the real stuff, not the green can)
- 1/4 cup fresh basil, chopped (optional but highly recommended)
Ingredient selection tip: Look for biscuits that come in the flaky layers style—they separate more easily and create better pull-apart texture. If you can only find the homestyle version, that works too; just know the layers won’t be as dramatic. For the cheese, pre-shredded mozzarella works in a pinch, but freshly shredded melts much more smoothly because it doesn’t have anti-caking agents. And about the garlic—please, please use fresh. I once tried this with pre-minced garlic from a jar, and the flavor was flat and slightly bitter. Fresh garlic makes the butter sing.
Substitution guidance: Use dairy-free butter and vegan cheese shreds for a dairy-free version. Gluten-free biscuit dough is available from brands like Annie’s or against the Grain—just check the package for baking instructions as they may vary. If you don’t have fresh herbs, use 1 teaspoon each of dried parsley, chives, and oregano. I’ve done it both ways, and honestly, dried herbs work fine in a pinch.
Equipment Needed
You don’t need a fancy kitchen to make this quick cheesy garlic herb pull-apart bread. Here’s what you’ll need:
- A 10-inch cast-iron skillet (or a 9×13 baking dish)
- A small microwave-safe bowl for melting butter
- A sharp knife and cutting board for mincing garlic and herbs
- A pastry brush (or just use a spoon to drizzle the butter)
- Measuring cups and spoons
- A cheese grater (if shredding your own cheese)
If you don’t have a cast-iron skillet, don’t worry. I’ve made this in a round cake pan, a pie dish, and even a loaf pan—they all work. The cast iron just gives you those extra-crispy edges that I personally can’t resist. If using a different pan, keep an eye on the baking time; it might need an extra 2-3 minutes. For the pastry brush, a silicone one is easiest to clean, but a natural bristle brush works too. Just don’t use a brush that smells like last week’s barbecue sauce—learn from my mistakes.
Preparation Method
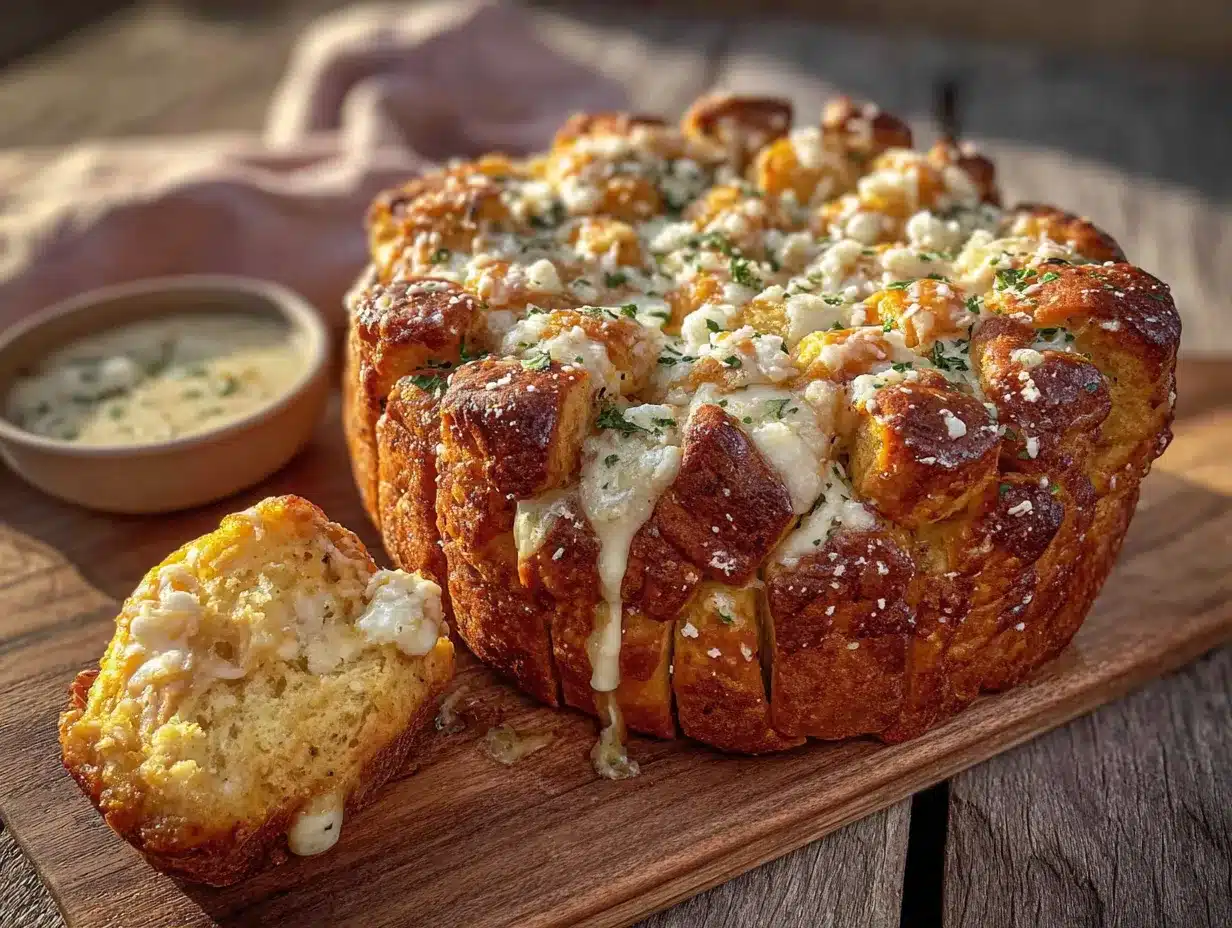
Alright, let’s get to it. This whole thing comes together in about 30 minutes, so preheat your oven to 375°F (190°C) right now. Trust me, you don’t want to be waiting around later.
- Make the garlic herb butter: In a small microwave-safe bowl, melt the butter in 20-second increments until fully liquid. Add the minced garlic, chopped parsley, chives, oregano, salt, and pepper. Stir it all together and let it sit for a minute. The heat from the butter will bloom the garlic and herbs, making everything smell amazing. (Pro tip: If you have time, let the butter sit for 5-10 minutes to infuse even more flavor.)
- Prepare the biscuits: Open both cans of biscuits and separate them. You should have 16 biscuits total. Using a sharp knife (or kitchen scissors—honestly, scissors work great here), cut each biscuit into quarters. Don’t stress about making them perfect; uneven pieces just add to the rustic charm. Toss the biscuit pieces into a large bowl.
- Assemble the bread: Pour about half of the garlic herb butter over the biscuit pieces and toss gently with your hands to coat. Add the shredded mozzarella, Parmesan, and fresh basil (if using), and toss again until everything is evenly distributed. The cheese will stick to the buttery dough pieces—this is exactly what you want.
- Layer it in the skillet: Grease your cast-iron skillet or baking dish with a little butter or nonstick spray. Start layering the biscuit mixture into the pan, pressing down gently as you go. Don’t pack it too tight—you want some air gaps for the cheese to bubble through. Pour the remaining garlic herb butter evenly over the top. Sprinkle any extra cheese you have left right on top—more is more here.
- Bake: Place the skillet in the preheated oven and bake for 18-22 minutes. At the 15-minute mark, check it. You’re looking for a deep golden-brown top and bubbling cheese around the edges. The center should be cooked through—if you poke it with a knife, there shouldn’t be any raw dough. (Sensory cue: Your kitchen will smell like a garlic bread dream about now.)
- Rest and serve: Let the bread cool in the skillet for exactly 5 minutes. This is important—if you try to pull it apart too soon, the cheese will be molten lava and you’ll burn your fingers. After 5 minutes, invert it onto a cutting board or serve it straight from the skillet. Pull apart with your hands or use a spatula to serve portions.
One thing I learned the hard way: don’t overcrowd the pan. If your skillet is too small, the center won’t cook through while the edges burn. Use a pan that allows the biscuit pieces to sit in a single layer with a little overlap. Also, if you’re doubling the recipe (which I often do for parties), use two separate pans rather than one big one.
Cooking Tips & Techniques
I’ve made this quick cheesy garlic herb pull-apart bread at least two dozen times, and I’ve messed it up in almost every way possible. Here’s what I’ve learned so you don’t have to repeat my mistakes.
Don’t overmix the butter and dough. I know it’s tempting to keep tossing until every piece is perfectly coated, but if you handle the biscuit dough too much, it gets tough. Just a few gentle tosses—enough to coat everything—then stop. The heat of the oven will distribute the butter as it melts.
Watch your oven like a hawk. Every oven runs differently. My old apartment oven would burn the top at 18 minutes while leaving the center doughy. I learned to rotate the pan halfway through and cover loosely with foil if the top was browning too fast. If your bread is getting dark on top but the center isn’t done, tent it with foil and keep baking.
Use room-temperature biscuits. Cold biscuits straight from the fridge take longer to bake through. Let them sit on the counter for 10 minutes while you prep the butter and cheese. This simple step makes a huge difference in even baking.
Layer strategically. When you’re putting the biscuit pieces in the pan, try to arrange them so the cheese is distributed throughout, not just on top. I like to do a layer of biscuit pieces, a sprinkle of cheese, another layer, more cheese, and then the final butter drizzle. This way, every pull-apart piece has cheesy goodness inside.
Timing is everything. If you’re making this for a meal, time it so the bread comes out of the oven right when you’re ready to serve. It’s at its absolute best within the first 15 minutes. After that, the cheese starts to set and the crispy edges soften. Still delicious, but not as magical.
Variations & Adaptations
One of the best things about this recipe is how flexible it is. Here are some variations I’ve tried and loved:
Spicy Jalapeño Popper Version: Add 2 tablespoons of chopped pickled jalapeños and 4 ounces of cream cheese (cut into small cubes) along with the mozzarella. The cream cheese melts into these amazing creamy pockets that contrast with the crispy bread. I made this for a Super Bowl party, and it was gone in 10 minutes.
Everything Bagel Version: Swap the Italian herbs for 2 tablespoons of everything bagel seasoning. Use a mix of cheddar and cream cheese instead of mozzarella and Parmesan. This version is incredible with soup—the savory, oniony flavor just works.
Herb Garden Version: In summer, when my basil plant is going crazy, I double the fresh herbs and add 2 tablespoons of fresh dill and 1 tablespoon of fresh thyme. The combination of fresh herbs with the garlic butter is absolutely stunning. This version feels lighter and brighter, perfect for serving alongside a fresh salad.
Dietary Adaptations: For a gluten-free version, use gluten-free biscuit dough (I’ve had good luck with the Against the Grain brand). For dairy-free, use vegan butter, dairy-free mozzarella shreds, and nutritional yeast in place of Parmesan. I tested the dairy-free version for a friend with lactose intolerance, and honestly, it was still delicious—just not quite as gooey.
Breakfast Version: This might sound weird, but hear me out. Swap the garlic and herbs for 2 tablespoons of maple syrup and 1 teaspoon of cinnamon. Use cheddar cheese (yes, cheese and maple syrup work together) and add cooked crumbled bacon. It’s like a savory-sweet breakfast pull-apart that makes weekend mornings feel special.
Serving & Storage Suggestions
This quick cheesy garlic herb pull-apart bread is best served warm, straight from the oven. The cheese is stretchy, the edges are crispy, and the butter is still soaking into every crevice. I like to put the skillet right on a trivet in the center of the table and let everyone dig in with their hands. It’s messy, it’s communal, and it’s exactly what a weeknight dinner should feel like.
What to serve with it: This bread pairs beautifully with a simple tomato soup (the classic combo), a big green salad with lemon vinaigrette, or a bowl of hearty minestrone. It’s also amazing alongside pasta dishes—think spaghetti and meatballs or baked ziti. If you’re serving it as an appetizer, set out a bowl of marinara sauce or garlic aioli for dipping.
Storage: If you have leftovers (unlikely, but possible), let the bread cool completely, then wrap it tightly in foil or plastic wrap. Store at room temperature for up to 2 days. Don’t refrigerate it—the fridge dries out the bread and makes the cheese rubbery.
Reheating: The best way to reheat this bread is in a 350°F oven for 5-7 minutes, uncovered. This restores the crispy edges and re-melts the cheese. You can also use an air fryer at 350°F for 3-4 minutes. The microwave works in a pinch (30 seconds per piece), but the bread will be soft rather than crispy. Honestly, I’ve eaten it cold straight from the fridge, and it’s still pretty great—like a cheesy biscuit snack.
One note: the flavors actually get better after a day. The garlic and herbs have time to meld with the butter and cheese, making the leftovers taste even more complex. So if you can resist eating it all in one sitting, you’re in for a treat.
Nutritional Information & Benefits
Let’s be honest—this quick cheesy garlic herb pull-apart bread is a treat, not a health food. But that doesn’t mean it can’t fit into a balanced diet. Here’s the estimated nutritional breakdown per serving (based on 8 servings):
| Nutrient | Amount Per Serving |
|---|---|
| Calories | 385 |
| Total Fat | 22g |
| Saturated Fat | 12g |
| Carbohydrates | 36g |
| Protein | 12g |
| Fiber | 1g |
| Sodium | 890mg |
Now, the good news: garlic is packed with health benefits. It’s known for its immune-boosting properties, thanks to compounds like allicin. Fresh parsley is rich in vitamins A, C, and K, and it acts as a natural breath freshener (which you’ll appreciate after all that garlic). The cheese provides calcium and protein, and the butter—well, butter makes life worth living, right?
Dietary considerations: This recipe contains gluten, dairy, and eggs (in the biscuit dough). For gluten-free or dairy-free options, see the variations section above. If you’re watching your sodium intake, use unsalted butter and low-sodium biscuit dough, and go easy on the added salt.
My personal perspective: I don’t believe in labeling food as “good” or “bad.” This bread is delicious, it brings people together, and it makes a regular Tuesday night feel special. If you’re eating it every single day, maybe rethink your meal plan. But as an occasional treat? Absolutely worth every bite.
Conclusion
This quick cheesy garlic herb pull-apart bread has become my go-to for so many reasons. It’s fast enough for a frantic weeknight, impressive enough for guests, and comforting enough to make any day feel a little better. The combination of buttery, garlicky, cheesy goodness in every pull-apart piece is just unbeatable.
I hope you give this recipe a try—and more than that, I hope you make it your own. Add extra garlic if you’re a garlic fiend. Throw in some red pepper flakes for heat. Use whatever cheese you have in the fridge. The beauty of this bread is that it’s forgiving and flexible, just like the best weeknight recipes should be.
When you make it (and I know you will), I’d love to hear how it turned out. Did you add something unexpected? Did your family devour it in record time? Drop a comment below and let me know. And if you’re looking for more quick and easy weeknight recipes, check out my 30-minute creamy tomato soup—they’re basically soulmates. Happy cooking, friends!
Frequently Asked Questions
Can I use homemade biscuit dough instead of canned?
Absolutely! If you have a favorite buttermilk biscuit recipe, go for it. Just prepare the dough as usual, roll it out, cut it into pieces, and follow the same assembly instructions. Keep in mind that homemade dough might need an extra 2-3 minutes of baking time.
Can I make this ahead of time?
You can assemble the bread up to 4 hours ahead and keep it in the refrigerator. Just cover the skillet with foil and bake straight from the fridge, adding 5 minutes to the baking time. I don’t recommend baking it fully ahead of time, as it’s best fresh from the oven.
Why is my bread doughy in the center?
This usually happens when the pan is too crowded or the oven temperature is too low. Make sure your biscuit pieces are in a single layer with some air gaps. Also, check your oven temperature with an oven thermometer—I’ve had ovens that run 25 degrees cooler than the dial says.
Can I freeze this bread?
Yes, but with a caveat. Bake the bread completely, let it cool, wrap it tightly in foil, and freeze for up to 3 months. To reheat, thaw in the refrigerator overnight, then warm in a 350°F oven for 10-12 minutes. The texture won’t be quite as crispy as fresh, but it’s still delicious.
What’s the best cheese combination for this recipe?
My go-to is mozzarella for the stretch and Parmesan for the salty, nutty flavor. But feel free to experiment—cheddar and Monterey Jack work great, provolone adds a smoky note, and fontina gives incredible creaminess. Just avoid pre-shredded cheese blends that contain anti-caking agents, as they don’t melt as smoothly.
Pin This Recipe!
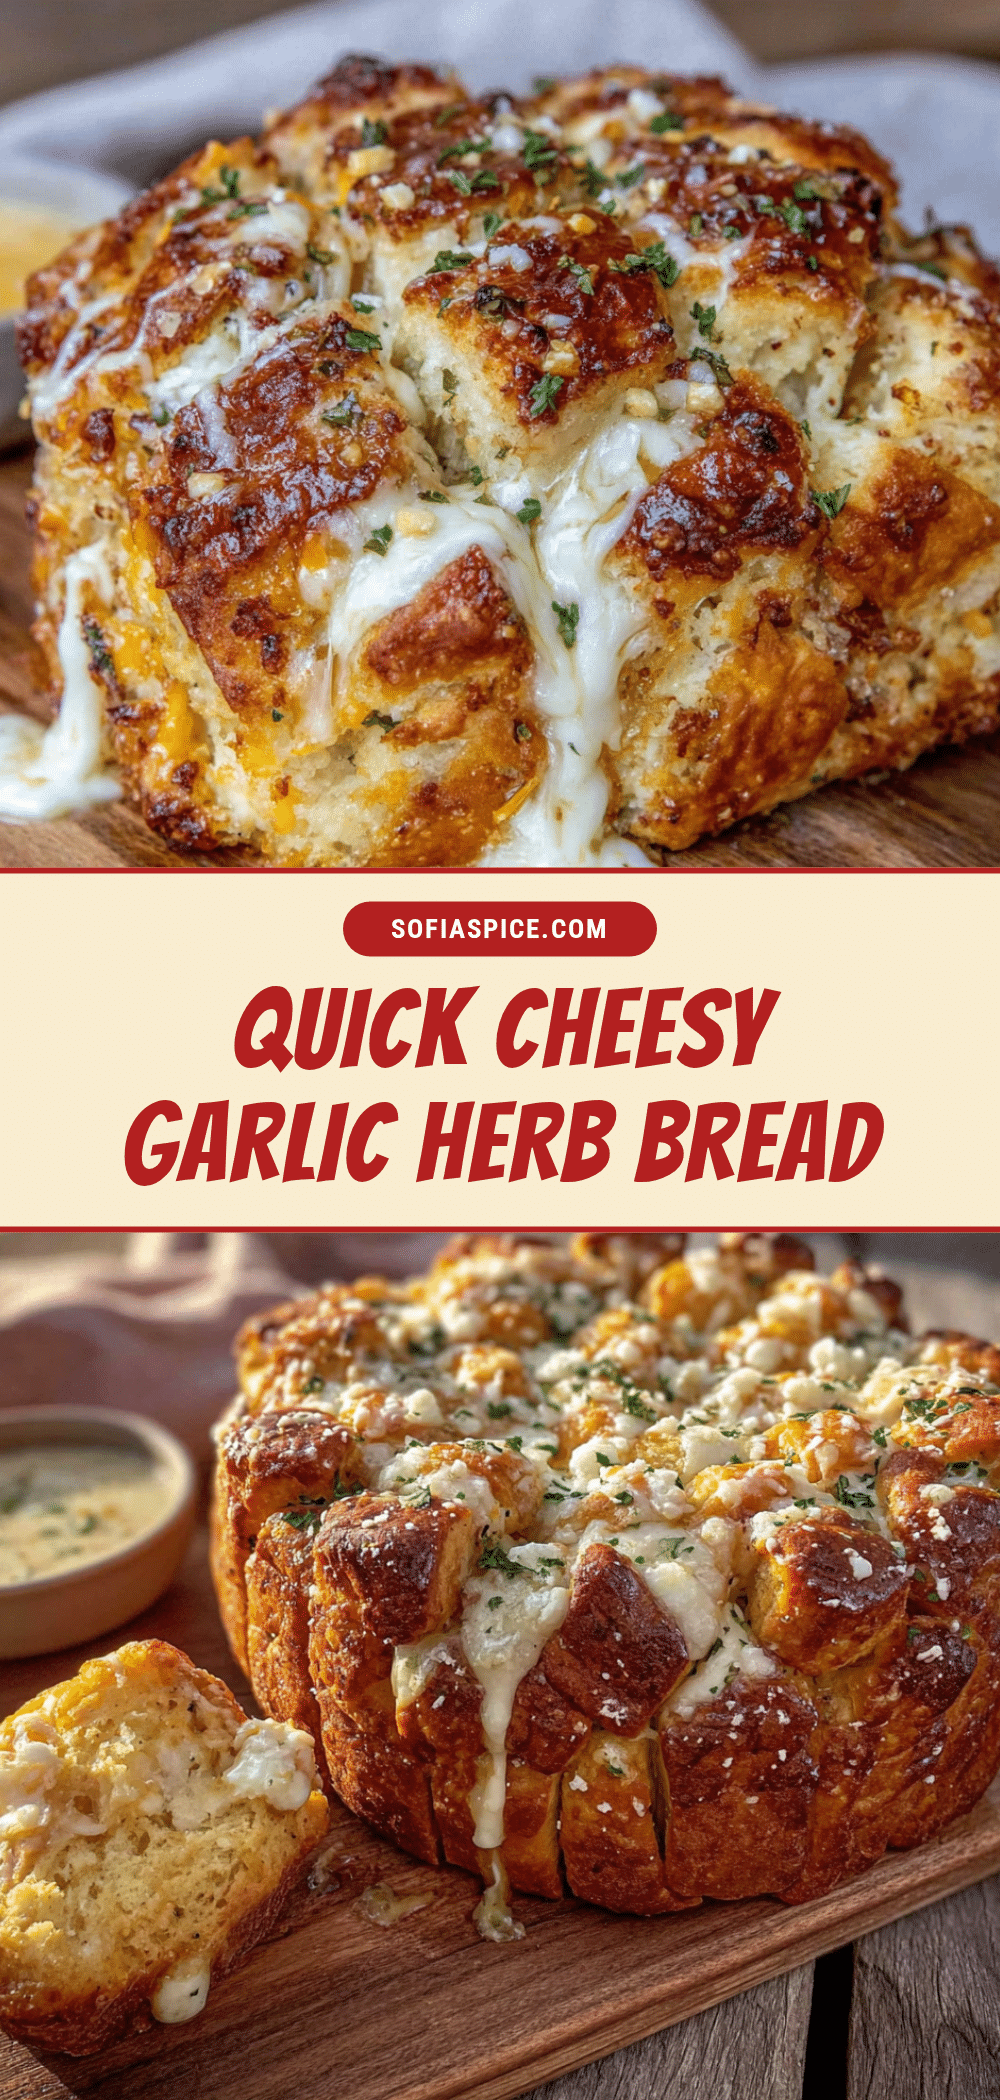
Quick Cheesy Garlic Herb Pull-Apart Bread: Easy 30-Min Recipe
This quick cheesy garlic herb pull-apart bread is a 30-minute weeknight wonder made with refrigerated biscuits, garlic herb butter, and melted cheese. It’s the perfect side dish or appetizer that delivers big flavor with minimal effort.
- Prep Time: 10 minutes
- Cook Time: 20 minutes
- Total Time: 30 minutes
- Yield: 8 servings 1x
- Category: Side Dish
- Cuisine: American
Ingredients
- 1/2 cup (1 stick) unsalted butter, melted
- 4 cloves garlic, minced
- 2 tablespoons fresh parsley, chopped
- 1 tablespoon fresh chives, chopped
- 1 teaspoon dried oregano
- 1/2 teaspoon salt
- 1/4 teaspoon black pepper
- 2 cans (16.3 oz each) refrigerated buttermilk biscuits
- 1 1/2 cups shredded mozzarella cheese
- 1/2 cup grated Parmesan cheese
- 1/4 cup fresh basil, chopped (optional)
Instructions
- Preheat oven to 375°F (190°C).
- Make the garlic herb butter: In a small microwave-safe bowl, melt the butter in 20-second increments until fully liquid. Add the minced garlic, chopped parsley, chives, oregano, salt, and pepper. Stir and let sit for a minute.
- Prepare the biscuits: Open both cans of biscuits and separate them. Cut each biscuit into quarters. Toss the biscuit pieces into a large bowl.
- Assemble the bread: Pour about half of the garlic herb butter over the biscuit pieces and toss gently to coat. Add the shredded mozzarella, Parmesan, and fresh basil (if using), and toss again until evenly distributed.
- Layer it in the skillet: Grease a 10-inch cast-iron skillet or 9×13 baking dish. Layer the biscuit mixture into the pan, pressing down gently. Pour the remaining garlic herb butter evenly over the top. Sprinkle any extra cheese on top.
- Bake: Place the skillet in the preheated oven and bake for 18-22 minutes, until deep golden-brown and bubbling.
- Rest and serve: Let the bread cool in the skillet for exactly 5 minutes. Serve warm, pulling apart with hands or using a spatula.
Notes
For best results, use room-temperature biscuits and fresh garlic. Don’t overmix the dough. If the top browns too quickly, tent with foil. Let rest 5 minutes before serving to avoid burning fingers.
Nutrition
- Serving Size: 1 serving
- Calories: 385
- Sugar: 4
- Sodium: 890
- Fat: 22
- Saturated Fat: 12
- Carbohydrates: 36
- Fiber: 1
- Protein: 12
Keywords: pull-apart bread, cheesy bread, garlic bread, quick bread, 30-minute recipe, appetizer, side dish


