This was supposed to be a fancy Swedish meatball situation. I had the lingonberry jam, the dill, the whole I’m-an-adult-who-hosts-dinner-parties vibe going on. But then, halfway through rolling the meat, I realized I’d grabbed the wrong bag of flour for the roux—all-purpose instead of the gluten-free kind my neighbor needed—and the power flickered, plunging my kitchen into that weird twilight dimness for a solid ten minutes. I stood there, hands covered in raw meat and breadcrumbs, staring at a half-finished tray of what were now decidedly un-Swedish meatballs. Honestly, I was this close to just ordering pizza.
But you know that feeling when you’ve already committed? The meat was mixed, the oven was preheating, and I had a pack of crescent roll dough I’d impulsively bought for a “just in case” situation. In a moment of pure, “well, this is ruined anyway” frustration, I grabbed the dough, tore it into strips, and started wrapping. It was less a culinary decision and more a desperate attempt to salvage something from the chaos. I wrapped them haphazardly, stuck some black olive eyes on top, and threw them in the oven, fully expecting a greasy, misshapen mess.
What came out was nothing like the plan—and better. The room went quiet for a second, then everyone laughed. Not the polite “oh, how creative” laugh, but the real, delighted laugh you get when something unexpectedly works. The golden, flaky wrappers, the juicy, savory center, the silly little faces staring back from the platter—it was the hit of the party. I didn’t plan to make Halloween Mummy Meatballs that day. I was trying to be sophisticated. But let me tell you, sometimes the best recipes are the ones you stumble into when your kitchen decides to throw a little chaos your way. And honestly, I haven’t looked back since.
Why You’ll Love This Recipe
Let’s be real for a second. Hosting a Halloween party or a spooky-themed dinner can feel like a lot. You want the food to be fun and festive, but you also don’t want to spend all day in the kitchen while your guests are having a good time in the other room. These Halloween Mummy Meatballs solve that problem perfectly. They deliver maximum visual impact with minimal actual effort.
- Quick & Easy: From start to finish, you’re looking at about 40 minutes. The active prep time is maybe 15 minutes. The rest is just oven time where you can get the drinks ready or set out your other snacks.
- Simple Ingredients: You probably have almost everything in your kitchen right now. Ground beef, breadcrumbs, an egg, some seasonings, and a can of crescent rolls. No trips to a specialty store for weird Halloween candy or obscure spices.
- Perfect for a Crowd: This recipe scales up beautifully. Need 30 mummies for a big party? Double the batch. They hold their shape, they reheat well, and they’re the first thing to disappear from the buffet table.
- Total Crowd-Pleaser: I’ve served these to kids, adults, picky eaters, and even my uncle who “doesn’t do themed food.” Every single person reaches for a second one. They’re just good meatballs, wrapped in buttery, flaky dough. The theme is a bonus.
- Unbelievably Delicious: The contrast between the juicy, seasoned meatball and the crispy, golden-brown crescent roll strips is honestly addictive. The dough gets all toasty and buttery in the oven, while the meatball stays moist and flavorful. It’s comfort food dressed up for a party.
This isn’t just another meatball recipe. It’s the one that gets photographed, the one people ask you for, and the one that makes you look like a Halloween hero without breaking a sweat. It’s the kind of recipe that makes you close your eyes after the first bite, not because it’s fancy, but because it’s just that satisfying.
What Ingredients You Will Need
This recipe uses simple, pantry-friendly ingredients to create something that looks like you spent hours on it. The magic is all in the assembly and the bake. Here is what you need to gather:
- For the Meatballs:
- 1 pound ground beef (80/20 blend works best for juiciness; leaner blends will work but might be a tad drier)
- 1/2 cup plain breadcrumbs (I use Progresso Italian-style for extra flavor, but plain works great too)
- 1 large egg, lightly beaten (this is your binder, don’t skip it)
- 1/4 cup milk (whole milk adds richness, but 2% or even oat milk works)
- 1/2 cup finely grated Parmesan cheese (the kind in the green can is fine, but freshly grated is even better)
- 1 teaspoon garlic powder
- 1 teaspoon onion powder
- 1/2 teaspoon salt
- 1/4 teaspoon black pepper
- 1 tablespoon Worcestershire sauce (adds that deep, savory umami flavor)
- For the Mummy Wraps:
- 1 can (8 ounces) refrigerated crescent roll dough (Pillsbury is my go-to; look for the sheet-style if you want to cut your own strips)
- 24-30 black olive slices (for the eyes; you can also use small dots of sriracha or ketchup)
- For the Dipping Sauce (Optional but Highly Recommended):
- 1 cup marinara sauce (jarred is perfect; Rao’s is my favorite for its rich flavor)
- OR 1/2 cup ranch dressing mixed with 1 tablespoon hot sauce for a spicy ranch dip
Ingredient Selection Tips: For the best texture, I recommend using ground beef that isn’t too lean. The 80/20 blend gives you a juicy meatball that doesn’t dry out during the bake. If you’re using a leaner blend, consider adding a tablespoon of olive oil to the mix. For the crescent rolls, the classic Pillsbury can is where it’s at. They’re easy to find and they unroll perfectly into those perforated triangles, which you then cut into strips. If you want a cleaner look, buy the seamless sheet dough, but honestly, the perforated triangles are faster.
Substitution Guidance: Need to make this gluten-free? Use gluten-free breadcrumbs and a gluten-free crescent roll dough (like the one from Schär). Want to make it dairy-free? Swap the Parmesan for a dairy-free alternative and use a plant-based milk. For a spicy kick, add 1/2 teaspoon of red pepper flakes to the meatball mixture. You can also swap the ground beef for ground turkey or chicken, just add a little extra olive oil to keep it from drying out.
Equipment Needed
You don’t need any fancy gadgets for this one. Most of this stuff is already in your kitchen. Here is what you’ll need:
- Large Mixing Bowl: For combining all the meatball ingredients. A glass or stainless steel bowl works best.
- Baking Sheet: A standard half-sheet pan (18×13 inches) is perfect. Line it with parchment paper for easy cleanup.
- Parchment Paper: This is non-negotiable for me. It prevents the crescent dough from sticking and makes cleanup a breeze. You can use a silicone baking mat too.
- Small Cookie Scoop or Tablespoon: For portioning out uniform meatballs. A #40 cookie scoop (about 1.5 tablespoons) is my favorite tool for this job. It ensures even cooking.
- Knife or Pizza Cutter: For cutting the crescent roll dough into strips. A pizza cutter makes quick work of it.
- Small Bowl: For beating the egg and for holding the olive slices.
- Cutting Board: For cutting the olives and the dough.
That’s it. No stand mixer, no food processor, no special molds. Just your hands and a few basic tools. I’ve made these in a tiny apartment kitchen with a dull knife and a flimsy baking sheet, and they still came out perfect. Don’t overthink the equipment.
Preparation Method
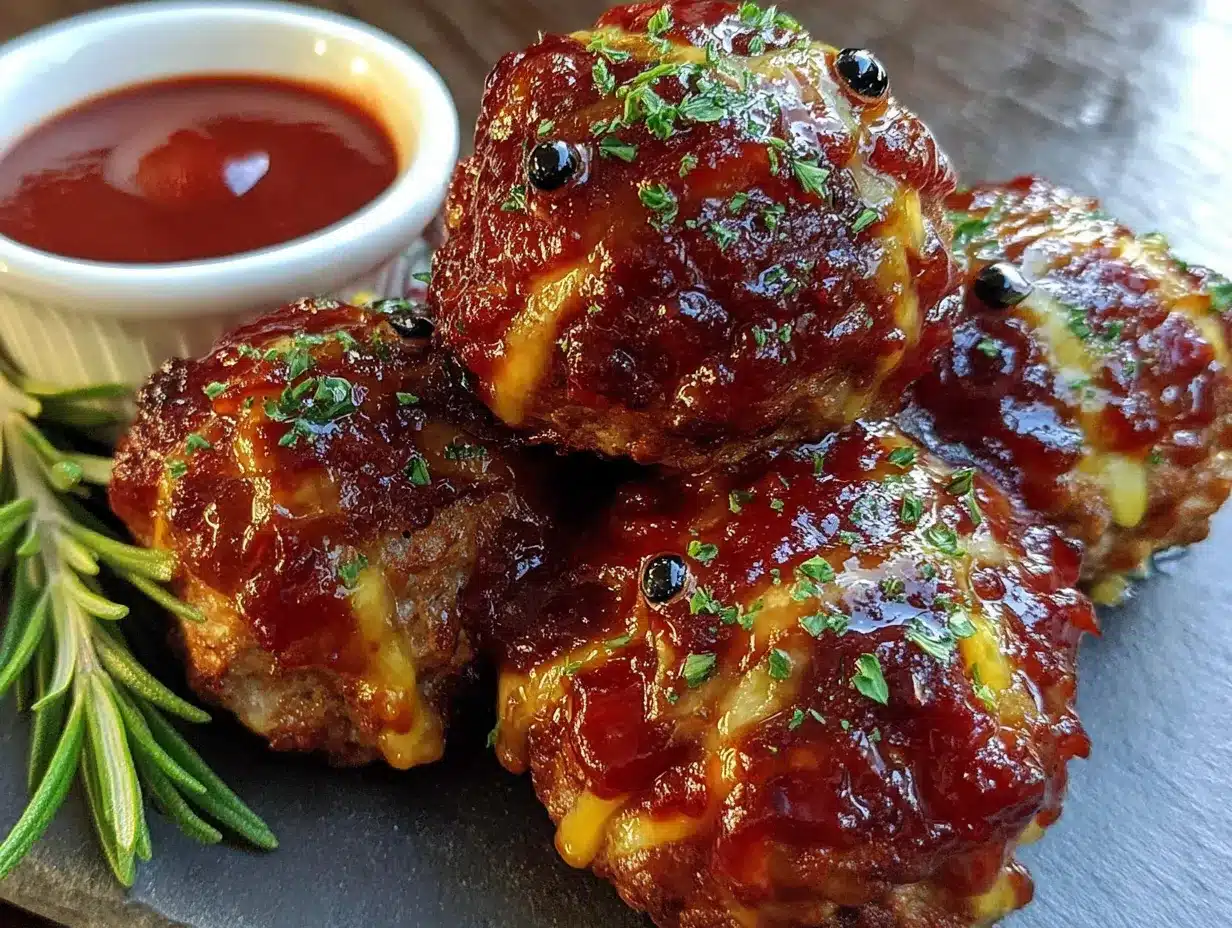
Alright, let’s get into the actual making of these little guys. It’s surprisingly straightforward, but I’ve got a few tips to make sure yours turn out perfect every time.
- Preheat and Prep: First things first, preheat your oven to 375°F (190°C). Line a large baking sheet with parchment paper. This step is crucial—without it, the crescent dough will stick and you’ll be peeling meatballs off the pan. I learned that one the hard way.
- Make the Meatball Mixture: In a large mixing bowl, combine the 1 pound of ground beef, 1/2 cup breadcrumbs, 1 beaten egg, 1/4 cup milk, 1/2 cup Parmesan cheese, 1 teaspoon garlic powder, 1 teaspoon onion powder, 1/2 teaspoon salt, 1/4 teaspoon black pepper, and 1 tablespoon Worcestershire sauce. Use your hands to mix everything together. Don’t overmix—just until it’s all combined. Overmixing makes the meatballs tough. You want it to feel slightly tacky but hold together when you squeeze it.
- Form the Meatballs: Using a small cookie scoop or a tablespoon, portion out the meat mixture and roll it into 1.5-inch balls. You should get about 20-24 meatballs from this batch. Place them on the prepared baking sheet, spacing them about an inch apart. They won’t expand much, but you want room for the dough strips.
- Prep the Dough: Open the can of crescent rolls. Unroll the dough and separate it along the perforated lines so you have 8 triangles. Using a sharp knife or pizza cutter, cut each triangle lengthwise into 3-4 thin strips. You want them to be about 1/4 to 1/2 inch wide. The thinner the strip, the more “mummy” look you get. I usually aim for 3 strips per triangle.
- Wrap the Mummies: This is the fun part. Take a meatball and start wrapping a strip of dough around it. Leave a small gap in the front for the eyes. Don’t wrap too tightly—you want the dough to puff up as it bakes, giving the mummy a nice, textured look. Overlap the strips slightly as you go. Tuck the end of the strip under the meatball to secure it. Repeat with all the meatballs.
- Add the Eyes: Before baking, press two small black olive slices into the exposed gap on each mummy. Make sure they’re pressed in gently so they stay put during baking. If the olives fall off, you can always add them right after the mummies come out of the oven while the dough is still hot and pliable.
- Bake: Place the baking sheet in the preheated oven and bake for 14-16 minutes, or until the meatballs are cooked through (internal temperature of 160°F or 71°C) and the crescent dough is golden brown and puffed. Keep an eye on them during the last few minutes—ovens vary, and you don’t want the dough to burn.
- Cool and Serve: Let the mummy meatballs cool on the baking sheet for 2-3 minutes before transferring them to a serving platter. The dough will be very hot and the meatballs will be steaming. Letting them rest helps the dough set. Serve warm with your choice of dipping sauce.
Sensory Cue: When the meatballs are done, your kitchen will smell like a combination of buttery, toasted bread and savory, seasoned beef. The dough will be a deep golden brown, and the meatballs will look slightly shiny from the rendered fat. The olives will be glistening. It’s a beautiful sight.
Cooking Tips & Techniques
I’ve made these mummy meatballs probably a dozen times now, and I’ve learned a few things the hard way so you don’t have to. Here are my best tips for consistent, crowd-pleasing results.
Don’t Overmix the Meatball Mixture. This is the number one mistake people make. You mix until it just comes together. Overworking the ground beef makes the meatballs dense and tough. You want them to be tender and juicy. Think of it like making a burger patty—gentle hands, light touch.
Chill the Wrapped Meatballs (Optional, but Helpful). If you have the time, pop the tray of wrapped mummies into the fridge for 10-15 minutes before baking. This helps the crescent dough firm up a bit, which means it will puff up more evenly and hold its shape better. It’s especially helpful if your kitchen is warm or if you’re making a big batch.
Watch the Dough Color. The crescent dough can go from perfectly golden to burnt in a matter of seconds. Set your timer for 12 minutes and start checking. If the dough is browning too quickly on the bottom but the meatballs aren’t done yet, tent the tray loosely with aluminum foil for the last few minutes of baking. This will protect the dough from direct heat.
Use a Meat Thermometer. This is my best friend for any meatball recipe. The safest way to know your meatballs are done is to check the internal temperature. It should reach 160°F (71°C) for ground beef. Stick the thermometer into the center of a meatball through the gap where the eyes are. No guesswork, no dry meatballs.
Make Ahead Strategy for Hosting. This is a lifesaver. You can assemble the mummy meatballs completely (wrap them, add the eyes) up to 24 hours in advance. Just cover the tray tightly with plastic wrap and keep it in the fridge. When your guests arrive, all you have to do is pop them in the oven. Fresh, hot mummies in under 20 minutes with zero stress. I did this for a Halloween party last year and it was a game-changer.
Variations & Adaptations
One of the best things about this recipe is how customizable it is. Once you have the basic technique down, you can adapt it to fit almost any dietary need or flavor preference. Here are a few of my favorite variations:
- Spicy Buffalo Mummies: Swap the Worcestershire sauce for hot sauce (like Frank’s RedHot) in the meatball mixture. After baking, brush the hot mummies with melted butter mixed with more hot sauce. Serve with blue cheese or ranch dressing. These are a huge hit with the wing-loving crowd.
- Turkey or Chicken Mummies: Use 1 pound of ground turkey or chicken instead of beef. Add 1 tablespoon of olive oil to the mixture to keep it from drying out. The cooking time remains the same. They’re a lighter option that still tastes fantastic.
- Gluten-Free Mummies: Use gluten-free breadcrumbs (I like Ian’s brand) and a gluten-free crescent roll dough (Schär makes a good one). The rest of the ingredients are naturally gluten-free. Just be aware that gluten-free dough can brown faster, so keep a close eye on them during the last few minutes of baking.
- Veggie-Packed Mummies: Finely grate a small carrot and a small zucchini into the meatball mixture. Squeeze out the excess moisture from the zucchini first. This adds moisture and a little hidden veggie boost. You won’t even taste it, but it makes the meatballs extra tender.
- Cheese-Stuffed Mummies: Before wrapping, press a small cube of mozzarella cheese into the center of each meatball. When you bite into it, you get a gooey, cheesy surprise. It’s a little extra work, but it’s absolutely worth it for a special occasion.
Serving & Storage Suggestions
These mummies are best served warm, right out of the oven. The contrast between the hot, juicy meatball and the flaky, buttery dough is at its peak when they’re fresh. Arrange them on a large platter, clustered together so they look like a little mummy army. I like to place a small bowl of dipping sauce in the center of the platter.
What to Serve Alongside: These are perfect as a main appetizer for a Halloween party. Pair them with other finger foods like deviled eggs, a cheese board shaped like a pumpkin, or a bowl of popcorn tossed with nutritional yeast for a “spooky” look. For a full dinner, serve them over a bed of egg noodles or mashed potatoes with extra marinara sauce.
Storage: Leftover mummy meatballs (if you have any!) can be stored in an airtight container in the refrigerator for up to 3 days. The dough will lose some of its crispness, but they’ll still be delicious.
Reheating: The best way to reheat them is in the oven. Preheat to 350°F (175°C) and bake for 5-7 minutes, or until warmed through. This helps restore some of the dough’s crispness. You can also reheat them in an air fryer at 350°F for 3-4 minutes. The microwave works in a pinch, but the dough will be soft and a bit chewy.
Freezing: You can freeze the assembled, unbaked mummies. Place them on a baking sheet and freeze until solid (about 1-2 hours). Then transfer them to a freezer-safe bag or container. They’ll keep for up to 2 months. To bake, add 3-5 minutes to the cooking time. No need to thaw.
Nutritional Information & Benefits
Let’s be honest—these are a treat. They’re not health food, but they’re made with real, whole ingredients that offer some nutritional value. Here’s a rough estimate per mummy (based on a recipe making 24 mummies):
- Calories: Approximately 120-140
- Protein: 8-10 grams
- Fat: 7-9 grams
- Carbohydrates: 6-8 grams
Health Benefits of Key Ingredients: The ground beef provides high-quality protein and iron, which is essential for energy and healthy blood cells. The Parmesan cheese adds a good dose of calcium for bone health. The garlic and onion powder are packed with antioxidants and have anti-inflammatory properties. Even the crescent dough, in moderation, provides carbohydrates for quick energy.
Dietary Considerations: As written, this recipe contains gluten (from the breadcrumbs and crescent rolls) and dairy (from the Parmesan and milk). I’ve provided gluten-free and dairy-free substitution options in the variations section. This recipe is also nut-free and egg-free (the egg can be replaced with a flax egg, but the texture will be slightly different).
Conclusion
Look, I know there are a million Halloween recipes out there. But these Mummy Meatballs? They’re the real deal. They’re the ones that get the “wow” when you walk into the room, the ones that disappear in minutes, and the ones people text you for the next day. They started as a mistake in my kitchen, a moment of frustration that turned into a happy accident. And now, I can’t imagine a Halloween party without them.
I want you to make these your own. Use your favorite ground meat, swap in your favorite dipping sauce, or get creative with the eyes—I’ve seen people use tiny dots of mustard or even candy eyes. The base recipe is solid, but the fun is in how you dress it up. Don’t be afraid to experiment.
So go ahead, grab that pack of crescent rolls and some ground beef. Your guests are going to love you for it. And when you make them, come back and tell me how they turned out. Did you add a twist? Did the kids go crazy for them? I want to hear it all. Drop a comment below or tag me in your photos. Happy Halloween, and happy cooking!
Frequently Asked Questions
Can I make these Mummy Meatballs ahead of time?
Absolutely! You can assemble them completely (wrap and add eyes) up to 24 hours in advance. Keep them covered in the fridge, then bake just before serving. This is my go-to strategy for parties.
Can I use frozen meatballs instead of making them from scratch?
You can, but the texture won’t be as good. Frozen meatballs are often drier and have a different seasoning profile. If you’re in a pinch, thaw them completely, wrap them in the dough, and bake as directed. They might need a couple extra minutes in the oven.
How do I keep the olive eyes from falling off during baking?
Press the olive slices gently into the dough gap before baking. The dough will puff up around them as it bakes, holding them in place. If they still fall off, you can press them back on right after the mummies come out of the oven while the dough is still soft.
Can I bake these in an air fryer?
Yes! Preheat your air fryer to 350°F (175°C). Place the mummies in a single layer in the basket (you may need to work in batches). Air fry for 8-10 minutes, or until the dough is golden and the meatballs are cooked through. Check them at the 7-minute mark.
What’s the best dipping sauce for these?
I love a good classic marinara sauce. But a spicy ranch (ranch mixed with hot sauce) is also fantastic. For a sweeter option, try a honey mustard or a sweet chili sauce. Really, anything you’d dip a meatball in works perfectly here.
Pin This Recipe!
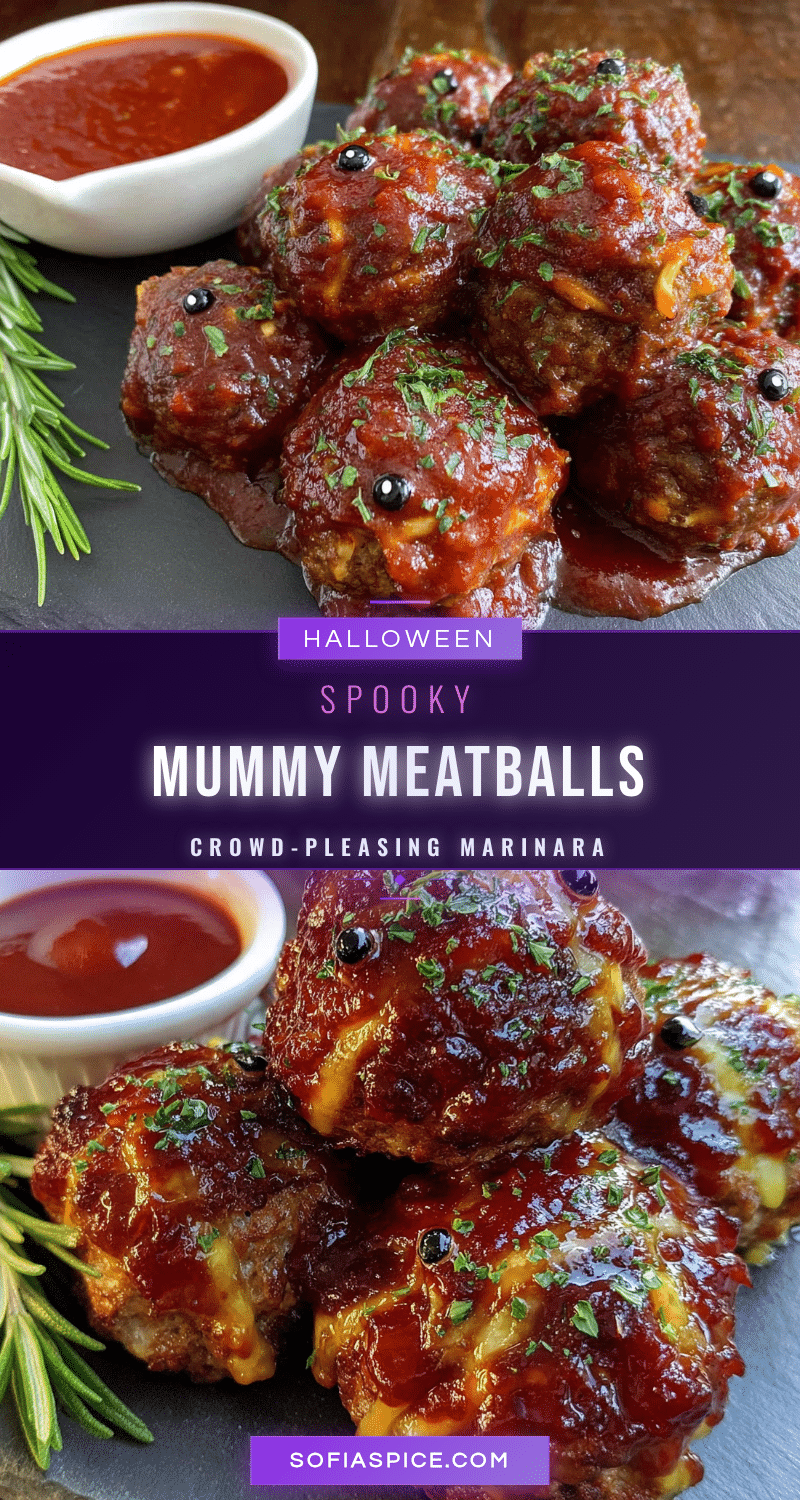
Best Halloween Mummy Meatballs Easy Crowd-Pleasing Recipe

These Halloween Mummy Meatballs are a fun and festive appetizer made with juicy seasoned meatballs wrapped in flaky crescent roll strips, topped with olive eyes. Perfect for parties, they deliver maximum visual impact with minimal effort.
- Prep Time: 15 minutes
- Cook Time: 16 minutes
- Total Time: 31 minutes
- Yield: 20-24 mummies 1x
- Category: Appetizer
- Cuisine: American
Ingredients
- 1 pound ground beef (80/20 blend)
- 1/2 cup plain breadcrumbs
- 1 large egg, lightly beaten
- 1/4 cup milk
- 1/2 cup finely grated Parmesan cheese
- 1 teaspoon garlic powder
- 1 teaspoon onion powder
- 1/2 teaspoon salt
- 1/4 teaspoon black pepper
- 1 tablespoon Worcestershire sauce
- 1 can (8 ounces) refrigerated crescent roll dough
- 24–30 black olive slices
- 1 cup marinara sauce (for dipping, optional)
- 1/2 cup ranch dressing mixed with 1 tablespoon hot sauce (for dipping, optional)
Instructions
- Preheat oven to 375°F (190°C). Line a large baking sheet with parchment paper.
- In a large mixing bowl, combine ground beef, breadcrumbs, beaten egg, milk, Parmesan cheese, garlic powder, onion powder, salt, black pepper, and Worcestershire sauce. Mix with your hands until just combined; do not overmix.
- Using a small cookie scoop or tablespoon, portion the mixture into 1.5-inch balls (about 20-24 meatballs). Place them on the prepared baking sheet, spacing about 1 inch apart.
- Open the can of crescent rolls. Unroll and separate along perforations into 8 triangles. Cut each triangle lengthwise into 3-4 thin strips (about 1/4 to 1/2 inch wide).
- Wrap a strip of dough around each meatball, leaving a small gap in the front for the eyes. Overlap strips slightly and tuck the end under the meatball to secure.
- Press two black olive slices into the exposed gap on each mummy for eyes.
- Bake for 14-16 minutes, until meatballs are cooked through (internal temperature of 160°F/71°C) and dough is golden brown and puffed.
- Let cool on the baking sheet for 2-3 minutes before transferring to a serving platter. Serve warm with dipping sauce.
Notes
For best results, use 80/20 ground beef for juiciness. If using leaner beef, add 1 tablespoon olive oil. To make ahead, assemble completely and refrigerate up to 24 hours before baking. For gluten-free, use gluten-free breadcrumbs and crescent roll dough. For dairy-free, use dairy-free Parmesan and plant-based milk.
Nutrition
- Serving Size: 1 mummy
- Calories: 130
- Sugar: 2
- Sodium: 280
- Fat: 8
- Saturated Fat: 3
- Carbohydrates: 7
- Protein: 9
Keywords: Halloween meatballs, mummy meatballs, easy appetizer, party food, crescent roll meatballs


