My sister swore she hated Halloween baking. For years. The messy frosting, the sticky fingers, the way sprinkles somehow end up in every corner of the kitchen. She’d watch me roll out sugar cookies and pipe orange icing with this look of pure suspicion, like I was wasting a perfectly good Saturday. Then last October, I found her standing over my kitchen island, a half-eaten pretzel rod in her hand, looking caught. She had crumbs on her sweater and a smear of white chocolate on her cheek. “It’s just the salty-sweet thing,” she mumbled. “And the crunch.”
Honestly, I didn’t even make them for her. I was testing a quick treat for my neighbor’s Halloween party, something that looked spooky but came together in under twenty minutes. I used pretzel rods, melted white chocolate, and a few slivered almonds for the witch fingers. Nothing fancy. But watching her grab another one, I knew I’d stumbled onto something. These aren’t the kind of Halloween treat that takes over your afternoon. They’re the kind you can make after work, while the kids are doing homework, or even while you’re half-watching a scary movie. No rolling pins, no chilling time, no complicated steps.
The best part? They actually look creepy. The almond slivers become jagged fingernails, and the white chocolate gives them that pale, witchy skin tone. Maybe you’ve been there, staring at a Pinterest board full of elaborate Halloween desserts and thinking, “That looks amazing, but I have a life.” I get it. These witch finger pretzel rods are my answer to that feeling. They’re the treat that proves you don’t need hours to make something memorable. And honestly, my sister now asks for them every year. That’s how you know a recipe is here to stay.
Why You’ll Love This Recipe
Let me be straight with you—I’ve tested a lot of Halloween treats over the years, and most of them fall into one of two categories: they look incredible but take forever, or they’re quick but look like a mess. These witch finger pretzel rods actually nail both. They’re spooky enough to impress at a party, but simple enough that you’re not scrubbing frosting out of your hair at 9 PM on a Tuesday.
- Ready in 20 Minutes: From start to finish, you’re looking at about twenty minutes of active time. The chocolate sets in the fridge in ten, so you’re not waiting around forever.
- Just 4 Ingredients: Pretzel rods, white chocolate chips or melting wafers, slivered almonds, and a tiny bit of green food coloring. That’s it. No weird specialty items.
- Perfect for Last-Minute Plans: Someone texts you about a Halloween get-together at 4 PM? You can have these done by 4:20. I’ve done it. More than once.
- Kid-Friendly Activity: My niece helped me dip the pretzels last year, and she only got chocolate on the counter twice. It’s a great no-bake project for little hands.
- Salty-Sweet Perfection: The combination of crunchy pretzels, creamy white chocolate, and the slight bitterness of almond slivers is honestly addictive. I’ve seen people eat three in a row without blinking.
What makes these different from other witch finger recipes you’ll find? It’s the texture. A lot of versions use cookie dough or breadsticks, which can get soggy or take too long. Pretzel rods stay perfectly crunchy, even after they’re coated. Plus, the salt cuts through the sweetness of the white chocolate in a way that makes you want another bite. I’ve tried this with milk chocolate too, but the white chocolate really gives that pale, witchy look that makes the almond fingernails pop. It’s not just another Halloween treat—it’s the one that disappears first from the dessert table.
What Ingredients You Will Need
This recipe uses just a handful of simple ingredients to create something that looks way more complicated than it is. The magic is in how they come together, not in hunting down obscure items at the grocery store.
- Pretzel rods (1 standard bag, about 12 ounces): You want the thick, sturdy rods here, not the thin sticks. They hold up better to the chocolate coating and look more like actual witch fingers. I usually grab the store brand—no need to spend extra. Just make sure they’re not broken in the bag.
- White chocolate melting wafers or white chocolate chips (2 cups, about 12 ounces): I prefer Ghirardelli white chocolate melting wafers for the smoothest texture, but white chocolate chips work fine too. If you use chips, add a teaspoon of coconut oil or vegetable shortening to help them melt smoothly. This prevents that grainy, clumpy texture that white chocolate can sometimes get.
- Slivered almonds (about ¼ cup): These become the fingernails. Look for slivered almonds that are relatively flat and uniform in size. If they’re too curved, they won’t sit flat on the chocolate. You can also use whole almonds and slice them lengthwise, but that’s extra work I don’t bother with. The slivered ones from the baking aisle are perfect.
- Green gel food coloring (a few drops): This gives the white chocolate that eerie, witchy tint. I use Americolor gel food coloring because it’s concentrated and doesn’t thin out the chocolate. Liquid food coloring can seize the chocolate, so stick with gel or paste. You want a pale, sickly green—not neon. Start with one drop and add more if needed.
- Optional – Edible eyeballs or sprinkles: Sometimes I add a tiny edible eyeball to the tip of the “finger” for extra creepiness. Totally optional, but kids love it. You can also dust them with a little cocoa powder or black luster dust for a “dirty” witch look.
Ingredient Selection Tips: When choosing white chocolate, look for one that contains cocoa butter (listed in the ingredients). That’s real white chocolate, and it melts more smoothly than candy melts or white coating. If you’re dairy-free, there are good white chocolate alternatives from brands like King David or Pascha. The texture will be slightly different, but they still work. For the pretzels, check the expiration date—stale pretzels are sad pretzels.
Substitution Guidance: If you don’t have slivered almonds, you can use sliced almonds or even pumpkin seeds for a nut-free version. The look changes a bit, but it still reads as creepy fingernails. For the chocolate, dark or milk chocolate works if you don’t mind brown “witch fingers.” It’s less spooky but still delicious. And if you’re avoiding food coloring altogether, leave the chocolate white—they look like bone fingers, which is honestly just as cool.
Equipment Needed
You don’t need a fancy kitchen setup for these. Most of this stuff you probably already have, which is exactly how I like my recipes.
- Baking sheet or tray: Lined with parchment paper or a silicone baking mat. The parchment makes cleanup a breeze—just lift it off and toss it. I’ve used the same half-sheet pan for years, and it’s perfect.
- Microwave-safe bowl or double boiler: For melting the white chocolate. I use a glass measuring cup because the pour spout makes dipping easier. If you don’t have a microwave, a heatproof bowl set over a pot of simmering water works too.
- Spatula or spoon: For stirring the chocolate and helping coat the pretzels. A small offset spatula is nice but not necessary.
- Small piping bag or zip-top bag: For drizzling extra chocolate or adding “wrinkle” details to the fingers. Honestly, I just use a sandwich bag with the corner snipped off. Works perfectly.
- Toothpick: For placing the almond fingernails and fixing any chocolate drips. Also useful for popping air bubbles in the coating.
- Refrigerator space: You need a flat spot in your fridge where the baking sheet can sit undisturbed for about 10 minutes. Clear a shelf before you start—I’ve learned this the hard way.
Budget-Friendly Options: If you don’t have a microwave, the stovetop double boiler method is free. No piping bag? A spoon works for drizzling. No parchment paper? Wax paper or even aluminum foil (lightly greased) will do in a pinch. The only thing I wouldn’t skip is the baking sheet—you need a flat surface for the chocolate to set.
Preparation Method
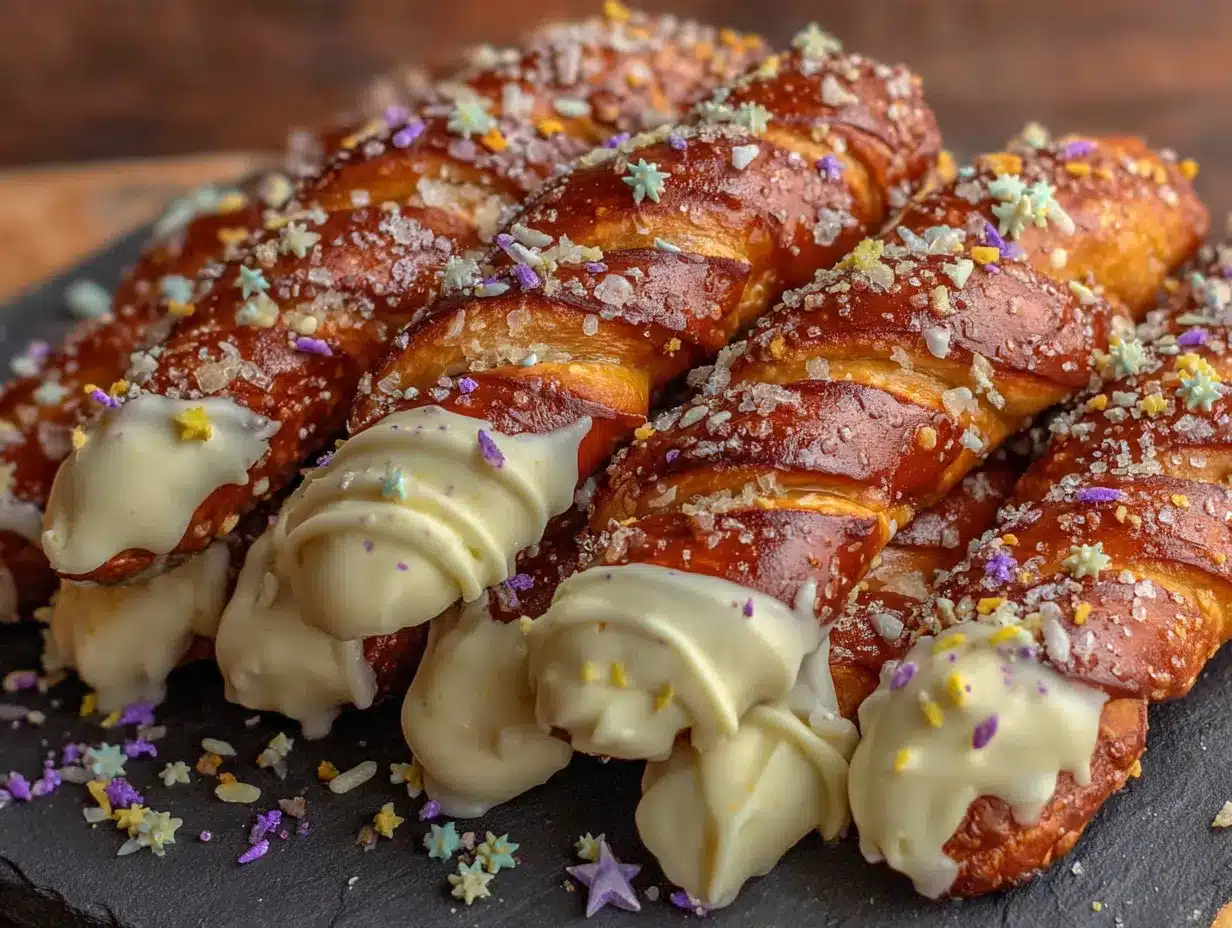
This is where the magic happens. Follow these steps, and you’ll have a tray of creepy witch fingers in no time. I’ve broken it down so you can work through it without rushing.
- Set up your workspace. Line a baking sheet with parchment paper. Lay out your pretzel rods, slivered almonds, and any decorations nearby. Have your green gel food coloring and a toothpick ready. This sounds basic, but when your hands are covered in chocolate, you’ll thank me. I once had to open a new bag of almonds with sticky fingers—never again.
- Melt the white chocolate. Place the white chocolate wafers or chips in a microwave-safe bowl. Microwave in 30-second intervals at 50% power, stirring thoroughly after each interval. White chocolate burns easily, so don’t crank up the power. It usually takes about 1.5 to 2 minutes total. When it’s almost melted but has a few lumps, keep stirring—the residual heat will finish the job. If you’re using chips and they seem thick, stir in ½ teaspoon of coconut oil.
- Tint the chocolate. Add one drop of green gel food coloring to the melted white chocolate. Stir completely. The color will look very pale at first—that’s what you want. Add another drop if you want a stronger green, but remember: witch fingers are supposed to look a little sickly, not radioactive. I usually stop at two drops for that perfect eerie shade.
- Dip the pretzel rods. Hold a pretzel rod by one end and dip it into the melted chocolate, tilting the bowl slightly to get good coverage. Rotate the pretzel as you lift it out, letting the excess drip back into the bowl. You want a thin, even coating—not a thick glob. Scrape the bottom of the pretzel against the rim of the bowl to remove extra chocolate. Place the coated pretzel on the parchment-lined baking sheet.
- Add the fingernail. While the chocolate is still wet, press a slivered almond onto the tip of the pretzel rod. Position it so the pointed end extends slightly beyond the chocolate, like a fingernail growing past the fingertip. Gently press it down with a toothpick so it adheres. Don’t push too hard or the almond will slide off. I angle mine slightly upward for that witchy, untamed look.
- Create the knuckle wrinkles. Here’s where they go from “chocolate-covered pretzels” to “witch fingers.” Use a toothpick to draw small horizontal lines across the chocolate coating, mimicking the wrinkles and creases of a finger joint. Make two or three lines about an inch from the tip, and another set a couple inches down. You can also use the toothpick to create a slight indentation where the “nail bed” would be. These little details make a huge difference.
- Chill to set. Place the baking sheet in the refrigerator for 10 to 15 minutes, until the chocolate is completely firm. Don’t skip this step—the chocolate needs to set fully so it doesn’t smudge when you handle them. If you’re in a hurry, you can pop them in the freezer for 5 minutes, but watch them closely so the chocolate doesn’t crack.
- Add final details (optional). Once the chocolate is set, you can add extra touches. Melt a small amount of additional white chocolate and drizzle it over the fingers for a “dried skin” effect. Or use a tiny brush to dust them with cocoa powder for a grungy look. I sometimes add a drop of red gel coloring mixed with a little vodka (or water) to create a blood drip effect near the fingernails. It’s extra, but Halloween is the time for extra.
- Serve or store. Transfer the finished witch finger pretzel rods to a serving platter or store them in an airtight container at room temperature. They’ll stay fresh for up to a week, though honestly, they never last that long in my house.
Sensory Cues: When you dip the pretzel, listen for the slight sizzle as the cold pretzel hits the warm chocolate—that means it’s the right temperature. The chocolate should be glossy and smooth, not thick and matte. When you draw the knuckle wrinkles, the toothpick should leave a clean line that stays put. If the lines disappear, the chocolate is too warm—let it cool for a minute before trying again.
Cooking Tips & Techniques
I’ve messed up this recipe more times than I’d like to admit, and each mistake taught me something. Here’s what I wish someone had told me the first time.
White chocolate is temperamental. It’s not like melting regular chocolate chips. White chocolate has milk solids that can burn at high temperatures, turning grainy and lumpy. Always melt it at 50% power in the microwave, and stir frequently. If it seizes up (turns thick and clumpy), you can try adding a teaspoon of hot water or coconut oil and stirring vigorously. Sometimes it comes back, sometimes it doesn’t. That’s why I prefer melting wafers—they’re more forgiving.
Don’t over-dip. I know it’s tempting to coat the whole pretzel in chocolate, but you only need about two-thirds of it covered. Leave the bottom third bare so people have a clean place to hold it. Otherwise, you end up with chocolate all over your fingers, which defeats the purpose of a handheld treat. Learn from my sticky mistakes.
The almond placement matters. I once put the almonds on upside down (pointed end inward) and they looked like weird toes instead of witch fingers. The pointed end should always face outward, past the chocolate. Also, press them gently—if you push too hard, the almond sinks into the chocolate and you lose the fingernail effect. A light touch with a toothpick is all you need.
Work in batches. If you’re making a large batch, don’t dip all the pretzels at once. The chocolate in the bowl will start to cool and thicken, making it harder to get a smooth coat. Reheat it in 15-second bursts as needed. I usually dip 6 to 8 pretzels at a time, then reheat the chocolate before continuing.
Timing strategy: Make the witch finger pretzel rods the day before your event. They actually taste better after sitting overnight—the flavors meld, and the chocolate sets perfectly. Plus, you free up your Halloween day for costume emergencies and last-minute candy runs. I always double the batch now because they disappear fast.
Variations & Adaptations
One of the best things about this recipe is how easy it is to change up. Here are some variations I’ve tried and loved.
Chocolate Witch Fingers: Use dark or milk chocolate instead of white chocolate. The look is less pale and eerie, but the flavor is richer. I use dark chocolate with a high cocoa percentage (60% or more) to balance the saltiness of the pretzel. For the fingernails, use white chocolate chips or even sliced almonds—the contrast is striking.
Monster Fingers: Skip the green food coloring and leave the white chocolate plain. Instead of slivered almonds, press a candy eyeball into the tip of each pretzel rod. Add a few dots of red gel coloring for a “bloodshot” effect. These are less scary and more silly, which is perfect for younger kids.
Mummy Pretzels: After dipping the pretzel in white chocolate, let it set partially (about 5 minutes in the fridge). Then use a piping bag with a small tip to drizzle extra white chocolate back and forth across the pretzel, creating a wrapped mummy effect. Add two tiny candy eyes peeking out from the “bandages.” This one takes a little more time but looks amazing.
Spider Web Fingers: Once the base chocolate is set, melt a small amount of dark chocolate and pipe thin concentric circles on the flat side of the pretzel. Use a toothpick to drag lines from the center outward, creating a web pattern. Place a small candy spider on the web. This is my go-to for Halloween parties where I want to show off a little.
Vegan Option: Use dairy-free white chocolate (I like King David brand) and ensure your pretzels are vegan (most are). The process is exactly the same. The texture is slightly different—dairy-free white chocolate can be a bit softer—but the taste is still fantastic. I’ve served these to vegan friends and non-vegan friends alike, and nobody complained.
Gluten-Free Adaptation: Swap regular pretzel rods for gluten-free pretzel rods. Snyder’s of Hanover makes a good gluten-free pretzel rod that holds up well. Everything else in the recipe is naturally gluten-free, so you’re good to go. Just double-check your white chocolate—some brands add wheat-based ingredients as thickeners.
Serving & Storage Suggestions
These witch finger pretzel rods are best served at room temperature, which is convenient because that’s how they store. Arrange them on a platter with the “fingernails” pointing outward for maximum creep factor. I like to scatter a few loose slivered almonds around the platter like “clippings” for an extra gross touch—kids love it.
For a Halloween party: Stand the pretzel rods upright in a tall glass jar or a clean flower pot filled with popped popcorn or crumpled black tissue paper. They look like a bouquet of witch fingers reaching up from the pot. It’s a conversation starter and makes it easy for guests to grab one. I did this last year and someone took a picture for Instagram before even saying hello.
Pairing suggestions: These go great with warm apple cider, hot chocolate, or even a pumpkin spice latte. The salty-sweet flavor complements the spices. For a savory balance, serve them alongside a cheese board or some roasted nuts. They also work as a dessert after a hearty bowl of chili—the contrast is perfect.
Storage: Keep the witch finger pretzel rods in an airtight container at room temperature. Layer them between sheets of parchment paper so the chocolate doesn’t stick together. They’ll stay fresh for up to a week, though the pretzels may soften slightly after day four. If you live in a humid climate, store them in the refrigerator to keep the pretzels crunchy. Let them come to room temperature before serving to avoid condensation on the chocolate.
Freezing: You can freeze these for up to three months. Place them in a single layer on a baking sheet and freeze until solid (about an hour), then transfer to a freezer-safe container with parchment between layers. Thaw at room temperature for about 30 minutes before serving. The texture holds up surprisingly well—I’ve pulled these out for last-minute Halloween gatherings and nobody could tell they were frozen.
Flavor development: Honestly, these taste best the day after you make them. The chocolate sets completely, and the salt from the pretzel melds with the sweetness in a way that’s just right. If you can resist eating them all on day one, you’ll be rewarded on day two.
Nutritional Information & Benefits
Let’s be real—these are a treat, not a health food. But here’s the breakdown so you know what you’re working with. Per one witch finger pretzel rod (assuming you get about 12 from a standard bag), here’s the approximate nutritional info:
| Nutrient | Amount per serving |
|---|---|
| Calories | 180-200 |
| Total Fat | 10-12g |
| Saturated Fat | 6-7g |
| Carbohydrates | 22-25g |
| Sugar | 14-16g |
| Protein | 3-4g |
| Sodium | 200-250mg |
Health Benefits (such as they are): White chocolate contains calcium from the milk solids, which is good for bone health. Almonds provide vitamin E, healthy fats, and a bit of fiber. And pretzels are low in fat (before you coat them in chocolate, anyway). Look, I’m not saying these are a superfood. But in the grand scheme of Halloween treats, they’re not the worst option. The portion control is built in—one rod feels satisfying, and it’s easy to stop there.
Dietary Considerations: This recipe contains dairy (white chocolate) and gluten (pretzels). It also contains tree nuts (almonds). For a dairy-free version, use vegan white chocolate. For a gluten-free version, use gluten-free pretzel rods. The almond slivers can be replaced with pumpkin seeds for a nut-free option. Always check labels if you’re serving people with allergies—some white chocolate brands process nuts on shared equipment.
My perspective: I believe in enjoying treats without guilt. Halloween comes once a year, and a few witch finger pretzel rods aren’t going to derail anyone’s healthy eating habits. The key is balance—enjoy one or two, savor them, and move on. That’s a healthier relationship with food than any diet plan I’ve ever tried.
Conclusion
These quick witch finger pretzel rods have become my go-to Halloween treat for a reason. They’re fast, they’re fun, and they actually look creepy without requiring any artistic talent. I’ve made them for costume parties, classroom celebrations, and lazy October evenings when I just want something festive without a huge mess. Every time, someone asks for the recipe.
What I love most is how adaptable they are. You can keep them simple or go all out with extra decorations. You can make them with your kids on a Tuesday night or whip up a batch before a party in twenty minutes flat. They meet you where you are, which is exactly what a weeknight recipe should do.
So grab a bag of pretzel rods and some white chocolate. Give these a try, and don’t be afraid to make them your own. Maybe you’ll add extra green coloring for a more intense hue, or maybe you’ll skip the almonds and use candy eyes instead. The recipe is just a starting point—the best version is the one that makes you smile.
I’d love to hear how yours turn out. Drop a comment below with your variations, tag me in your photos, or share your own Halloween treat tips. Let’s make this October the most delicious one yet!
Frequently Asked Questions
Can I use white chocolate chips instead of melting wafers?
Yes, you can. White chocolate chips work fine, but they’re a little thicker and more prone to seizing. Add a teaspoon of coconut oil or vegetable shortening to help them melt smoothly. Stir frequently and use low heat in the microwave.
How do I keep the almond fingernails from falling off?
Press the almond into the chocolate while it’s still wet, and use a toothpick to gently secure it. Make sure the chocolate completely surrounds the base of the almond. If you’re having trouble, let the chocolate cool for a minute so it’s slightly thicker—it will hold the almond better.
Can I make these ahead of time for a party?
Absolutely. These store beautifully at room temperature for up to a week. I actually prefer making them a day ahead because the flavors meld and the chocolate sets perfectly. Just keep them in an airtight container with parchment between layers.
My white chocolate seized and turned grainy. Can I fix it?
Sometimes you can save seized chocolate by adding a teaspoon of hot water or coconut oil and stirring vigorously. If it doesn’t smooth out, you can use it as a topping or mix it into another recipe. For best results, always melt white chocolate at low power and stir frequently to prevent seizing in the first place.
Are these safe for kids with nut allergies?
The almond slivers are a tree nut, so this recipe is not nut-free. For a nut-free version, replace the almonds with pumpkin seeds or sunflower seeds. They won’t look exactly like fingernails, but they still add a creepy texture. Always check your white chocolate label for cross-contamination warnings if allergies are a concern.
Pin This Recipe!

Quick Witch Finger Pretzel Rods: Easy Halloween Treat

These spooky witch finger pretzel rods are a quick and easy Halloween treat that comes together in under 20 minutes. Made with just 4 ingredients, they’re perfect for last-minute parties and kid-friendly fun.
- Prep Time: 10 minutes
- Cook Time: 10 minutes
- Total Time: 20 minutes
- Yield: 12 servings 1x
- Category: Dessert
- Cuisine: American
Ingredients
- 1 standard bag (about 12 ounces) pretzel rods
- 2 cups (about 12 ounces) white chocolate melting wafers or white chocolate chips
- ¼ cup slivered almonds
- A few drops green gel food coloring
- Optional: edible eyeballs or sprinkles for decoration
Instructions
- Set up your workspace: Line a baking sheet with parchment paper. Lay out pretzel rods, slivered almonds, and any decorations nearby. Have green gel food coloring and a toothpick ready.
- Melt the white chocolate: Place white chocolate wafers or chips in a microwave-safe bowl. Microwave in 30-second intervals at 50% power, stirring thoroughly after each interval, until almost melted (about 1.5 to 2 minutes total). Stir until smooth. If using chips and the mixture seems thick, stir in ½ teaspoon of coconut oil.
- Tint the chocolate: Add one drop of green gel food coloring to the melted white chocolate and stir completely. Add another drop if a stronger green is desired, but aim for a pale, sickly green.
- Dip the pretzel rods: Hold a pretzel rod by one end and dip it into the melted chocolate, tilting the bowl to get good coverage. Rotate the pretzel as you lift it out, letting excess drip back into the bowl. Scrape the bottom against the rim of the bowl to remove extra chocolate. Place the coated pretzel on the parchment-lined baking sheet.
- Add the fingernail: While the chocolate is still wet, press a slivered almond onto the tip of the pretzel rod, with the pointed end extending slightly beyond the chocolate. Gently press it down with a toothpick so it adheres.
- Create the knuckle wrinkles: Use a toothpick to draw small horizontal lines across the chocolate coating, mimicking the wrinkles and creases of a finger joint. Make two or three lines about an inch from the tip, and another set a couple inches down.
- Chill to set: Place the baking sheet in the refrigerator for 10 to 15 minutes, until the chocolate is completely firm. Alternatively, freeze for 5 minutes, but watch closely so the chocolate doesn’t crack.
- Add final details (optional): Once set, drizzle with additional melted white chocolate for a ‘dried skin’ effect, dust with cocoa powder, or add red gel coloring for a blood drip effect near the fingernails.
- Serve or store: Transfer to a serving platter or store in an airtight container at room temperature for up to a week.
Notes
White chocolate is temperamental; melt at 50% power in the microwave and stir frequently to prevent seizing. Don’t over-dip the pretzels—leave the bottom third bare for a clean hold. Work in batches to keep the chocolate from cooling and thickening. These taste even better the day after they’re made.
Nutrition
- Serving Size: 1 witch finger pretz
- Calories: 190
- Sugar: 15
- Sodium: 225
- Fat: 11
- Saturated Fat: 6.5
- Carbohydrates: 23
- Fiber: 1
- Protein: 3.5
Keywords: Halloween treats, witch fingers, pretzel rods, white chocolate, easy Halloween recipe, no-bake dessert, spooky snacks


