There used to be a tiny, slightly crooked bakery called “The Midnight Whisk” tucked away on a side street in the old part of town. It was the kind of place that smelled like toasted sugar and vanilla no matter the season, and they made these incredible black cat-shaped peanut butter cookies every October. When they closed their doors two years ago—just a handwritten sign on the door saying “Thanks for the memories”—I honestly felt a little pang of loss. After about seven tries, including one batch that looked more like sad, flat blobs than cats, I finally cracked the code. These cozy black cat peanut butter cookie sandwiches are the result, and let me tell you, they taste exactly like those chilly autumn afternoons at The Whisk. Maybe you’ve had that experience where a specific treat just feels like a warm hug. That’s what these are.
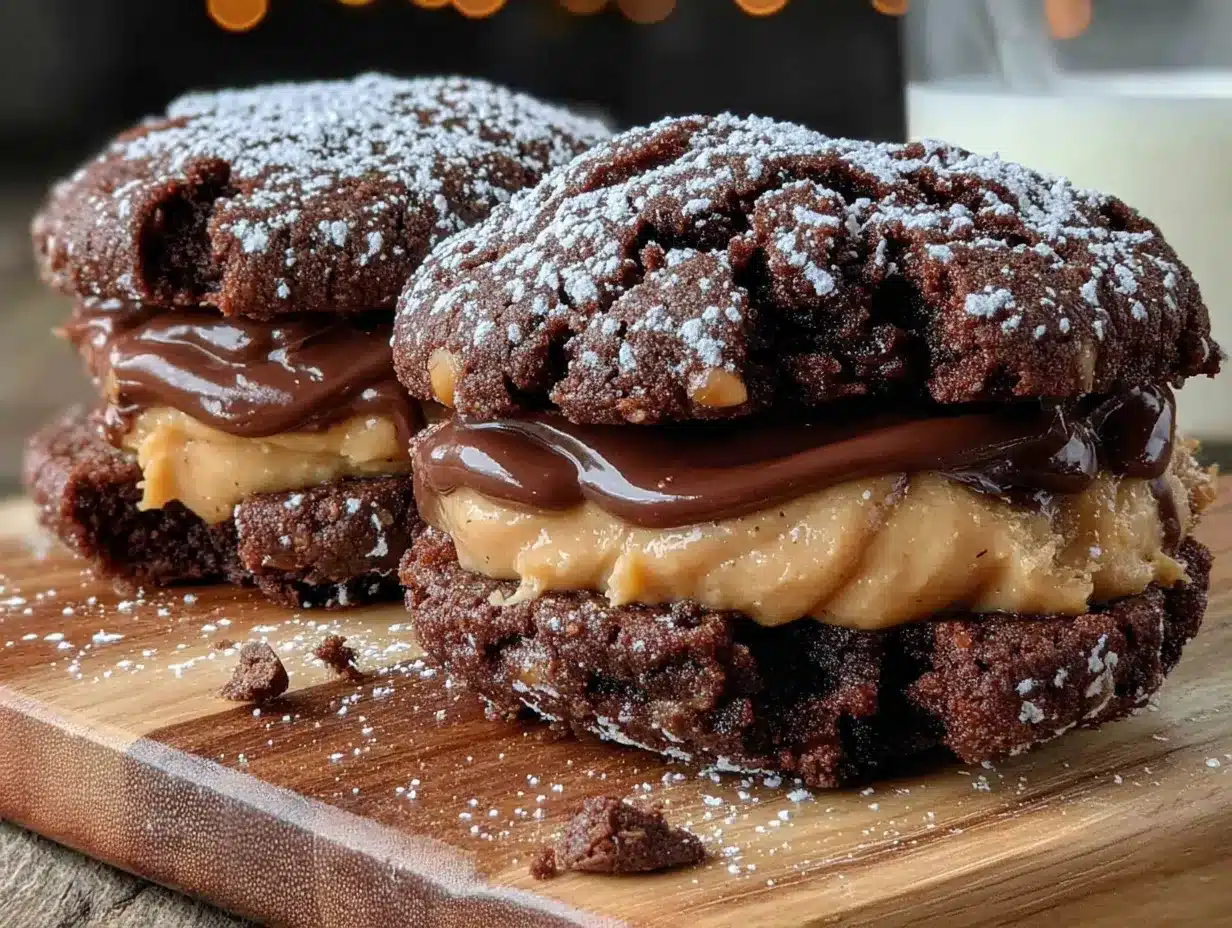
These aren’t just cookies. They’re little sandwich cookies filled with a creamy, dreamy peanut butter filling, shaped like the most adorable black cats you’ve ever seen. They’re the perfect Halloween treat that doesn’t scream “spooky” but rather whispers “cozy.” I mean, who can resist a peanut butter cookie sandwich? Especially one that looks like a cute little feline friend.
Why You’ll Love This Recipe
Let’s be real for a second. Halloween baking can be a bit of a mess sometimes. You’ve got complicated sugar cookie cutouts, sticky frosting, and a whole lot of stress. These cozy black cat peanut butter cookie sandwiches are the complete opposite. They’re the kind of recipe that makes you look like a kitchen wizard without actually having to work that hard.
- Quick & Easy: From start to finish, these come together in under an hour. The dough chills for just 20 minutes, and the cookies bake in about 10 minutes. Perfect for a last-minute Halloween party or a cozy night in.
- Simple Ingredients: You probably have most of these in your pantry right now. Peanut butter, butter, sugar, flour, eggs—the usual suspects. No fancy extracts or hard-to-find decorations.
- Perfect for Halloween Fun: Whether you’re hosting a spooky movie night, a kid’s costume party, or just want a fun treat for the family, these cookies deliver. They’re cute without being creepy.
- Crowd-Pleaser: I’ve brought these to three different gatherings now, and they disappear every single time. Kids love the cat shape, and adults can’t resist that peanut butter filling combo.
- Unbelievably Delicious: The cookie itself is soft, chewy, and packed with peanut butter flavor. Then you add that creamy filling, and honestly, it’s next-level comfort food. You’ll close your eyes after the first bite.
What makes this recipe different from all the other peanut butter cookie recipes out there? It’s the texture. I spent a whole weekend testing different ratios of butter to peanut butter until I got that perfect balance—crispy on the outside, soft in the middle. Plus, the black cocoa powder gives them that deep, dark color without any artificial food coloring. It’s a small detail, but it makes a huge difference. This isn’t just another cookie recipe. This is your new go-to Halloween treat.
What Ingredients You Will Need
This recipe uses simple, wholesome ingredients to deliver that bold peanut butter flavor and satisfying texture without any fuss. Most of these are pantry staples you probably already have on hand, which makes this perfect for spontaneous baking sessions. Let’s break down what you’ll need for both the cookies and the filling.
For the Black Cat Peanut Butter Cookies
- Unsalted butter, softened – 1/2 cup (1 stick / 113g). Make sure it’s truly at room temperature, not melted. This helps the cookies spread just right.
- Creamy peanut butter – 1/2 cup (130g). I prefer Skippy or Jif for consistent results, but any brand works. Do not use natural, oily peanut butter here; it changes the texture.
- Granulated sugar – 1/2 cup (100g). Adds sweetness and helps with that slight crisp edge.
- Light brown sugar, packed – 1/2 cup (100g). This gives the cookies moisture and a deeper flavor.
- Large egg – 1, at room temperature. If you forget to take it out early, place it in a bowl of warm water for 5 minutes.
- Vanilla extract – 1 teaspoon. Pure vanilla is best, but imitation works in a pinch.
- All-purpose flour – 1 1/4 cups (156g). Spoon and level it—don’t scoop directly from the bag or you’ll end up with dry cookies.
- Black cocoa powder – 1/4 cup (20g). This is the magic ingredient for that dark, rich color. I recommend Rodelle brand for the best deep black hue. Regular cocoa powder won’t give you the same effect.
- Baking soda – 1/2 teaspoon. Helps the cookies spread slightly and stay tender.
- Salt – 1/4 teaspoon. Balances the sweetness and enhances the peanut butter flavor.
For the Creamy Peanut Butter Filling
- Creamy peanut butter – 1/4 cup (65g). Same brand as the cookies for consistency.
- Unsalted butter, softened – 2 tablespoons (28g). Softened, not melted.
- Powdered sugar – 1 cup (120g). Sift it if it’s lumpy for a silky smooth filling.
- Heavy cream – 2 to 3 tablespoons (30-45ml). Start with 2 and add more if needed for spreading consistency.
- Vanilla extract – 1/2 teaspoon. Just a touch for flavor.
- Pinch of salt – Optional, but recommended if using unsalted peanut butter.
For Decoration (Optional but Fun)
- Mini chocolate chips – For the cat eyes. About 24 chips for 12 cookies (24 sandwich halves).
- Black licorice strings or dark chocolate melts – For whiskers. I’ve used both, and the chocolate melts are easier to work with.
Equipment Needed
You don’t need a fancy kitchen to make these cozy black cat peanut butter cookie sandwiches. Here’s what you’ll actually use:
- Electric mixer – Handheld or stand mixer works. I’ve made these with a hand mixer for years. It’s easier for creaming the butter and sugar together.
- Large mixing bowls – One for the wet ingredients, one for the dry.
- Whisk and spatula – For combining dry ingredients and folding everything together.
- Cat-shaped cookie cutter – About 2.5 to 3 inches in size. I found mine at a local baking supply store, but you can find them online easily. A simple cat face shape works best.
- Baking sheets – Two standard half-sheet pans. Line them with parchment paper for easy cleanup.
- Cooling rack – Wire rack for cooling the cookies completely before assembling.
- Piping bag or small zip-top bag – For the filling. A zip-top bag with the corner snipped works perfectly. No need to buy a fancy piping set.
- Rolling pin – For rolling out the dough evenly. I use a simple wooden one.
- Plastic wrap – For chilling the dough.
If you don’t have a cat cookie cutter, you can use a round cutter and just draw a cat face with frosting. Honestly, I’ve done that before when my cat cutter mysteriously disappeared (I think my actual cat hid it). It still works!
Preparation Method
Alright, let’s get baking. This recipe is straightforward, but there are a few little tricks I’ve learned through my seven attempts that make all the difference. Follow these steps, and you’ll have the most adorable, delicious black cat cookies on the block.
Step 1: Make the Cookie Dough
In a large mixing bowl, beat together the softened butter, creamy peanut butter, granulated sugar, and brown sugar with your electric mixer on medium speed. Beat for about 2 to 3 minutes until the mixture is light, fluffy, and well combined. You’ll notice it gets a bit paler in color—that’s a good sign. Add the egg and vanilla extract, then beat again until everything is smooth. Scrape down the sides of the bowl with your spatula once or twice to make sure it’s all incorporated.
Step 2: Combine the Dry Ingredients
In a separate, medium-sized bowl, whisk together the all-purpose flour, black cocoa powder, baking soda, and salt. Make sure the cocoa powder is fully mixed in—you don’t want any white streaks of flour later. The black cocoa powder might make a bit of a mess, so be careful not to sneeze near it. I learned that one the hard way. My kitchen looked like a crime scene.
Step 3: Mix Wet and Dry Together
Gradually add the dry ingredients to the wet mixture, mixing on low speed. Add it in about three additions, mixing just until the flour disappears after each one. Don’t overmix. Once you’ve added all the dry ingredients and the dough comes together, it will be slightly sticky but should hold its shape when pressed. If it feels too sticky, add an extra tablespoon of flour. If it’s too dry, add a teaspoon of milk.
Step 4: Chill the Dough
Turn the dough out onto a piece of plastic wrap. Flatten it into a disc about 1 inch thick, wrap it tightly, and place it in the refrigerator for at least 20 minutes. This is crucial. Chilling the dough prevents the cookies from spreading too much and losing their cat shape. I once skipped this step because I was in a hurry, and my cats turned into amorphous blobs. They still tasted good, but they looked more like potatoes than cats.
Step 5: Preheat and Prep
While the dough chills, preheat your oven to 350°F (175°C). Line two baking sheets with parchment paper. This ensures the cookies don’t stick and makes cleanup a breeze.
Step 6: Roll and Cut
Lightly flour your work surface and your rolling pin. Unwrap the chilled dough and roll it out to about 1/4 inch thickness. If the dough cracks at the edges, just press it back together with your fingers. Use your cat-shaped cookie cutter to cut out as many cookies as you can. Press straight down and lift up—don’t twist the cutter, or the edges will seal and the cookies won’t have clean shapes. Place the cut cookies about 1 inch apart on the prepared baking sheets. Gather the scraps, re-roll, and cut again. You should get about 24 cookies total (which will make 12 sandwiches).
Step 7: Bake the Cookies
Bake the cookies for 8 to 10 minutes. They should look set around the edges but still slightly soft in the center. Don’t overbake them—they’ll continue to cook slightly on the hot baking sheet after you take them out. Let them cool on the baking sheet for 5 minutes, then transfer them to a wire rack to cool completely. I know it’s tempting, but don’t try to fill them while they’re warm. The filling will just melt and slide off.
Step 8: Make the Peanut Butter Filling
While the cookies are cooling, make the filling. In a medium bowl, beat together the softened butter and creamy peanut butter with your mixer until smooth and creamy. Gradually add the powdered sugar, beating on low speed at first to avoid a sugar cloud. Add the vanilla extract and 2 tablespoons of heavy cream. Beat on medium-high until the filling is light, fluffy, and spreadable. If it’s too thick, add the remaining tablespoon of heavy cream. If it’s too thin, add a little more powdered sugar.
Step 9: Assemble the Sandwiches
Once the cookies are completely cool, pair them up by size and shape. Transfer the filling to a piping bag or a zip-top bag with a small corner snipped off. Pipe a generous dollop of filling onto the flat side of one cookie. Place another cookie on top, flat side down, and gently press until the filling reaches the edges. Repeat with all the cookie pairs.
Step 10: Decorate the Cat Faces
This is the fun part. For the eyes, press two mini chocolate chips into the filling on the top cookie, pointed side down. For the whiskers, use small pieces of black licorice strings or pipe tiny lines with melted dark chocolate. I prefer the chocolate because it stays put better. You can also add a tiny dot of filling for a little nose if you want. Let the assembled sandwiches set for about 10 minutes before serving.
Cooking Tips & Techniques
I’ve made these cozy black cat peanut butter cookie sandwiches about a dozen times now, and I’ve picked up a few tricks along the way. Let me save you from my early mistakes.
Don’t Skip the Chill Time. I cannot stress this enough. The dough needs at least 20 minutes in the fridge. If you’re in a warm kitchen, even 30 minutes is better. Chilled dough holds its shape so much better in the oven. My first batch spread into weird, flat discs because I was impatient.
Use Fresh Baking Soda. Baking soda loses its potency over time. If your cookies aren’t spreading at all or are coming out too dense, your baking soda might be old. Test it by dropping a little into vinegar—if it fizzes vigorously, it’s good.
Roll Evenly. Use two wooden spoons or rolling pin guides to ensure your dough is rolled to an even thickness. This way, all your cookies bake at the same rate. Uneven cookies mean some will be crispy and some will be underdone.
Let Cookies Cool Completely. I know, I know. The smell of peanut butter cookies fresh from the oven is intoxicating. But if you try to fill them while they’re warm, the filling will turn into a melty mess. Patience, my friend. Let them cool fully on a wire rack.
Double the Batch. Honestly, these cookies disappear fast. If you’re making them for a party or a gathering, double the recipe. They freeze beautifully, too, so you can have a stash ready for last-minute Halloween cravings.
Watch the Oven. Every oven runs a little differently. Start checking your cookies at the 8-minute mark. You want them set around the edges but still soft in the center. If you wait until they look “done” all over, they’ll be overbaked and crunchy.
Variations & Adaptations
One of the best things about this recipe is how flexible it is. You can tweak it to fit different diets, occasions, or just your personal mood. Here are some variations I’ve tried and loved.
Gluten-Free Version
Swap the all-purpose flour with a 1:1 gluten-free baking flour blend. I’ve used King Arthur Measure for Measure with great success. The texture will be slightly more delicate, so handle the dough gently. You might need to chill it for an extra 10 minutes.
Vegan Version
Use vegan butter (like Earth Balance) and a flax egg (1 tablespoon ground flaxseed mixed with 3 tablespoons water, let sit for 5 minutes). For the filling, use vegan butter and a plant-based heavy cream alternative. The cookies will be a bit more crumbly, but the flavor is still spot on.
White Cat Variation
If black cats aren’t your thing, or you want a different look, omit the black cocoa powder and add 1/4 cup more all-purpose flour. You’ll get a classic golden peanut butter cookie. Decorate with white chocolate chips for the eyes and pink frosting for the nose. My niece loves these.
Stuffed Cat Cookies
Instead of making sandwiches, you can stuff the cookies. Roll the dough into balls, press a small piece of chocolate or a mini peanut butter cup into the center, and seal the dough around it. Bake as usual. They’re like little peanut butter cookie surprises.
Spooky Spider Web Design
For a more Halloween-themed look, drizzle melted white chocolate over the assembled sandwiches in a spider web pattern. Use a toothpick to drag the lines from the center outward. It’s easier than it sounds and looks incredibly impressive.
Serving & Storage Suggestions
These cookies are best served at room temperature, which lets the filling stay creamy and the cookies stay chewy. Arrange them on a cute platter or a cake stand for a Halloween party. They look adorable next to a bowl of candy corn or some caramel apples.
For a cozy night in, serve them with a cold glass of milk or a warm cup of hot chocolate. The combination of peanut butter and chocolate (if you used chocolate chips for the eyes) is unbeatable. I’ve also been known to enjoy one with a cup of black coffee in the morning—don’t judge me.
Storage: Store the assembled sandwich cookies in an airtight container at room temperature for up to 4 days. Place a sheet of parchment paper between layers to prevent them from sticking together. If you live in a warm climate, you might want to keep them in the fridge so the filling doesn’t soften too much.
Freezing: These cookies freeze wonderfully. You can freeze the unfilled cookies for up to 3 months. Just layer them between parchment paper in a freezer-safe container. When you’re ready to serve, thaw them at room temperature, make the filling, and assemble. Alternatively, you can freeze the assembled sandwiches. Wrap each one individually in plastic wrap, then place them in a freezer bag. Thaw in the fridge overnight. The flavor actually gets better after a day or two in the fridge—the filling sets up perfectly.
Reheating: If you want that just-baked warmth, pop a cookie sandwich in the microwave for about 10 seconds. Be careful not to overdo it, or the filling will melt. A quick zap is all you need.
Nutritional Information & Benefits
Let’s be honest—these are a treat, not a health food. But there are a few redeeming qualities worth mentioning. Each cookie sandwich (with filling) contains approximately:
| Nutrient | Amount per Sandwich |
|---|---|
| Calories | 285 |
| Total Fat | 16g |
| Saturated Fat | 7g |
| Carbohydrates | 31g |
| Sugar | 20g |
| Protein | 7g |
| Fiber | 2g |
Health Highlights: Peanut butter is a good source of plant-based protein and healthy fats. It also contains vitamin E, magnesium, and potassium. The black cocoa powder adds antioxidants without a ton of extra sugar. Of course, these are still cookies, so enjoy them in moderation. But I always feel a little better knowing there’s some protein in my dessert.
Dietary Considerations: This recipe contains peanuts, dairy (butter, heavy cream), eggs, and gluten. For a dairy-free version, use vegan butter and a plant-based cream. For egg-free, use a flax egg. For gluten-free, use a 1:1 gluten-free flour blend. Always check your ingredient labels if you’re cooking for someone with allergies.
Conclusion
These cozy black cat peanut butter cookie sandwiches are more than just a Halloween treat. They’re a little piece of nostalgia, a tiny tribute to that bakery that closed too soon, and a whole lot of deliciousness wrapped up in an adorable package. I’ve made them for Halloween parties, movie nights, and even just because it was a Tuesday. Every time, they bring a smile to someone’s face.
I really hope you give these a try. Don’t be afraid to make them your own—add different decorations, try the variations, or just enjoy them as is. The best recipes are the ones that feel like yours, you know? If you make them, I’d love to hear about it. Leave a comment below and tell me how they turned out. Did you add whiskers? Did your cat try to steal one? (Mine did.) Share your photos and tag me on social media. Let’s make this Halloween a little cozier, one peanut butter cookie at a time.
Frequently Asked Questions
Can I use natural peanut butter for this recipe?
I don’t recommend it. Natural peanut butter has a higher oil content and tends to separate, which can make the cookies spread too much and become greasy. Stick with a standard creamy peanut butter like Jif or Skippy for the best texture and consistency.
Why did my cookies turn out gray instead of black?
That usually means you didn’t use enough black cocoa powder, or you used regular cocoa powder. Black cocoa powder is much darker and has a different flavor profile. If you used the right amount and they still look gray, try adding an extra tablespoon of black cocoa powder next time. Also, make sure your baking soda is fresh—old baking soda can affect the color.
Can I make the dough ahead of time?
Absolutely. You can make the dough up to 3 days in advance and keep it wrapped tightly in the refrigerator. When you’re ready to bake, let it sit at room temperature for about 10 minutes to soften slightly before rolling. You can also freeze the dough disc for up to 3 months. Thaw it overnight in the fridge before using.
How do I keep the cat shape from spreading too much?
Chill the dough thoroughly before rolling and cutting. Also, make sure your baking sheets are cool before placing the cut cookies on them. If you’re reusing a hot baking sheet, the dough will start melting before it even goes in the oven. Chill the cut cookies on the baking sheet for 5 minutes before baking if your kitchen is warm.
Can I skip the black cocoa powder and use regular cocoa powder?
You can, but the cookies will be a dark brown color, not black. The flavor will also change—black cocoa powder has a more mild, Oreo-like taste, while regular cocoa is more intense and slightly bitter. If you use regular cocoa, reduce the amount to 2 tablespoons and add 2 tablespoons more flour to balance the texture.
Pin This Recipe!

Cozy Black Cat Peanut Butter Cookie Sandwiches – Easy Halloween Treat

These adorable black cat-shaped peanut butter cookie sandwiches are filled with a creamy peanut butter filling. They’re the perfect Halloween treat that whispers ‘cozy’ instead of screaming ‘spooky,’ and they come together in under an hour.
- Prep Time: 20 minutes
- Cook Time: 10 minutes
- Total Time: 45 minutes
- Yield: 12 servings 1x
- Category: Dessert
- Cuisine: American
Ingredients
- 1/2 cup (1 stick / 113g) unsalted butter, softened
- 1/2 cup (130g) creamy peanut butter (e.g., Skippy or Jif)
- 1/2 cup (100g) granulated sugar
- 1/2 cup (100g) light brown sugar, packed
- 1 large egg, at room temperature
- 1 teaspoon vanilla extract
- 1 1/4 cups (156g) all-purpose flour
- 1/4 cup (20g) black cocoa powder (e.g., Rodelle brand)
- 1/2 teaspoon baking soda
- 1/4 teaspoon salt
- 1/4 cup (65g) creamy peanut butter (for filling)
- 2 tablespoons (28g) unsalted butter, softened (for filling)
- 1 cup (120g) powdered sugar, sifted (for filling)
- 2 to 3 tablespoons (30-45ml) heavy cream (for filling)
- 1/2 teaspoon vanilla extract (for filling)
- Pinch of salt (optional, for filling)
- Mini chocolate chips (for cat eyes, about 24 chips)
- Black licorice strings or dark chocolate melts (for whiskers, optional)
Instructions
- In a large mixing bowl, beat together the softened butter, creamy peanut butter, granulated sugar, and brown sugar with an electric mixer on medium speed for 2-3 minutes until light and fluffy.
- Add the egg and vanilla extract, then beat until smooth. Scrape down the sides of the bowl as needed.
- In a separate medium bowl, whisk together the all-purpose flour, black cocoa powder, baking soda, and salt until fully combined.
- Gradually add the dry ingredients to the wet mixture in three additions, mixing on low speed just until the flour disappears after each addition. Do not overmix. The dough should be slightly sticky but hold its shape when pressed.
- Turn the dough out onto a piece of plastic wrap, flatten into a 1-inch thick disc, wrap tightly, and refrigerate for at least 20 minutes.
- Preheat the oven to 350°F (175°C). Line two baking sheets with parchment paper.
- Lightly flour a work surface and rolling pin. Roll the chilled dough to 1/4-inch thickness. Use a cat-shaped cookie cutter (about 2.5-3 inches) to cut out cookies. Press straight down and lift up without twisting. Place cookies 1 inch apart on prepared baking sheets. Gather scraps, re-roll, and cut again. You should get about 24 cookies total.
- Bake for 8-10 minutes, until edges are set but centers are still soft. Cool on the baking sheet for 5 minutes, then transfer to a wire rack to cool completely.
- While cookies cool, make the filling: In a medium bowl, beat together the softened butter and creamy peanut butter until smooth. Gradually add the powdered sugar, beating on low speed. Add vanilla extract and 2 tablespoons of heavy cream. Beat on medium-high until light and fluffy. If too thick, add remaining tablespoon of cream; if too thin, add more powdered sugar.
- Once cookies are completely cool, pair them by size. Transfer filling to a piping bag or zip-top bag with a small corner snipped off. Pipe a generous dollop onto the flat side of one cookie, top with another cookie (flat side down), and gently press until filling reaches edges.
- Decorate the cat faces: Press two mini chocolate chips into the filling on the top cookie for eyes (pointed side down). Add whiskers using small pieces of black licorice strings or piped melted dark chocolate. Optionally, add a tiny dot of filling for a nose. Let assembled sandwiches set for 10 minutes before serving.
Notes
Don’t skip chilling the dough—it prevents spreading. Use fresh baking soda for best results. Roll dough evenly using guides. Let cookies cool completely before filling to avoid melting the filling. Double the batch for parties; unfilled cookies freeze well for up to 3 months. Store assembled sandwiches in an airtight container at room temperature for up to 4 days, or refrigerate in warm climates.
Nutrition
- Serving Size: 1 cookie sandwich
- Calories: 285
- Sugar: 20
- Fat: 16
- Saturated Fat: 7
- Carbohydrates: 31
- Fiber: 2
- Protein: 7
Keywords: Halloween cookies, peanut butter cookies, black cat cookies, sandwich cookies, easy Halloween treat, peanut butter cookie sandwiches


