I was standing in the baking aisle of our local grocery store last November—a Tuesday, I think—when a whiff of something sweet and almost spicy hit me. It was coming from those pre-made sugar cookie tubes near the seasonal displays, and suddenly I was eight years old in my Aunt Margie’s tiny yellow kitchen. She wasn’t really my aunt, just our next-door neighbor, but she had this way of making you feel like family. The air in her kitchen always smelled like butter and vanilla, and she’d let me press the cookie cutters into the dough while she stood over the stove, stirring something that bubbled and smelled like autumn. I can still see the way the afternoon light came through her ruffled curtains, catching the little clouds of flour dust. She passed away about five years ago, and I haven’t thought about those afternoons in a long time. But standing there in that grocery store, surrounded by strangers and shopping carts, I missed her so much it almost knocked the breath out of me. You know that feeling when a memory hits you so hard you can practically taste it? That was me, frozen in the baking aisle with a package of sprinkles in my hand. I didn’t buy the tube cookies—I couldn’t. Instead, I went home and spent the next three days trying to recreate the sugar cookies we used to make together, the ones she’d decorate with little royal icing leaves for Thanksgiving. It took me a few tries, honestly. The first batch came out too flat, and the second batch had icing that ran right off the edges. But by the third attempt, I finally got it right. These Best Thanksgiving Sugar Cookies with Royal Icing Leaves are the result of that week of missing her and trying to hold onto a feeling I can’t quite describe. They’re the cookies I keep making, year after year, because they taste like those afternoons in her kitchen—and because they remind me that some things, like a really good sugar cookie, are worth getting right.
Why You’ll Love This Recipe
Let me be honest with you—I’ve tested a lot of sugar cookie recipes over the years, and most of them are either too fussy or just plain disappointing. But this one? This one is different. It’s the kind of cookie that makes you close your eyes after the first bite, and I’m not exaggerating. Here’s why you’re going to love it:
- Simple Ingredients : You probably have most of these in your pantry right now. No weird extracts, no hard-to-find flours—just butter, sugar, eggs, and a few basics. Perfect for feeding a family on a sensible budget.
- No Spreading : These cookies hold their shape beautifully, which means those little leaf cutters you spent money on will actually produce leaves, not blobs. I learned this the hard way, trust me.
- Royal Icing That Actually Works : I’ve included my foolproof method for royal icing that dries smooth and shiny. No more runny messes or lumpy disasters.
- Crowd-Pleaser : My kids, who usually pick around the decorations, ate three of these before I could even get them on the serving plate. They’re that good.
- Great for Thanksgiving : Whether you’re bringing a dessert to a family gathering or just want something special for your own table, these cookies fit right in. They’re festive without being over the top.
What makes this recipe different from all the other sugar cookie recipes out there? It’s the technique. Most recipes tell you to cream the butter and sugar until light and fluffy, but I’ve found that going just a little longer—until the mixture is almost pale and doubled in volume—gives you a cookie that’s tender but sturdy enough to hold icing. Plus, I use a tiny bit of cream cheese in the dough, which adds a subtle tang that balances the sweetness of the royal icing. It’s not your average sugar cookie, and that’s exactly the point.
What Ingredients You Will Need
This recipe uses simple, wholesome ingredients to deliver a sugar cookie that’s soft in the middle, slightly crisp at the edges, and perfect for decorating. Most of these are pantry staples, which is exactly what you want when you’re feeding a family on a budget.
For the Sugar Cookies
- Unsalted butter, softened (1 cup / 226g) — I prefer Land O’Lakes for consistent results, but any good-quality butter works. Make sure it’s truly softened, not melted.
- Granulated sugar (1 cup / 200g) — Regular white sugar is fine. Don’t use powdered sugar here; it changes the texture.
- Cream cheese, softened (2 oz / 57g) — This is my secret ingredient. It adds tenderness and a slight tang that makes the cookies taste more complex. Use full-fat for best results.
- Large egg (1) — Room temperature, please. Cold eggs can make the dough seize up.
- Vanilla extract (1 teaspoon) — Pure vanilla extract is worth the splurge here. Imitation works, but the flavor won’t be as rich.
- Almond extract (½ teaspoon) — Optional, but I love the subtle nutty flavor it adds. It pairs beautifully with the royal icing.
- All-purpose flour (2½ cups / 312g) — Spoon and level your flour. Scooping directly from the bag can give you too much, which makes dry cookies.
- Baking powder (½ teaspoon) — Make sure it’s fresh. Old baking powder won’t give you the right lift.
- Salt (½ teaspoon) — I use fine sea salt. It balances the sweetness.
For the Royal Icing
- Powdered sugar (2 cups / 240g) — Sift it if it’s lumpy. Nobody wants bumpy icing.
- Meringue powder (2 tablespoons) — You can find this at most craft stores or online. It stabilizes the icing and gives it that smooth, hard finish. (If you can’t find it, you can use 2 large egg whites instead, but meringue powder is safer since you don’t have to worry about raw eggs.)
- Warm water (3-4 tablespoons) — Add it slowly. You might not need all of it.
- Vanilla extract (½ teaspoon) — For flavor.
- Gel food coloring — I use Wilton brand in leaf green and autumn orange. Liquid food coloring can make the icing too runny.
For Decoration
- Leaf-shaped cookie cutters — A set of 3-4 different sizes looks nice. I got mine at a kitchen supply store for about $6.
- Piping bags or zip-top bags — Disposable piping bags are easiest, but a sturdy zip-top bag with a tiny corner snipped off works just fine.
- Small round piping tip (size 2 or 3) — For outlining and flooding the leaves.
- Edible glitter or sanding sugar (optional) — For a little sparkle. My kids love this part.
Equipment Needed
You don’t need a professional bakery setup for these cookies, but a few key tools will make your life much easier. Here’s what I use:
- Stand mixer or hand mixer — I’ve made this dough with both, and either works. A stand mixer is faster, but a hand mixer gets the job done. If you’re mixing by hand, just be prepared for a little arm workout.
- Rolling pin — I prefer a French-style rolling pin (the one without handles), but any rolling pin works. If you don’t have one, a clean wine bottle can work in a pinch—I’ve done it.
- Parchment paper — This is non-negotiable for me. It prevents sticking and makes cleanup so much easier. Plus, you can reuse the same sheet for multiple batches.
- Cookie sheets — Light-colored, rimmed baking sheets are best. Dark sheets can cause the bottoms to brown too quickly.
- Cooling rack — You need these so the cookies cool evenly. Stacking warm cookies on a plate will make them soggy.
- Leaf-shaped cookie cutters — As mentioned above. If you don’t have leaf cutters, you can use any shape and just decorate them with leaf patterns. I’ve done that before too.
- Piping bags and tips — For the royal icing. A small round tip (size 2 or 3) is all you need.
- Toothpicks — For popping air bubbles in the icing and for making little swirl patterns.
I bought most of my equipment at a local kitchen supply store, but you can find everything online too. The piping bags are reusable if you wash them carefully, which saves money in the long run. And honestly, if you’re just starting out, those disposable decorating bags from the grocery store work perfectly fine.
Preparation Method
Alright, let’s get to the good part. I’m going to walk you through this step by step, and I’ll include all the little tricks I’ve learned from making these cookies about a dozen times. Trust me, it’s worth reading through the whole method before you start.
Step 1: Make the Cookie Dough
In the bowl of your stand mixer (or a large bowl if using a hand mixer), beat the softened butter, cream cheese, and granulated sugar together on medium speed until the mixture is light and fluffy. This takes about 3-4 minutes. You want it to look almost pale and doubled in volume. Don’t rush this step—it’s what gives the cookies their tender texture. Scrape down the sides of the bowl once or twice.
Add the egg, vanilla extract, and almond extract (if using). Beat on medium speed until everything is well combined, about 1 minute. The mixture might look a little curdled at this point, but that’s okay. It will come together when you add the flour.
In a separate bowl, whisk together the all-purpose flour, baking powder, and salt. With the mixer on low speed, gradually add the dry ingredients to the wet ingredients. Mix just until the dough comes together. Stop as soon as you don’t see any more streaks of flour. Overmixing will make the cookies tough, and nobody wants that.
Step 2: Chill the Dough
Divide the dough into two equal portions. Flatten each portion into a disk about 1 inch thick, wrap them tightly in plastic wrap, and refrigerate for at least 2 hours. I know, I know—waiting is the worst part. But trust me, this is essential. Chilled dough is much easier to roll out, and it helps the cookies hold their shape while baking. If you try to roll the dough when it’s warm, it will stick to everything and spread into weird shapes in the oven. I learned this the hard way when I made my first batch and ended up with cookies that looked more like abstract art than leaves.
Pro tip: You can make the dough up to 3 days ahead and keep it in the fridge. Or freeze it for up to 3 months. Just thaw it in the refrigerator overnight before rolling.
Step 3: Roll and Cut
Preheat your oven to 350°F (175°C). Line two baking sheets with parchment paper.
Lightly flour your work surface and rolling pin. Take one disk of dough out of the fridge and let it sit at room temperature for about 5 minutes—just until it’s pliable enough to roll without cracking. Roll the dough to about ¼-inch thickness. I like to use two wooden dowels or rulers placed on either side of the dough as guides to ensure even thickness. If you don’t have those, just eyeball it and try to be consistent.
Cut out your leaf shapes using the cookie cutters. Dip the cutters in flour between cuts to prevent sticking. Use a thin spatula to transfer the cut cookies to the prepared baking sheets, spacing them about 2 inches apart. They don’t spread much, but they need a little room.
Gather the scraps, gently press them together, and reroll. You can do this once or twice, but after that, the dough gets tough. I usually get about 24-30 cookies, depending on the size of your cutters.
Step 4: Bake
Bake the cookies for 8-10 minutes, or until the edges are just barely golden. The centers should look set but not brown. Don’t overbake—sugar cookies go from perfect to dry very quickly. I usually start checking at 8 minutes. The cookies will continue to set on the baking sheet as they cool.
Let the cookies cool on the baking sheet for 5 minutes, then transfer them to a wire rack to cool completely. Do not ice warm cookies—the royal icing will melt and slide right off. I’ve made that mistake, and it’s not pretty.
Step 5: Make the Royal Icing
In the bowl of your stand mixer (or a medium bowl if using a hand mixer), combine the powdered sugar and meringue powder. Add 3 tablespoons of warm water and the vanilla extract. Beat on low speed until combined, then increase to medium-high speed and beat for about 4-5 minutes, until the icing is thick, glossy, and holds stiff peaks. If it’s too thick, add more water, a teaspoon at a time. If it’s too thin, add more powdered sugar, a tablespoon at a time.
Divide the icing into separate bowls if you’re using multiple colors. Add gel food coloring a little at a time until you reach your desired shade. I usually make one bowl of autumn green and one bowl of warm orange, but you can do whatever colors you like.
Step 6: Decorate the Cookies
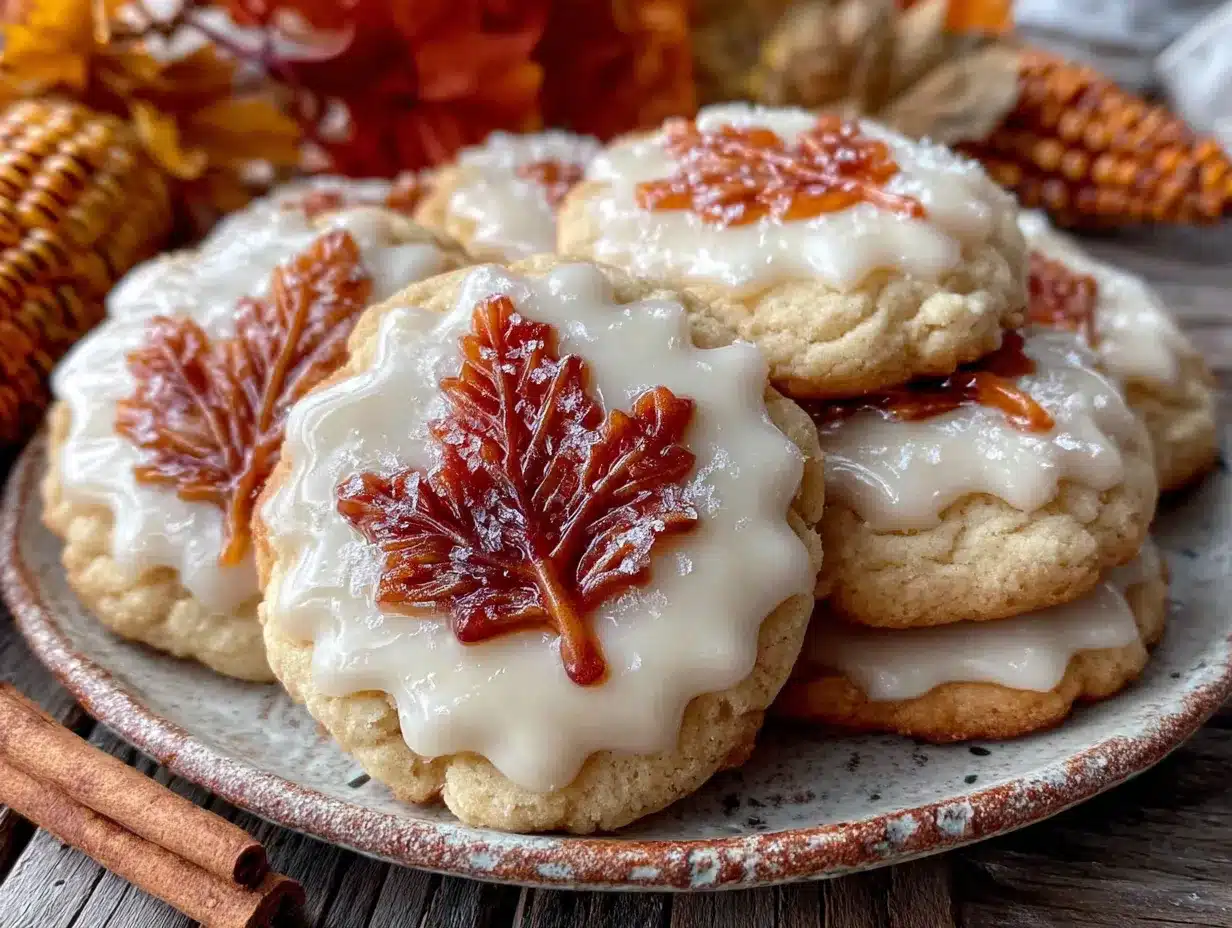
Fit your piping bag with a small round tip and fill it with icing. Outline each cookie with a thin line of icing, then fill in the center with more icing (this is called “flooding”). Use a toothpick to spread the icing into the corners and to pop any air bubbles. For the leaf veins, you can pipe thin lines of icing on top while the base is still wet, then drag a toothpick through them to create a feathered effect.
If you’re using edible glitter or sanding sugar, sprinkle it on while the icing is still wet. Let the cookies dry completely, which can take 4-6 hours or overnight. I usually decorate them in the evening and let them dry overnight.
Cooking Tips & Techniques
I’ve made enough mistakes with sugar cookies to fill a small book, so let me save you some trouble. Here are my best tips:
Measure your flour correctly. This is the number one mistake people make. If you scoop your measuring cup directly into the flour bag, you can end up with up to 25% more flour than you need. Instead, spoon the flour into the measuring cup and level it off with a knife. It takes an extra 10 seconds and makes a huge difference.
Don’t skip the cream cheese. I know it seems weird, but it’s what makes these cookies so tender. It also helps them stay soft for days, which is great if you’re making them ahead for Thanksgiving. I’ve had these cookies still taste fresh after 4 days in an airtight container.
Chill, chill, chill. If at any point your dough gets too soft to work with, just pop it back in the fridge for 15 minutes. I keep a small bowl of flour nearby and dip my cutters in it frequently. Sticky dough is the enemy of clean edges.
Use gel food coloring, not liquid. Liquid food coloring will thin out your royal icing and make it runny. Gel coloring gives you vibrant colors without changing the consistency. I learned this after a particularly sad batch of pastel-colored icing that looked more like soup than frosting.
Multitask wisely. While your first batch of cookies is baking, you can be rolling out the next batch. Just keep the unused dough in the fridge until you’re ready for it. And while the cookies are cooling, you can be making the icing. This way, everything comes together at about the same time.
Variations & Adaptations
One of the best things about this recipe is how adaptable it is. Here are some ways to make it your own:
Dietary variations: For a dairy-free version, substitute the butter with a high-quality vegan butter (I like Earth Balance) and use a dairy-free cream cheese alternative. The texture will be slightly different, but still delicious. For a gluten-free version, use a 1:1 gluten-free flour blend. I’ve tested this with Bob’s Red Mill and it worked well, though the cookies were a bit more delicate.
Flavor variations: Swap the vanilla extract for lemon or orange extract for a citrusy twist. Add a teaspoon of cinnamon or pumpkin pie spice to the dough for a more autumnal flavor. I made a batch with cinnamon last year, and they were gone before the turkey was even carved.
Seasonal adaptations: Use different cookie cutter shapes for different holidays. Christmas trees, snowflakes, hearts, flowers—the dough works with any shape. Just adjust the baking time slightly if your cutters are much larger or smaller.
Decoration variations: If royal icing feels too fussy, you can simply dust the cooled cookies with powdered sugar. Or melt some white chocolate chips and drizzle them over the cookies for a quick and easy decoration. I’ve done that on busy days, and they still look pretty on the plate.
Serving & Storage Suggestions
These cookies are best served at room temperature. I like to arrange them on a large platter or cake stand, mixing the different leaf colors together for a nice visual effect. They’re perfect for a Thanksgiving dessert table alongside pies and cakes, or you can package them up in little cellophane bags as favors for your guests.
Storage: Store the decorated cookies in an airtight container at room temperature for up to 5 days. Layer them between sheets of wax paper or parchment paper to prevent the icing from sticking. Do not refrigerate them—the humidity in the fridge can make the icing sticky and the cookies soft.
Freezing: You can freeze the undecorated baked cookies for up to 3 months. Just wrap them tightly in plastic wrap and then foil. Thaw at room temperature before decorating. I’ve also frozen the raw cookie dough disks for up to 3 months, which is great for making cookies on a whim.
Reheating: If you prefer your cookies slightly warm (I do!), pop them in a 300°F (150°C) oven for 3-4 minutes. But honestly, these are so good at room temperature that I rarely bother.
The flavors actually develop a bit over time. The cookies are at their best the day after baking—the texture softens slightly and the flavors meld together. So don’t stress about making them at the last minute. They’re actually better if you make them a day ahead.
Nutritional Information & Benefits
Let’s be real—these are sugar cookies, not health food. But I do believe in being transparent about what you’re eating. Here’s the estimated nutritional information per cookie (based on 24 cookies):
- Calories: 185
- Fat: 8g
- Carbohydrates: 27g
- Protein: 2g
- Sugar: 18g
That said, there are a few redeeming qualities. The cream cheese adds a small amount of protein and calcium. And if you use almond extract, you get a hint of that nutty flavor without any added fat or sugar. Mostly, though, these are a treat—and that’s okay. I believe in balance. Serve these alongside a healthy meal, and don’t feel guilty about enjoying one (or two).
For those with dietary concerns: these cookies contain dairy (butter, cream cheese), eggs, and gluten. The royal icing contains meringue powder, which is made from dried egg whites. If you’re avoiding raw eggs, the meringue powder is pasteurized and safe. For nut allergies, skip the almond extract and use extra vanilla instead.
Conclusion
These Best Thanksgiving Sugar Cookies with Royal Icing Leaves are more than just a pretty dessert. They’re the cookies I make when I want to feel connected to those afternoons in Aunt Margie’s kitchen, when the world felt simpler and a batch of cookies could make everything better. They’re the cookies my kids now ask for every Thanksgiving, the ones that disappear from the platter before dinner is even served. I hope they become that for you too—a tradition, a comfort, a little piece of joy on your holiday table.
Don’t be afraid to make them your own. Change the colors, try different shapes, experiment with the flavors. That’s the beauty of a good recipe—it’s a starting point, not a rulebook. And if your first batch isn’t perfect? That’s okay. Mine wasn’t either. Just keep baking, and I promise you’ll get there.
I’d love to hear how these turn out for you. Leave a comment below and let me know—did your kids help decorate? Did you try a different flavor? Did you eat three before they made it to the platter? (No judgment here.) Share your photos, your stories, your happy accidents. That’s what makes this community so special. Happy baking, and Happy Thanksgiving!
Frequently Asked Questions
Can I make these sugar cookies without royal icing?
Absolutely. If royal icing feels too complicated, you can skip it entirely. The cookies are delicious on their own, dusted with powdered sugar, or topped with a simple glaze made from powdered sugar and milk. You can also press sanding sugar into the dough before baking for a sparkly finish without any extra work.
Why did my cookies spread in the oven?
This usually happens for one of three reasons: your dough wasn’t chilled long enough, your butter was too soft, or your oven wasn’t hot enough. Make sure you chill the dough for at least 2 hours, use butter that’s softened but not melted, and preheat your oven fully. If your cookies still spread, try chilling the cut cookies on the baking sheet for 10 minutes before baking.
How do I get the royal icing to dry shiny and smooth?
The key is getting the right consistency. Your icing should be thick enough to hold its shape when piped but thin enough to settle into a smooth surface. Add water a teaspoon at a time until it flows like honey. Also, make sure your cookies are completely cool before icing, and let the icing dry undisturbed for at least 4 hours. A fan nearby can help speed up the drying process.
Can I use this dough for cut-out cookies other than leaves?
Yes! This is my go-to sugar cookie dough for any shape. It holds its edges beautifully, so it works for detailed cutters like snowflakes, animals, or letters. Just adjust the baking time slightly if your cookies are much thicker or thinner than ¼ inch.
How far in advance can I make these cookies?
You have several options. You can make the dough up to 3 days ahead and keep it in the fridge. You can bake the cookies up to a week ahead and store them undecorated in an airtight container. Or you can fully decorate them up to 3 days ahead—just make sure the icing is completely dry before stacking them. They actually taste better the day after baking, so don’t stress about making them at the last minute.
Pin This Recipe!

Best Thanksgiving Sugar Cookies with Royal Icing Leaves (Easy Recipe)

These tender, buttery sugar cookies hold their shape perfectly and are decorated with smooth royal icing in autumn leaf colors. A secret ingredient—cream cheese—adds a subtle tang that balances the sweetness, making them the perfect Thanksgiving treat.
- Prep Time: 30 minutes
- Cook Time: 10 minutes
- Total Time: 2 hours 40 minutes (includes 2 hours chilling)
- Yield: 24-30 cookies 1x
- Category: Dessert
- Cuisine: American
Ingredients
- 1 cup (226g) unsalted butter, softened
- 1 cup (200g) granulated sugar
- 2 oz (57g) cream cheese, softened
- 1 large egg, room temperature
- 1 teaspoon vanilla extract
- ½ teaspoon almond extract (optional)
- 2½ cups (312g) all-purpose flour, spooned and leveled
- ½ teaspoon baking powder
- ½ teaspoon fine sea salt
- 2 cups (240g) powdered sugar, sifted if lumpy
- 2 tablespoons meringue powder
- 3–4 tablespoons warm water
- ½ teaspoon vanilla extract
- Gel food coloring (leaf green and autumn orange)
- Leaf-shaped cookie cutters
- Piping bags or zip-top bags
- Small round piping tip (size 2 or 3)
- Edible glitter or sanding sugar (optional)
Instructions
- Make the cookie dough: In a stand mixer or large bowl, beat softened butter, cream cheese, and granulated sugar on medium speed until light and fluffy, about 3-4 minutes. Scrape down the sides.
- Add egg, vanilla extract, and almond extract (if using). Beat on medium speed until well combined, about 1 minute.
- In a separate bowl, whisk together flour, baking powder, and salt. With mixer on low, gradually add dry ingredients to wet ingredients. Mix just until dough comes together—stop when no streaks of flour remain.
- Divide dough into two equal portions. Flatten each into a 1-inch thick disk, wrap tightly in plastic wrap, and refrigerate for at least 2 hours (or up to 3 days).
- Preheat oven to 350°F (175°C). Line two baking sheets with parchment paper.
- Lightly flour work surface and rolling pin. Roll one disk of dough to ¼-inch thickness. Cut out leaf shapes with cookie cutters, dipping cutters in flour between cuts. Transfer to prepared baking sheets, spacing 2 inches apart.
- Gather scraps, press together, and reroll once or twice. Repeat with remaining dough.
- Bake for 8-10 minutes, until edges are just barely golden. Centers should look set but not brown. Cool on baking sheet for 5 minutes, then transfer to wire rack to cool completely.
- Make royal icing: In a stand mixer or medium bowl, combine powdered sugar and meringue powder. Add 3 tablespoons warm water and vanilla extract. Beat on low until combined, then increase to medium-high and beat 4-5 minutes until thick, glossy, and holds stiff peaks. Add more water a teaspoon at a time if too thick, or more powdered sugar if too thin.
- Divide icing into bowls for different colors. Add gel food coloring a little at a time until desired shade is reached.
- Decorate cookies: Fit piping bag with small round tip and fill with icing. Outline each cookie with thin line of icing, then fill center (flooding). Use toothpick to spread icing into corners and pop air bubbles. For leaf veins, pipe thin lines on top while base is still wet, then drag toothpick through to create feathered effect.
- If using edible glitter or sanding sugar, sprinkle on while icing is still wet. Let cookies dry completely, 4-6 hours or overnight.
Notes
Chill dough thoroughly for best shape retention. Use gel food coloring, not liquid, to avoid thinning the royal icing. Cookies can be made ahead: dough keeps 3 days in fridge or 3 months frozen; baked undecorated cookies keep 1 week in airtight container; decorated cookies keep 3 days. Do not refrigerate decorated cookies—humidity can make icing sticky.
Nutrition
- Serving Size: 1 cookie
- Calories: 185
- Sugar: 18
- Sodium: 95
- Fat: 8
- Saturated Fat: 5
- Carbohydrates: 27
- Protein: 2
Keywords: Thanksgiving sugar cookies, royal icing leaves, easy sugar cookie recipe, cream cheese sugar cookies, decorated sugar cookies, fall cookies, holiday baking


