This was supposed to be a simple roasted vegetable side dish for a Friendsgiving potluck—the kind you throw together without thinking, the kind nobody raves about but everyone politely finishes. But I grabbed the wrong bottle from the pantry. Instead of plain olive oil, I reached for a dark amber bottle of toasted sesame oil that my neighbor had left after a cooking exchange. The oven was already preheating, guests were arriving in two hours, and I was already in that frantic state where stopping to fix a mistake felt impossible. So I just went with it. What came out was nothing like the plan—and better. The sesame oil gave the squash this nutty, almost caramelized edge I had never tasted before, and when I added a drizzle of maple brown butter right before serving, people actually stopped talking mid-sentence to ask what was in it. I mean, honestly, I almost didn’t tell them about the happy accident because it felt like cheating.
Now, let me tell you, I’ve made this dish more times than I can count, and every single time I think back to that panicked afternoon. The sesame oil is long gone—replaced by good old olive oil or avocado oil—but the maple brown butter? That stayed. It’s the kind of addition that makes you wonder why you ever roasted squash without it. The sweetness of the maple, the nuttiness of the browned butter, the way it clings to the caramelized edges of the butternut squash—it’s pure magic. And honestly, if you’ve ever had a roasted vegetable come out dry or bland, you know that feeling when you finally find a version that just works. This is that version.
This recipe has become my go-to for every fall gathering, every holiday table, every time I need to impress without stress. It’s forgiving, it’s flexible, and it’s absolutely packed with flavor. Plus, it scales beautifully for a crowd—more on that later. Let’s just say this accidental masterpiece has earned a permanent spot in my hosting rotation.
Why You’ll Love This Recipe
This isn’t just another roasted squash recipe. After testing this dozens of times—for casual weeknight dinners, for Thanksgiving feasts, for potlucks where I needed something that could sit out for an hour and still taste amazing—I can confidently say this version stands apart. Let me break down exactly why you’ll fall for it too.
- Quick & Easy: This comes together in under 45 minutes, with only about 10 minutes of active prep. The oven does the heavy lifting, which means you can focus on other dishes or, you know, actually enjoy your guests.
- Simple Ingredients: No fancy grocery trips required. You need butternut squash, butter, maple syrup, and a few pantry staples. That’s it. I bet you have most of these right now.
- Perfect for Gatherings: This dish was born for dinner parties, potlucks, and festive get-togethers. It looks gorgeous on a platter, it reheats beautifully, and it’s the kind of side dish that steals the show without trying too hard.
- Crowd-Pleaser: I’ve served this to picky eaters, to vegans (with a butter substitute), to people who swore they didn’t like squash. Every single time, the bowl comes back empty. Kids love the sweetness, adults love the sophistication.
- Unbelievably Delicious: The texture is where this recipe shines—crispy, caramelized edges with a tender, almost creamy interior. The maple brown butter adds a depth of flavor that makes you close your eyes after the first bite. It’s comfort food reimagined.
What makes this recipe different from the rest? It’s the technique. Most recipes just toss squash in oil and roast it, but browning the butter first changes everything. It adds a nutty, toasty flavor that complements the natural sweetness of the squash and the maple syrup perfectly. Plus, I’ve perfected the roasting temperature and timing to get that ideal balance of caramelization without burning. This isn’t just another version—it’s the best version.
This recipe is the kind that makes you look like a hero in the kitchen with minimal effort. It’s perfect for impressing guests without stress, or turning a simple weeknight dinner into something memorable. Trust me, once you try it, you’ll understand why I keep coming back to it.
What Ingredients You Will Need
This recipe uses simple, wholesome ingredients to deliver bold flavor and satisfying texture without the fuss. Most of these are pantry staples, especially during fall and winter. Here’s everything you need, broken down by function.
For the Roasted Squash
- Butternut squash (1 large, about 3 pounds) — Peeled, seeded, and cut into 1-inch cubes. Look for a squash that feels heavy for its size with firm, unblemished skin. (I prefer using pre-cut squash from the grocery store when I’m short on time, but fresh is always better for texture.)
- Olive oil (2 tablespoons) — Use a good quality extra virgin olive oil for the best flavor. Avocado oil works great too, especially if you’re roasting at a higher temperature.
- Salt (1 teaspoon) — I use kosher salt for its clean flavor and easy pinch-ability. Sea salt works too.
- Black pepper (½ teaspoon) — Freshly ground is always better, but pre-ground works in a pinch.
- Garlic powder (½ teaspoon) — Optional, but it adds a subtle savory note that balances the sweetness. I add it about 90% of the time.
For the Maple Brown Butter
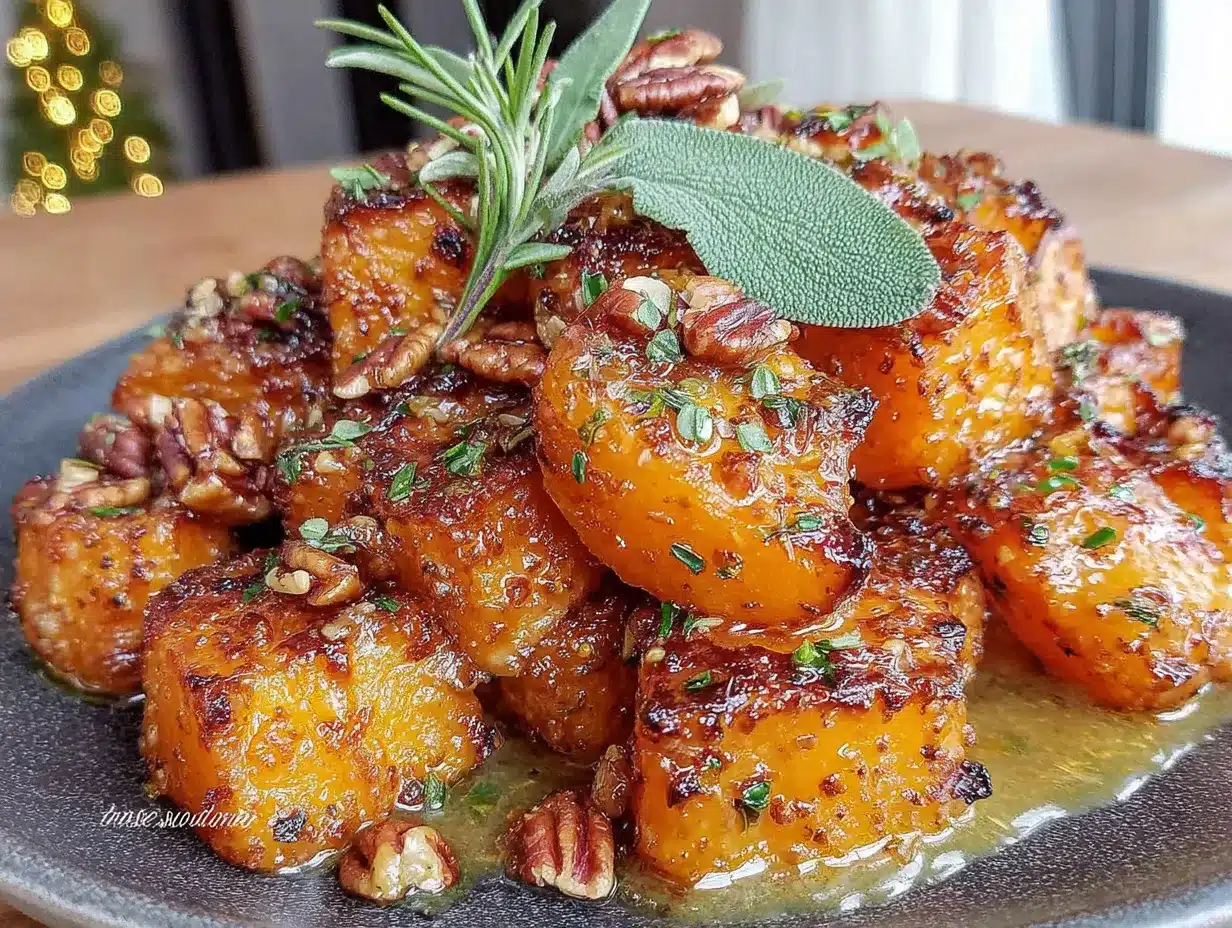
- Unsalted butter (4 tablespoons, ½ stick) — Unsalted is important here because it lets you control the salt level. If you only have salted, reduce the added salt in the recipe.
- Pure maple syrup (3 tablespoons) — Please use real maple syrup, not pancake syrup. The flavor difference is night and day. Grade A dark amber is my favorite for its robust flavor.
- Fresh sage leaves (6-8 leaves) — Optional but highly recommended. The sage adds an earthy, aromatic note that pairs beautifully with the squash and brown butter. (I grow sage in my garden just for this recipe.)
- Pinch of cinnamon (⅛ teaspoon) — Just a tiny bit to warm up the flavors without overpowering them. (I learned this trick from a chef friend who specializes in fall dishes.)
- Flaky sea salt (for finishing) — Maldon or any flaky salt. This is non-negotiable for me—it adds that perfect crunch and burst of saltiness that makes every bite sing.
Optional Garnishes
- Toasted pecans or walnuts (¼ cup, chopped) — Adds crunch and extra nuttiness. Toast them in a dry pan for 2-3 minutes until fragrant.
- Dried cranberries (2 tablespoons) — For a pop of tartness and color. I add these when serving for Thanksgiving or Christmas.
- Fresh parsley or thyme (1 tablespoon, chopped) — For a fresh, herby finish. (Use sparingly—you don’t want to cover up that beautiful brown butter flavor.)
Ingredient Tips: For the best texture, make sure your butternut squash cubes are uniform in size—about 1 inch each. If they’re too small, they’ll burn; too large, and they won’t cook through. I recommend using a sharp vegetable peeler for the skin—it’s much easier than using a knife. And if you’re buying pre-cut squash, look for pieces that are all roughly the same size. Some brands cut them haphazardly, which leads to uneven roasting.
Substitution Guidance: For a dairy-free version, use vegan butter or coconut oil instead of regular butter. The coconut oil will add a slight coconut flavor, which actually works surprisingly well with the maple and squash. For a lower-sugar option, reduce the maple syrup to 2 tablespoons or use a sugar-free maple alternative. And if you don’t have fresh sage, dried sage works—use about 1 teaspoon, crumbled. Just add it to the brown butter during the last 30 seconds of cooking so it doesn’t burn.
Equipment Needed
You don’t need a fancy kitchen to make this recipe shine. Here’s what you’ll need:
- Large baking sheet (18×13 inches or similar) — A rimmed baking sheet is ideal to catch any juices. I use a half-sheet pan for even roasting. If you don’t have one large enough, use two smaller sheets to avoid overcrowding.
- Chef’s knife and cutting board — A sharp chef’s knife makes quick work of peeling and cubing the squash. I learned the hard way that a dull knife is dangerous with hard squash—it slipped once and I nearly cut my finger. Please use a sharp one.
- Vegetable peeler — A sturdy Y-shaped peeler works best for butternut squash skin. I’ve tried regular peelers, and they just don’t cut it—literally.
- Small saucepan — For browning the butter. A light-colored pan is helpful so you can see the butter change color.
- Mixing bowl — For tossing the squash with oil and seasonings. Any medium bowl works.
- Spatula or wooden spoon — For stirring the brown butter. A silicone spatula is great for scraping every last drop.
- Parchment paper or aluminum foil — For lining the baking sheet. This makes cleanup so much easier. I prefer parchment for its non-stick properties.
Budget-Friendly Alternatives: Don’t have a vegetable peeler? Use a sharp paring knife to cut off the skin. It takes a bit more time and patience, but it works. No baking sheet? Use a large oven-safe skillet or even a 9×13 baking dish—just watch the cooking time, as it might need a few extra minutes. And if you don’t have a small saucepan, any small pot or even a microwave-safe bowl will work for browning the butter (just watch it carefully in the microwave, stopping every 20 seconds to stir).
Maintenance Tip: After using your baking sheet, soak it in hot, soapy water for 10 minutes before scrubbing. This prevents any caramelized bits from becoming permanent fixtures. Trust me on this one—I ruined a good baking sheet by being lazy about it.
Preparation Method
Let’s get cooking! This recipe is straightforward, but paying attention to a few key details will make all the difference. Follow these steps, and you’ll have perfectly roasted butternut squash every time.
- Preheat your oven to 400°F (200°C). Getting the oven hot before you start prepping ensures even cooking. While it’s heating, line a large baking sheet with parchment paper or foil for easy cleanup.
- Prepare the butternut squash. Using a sharp vegetable peeler, remove the skin completely. Cut off the top and bottom ends, then slice the squash in half lengthwise. Scoop out the seeds and stringy bits with a spoon. (Save the seeds! You can roast them just like pumpkin seeds—toss with salt and oil, and bake at 350°F for 10-12 minutes.) Cut the squash into 1-inch cubes. Try to make them as uniform as possible—this is the secret to even cooking. If some pieces are smaller, they’ll burn before the larger ones are done.
- Season the squash. In a large mixing bowl, combine the cubed squash, olive oil, salt, pepper, and garlic powder (if using). Toss well with your hands or a spatula until every piece is evenly coated. Don’t be shy—get in there and make sure the oil reaches all the nooks and crannies. This is where the flavor starts.
- Arrange on the baking sheet. Spread the squash in a single layer on the prepared baking sheet. Make sure the pieces aren’t touching or overlapping—crowding leads to steaming instead of roasting. If they’re too close together, they’ll release moisture and get soggy instead of caramelizing. (I learned this the hard way when I tried to cram a double batch onto one sheet. Never again.)
- Roast for 25-30 minutes. Place the baking sheet on the middle rack of the oven. Roast for 25 minutes, then remove the sheet and flip each piece using a spatula. Return to the oven and roast for another 5-10 minutes, until the squash is tender when pierced with a fork and the edges are golden brown and caramelized. The total time depends on the size of your cubes—check at 25 minutes and go from there.
- Make the maple brown butter. While the squash roasts, place the unsalted butter in a small saucepan over medium heat. Melt the butter, then continue cooking, swirling the pan occasionally. The butter will foam, then the foam will subside, and you’ll see brown specks forming at the bottom. This takes about 3-5 minutes. Watch closely—it can go from perfect to burnt in seconds. When it smells nutty and looks golden brown, remove it from the heat immediately. (If you’re using sage, add the leaves during the last 30 seconds of browning—they’ll crisp up and infuse the butter with their flavor.)
- Add the maple syrup. Stir the maple syrup and cinnamon into the browned butter. The mixture will bubble up a bit—that’s normal. Whisk until smooth and well combined. Set aside. The maple brown butter will thicken slightly as it cools, but that’s fine—it’ll loosen up when you drizzle it over the hot squash.
- Combine and serve. Transfer the roasted squash to a serving platter. Drizzle the maple brown butter over the top, making sure to get some on every piece. Sprinkle with flaky sea salt and any optional garnishes you’re using. Serve immediately while the squash is hot and the butter is glossy.
Sensory Cues: At step 5, you’ll know the squash is ready when the edges are deep golden brown and slightly crispy, and the flesh is tender enough that a fork slides in with little resistance. The kitchen should smell nutty and sweet—a combination of caramelized squash and browned butter. If you’re using sage, you’ll also catch that earthy, almost pine-like aroma. At step 6, the butter should be a warm amber color with tiny brown specks, and it should smell distinctly nutty—like toasted hazelnuts.
Time-Saving Tip: You can prep the squash up to 24 hours in advance. Just peel, cube, and store it in an airtight container in the refrigerator. Toss with oil and seasonings right before roasting. This is a game-changer when you’re hosting—do the prep the night before, and all you have to do on the day is roast and drizzle.
Cooking Tips & Techniques
After making this recipe more times than I can count—and yes, messing it up plenty of times along the way—I’ve gathered some tips that will help you nail it every single time. Let me share what I’ve learned.
Don’t skip the flipping. I know it’s tempting to just let the squash roast undisturbed, but flipping halfway through ensures even caramelization. The side sitting on the hot baking sheet gets browner faster, and flipping gives the other side a chance to catch up. I once forgot to flip, and half the batch was perfect while the other half was pale and soft. Lesson learned.
Space is your friend. This is the number one mistake I see home cooks make. If the squash pieces are touching or overlapping, they’ll steam instead of roast. Steamed squash is mushy and bland. Roasted squash is caramelized and flavorful. Give them room to breathe. If you’re making a double batch, use two baking sheets and rotate them halfway through cooking.
Watch the brown butter like a hawk. Brown butter can go from perfect to burnt in about 30 seconds. The first time I made it, I walked away to check on the squash, and by the time I came back, the butter was black and smoking. The smell was awful. Now I stay right by the stove, swirling the pan constantly. When the foam subsides and you see brown specks, it’s done. Immediately remove it from the heat—the residual heat will continue cooking it for a few seconds.
Timing is everything. I like to start the brown butter when the squash has about 10 minutes left to roast. That way, everything is ready at the same time, and I can drizzle the butter over the hot squash immediately. If you make the butter too early, it will solidify. If you make it too late, the squash will cool down. Aim for that sweet spot.
Use a light-colored pan for brown butter. Dark pans make it hard to see the color change. I use a stainless steel saucepan, and it makes a world of difference. If all you have is dark non-stick, you’ll need to rely more on smell—that nutty aroma is your best clue.
Season generously. Butternut squash is naturally sweet, and it needs salt to balance that sweetness. Don’t be shy with the salt at the beginning, and definitely don’t skip the flaky salt at the end. That final sprinkle adds texture and a burst of saltiness that makes the maple brown butter taste even sweeter.
One more thing— if you’re making this for a crowd, you can roast the squash up to 2 hours ahead and keep it warm in a low oven (200°F). Just wait to add the maple brown butter until right before serving. The butter will soak into the squash if it sits too long, and you’ll lose that beautiful glossy finish.
Variations & Adaptations
One of the things I love most about this recipe is how flexible it is. Over the years, I’ve experimented with all sorts of variations, and here are some of my favorites. Feel free to mix and match based on what you have or what you’re craving.
Dietary Adaptations:
- Vegan version: Substitute the butter with vegan butter or coconut oil. If using coconut oil, add a pinch of salt to mimic the savory notes of butter. The maple syrup is already vegan, so no changes needed there.
- Gluten-free: This recipe is naturally gluten-free, so no adjustments needed. Just double-check that your spices and maple syrup are certified gluten-free if you’re serving someone with celiac disease.
- Low-sugar: Reduce the maple syrup to 2 tablespoons or use a sugar-free maple alternative. The squash is naturally sweet, so you won’t miss the extra sugar.
Flavor Variations:
- Spicy kick: Add ¼ teaspoon of cayenne pepper or red pepper flakes to the maple brown butter. The heat pairs beautifully with the sweetness. I tried this on a whim one night, and it was a hit at a dinner party.
- Herb-infused: Swap the sage for fresh rosemary or thyme. Rosemary adds a piney, aromatic quality that’s perfect for winter. Thyme is more subtle and works year-round.
- Citrus twist: Add 1 teaspoon of orange zest to the maple brown butter. The bright citrus cuts through the richness and adds a fresh note. This is my go-to for spring gatherings.
Different Cooking Methods:
- Air fryer: Cook the seasoned squash at 375°F for 12-15 minutes, shaking the basket halfway through. The air fryer gives you extra crispy edges in less time. (Just work in batches to avoid overcrowding.)
- Grilled: Thread the cubed squash onto skewers, brush with oil, and grill over medium heat for 10-12 minutes, turning occasionally. The smoky flavor is incredible. Then drizzle with the maple brown butter as usual.
Personal Variation: My absolute favorite twist is adding toasted pecans and a drizzle of balsamic glaze on top. The pecans add crunch, and the balsamic glaze adds a tangy sweetness that complements the maple brown butter perfectly. I discovered this combination when I had leftover pecans from a pie and decided to experiment. Now I make it this way every Thanksgiving, and my family fights over the last pieces.
Serving & Storage Suggestions
This roasted butternut squash is incredibly versatile when it comes to serving. Here’s how to make it shine on your table, plus tips for storing leftovers (if there are any).
Serving Temperature and Presentation: Serve this dish hot, right after drizzling with the maple brown butter. The butter should be glossy and warm, coating each piece of squash beautifully. For presentation, arrange the squash on a large white platter in a single layer—this shows off the caramelized edges and makes it easy for guests to serve themselves. Sprinkle with flaky sea salt and any garnishes just before bringing it to the table. A few fresh sage leaves on top add a pop of green that looks gorgeous against the golden squash.
What to Serve Alongside: This dish pairs beautifully with roasted chicken, grilled pork chops, or a hearty grain bowl. For holiday meals, it’s perfect alongside roasted turkey, mashed potatoes, and green bean casserole. I also love serving it with a simple arugula salad dressed with lemon vinaigrette—the peppery greens balance the sweetness of the squash. For a vegetarian main course, serve it over quinoa or farro with a dollop of ricotta or goat cheese.
Beverage Pairings: A crisp white wine like Sauvignon Blanc or a light Pinot Noir works wonderfully. For non-alcoholic options, try sparkling apple cider or a warm spiced tea. The maple brown butter pairs especially well with the tannins in a light red wine.
Storage Instructions: Store leftover roasted squash in an airtight container in the refrigerator for up to 4 days. The maple brown butter will solidify as it cools, but that’s fine—it will melt again when reheated. For longer storage, freeze the squash (without the brown butter) in a freezer-safe bag for up to 3 months. Thaw overnight in the refrigerator before reheating.
Reheating Methods: The best way to reheat is in the oven at 350°F for 5-7 minutes, or until heated through. This restores the crispy edges better than the microwave. If you’re in a hurry, the microwave works too—just heat in 30-second intervals and expect the texture to be softer. For a quick refresh, reheat in a skillet over medium heat with a tiny splash of water or broth to prevent sticking. (I actually prefer the skillet method for leftovers—the squash gets a second round of caramelization that’s even better than the first.)
Flavor Development: Interestingly, this dish tastes even better the next day. The flavors meld together as it sits, and the maple brown butter soaks into the squash, making every bite incredibly flavorful. I’ve been known to make a double batch just so I can have leftovers for lunch the next day. It’s great cold straight from the fridge, or warmed up and served over a bed of greens for a quick salad.
Nutritional Information & Benefits
This recipe isn’t just delicious—it also packs some serious nutritional benefits. Here’s what you’re getting in each serving.
Estimated Nutritional Values (per serving, based on 6 servings):
- Calories: Approximately 220
- Total Fat: 12g (mostly from olive oil and butter)
- Saturated Fat: 6g
- Carbohydrates: 28g
- Fiber: 5g
- Sugar: 12g (naturally occurring plus maple syrup)
- Protein: 2g
- Vitamin A: Over 300% of the Daily Value (from butternut squash)
- Vitamin C: 35% of the Daily Value
- Potassium: 15% of the Daily Value
Health Benefits of Key Ingredients:
- Butternut squash is rich in beta-carotene, which your body converts to vitamin A for healthy vision and immune function. It’s also high in fiber, which supports digestive health and keeps you feeling full.
- Olive oil provides heart-healthy monounsaturated fats and antioxidants that reduce inflammation.
- Maple syrup contains antioxidants and minerals like zinc and manganese, though it should be used in moderation due to its sugar content.
- Sage has anti-inflammatory properties and is known for its cognitive benefits. (I always add it when I’m studying for a big project!)
Dietary Considerations: This recipe is naturally gluten-free and vegetarian. For a vegan version, simply substitute the butter with plant-based butter or coconut oil. It’s also relatively low in calories for a side dish, making it a great option if you’re watching your intake. The main allergens are dairy (butter) and tree nuts (if you add pecans or walnuts).
Personal Wellness Perspective: I love that this recipe makes vegetables feel like a treat. It’s not often that a side dish steals the show, but this one does. The combination of healthy squash with a small amount of butter and maple syrup strikes a perfect balance—you get the nutritional benefits of the vegetable without feeling like you’re eating diet food. It’s comfort food that happens to be good for you, and that’s my favorite kind of cooking.
Conclusion
This roasted butternut squash with maple brown butter has become one of those recipes I turn to again and again, and I have a feeling it will become one of yours too. It started as a happy accident—a wrong bottle, a panicked moment, a dish that turned out better than anything I had planned—and it’s been a staple ever since. The combination of caramelized squash, nutty brown butter, and sweet maple syrup is just unbeatable. It’s simple enough for a weeknight, elegant enough for a holiday table, and always, always a crowd-pleaser.
What I love most about this recipe is how forgiving it is. You can swap ingredients, adjust the seasonings, add your own twists, and it still turns out amazing. It’s the kind of dish that makes you look like a pro in the kitchen, even if you’re just starting out. So go ahead—make it your own. Add extra sage, throw in some pecans, drizzle with balsamic glaze. The possibilities are endless, and every version is delicious.
I’d love to hear how this recipe turns out for you! Did you try any variations? Did it become a hit at your dinner party? Drop a comment below and let me know. And if you loved it, please share it with your friends and family—good food is meant to be shared. Until next time, happy cooking!
Frequently Asked Questions
Can I use frozen butternut squash instead of fresh?
Yes, you can use frozen butternut squash, but the texture will be different. Frozen squash releases more water as it cooks, so it won’t caramelize as well. If using frozen, thaw it first and pat it dry with paper towels to remove as much moisture as possible. Also, expect a slightly softer texture and less crispy edges. Fresh is always best for this recipe, but frozen works in a pinch.
How do I prevent the maple brown butter from burning?
The key is to watch it closely and remove it from the heat as soon as you see brown specks forming. Use a light-colored pan so you can see the color change, and keep the heat at medium—not high. Swirl the pan constantly to ensure even cooking. If it starts smoking or smells burnt, you’ve gone too far. Start over with fresh butter—it’s worth it.
Can I make this recipe ahead of time for a party?
Absolutely! You can prep the squash up to 24 hours in advance—just peel, cube, and store it in the fridge. Roast it the day of the party, and keep it warm in a low oven (200°F) for up to 2 hours. Add the maple brown butter right before serving for the best texture and presentation. This is my go-to strategy for holiday hosting.
What’s the best way to peel butternut squash?
Use a sharp Y-shaped vegetable peeler—it’s much easier and safer than using a knife. Start by cutting off the top and bottom ends of the squash so it sits flat on your cutting board. Then peel from top to bottom, following the curve of the squash. If the skin is particularly tough, you can microwave the whole squash for 2 minutes to soften it slightly before peeling. Always use a sharp peeler—dull ones slip and can cause injuries.
Can I use this maple brown butter on other vegetables?
Yes, this maple brown butter is amazing on so many things! Try it on roasted Brussels sprouts, carrots, sweet potatoes, or even green beans. It’s also delicious drizzled over roasted chicken or pork, or even on pancakes or waffles for a decadent breakfast. I keep a jar in the fridge during fall and use it on everything—it’s that good.
Pin This Recipe!
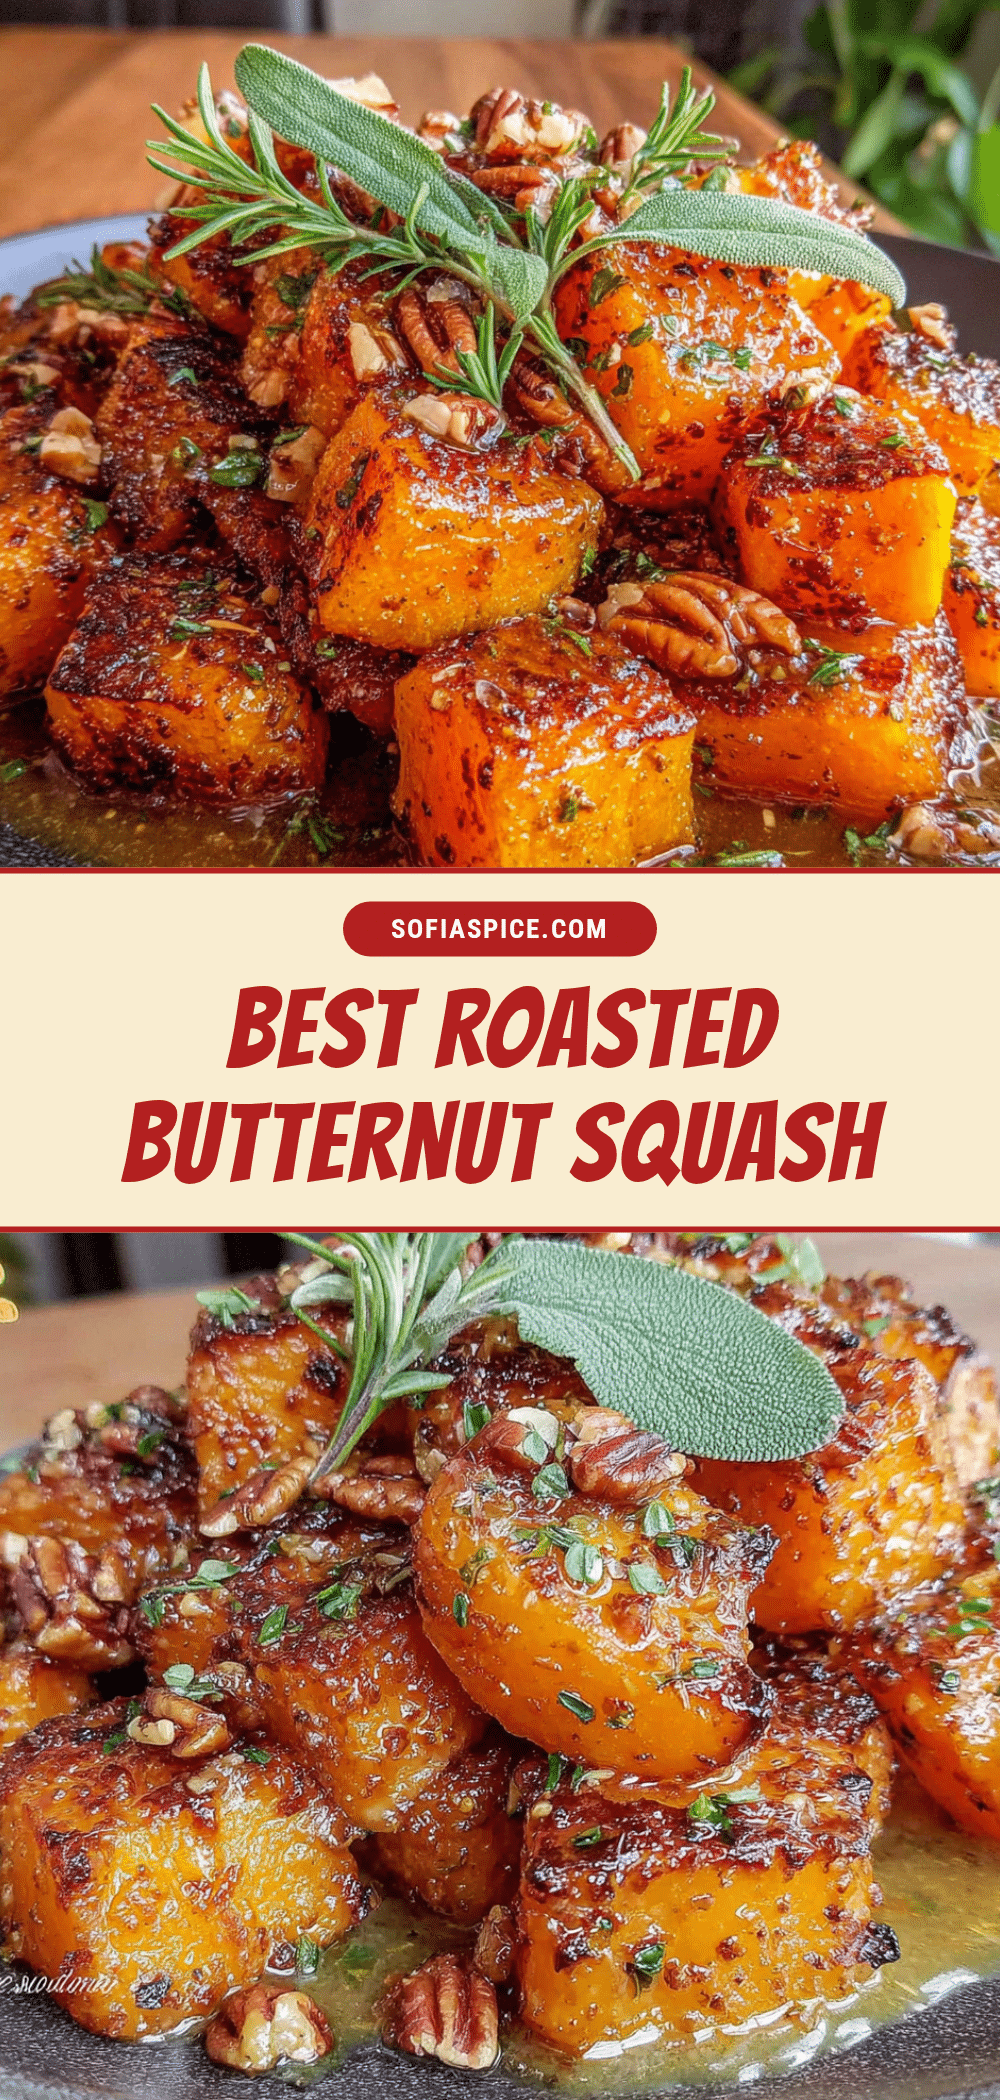
Best Roasted Butternut Squash with Maple Brown Butter
This roasted butternut squash with maple brown butter is a perfect fall side dish. It’s quick, easy, and packed with flavor, making it ideal for gatherings and holiday tables.
- Prep Time: 10 minutes
- Cook Time: 30 minutes
- Total Time: 40 minutes
- Yield: 6 servings 1x
- Category: Side Dish
- Cuisine: American
Ingredients
- 1 large butternut squash (about 3 pounds), peeled, seeded, and cut into 1-inch cubes
- 2 tablespoons olive oil
- 1 teaspoon kosher salt
- ½ teaspoon black pepper, freshly ground
- ½ teaspoon garlic powder (optional)
- 4 tablespoons unsalted butter (½ stick)
- 3 tablespoons pure maple syrup
- 6–8 fresh sage leaves (optional)
- ⅛ teaspoon cinnamon
- Flaky sea salt for finishing
- ¼ cup toasted pecans or walnuts, chopped (optional)
- 2 tablespoons dried cranberries (optional)
- 1 tablespoon fresh parsley or thyme, chopped (optional)
Instructions
- Preheat your oven to 400°F (200°C). Line a large baking sheet with parchment paper or foil.
- Prepare the butternut squash: Using a sharp vegetable peeler, remove the skin completely. Cut off the top and bottom ends, then slice the squash in half lengthwise. Scoop out the seeds and stringy bits with a spoon. Cut the squash into 1-inch cubes, making them as uniform as possible.
- In a large mixing bowl, combine the cubed squash, olive oil, salt, pepper, and garlic powder (if using). Toss well until every piece is evenly coated.
- Spread the squash in a single layer on the prepared baking sheet, ensuring pieces are not touching or overlapping.
- Roast for 25 minutes. Remove the sheet, flip each piece using a spatula, and return to the oven. Roast for another 5-10 minutes, until the squash is tender when pierced with a fork and the edges are golden brown and caramelized.
- While the squash roasts, make the maple brown butter: Place the unsalted butter in a small saucepan over medium heat. Melt the butter, then continue cooking, swirling the pan occasionally. The butter will foam, then the foam will subside, and brown specks will form at the bottom. This takes about 3-5 minutes. When it smells nutty and looks golden brown, remove from heat immediately. If using sage, add the leaves during the last 30 seconds of browning.
- Stir the maple syrup and cinnamon into the browned butter. Whisk until smooth and well combined. Set aside.
- Transfer the roasted squash to a serving platter. Drizzle the maple brown butter over the top. Sprinkle with flaky sea salt and any optional garnishes. Serve immediately.
Notes
For the best texture, ensure squash cubes are uniform in size. Don’t skip flipping the squash halfway through roasting. Watch the brown butter closely to prevent burning. The dish can be prepped up to 24 hours in advance by peeling and cubing the squash. Leftovers can be stored in an airtight container in the refrigerator for up to 4 days.
Nutrition
- Serving Size: 1 serving
- Calories: 220
- Sugar: 12
- Sodium: 400
- Fat: 12
- Saturated Fat: 6
- Carbohydrates: 28
- Fiber: 5
- Protein: 2
Keywords: roasted butternut squash, maple brown butter, fall side dish, holiday side dish, easy roasted vegetables


