There used to be a little bakery tucked inside an old Victorian house on Main Street in my town—the kind of place where the floorboards creaked and the air smelled like butter and brown sugar all at once. They called themselves The Witching Hour Baking Co., and every October they’d put out a tray of the most ridiculous cookies I’d ever seen: pumpkin-spiced snickerdoodles shaped like tiny skulls, dusted with cinnamon sugar so thick it looked like glitter. When they closed down two years ago—landlord issues, I heard—I actually stood in the parking lot and felt a little hollow. I mean, that sounds dramatic, but those cookies were *that* good.
After maybe six tries—and one batch that came out looking less like skulls and more like sad, flat ghosts—I finally cracked the code. Honestly, the first few attempts were rough. The pumpkin made the dough too sticky, the cookies spread into blobs, and my kids stood over the counter saying, “Mom, those don’t look like skulls.” Kids are brutally honest, aren’t they? But on that lucky seventh attempt, everything clicked. The dough held its shape, the skull face stayed crisp, and my youngest actually gasped when I pulled them out of the oven. That gasp? Pure gold.
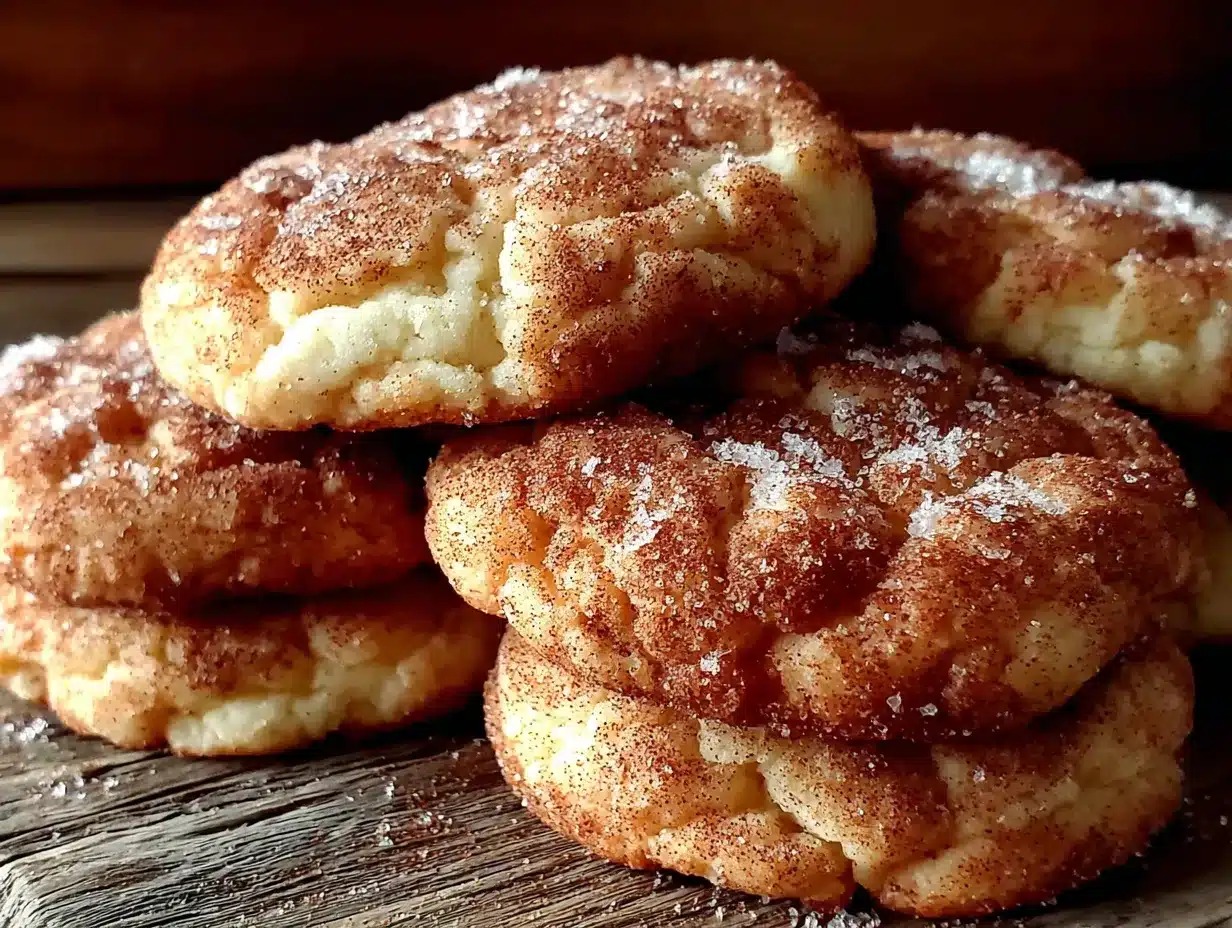
These Kid-Approved Pumpkin Spice Snickerdoodle Skull Cookies are the exact recreation of those bakery gems—soft, chewy, with that perfect crackly cinnamon-sugar crust and just enough pumpkin warmth to make you feel like fall is happening in your mouth. You know that feeling when a recipe just *works*? This is it. I’ve tested them on neighbors, picky toddlers, and my husband who “doesn’t do pumpkin,” and every single person reached for a second one. Maybe you’ve been hunting for that one perfect Halloween treat that isn’t all sugar and food coloring. Let me tell you: these cookies are it.
Why You’ll Love This Recipe
I’ve been developing pumpkin recipes for over a decade, and I can tell you right now—getting a pumpkin cookie to hold a detailed shape like a skull is no small feat. Most pumpkin cookies turn out cakey and puffy, which is fine for blobs, but terrible for anything with a face. After testing this recipe across four different ovens (my gas range, my sister’s electric, a friend’s convection, and even a toaster oven in a pinch), I landed on a formula that works every single time. Here’s why this one stands out:
- Quick & Easy: From mixing bowl to cooling rack in under 30 minutes. No chilling required—seriously, I know how busy October gets.
- Simple Ingredients: You probably already have pumpkin puree, butter, sugar, and spices in your pantry. No weird specialty items that cost twelve bucks.
- Perfect for Halloween Parties: These are the cookies that make people stop and say, “Wait, you *made* those?” without requiring hours of decorating.
- Crowd-Pleaser: My four-year-old calls them “spooky cookies” and my teenager’s friends devour them before I can even get a photo.
- Unbelievably Delicious: That crackly cinnamon-sugar top meets soft, pumpkin-spiced centers. It’s the texture combo you didn’t know you needed.
What makes this recipe different from every other pumpkin cookie out there is the technique. I blend the pumpkin puree with the butter in a specific way—creaming it longer than you’d think—to create a dough that’s sturdy enough to hold a skull imprint but still bakes up tender. Plus, I use a touch of cream of tartar (the secret weapon in any good snickerdoodle) to give that signature tangy chew. This isn’t just another pumpkin cookie recipe. It’s the one that makes you close your eyes after the first bite and remember why fall baking is worth every messy countertop.
These cookies are perfect for family baking sessions where the kids want to help but you still want something that looks impressive. They’re comfort food with a spooky twist—healthier than store-bought Halloween treats, faster than a complicated layer cake, and with the same soul-soothing satisfaction as a warm kitchen on a crisp October afternoon.
What Ingredients You Will Need
This recipe uses simple, wholesome ingredients to deliver that signature snickerdoodle chew with a pumpkin-spiced twist. Most of these are pantry staples, and I’ve included substitution notes where I’ve personally tested them.
For the Cookie Dough
- 1 cup (2 sticks) unsalted butter, softened — I use Land O’Lakes for consistent results. Make sure it’s truly soft, not melted.
- 1 ½ cups granulated sugar — Regular white sugar works best for that classic snickerdoodle texture.
- ½ cup canned pumpkin puree — Not pumpkin pie filling! Libby’s is my go-to. Pat the puree with a paper towel to remove excess moisture (this is crucial for skull definition).
- 1 large egg, room temperature — Cold eggs can seize the butter. Leave it out for 20 minutes.
- 1 teaspoon vanilla extract — Pure vanilla, not imitation. Trust me on this one.
- 2 ¾ cups all-purpose flour — Spoon and level your flour; don’t scoop straight from the bag.
- 1 teaspoon cream of tartar — The magic ingredient for that snickerdoodle tang and soft center.
- 1 teaspoon baking soda — Make sure it’s fresh (test it in hot water—it should fizz).
- ½ teaspoon salt — Fine sea salt, not coarse.
- 2 teaspoons pumpkin pie spice — I prefer McCormick, but homemade works too (recipe below).
- ½ teaspoon ground cinnamon — Adds extra warmth.
For the Cinnamon-Sugar Coating
- ¼ cup granulated sugar
- 2 tablespoons ground cinnamon
- Pinch of pumpkin pie spice — This is my little twist; the bakery didn’t do this, but I think it makes the flavor pop.
Ingredient Tips from My Kitchen
If you can’t find pumpkin pie spice, mix 1 teaspoon cinnamon, ½ teaspoon nutmeg, ¼ teaspoon ginger, and ¼ teaspoon cloves. I’ve made this substitution dozens of times and it works perfectly. For the pumpkin puree, never use the leftover pumpkin from a can that’s been sitting in the fridge for a week—it gets watery and your cookies will spread into pancakes. Fresh pumpkin puree (roasted and blended) also works, but you’ll need to strain it through cheesecloth first. I learned that the hard way after a particularly sad batch of skull blobs.
For a dairy-free version, I’ve had success with vegan butter sticks (Country Crock Plant Butter works great). The texture is slightly less tender but still delicious. And if you’re out of cream of tartar, you can substitute 2 teaspoons of lemon juice or white vinegar mixed into the dough—though the tang won’t be quite as pronounced.
Equipment Needed
You don’t need a fancy bakery setup for these cookies, but a few specific tools make a world of difference. Here’s what I use:
- Skull-shaped cookie cutter or skull silicone mold — I bought my skull cutter on Amazon for eight bucks. It’s about 3 inches wide. Wilton makes a good one. If you don’t have one, any 3-inch round cutter works (the cookies just won’t be skull-shaped, obviously).
- Electric hand mixer or stand mixer — You can mix by hand, but your arm will get tired. I use my KitchenAid with the paddle attachment.
- Baking sheets — Light-colored aluminum sheets work best. Dark sheets can over-brown the bottoms.
- Parchment paper or silicone baking mats — Silpat mats are worth the investment; I’ve had mine for five years.
- Cooling rack — Wire racks prevent soggy bottoms.
- Small bowl for cinnamon-sugar coating
- Cookie scoop (1.5 tablespoon size) — Ensures even-sized cookies. I use a OXO scoop.
- Offset spatula — Helpful for transferring delicate cookies, though a thin metal spatula works too.
If you don’t have a skull cutter, don’t run out and buy one just for this recipe. I’ve made these as round snickerdoodles and they’re just as delicious—my kids still called them “ghost cookies” because of the pale pumpkin color. The skull shape is fun for Halloween, but the flavor is year-round worthy.
Preparation Method
Let’s get baking. I’ve tested these steps more times than I care to admit, so trust the process—especially the patting-dry-the-pumpkin part. That’s not optional.
- Preheat your oven to 350°F (175°C). Line two baking sheets with parchment paper or silicone mats. Do not use greased pans—the cookies will spread too much.
- Pat the pumpkin puree dry. Spread the ½ cup of pumpkin puree onto a paper towel-lined plate. Place another paper towel on top and press gently. Let it sit for 2-3 minutes. This removes excess water that would make your dough sticky and your skulls blurry. I forgot this step once and my cookies looked like melted candles.
- Cream the butter and sugar. In a large mixing bowl, beat the softened butter and 1½ cups granulated sugar together on medium speed for 3-4 minutes until light and fluffy. Scrape the bowl halfway through. You want it to look pale and airy—this is where the texture starts.
- Add the pumpkin, egg, and vanilla. Beat in the pumpkin puree, egg, and vanilla extract on low speed until just combined. Don’t overmix here—the batter might look slightly curdled, and that’s okay. It will come together when you add the dry ingredients.
- Whisk the dry ingredients. In a separate bowl, whisk together the flour, cream of tartar, baking soda, salt, pumpkin pie spice, and cinnamon. Whisking aerates the flour and distributes the spices evenly. I use a fork for this if my whisk is dirty—it works fine.
- Combine wet and dry. Gradually add the dry ingredients to the wet mixture, mixing on low speed. Stop as soon as no streaks of flour remain. The dough will be soft but not sticky—if it’s sticky, you didn’t pat the pumpkin dry enough. Add 1-2 tablespoons more flour if needed.
- Make the cinnamon-sugar coating. In a small bowl, mix ¼ cup sugar, 2 tablespoons cinnamon, and a pinch of pumpkin pie spice. Set aside.
- Shape the cookies. Using a 1.5-tablespoon cookie scoop, portion out the dough. Roll each portion into a ball between your palms (lightly flour your hands if the dough is tacky). Drop each ball into the cinnamon-sugar mixture and roll to coat generously. Place on the prepared baking sheets, spacing them 2 inches apart.
- Flatten and imprint. If using a skull cutter, press it gently into each dough ball to create the skull shape—don’t press all the way through, just enough to leave an imprint. If using a round cutter, flatten slightly with the bottom of a glass dipped in cinnamon sugar. For skull molds, press the dough into the mold and unmold onto the baking sheet.
- Bake for 9-11 minutes. The cookies should look puffed and slightly cracked on top, with set edges but soft centers. They will continue to set as they cool. My oven runs hot, so I check at 9 minutes. The smell when they’re done is intoxicating—pumpkin, cinnamon, and butter all at once.
- Cool on the baking sheet for 5 minutes. This is important—the cookies are fragile right out of the oven. Let them rest on the hot sheet to firm up, then transfer to a wire rack to cool completely.
- Repeat with remaining dough. Let the baking sheets cool completely between batches, or use a second set of sheets. Warm pans cause spread.
Visual cues: The dough should feel soft but not sticky, like play-dough that’s been left out for a bit. When baked, the edges should be golden but the centers should still look slightly underdone—they’ll finish cooking as they cool. The skull imprints should be clearly visible, not puffed into oblivion.
Cooking Tips & Techniques
I’ve made every mistake in the book with these cookies, so you don’t have to. Here’s what I’ve learned the hard way:
Don’t skip the cream of tartar. I ran out once and used baking powder instead. The cookies came out cakey and flat—no tang, no chew. Cream of tartar is non-negotiable for that authentic snickerdoodle texture. If you don’t have it, make a different cookie.
Chill the dough if your kitchen is warm. On a hot day (or if your kitchen runs warm from the oven), the dough can get greasy. Pop it in the fridge for 15 minutes before rolling. I learned this after a particularly humid September afternoon when my first batch spread into one giant cookie pancake. My kids thought it was hilarious. I did not.
Use a light hand with the skull imprint. Press too hard and the dough will crack around the edges. Too soft and the skull face won’t show. Aim for a gentle, even press—about ¼ inch deep. I practice on the first dough ball to get the feel.
Bake one sheet at a time. I know it’s tempting to cram both sheets in the oven, but the heat circulation gets messed up and the cookies bake unevenly. Middle rack, one sheet, 10 minutes. Your patience will be rewarded with perfectly uniform cookies.
Rotate the pan halfway through. Halfway through baking, spin the pan 180 degrees. Ovens have hot spots (my back right corner is always hotter), and this prevents burnt bottoms.
Let them cool completely before storing. Warm cookies in an airtight container = soggy cookies. I made this mistake before a Halloween party and ended up with sad, steamy skulls. Let them cool fully—about 30 minutes—before stacking.
Variations & Adaptations
One of the best things about this recipe is how flexible it is. I’ve tested several variations, and here are my favorites:
Gluten-Free Version: Substitute the all-purpose flour with a 1:1 gluten-free baking flour (I use Bob’s Red Mill). Add 1 teaspoon of xanthan gum if your blend doesn’t include it. The texture is slightly more crumbly but still delicious. My gluten-sensitive friend couldn’t tell the difference.
Vegan Adaptation: Use vegan butter sticks and replace the egg with a flax egg (1 tablespoon ground flaxseed + 3 tablespoons water, let sit for 5 minutes). The cookies are a bit less tender but still hold their shape well. I’ve made these for a school Halloween party and they were gone in minutes.
Chocolate-Dipped Skulls: After the cookies cool completely, dip half of each skull in melted dark chocolate and let set on parchment paper. This adds a fancy touch for parties and the chocolate-pumpkin combo is unreal. I do this for adult gatherings and skip it for kid events.
Extra Spicy: Add ¼ teaspoon of black pepper and a pinch of cayenne to the dough. It sounds weird, but it amplifies the pumpkin spice flavors. My husband calls these “grown-up skulls.”
Pumpkin-Free Version: Replace the pumpkin puree with ½ cup of unsweetened applesauce (pat it dry the same way). The cookies won’t be pumpkin-flavored, but they’ll still have that soft snickerdoodle texture. I’ve done this when I ran out of pumpkin mid-batch.
Cookie Sandwiches: Make smaller cookies (use a 1-teaspoon scoop) and sandwich them with cream cheese frosting or pumpkin butter. These are dangerous—I ate four in one sitting.
Serving & Storage Suggestions
These cookies are best served at room temperature, ideally within a few hours of baking. The edges are slightly crisp, the centers are soft, and the cinnamon-sugar coating is at its crackly peak. For Halloween parties, arrange them on a black platter with a dusting of powdered sugar (looks like bone dust—my kids love this).
They pair beautifully with a cold glass of milk (obviously), hot apple cider, or a pumpkin spice latte. For an adult twist, serve alongside a dark stout or a bourbon-spiked hot chocolate. I’ve also crumbled them over vanilla ice cream for a quick fall sundae.
Storage: Keep in an airtight container at room temperature for up to 5 days. Place a piece of bread in the container to absorb excess moisture and keep the cookies soft—replace the bread every other day. Do not refrigerate; the fridge dries them out.
Freezing: These freeze beautifully. Layer cooled cookies between sheets of parchment paper in a freezer-safe container. Freeze for up to 3 months. Thaw at room temperature for 30 minutes before serving. I always make a double batch and stash half for Thanksgiving.
Reheating: Pop a cookie in the microwave for 8-10 seconds for that just-baked warmth. Or warm them in a 300°F oven for 3-4 minutes. The cinnamon sugar gets fragrant again, and the centers go back to that soft, melty texture.
One note: the flavor actually improves after day one. The pumpkin and spices meld together overnight, and the cookies become even more tender. So don’t stress about baking them the morning of your party—day-old cookies are actually better.
Nutritional Information & Benefits
Let’s be real—these are cookies, not health food. But they’re made with real ingredients, and there are a few bright spots worth mentioning. Here’s the estimated nutrition per cookie (based on 24 cookies):
| Nutrient | Amount per Cookie |
|---|---|
| Calories | 165 |
| Total Fat | 8g |
| Saturated Fat | 5g |
| Cholesterol | 28mg |
| Sodium | 115mg |
| Total Carbohydrates | 22g |
| Dietary Fiber | 1g |
| Sugars | 13g |
| Protein | 2g |
| Vitamin A | 15% DV |
| Calcium | 2% DV |
| Iron | 4% DV |
The pumpkin puree provides a good dose of Vitamin A (great for eye health and immune function) and fiber. The cinnamon has anti-inflammatory properties and can help regulate blood sugar—though the sugar in these cookies probably cancels that out a bit! The butter and egg provide some protein and healthy fats, making these more satisfying than a processed snack.
These cookies are vegetarian and can be made gluten-free and vegan with the substitutions listed above. They contain dairy, eggs, and gluten in their standard form. If you’re watching your sugar intake, you can reduce the coating sugar by half, but the cookies won’t have that signature crackly crust.
My personal take? I don’t make these every week. But for Halloween, fall gatherings, and those cozy October afternoons when the kids are bouncing off the walls and need something fun to do? They’re worth every calorie. I’d rather my kids eat a homemade cookie with real butter and pumpkin than a bag of neon-colored sugar from the store.
Conclusion
These Kid-Approved Pumpkin Spice Snickerdoodle Skull Cookies are everything I loved about that little bakery on Main Street—the warmth, the nostalgia, the way a simple cookie can make an ordinary October day feel special. After all those failed batches and flat skulls, I finally have a recipe that works every time, and I’m honestly a little proud of that.
What I love most about these cookies is how they bring people together. My kids fight over who gets to roll the dough balls. My neighbor texts me every October asking when I’m making “the skull cookies.” And every time I pull a tray out of the oven, I think about that creaky-floored bakery and smile. Food does that, doesn’t it? It connects us to places and people and moments we don’t want to forget.
I’d love to hear how these turn out for you. Did your kids love them? Did you try a fun variation? Drop a comment below or tag me in your photos—I genuinely get excited seeing other people make my recipes. And if you make a batch and they disappear in five minutes? That’s the highest compliment. Happy baking, friends. May your skulls be crisp, your kitchen smell like cinnamon, and your Halloween be full of joy.
Frequently Asked Questions
Can I make the dough ahead of time?
Yes! You can prepare the dough up to 48 hours in advance. Wrap it tightly in plastic wrap and refrigerate. Let it sit at room temperature for 10-15 minutes before rolling, as cold dough is harder to shape. The flavor actually deepens overnight.
Why did my cookies spread into flat blobs?
This usually happens for one of three reasons: the butter was too soft (almost melted), the pumpkin wasn’t patted dry enough, or the baking soda is old. Make sure your butter is softened but still cool to the touch, and always pat your pumpkin puree with paper towels. If your baking soda doesn’t fizz in hot water, toss it and buy fresh.
Can I use fresh pumpkin instead of canned?
Absolutely, but you’ll need to strain it first. Fresh pumpkin puree has more water than canned. Spread it in a cheesecloth-lined sieve and let it drain for 30 minutes, then pat dry with paper towels. I’ve done this with roasted sugar pumpkins and it works beautifully—just more prep work.
How do I get the skull imprint to stay visible after baking?
The key is pressing firmly but not too deep, and making sure your dough isn’t too wet. Chilling the shaped cookies for 10 minutes before baking also helps the imprint hold. I’ve also had success using a silicone skull mold—press the dough in, unmold onto the baking sheet, and bake. The detail stays crisp.
Can I double this recipe?
Yes, and I do it all the time. The recipe doubles perfectly. Just be sure to use a very large bowl or mix in batches—my KitchenAid can handle a double batch, but a hand mixer might struggle. I always make a double batch for Halloween parties and freeze half for later.
Pin This Recipe!
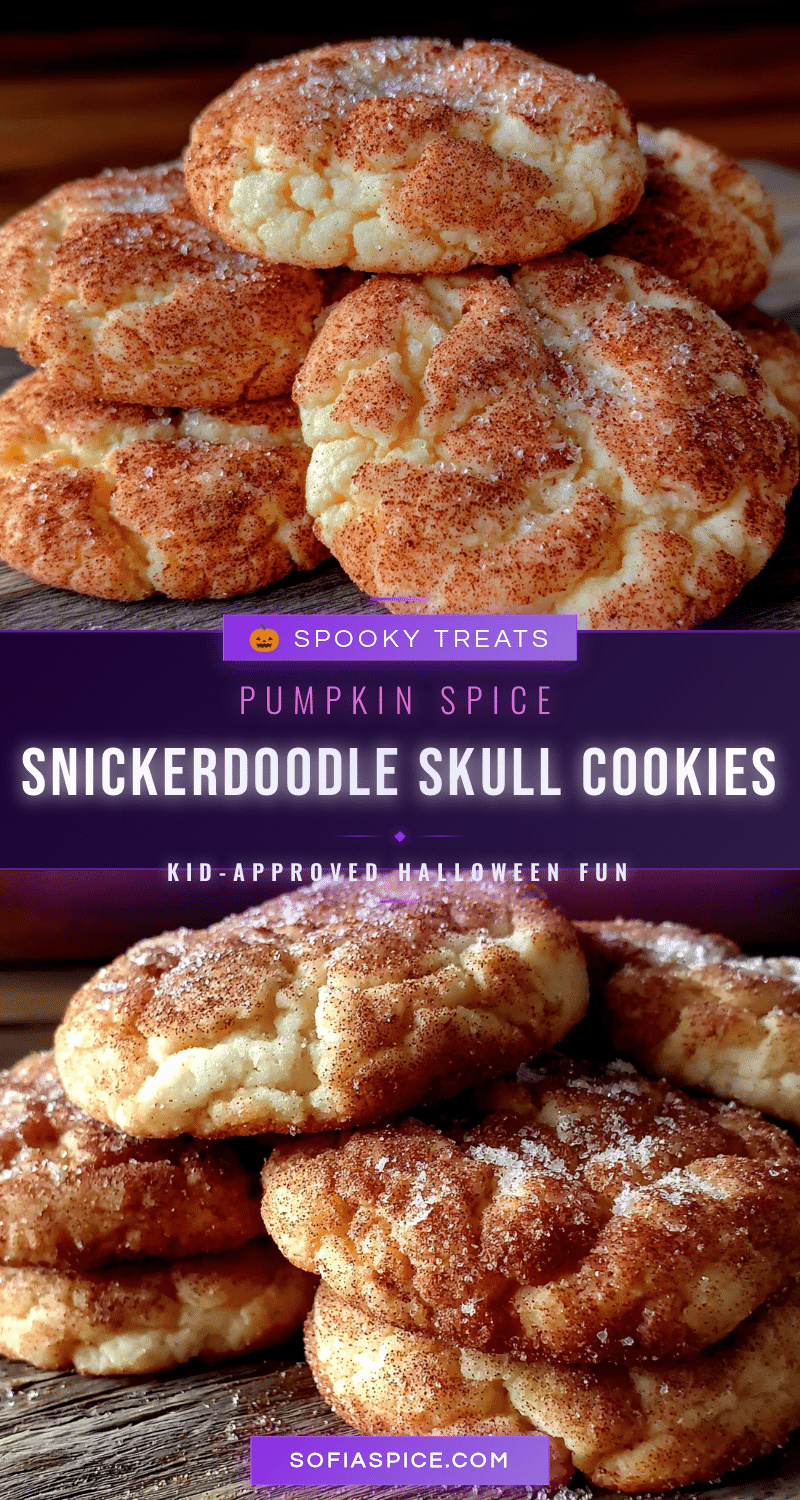
Best Easy Pumpkin Spice Snickerdoodle Skull Cookies
Soft, chewy pumpkin-spiced snickerdoodles shaped like tiny skulls with a crackly cinnamon-sugar crust. Perfect for Halloween parties and fall baking.
- Prep Time: 15 minutes
- Cook Time: 10 minutes
- Total Time: 25 minutes
- Yield: 24 cookies 1x
- Category: Dessert
- Cuisine: American
Ingredients
- 1 cup (2 sticks) unsalted butter, softened
- 1 ½ cups granulated sugar
- ½ cup canned pumpkin puree (not pumpkin pie filling), patted dry
- 1 large egg, room temperature
- 1 teaspoon vanilla extract
- 2 ¾ cups all-purpose flour
- 1 teaspoon cream of tartar
- 1 teaspoon baking soda
- ½ teaspoon salt
- 2 teaspoons pumpkin pie spice
- ½ teaspoon ground cinnamon
- ¼ cup granulated sugar (for coating)
- 2 tablespoons ground cinnamon (for coating)
- Pinch of pumpkin pie spice (for coating)
Instructions
- Preheat oven to 350°F (175°C). Line two baking sheets with parchment paper or silicone mats.
- Pat the pumpkin puree dry: spread ½ cup onto a paper towel-lined plate, cover with another paper towel, press gently, and let sit 2-3 minutes.
- In a large bowl, cream softened butter and 1½ cups sugar on medium speed for 3-4 minutes until light and fluffy.
- Beat in pumpkin puree, egg, and vanilla on low speed until just combined (batter may look slightly curdled).
- In a separate bowl, whisk together flour, cream of tartar, baking soda, salt, pumpkin pie spice, and cinnamon.
- Gradually add dry ingredients to wet mixture on low speed, mixing until no streaks of flour remain. Dough should be soft but not sticky.
- In a small bowl, mix ¼ cup sugar, 2 tablespoons cinnamon, and a pinch of pumpkin pie spice for coating.
- Using a 1.5-tablespoon cookie scoop, portion dough. Roll each portion into a ball, then coat generously in cinnamon-sugar mixture. Place on prepared sheets 2 inches apart.
- If using a skull cutter, press gently into each dough ball to create an imprint (about ¼ inch deep). If using a round cutter, flatten slightly with a glass dipped in cinnamon sugar.
- Bake for 9-11 minutes until puffed and slightly cracked on top with set edges and soft centers.
- Cool on baking sheet for 5 minutes, then transfer to a wire rack to cool completely.
- Repeat with remaining dough, letting baking sheets cool between batches.
Notes
Do not skip patting the pumpkin puree dry—excess moisture causes spreading. Cream of tartar is essential for the signature snickerdoodle tang and chew. If dough becomes too sticky, chill for 15 minutes. For best results, bake one sheet at a time on the middle rack. Cookies improve in flavor after one day.
Nutrition
- Serving Size: 1 cookie
- Calories: 165
- Sugar: 13
- Sodium: 115
- Fat: 8
- Saturated Fat: 5
- Carbohydrates: 22
- Fiber: 1
- Protein: 2
Keywords: pumpkin spice, snickerdoodle, skull cookies, Halloween cookies, fall baking, pumpkin cookies, kid-friendly


