The neighborhood potluck was in six hours and I’d completely forgotten. I mean, completely. I was standing in my kitchen at 1 PM on a Saturday, staring at a half-empty carton of eggs and wondering if I could fake a sudden illness. Everyone else would be bringing their signature dishes — you know the ones. That neighbor with the fancy sourdough starter. The one who makes those impossible little quiches from scratch. And me? I had butter, sugar, flour, and a container of rainbow sprinkles that had been sitting in my pantry since my daughter’s birthday party last year. Honestly, I almost just grabbed a store-bought cake from the bakery section and called it a day. But something made me stop. I remembered a recipe my aunt used to throw together when we were kids — nothing fancy, just a simple vanilla cake with sprinkles baked right in. She called it “happy cake” and it was always the first thing to disappear at family gatherings. I had the ingredients. I had the sprinkles. I had about four hours until showtime. So I figured, why not? Worst case scenario, I’d show up with a slightly lopsided cake and a good excuse. Best case? Well, let me tell you — that cake didn’t just hold its own. People were coming up to me asking for the recipe before I’d even set the plate down. The sourdough neighbor asked for seconds. I’m not kidding. The whole thing felt like a happy accident, but honestly, I’ve been making it on purpose ever since.
Why You’ll Love This Recipe
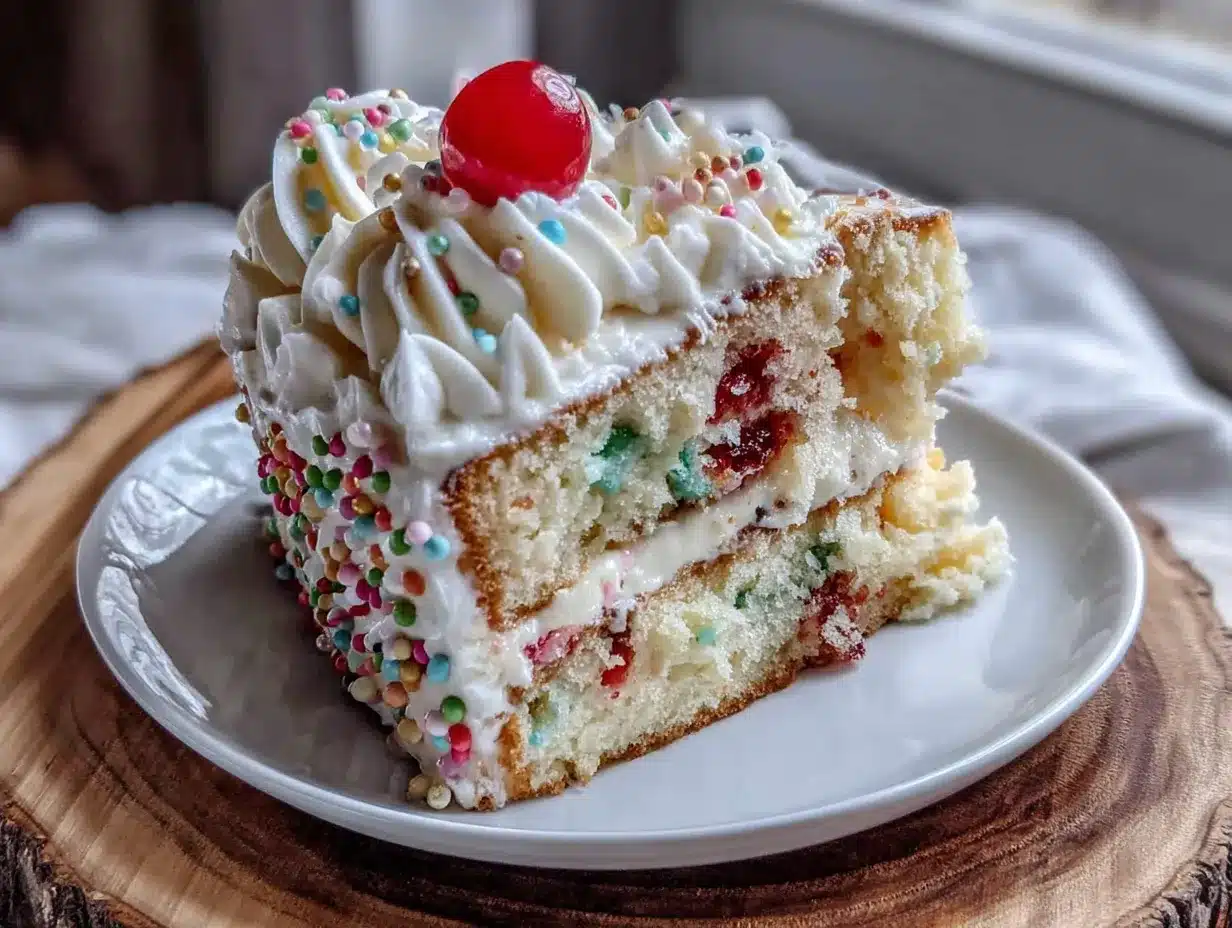
This isn’t just another birthday cake recipe. This is the one that makes people stop mid-conversation and ask what’s in it. It’s the cake that disappears first at parties, the one kids fight over the last slice of, and the one adults pretend they’re only eating “because of the sprinkles.” Let me break down exactly why this funfetti birthday cake deserves a permanent spot in your recipe collection.
- Quick & Easy: From start to finish, this cake comes together in under an hour. No complicated techniques, no fancy equipment — just straightforward mixing and baking. Perfect for when you realize at 3 PM that you need a dessert by 6 PM.
- Simple Ingredients: You probably already have everything in your kitchen right now. Butter, sugar, eggs, flour, vanilla — and a bottle of rainbow sprinkles. No special trips to the store required.
- Perfect for Hosting: This cake was practically made for parties. It feeds a crowd, looks impressive on a cake stand, and slices beautifully. Plus, the sprinkles make it instantly festive without any complicated decorating skills.
- Crowd-Pleaser: I have yet to meet a single person who doesn’t love this cake. Kids adore the colorful dots, adults appreciate the tender crumb, and everyone goes back for seconds. It’s the ultimate neutral ground dessert.
- Unbelievably Delicious: Here’s the thing — a lot of funfetti cakes are dry or artificial-tasting. Not this one. The texture is incredibly moist and tender, with a rich vanilla flavor that actually tastes like something. The sprinkles add a tiny bit of crunch and a whole lot of joy.
What makes this version different from all the others? It’s the technique. Most funfetti cakes end up with sprinkles that bleed their color into the batter, leaving you with gray streaks instead of bright rainbow dots. I figured out the trick to keeping those colors vibrant — and it’s simpler than you’d think. This cake also uses a combination of butter and oil for the perfect balance of flavor and moisture. It’s not just another version of funfetti cake. It’s the best version. The kind that makes you close your eyes after the first bite and forget you’re standing in a kitchen full of people.
What Ingredients You Will Need
This recipe uses simple, mostly pantry-staple ingredients to create something that feels genuinely special. The magic is in how they come together, not in any hard-to-find items. Here’s everything you’ll need for the ultimate funfetti birthday cake.
For the Cake
- 2 ½ cups (315g) all-purpose flour — Spoon and level for accuracy. Too much flour makes a dense cake.
- 2 ½ teaspoons baking powder — Fresh baking powder is crucial here. If yours has been sitting in the cabinet for a year, go buy new stuff.
- ½ teaspoon salt — Balances the sweetness and enhances the vanilla flavor.
- ¾ cup (170g) unsalted butter, softened — I use Kerrygold for the best flavor, but any good unsalted butter works. Let it sit out for at least an hour before starting.
- 1 ½ cups (300g) granulated sugar — Regular white sugar. No need for anything fancy.
- 3 large eggs, room temperature — Cold eggs can seize the butter mixture. If you forgot to take them out, place them in a bowl of warm water for 5 minutes.
- 2 teaspoons vanilla extract — Pure vanilla extract makes a noticeable difference. Save the imitation stuff for cookies.
- 1 cup (240ml) whole milk, room temperature — Whole milk gives the richest texture. You can use 2% in a pinch, but avoid skim.
- ⅓ cup (80ml) vegetable oil — This is the secret to the moist crumb. Use a neutral oil like canola or grapeseed.
- ½ cup (80g) rainbow sprinkles (jimmies, not nonpareils) — This matters more than you think. Jimmies are the long, rod-shaped sprinkles. Nonpareils (the tiny round ones) will bleed their color into your batter and turn it gray. Trust me on this one.
For the Vanilla Buttercream Frosting
- 1 cup (226g) unsalted butter, softened — Again, room temperature is key. Cold butter won’t cream properly and you’ll end up with lumpy frosting.
- 4 cups (480g) powdered sugar — Sift it if you want extra smooth frosting. I usually skip this step and it’s still fine.
- 2 teaspoons vanilla extract — Double the vanilla for that classic birthday cake flavor.
- 2-4 tablespoons heavy cream or whole milk — Start with 2 tablespoons and add more until you reach your desired consistency.
- Pinch of salt — Cuts the sweetness and makes the flavor pop.
- Extra sprinkles for decorating — Because obviously.
Ingredient Selection Tips
I recommend using Wilton brand jimmies for the sprinkles — they hold their color better than any other brand I’ve tried. For the vanilla, Nielsen-Massey is my go-to, but honestly, any pure vanilla extract will work beautifully. If you’re making this for someone with a dairy allergy, you can substitute the butter with a high-quality vegan butter and the milk with oat milk. Just know the texture will be slightly different — still delicious, just not quite as tender.
Equipment Needed
You don’t need a professional bakery setup to make this cake. Here’s what you’ll actually use:
- Two 9-inch round cake pans — I prefer light-colored aluminum pans for even baking. Dark pans can cause the edges to brown too quickly.
- Electric hand mixer or stand mixer — You can technically do this by hand, but your arm will hate you. A hand mixer is totally sufficient.
- Mixing bowls — At least two: one for dry ingredients, one for wet.
- Whisk — For combining the dry ingredients.
- Rubber spatula — For folding in the sprinkles and scraping down the bowl.
- Measuring cups and spoons — Accurate measurements matter in baking.
- Kitchen scale (optional but recommended) — Weighing your ingredients is more accurate than measuring by volume. I resisted getting one for years and now I use it every single time.
- Cooling rack — Essential for even cooling. If you don’t have one, you can use the wire rack from your oven — just make sure it’s clean.
- Offset spatula — Makes frosting so much easier. A butter knife works in a pinch, but an offset spatula is worth the $8 investment.
- Cake stand or serving plate — For that grand reveal at the party.
Preparation Method
Let’s get to the good part. Follow these steps carefully and you’ll have a cake that looks like you spent all day on it — even though you absolutely did not.
- Preheat your oven to 350°F (175°C). Position the rack in the center of the oven. Grease two 9-inch round cake pans with butter or non-stick spray, then line the bottoms with parchment paper circles. This extra step guarantees your cakes will release cleanly. I learned this the hard way after a particularly tragic cake-flipping incident.
- Whisk the dry ingredients together. In a medium bowl, combine 2 ½ cups (315g) all-purpose flour, 2 ½ teaspoons baking powder, and ½ teaspoon salt. Whisk until evenly distributed — about 15 seconds. Set aside.
- Cream the butter and sugar. In a large mixing bowl, beat ¾ cup (170g) softened unsalted butter and 1 ½ cups (300g) granulated sugar together on medium speed until light and fluffy. This takes about 3-4 minutes with a hand mixer, slightly less with a stand mixer. Scrape down the sides of the bowl halfway through. You’re looking for a pale, airy mixture that looks almost like wet sand.
- Add the eggs one at a time. Crack in 3 room-temperature eggs, one at a time, beating well after each addition. The mixture should look smooth and slightly glossy. Add 2 teaspoons vanilla extract and beat until combined.
- Alternate adding dry ingredients and milk. With the mixer on low speed, add about one-third of the flour mixture. Mix until just combined — a few streaks of flour are fine. Pour in half of the 1 cup (240ml) whole milk. Mix again. Repeat with another third of flour, the remaining milk, and finally the last of the flour. Stop mixing as soon as the flour disappears. Overmixing at this stage will make your cake tough.
- Add the oil. Pour in ⅓ cup (80ml) vegetable oil and mix on low speed until just incorporated. The oil adds that extra moisture that keeps this cake tender for days. Scrape down the bowl one last time.
- Fold in the sprinkles — carefully. This is the most important step. Add ½ cup (80g) rainbow jimmies to the batter. Using a rubber spatula, fold them in gently. No more than 10-12 strokes. Overmixing will cause the sprinkles to bleed their color. You want distinct dots of color throughout the batter, not a grayish swirl. Trust me, I’ve made that mistake more times than I’d like to admit.
- Divide the batter between the prepared pans. Use a kitchen scale for accuracy if you have one — each pan should get about 500g of batter. If you don’t have a scale, eyeball it as evenly as possible. Smooth the tops with a spatula.
- Bake for 25-30 minutes. The cakes are done when a toothpick inserted into the center comes out clean or with a few moist crumbs. The tops should be golden and spring back when lightly touched. Rotate the pans halfway through baking if your oven has hot spots — mine definitely does.
- Cool completely before frosting. Let the cakes cool in the pans for 10 minutes, then run a knife around the edges and turn them out onto a cooling rack. Remove the parchment paper. Let them cool completely — at least 1 hour. Frosting a warm cake is a disaster waiting to happen. The frosting will melt and slide right off. I speak from experience.
For the Frosting
- Beat the butter. In a large bowl, beat 1 cup (226g) softened butter on medium speed until smooth and creamy — about 2 minutes.
- Add powdered sugar gradually. Add 4 cups (480g) powdered sugar, one cup at a time, beating on low speed after each addition. The mixture will look dry and crumbly at first. Don’t panic. That’s normal.
- Add vanilla and cream. Pour in 2 teaspoons vanilla extract and 2 tablespoons heavy cream. Beat on medium speed for 2-3 minutes until light and fluffy. Add more cream, one tablespoon at a time, if you want a softer consistency. Add a pinch of salt and beat once more.
- Frost the cake. Place one cake layer on your serving plate. Spread about ¾ cup of frosting evenly on top. Place the second layer on top. Apply a thin “crumb coat” of frosting all over the cake — this catches any loose crumbs. Refrigerate for 15 minutes, then apply the final layer of frosting. Top with extra sprinkles before the frosting sets.
Cooking Tips & Techniques
After making this cake more times than I can count — including some truly memorable failures — I’ve picked up a few tricks that make a real difference.
The sprinkle situation. I cannot emphasize this enough: use jimmies, not nonpareils. Nonpareils are those tiny round sprinkles that look pretty in the jar but turn your batter into a sad, gray mess. Jimmies hold their shape and color through the baking process. Also, don’t try to use those sparkly sugar crystals — they’ll just sink to the bottom of the pan.
Room temperature ingredients matter. I know, I know, everyone says this and it feels like a hassle. But here’s what actually happens: cold eggs seize the butter, cold milk makes the batter curdle, and cold butter won’t cream properly. If you forgot to plan ahead, here’s a shortcut — place your eggs in a bowl of warm water for 5 minutes, and microwave your milk for 15 seconds. The butter you really do need to let sit out for at least an hour.
The toothpick test is not foolproof. Sometimes a toothpick comes out clean but the cake is still underbaked in the center. I’ve started using a thermometer — 210°F (99°C) in the center means it’s done. If you don’t have a thermometer, look for the edges to pull away slightly from the pan and the top to spring back when you press it gently.
My biggest failure. The first time I made this cake for a friend’s birthday, I forgot the baking powder. The cake came out flat and dense — like a weird vanilla pancake. I tried to cover it with frosting and pretend it was intentional, but everyone knew. Now I double-check my ingredients before I start. Learn from my embarrassment.
Timing strategy for hosting. Bake the cakes the day before your party. Wrap them tightly in plastic wrap once they’re completely cool and store them at room temperature. Make the frosting the morning of. Assemble and frost about 2 hours before guests arrive. This takes so much pressure off and the cake actually tastes better — the flavors have time to settle.
Variations & Adaptations
This funfetti birthday cake is pretty perfect as-is, but I’ve played around with enough variations to know what works and what doesn’t. Here are my favorites.
Chocolate Funfetti Cake. Replace ½ cup (60g) of the all-purpose flour with ½ cup (50g) of unsweetened cocoa powder. Add an extra 2 tablespoons of milk to compensate for the dry cocoa. The chocolate-sprinkle combination is absolutely deadly — in the best way possible.
Lemon Funfetti Cake. Add the zest of 2 lemons to the sugar and rub it in with your fingers before creaming with the butter. Replace 2 tablespoons of the milk with fresh lemon juice. The citrus cuts through the sweetness beautifully and makes the cake taste almost like a fancy bakery item.
Cupcake Version. This batter makes about 24 cupcakes. Bake at 350°F (175°C) for 15-18 minutes. The bake time is shorter, so keep a close eye on them. My kids love when I make these for school events — they’re portable and everyone gets their own.
Gluten-Free Option. Substitute the all-purpose flour with a 1:1 gluten-free baking flour blend that contains xanthan gum. I’ve had good results with King Arthur’s Measure for Measure blend. The texture is slightly more crumbly but still delicious. Just be extra gentle when folding in the sprinkles.
Dairy-Free Adaptation. Use vegan butter (I like Miyoko’s) and oat milk or almond milk. The texture will be a bit less tender, but the flavor is still spot-on. Use a dairy-free yogurt in place of the buttermilk if you’re doing the tangy version.
My personal favorite variation. I once added a teaspoon of almond extract along with the vanilla and it was incredible. The almond flavor complements the vanilla and makes the cake taste like something from a fancy French bakery. Just don’t add more than a teaspoon — almond extract is strong and can easily overpower everything else.
Serving & Storage Suggestions
This cake is best served at room temperature — it brings out the flavor and softness of the crumb. If it’s been in the fridge, let it sit out for about 30 minutes before slicing. Use a sharp, thin-bladed knife and wipe it clean between cuts for the prettiest slices.
What to serve alongside. A scoop of vanilla ice cream is the obvious choice and it works beautifully. Fresh berries — especially raspberries or sliced strawberries — add a nice tart contrast to the sweet cake. For an adult gathering, a glass of cold milk or a cup of coffee is all you really need. If you’re feeling fancy, a drizzle of warm chocolate sauce takes this over the top.
Presentation tips for hosting. Place the cake on a tall cake stand to give it presence on the table. I like to scatter a few extra sprinkles around the base of the stand for a festive look. If you have fresh flowers, a small arrangement next to the cake adds a beautiful touch — just make sure no petals end up on the cake.
Storage. This cake stays moist and delicious for up to 3 days at room temperature. Store it under a cake dome or in an airtight container. Do not refrigerate it — the cold dries out the cake and firms up the frosting. If you absolutely must store it longer, wrap individual slices tightly in plastic wrap and freeze for up to 3 months.
Reheating. Pop individual slices in the microwave for 10-15 seconds to bring back that fresh-from-the-oven softness. The frosting will get a bit melty, which honestly is not a bad thing.
How flavors develop. This cake actually tastes better on day two. The moisture distributes more evenly and the vanilla flavor deepens. If you’re hosting, bake it a day ahead and thank me later.
Nutritional Information & Benefits
Let’s be real — this is a birthday cake, not a health food. But here’s the honest breakdown so you know what you’re working with.
Per slice (1/12 of cake with frosting): Approximately 480 calories, 24g fat, 62g carbohydrates, 5g protein, 42g sugar. These numbers will vary based on your specific ingredients and portion sizes.
Health highlights. The eggs provide high-quality protein and essential vitamins like B12 and D. The butter contains fat-soluble vitamins A, D, E, and K. And the sprinkles? Well, they bring joy — and that counts for something. This cake is meant to be a celebration, not a daily staple. It’s the kind of treat that makes people smile and feel special, and there’s real value in that.
Dietary considerations. This recipe contains gluten, dairy, and eggs. For allergen-friendly alternatives, see the variations section above. The cake is nut-free as written, making it safe for most school and party environments.
My perspective. I believe in balance. I eat vegetables every day and I also eat birthday cake when there’s a reason to celebrate. This cake is made with real ingredients — butter, eggs, milk, vanilla — not artificial mixes or preservatives. That counts for something. When you make it from scratch, you control what goes into it, and that feels good.
Conclusion
This funfetti birthday cake is proof that you don’t need complicated techniques or fancy ingredients to make something truly special. It’s the cake that shows up when you need it — for birthdays, for potlucks, for Tuesday nights when everyone just needs a little happiness. The rainbow sprinkles dotting every slice, the tender vanilla crumb, the creamy buttercream frosting — it all comes together in a way that feels both nostalgic and fresh.
I hope you make this cake for your next celebration. I hope you customize it with your own twists — maybe some lemon zest, maybe a chocolate version, maybe extra sprinkles because there’s no such thing as too many sprinkles. And I hope it brings the same joy to your table that it’s brought to mine, time and time again.
If you make this recipe, I’d love to hear about it. Drop a comment below and let me know how it turned out — did you make any changes? Was it a hit at your party? Your stories are what make this community so wonderful. And if you’re looking for more crowd-pleasing desserts, check out my classic vanilla birthday cake for a simpler take, or my chocolate layer cake when you want something richer.
Happy baking, friends. And happy birthday to whoever you’re celebrating.
Frequently Asked Questions
Can I use any type of sprinkles for this cake?
No, and this is important. Use jimmies — the long, rod-shaped sprinkles. Nonpareils (tiny round sprinkles) will bleed their color into the batter and turn it gray. Sanding sugar and sparkly sprinkles will sink to the bottom of the pan. Stick with rainbow jimmies for the best results.
Can I make this cake ahead of time?
Absolutely. Bake the cake layers up to 2 days in advance. Wrap them tightly in plastic wrap once they’re completely cool and store at room temperature. You can also freeze the unfrosted layers for up to 3 months. Make the frosting fresh on the day you plan to serve it.
Why did my cake sink in the middle?
This usually happens for one of three reasons: your oven temperature was too low, you opened the oven door too early, or you overmixed the batter. Make sure your oven is fully preheated, resist the urge to peek for the first 20 minutes, and stop mixing as soon as the flour disappears.
Can I make this into a sheet cake instead?
Yes! Pour the batter into a greased 9×13-inch pan and bake at 350°F (175°C) for 30-35 minutes. You’ll need about 1 ½ times the frosting recipe to cover the top. This is a great option for feeding a larger crowd with less fuss.
How do I keep the sprinkles from sinking to the bottom?
Two tricks work well here. First, toss the sprinkles with a tablespoon of flour before folding them into the batter — this helps them stay suspended. Second, fold them in very gently and only until just combined. Overmixing breaks down the sprinkle coating and makes them sink.
Pin This Recipe!
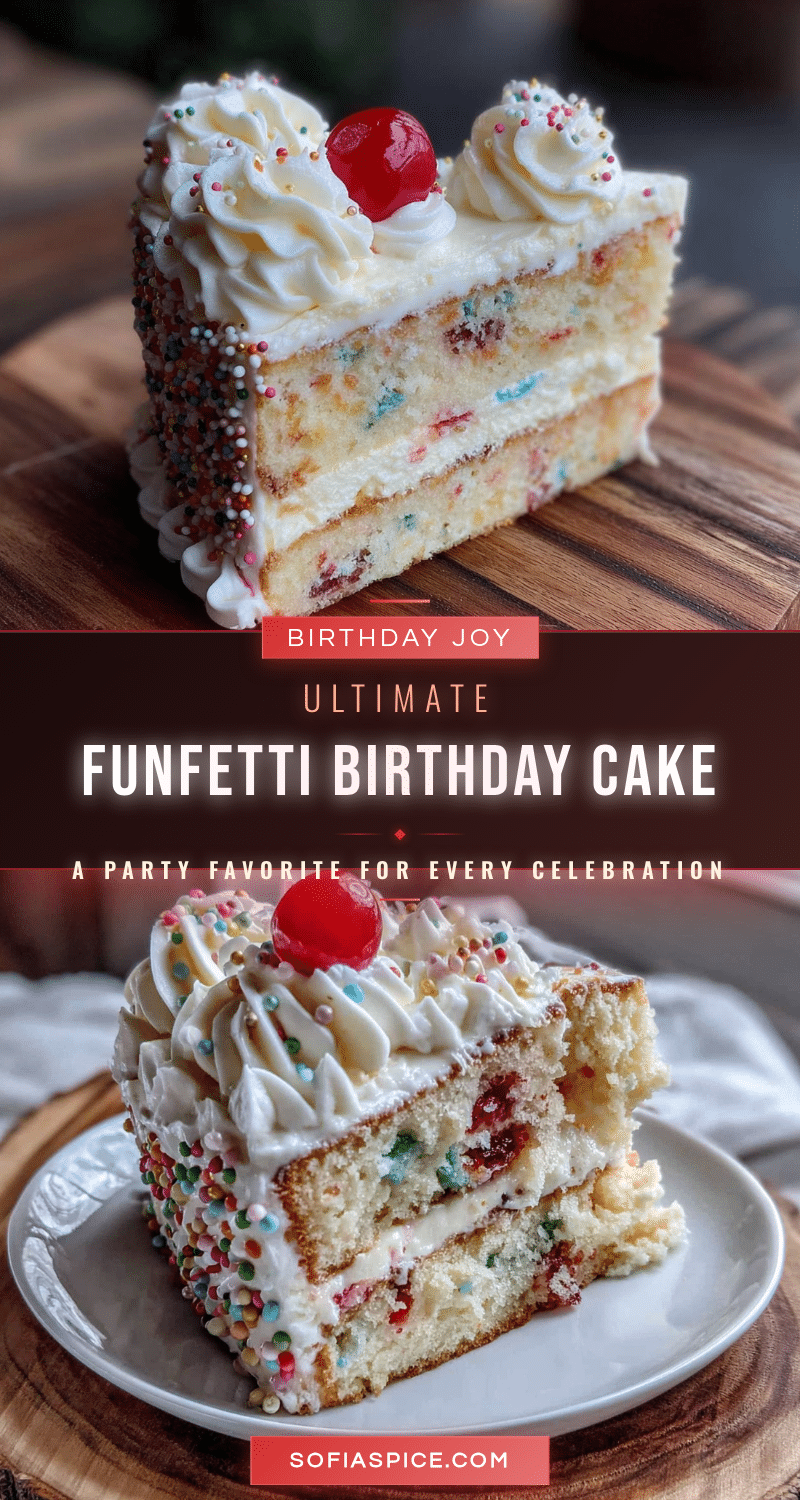
The Ultimate Funfetti Birthday Cake: Best Easy Recipe
This funfetti birthday cake is incredibly moist and tender, with a rich vanilla flavor and vibrant rainbow sprinkles throughout. It’s the perfect crowd-pleasing dessert that comes together in under an hour with simple ingredients.
- Prep Time: 20 minutes
- Cook Time: 30 minutes
- Total Time: 50 minutes
- Yield: 12 servings 1x
- Category: Dessert
- Cuisine: American
Ingredients
- 2 ½ cups (315g) all-purpose flour
- 2 ½ teaspoons baking powder
- ½ teaspoon salt
- ¾ cup (170g) unsalted butter, softened
- 1 ½ cups (300g) granulated sugar
- 3 large eggs, room temperature
- 2 teaspoons vanilla extract
- 1 cup (240ml) whole milk, room temperature
- ⅓ cup (80ml) vegetable oil
- ½ cup (80g) rainbow sprinkles (jimmies, not nonpareils)
- 1 cup (226g) unsalted butter, softened (for frosting)
- 4 cups (480g) powdered sugar (for frosting)
- 2 teaspoons vanilla extract (for frosting)
- 2–4 tablespoons heavy cream or whole milk (for frosting)
- Pinch of salt (for frosting)
- Extra sprinkles for decorating
Instructions
- Preheat your oven to 350°F (175°C). Position the rack in the center of the oven. Grease two 9-inch round cake pans with butter or non-stick spray, then line the bottoms with parchment paper circles.
- In a medium bowl, whisk together 2 ½ cups (315g) all-purpose flour, 2 ½ teaspoons baking powder, and ½ teaspoon salt until evenly distributed. Set aside.
- In a large mixing bowl, beat ¾ cup (170g) softened unsalted butter and 1 ½ cups (300g) granulated sugar together on medium speed until light and fluffy, about 3-4 minutes. Scrape down the sides of the bowl halfway through.
- Add 3 room-temperature eggs one at a time, beating well after each addition. Add 2 teaspoons vanilla extract and beat until combined.
- With the mixer on low speed, add about one-third of the flour mixture and mix until just combined. Pour in half of the 1 cup (240ml) whole milk and mix again. Repeat with another third of flour, the remaining milk, and finally the last of the flour. Stop mixing as soon as the flour disappears.
- Pour in ⅓ cup (80ml) vegetable oil and mix on low speed until just incorporated. Scrape down the bowl.
- Add ½ cup (80g) rainbow jimmies to the batter. Using a rubber spatula, fold them in gently with no more than 10-12 strokes.
- Divide the batter evenly between the prepared pans (about 500g each if using a scale). Smooth the tops with a spatula.
- Bake for 25-30 minutes, until a toothpick inserted into the center comes out clean or with a few moist crumbs. Rotate the pans halfway through if needed.
- Let the cakes cool in the pans for 10 minutes, then run a knife around the edges and turn them out onto a cooling rack. Remove the parchment paper. Let cool completely, at least 1 hour.
- For the frosting: In a large bowl, beat 1 cup (226g) softened butter on medium speed until smooth and creamy, about 2 minutes.
- Add 4 cups (480g) powdered sugar, one cup at a time, beating on low speed after each addition.
- Add 2 teaspoons vanilla extract and 2 tablespoons heavy cream. Beat on medium speed for 2-3 minutes until light and fluffy. Add more cream one tablespoon at a time for a softer consistency. Add a pinch of salt and beat once more.
- Place one cake layer on your serving plate. Spread about ¾ cup of frosting evenly on top. Place the second layer on top. Apply a thin crumb coat of frosting all over the cake. Refrigerate for 15 minutes, then apply the final layer of frosting. Top with extra sprinkles before the frosting sets.
Notes
Use jimmies (long rod-shaped sprinkles), not nonpareils, to prevent color bleeding. Room temperature ingredients are crucial for proper texture. The cake tastes even better on day two. Bake layers a day ahead and wrap tightly in plastic wrap for best results.
Nutrition
- Serving Size: 1 slice (1/12 of cak
- Calories: 480
- Sugar: 42
- Sodium: 280
- Fat: 24
- Saturated Fat: 14
- Carbohydrates: 62
- Fiber: 1
- Protein: 5
Keywords: funfetti cake, birthday cake, sprinkle cake, vanilla cake, easy cake recipe, homemade birthday cake


