It was 11:47 PM on a random Wednesday, and I had a cookie craving that would not quit. Not the kind you can just ignore and roll over and go to sleep—the kind that makes you get up, walk to the kitchen, and start opening cabinets with purpose. I wanted chocolate chip cookies, the real deal, but I also knew I’d regret eating a full batch of heavy, buttery dough right before bed. I didn’t have the energy for chilling dough either—honestly, who does at midnight? But I had a half-used bag of dark chocolate chips, some whole wheat pastry flour I’d bought on a whim, and a desperate idea.
What if I could make a single, perfect cookie that felt indulgent but didn’t weigh me down? I grabbed a small bowl and started experimenting—cutting back the butter, swapping in a little coconut oil, using less sugar than I normally would. I figured if it flopped, I’d only wasted a few tablespoons of flour. But then I pulled that one cookie out of the oven, and let me tell you, the smell alone was worth the late-night kitchen mess. It was golden at the edges, soft in the center, and it had that slightly crisp bottom that makes a cookie feel complete.
I ate it standing over the counter, and honestly, I felt a little smug. I mean, here was a cookie that tasted like a cheat meal but was actually reasonable enough to fit into my everyday eating habits. Maybe you’ve been there—wanting something sweet but not wanting to undo a whole day of good choices. This recipe was born from that exact tension, and I keep making it because it solves the problem perfectly. It’s the kind of cookie that proves you don’t have to choose between feeling good and eating something truly satisfying.
Why You’ll Love This Recipe
These lighter small-batch chocolate chip cookies are not just another healthy compromise. They are genuinely delicious, and I’ve tested them enough times to know they work. After multiple late-night trials and a few batches that were too dry or too flat, I finally nailed the balance. Here is why this recipe stands out:
- No Chilling Required: You can go from craving to cookie in about 20 minutes flat. No waiting, no planning ahead—just pure instant gratification.
- Lighter but Satisfying: By using a smart mix of whole wheat pastry flour, less butter, and a touch of coconut oil, these cookies have a fraction of the saturated fat without sacrificing that buttery taste you crave.
- Perfect Portion Control: This recipe makes exactly six cookies. Not a dozen you’ll feel guilty about finishing, not a single lonely cookie—just the right amount for a treat that feels special.
- Simple Pantry Ingredients: You probably already have everything you need. No weird flours or obscure sweeteners required.
- Kid-Approved and Adult-Friendly: My neighbor’s kids devoured these in minutes, and I’ve brought them to a casual get-together where nobody guessed they were the “lighter” version.
What makes these cookies different from every other healthy cookie recipe is the texture. I spent ages figuring out how to get that soft, chewy center with crispy edges using less fat. The secret is a combination of melted butter and coconut oil, plus a tiny bit of milk to keep the dough moist without needing extra fat. It’s a technique I stumbled on during that first midnight experiment, and it works every single time.
This recipe is for those evenings when you want something sweet but don’t want to derail your week. It is comfort food reimagined—lighter, faster, and with the same soul-soothing satisfaction as the classic version. You will close your eyes after the first bite, I promise.
What Ingredients You Will Need
This recipe uses simple, wholesome ingredients to deliver that classic chocolate chip cookie experience without the heavy feeling afterward. Most of these are pantry staples, so you can whip up a batch whenever the craving strikes.
For the Cookie Dough
- Unsalted butter, 1 tablespoon (14g), melted (adds richness without going overboard)
- Coconut oil, 1 tablespoon (14g), melted (use refined for neutral flavor or virgin for a subtle coconut note)
- Light brown sugar, 3 tablespoons (45g), packed (gives that chewy texture and caramel depth)
- Granulated sugar, 2 tablespoons (25g) (for crisp edges and balanced sweetness)
- Large egg yolk, 1 (keeps the dough tender without the extra whites making it cakey)
- Vanilla extract, ½ teaspoon (pure, not imitation—it makes a real difference here)
- Whole wheat pastry flour, ½ cup (60g) (lighter than regular whole wheat, more fiber than all-purpose—I prefer Bob’s Red Mill for consistent results)
- Baking soda, ¼ teaspoon (for that slight spread and golden color)
- Salt, ¼ teaspoon (flaky sea salt if you have it, but fine salt works too)
- Milk, 1 tablespoon (15ml) (any kind works—dairy, oat, or almond—adds moisture without extra fat)
For the Mix-Ins
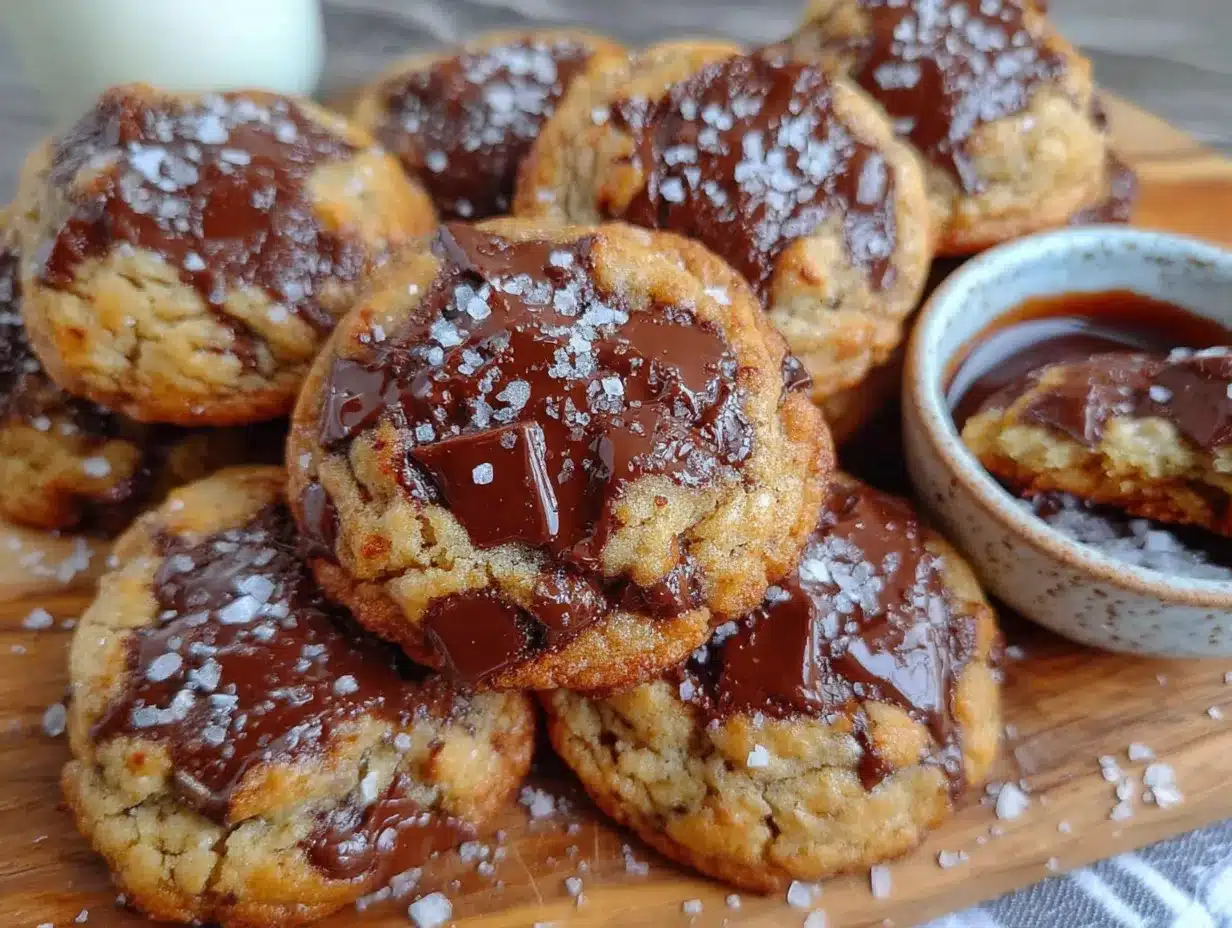
- Semi-sweet chocolate chips, ¼ cup (45g) (I like Ghirardelli for their melt quality, but any good brand works)
- Optional: Flaky sea salt for sprinkling on top before baking
Ingredient Substitutions: If you don’t have whole wheat pastry flour, you can use all-purpose flour with 1 tablespoon replaced by whole wheat flour. For a dairy-free version, use all coconut oil (2 tablespoons total) and a plant-based milk. If you are out of brown sugar, use all granulated sugar—the cookies will be slightly crisper but still delicious.
Equipment Needed
- Small mixing bowl (any medium bowl works; I use a ceramic one that feels nice to mix in)
- Whisk or fork (for combining wet ingredients—a fork works in a pinch if your whisk is dirty)
- Rubber spatula or wooden spoon (for folding the dough together)
- Baking sheet (a half-sheet pan is perfect; line it with parchment paper for easy cleanup)
- Parchment paper (non-stick and saves you from scrubbing)
- Cookie scoop or tablespoon measure (for even portioning—I use a #60 scoop, about 1.5 tablespoons)
- Cooling rack (optional but helps the bottoms stay crisp)
If you don’t have a cookie scoop, just use two spoons to portion the dough. Your hands work too, but the dough is a bit soft, so it might get messy. A basic baking sheet from any grocery store will do—no need for fancy equipment here.
Preparation Method
- Preheat your oven to 350°F (175°C). Line a small baking sheet with parchment paper. This gives you a non-stick surface and helps the cookies bake evenly. While the oven heats, get your ingredients measured—I always do this step first because melted butter waits for no one.
- Melt the butter and coconut oil together. Place both in a small microwave-safe bowl and heat in 20-second bursts until just melted, about 30-40 seconds total. Stir until smooth. Let it cool for 2 minutes—you don’t want it hot enough to cook the egg yolk when you add it later.
- Whisk in the sugars. Add the brown sugar and granulated sugar to the melted butter mixture. Whisk vigorously for about 30 seconds until it looks like wet sand and the sugar has started to dissolve. This step is important—it helps create that chewy texture we are after.
- Add the egg yolk and vanilla. Drop in the egg yolk and vanilla extract. Whisk until the mixture is smooth, creamy, and slightly lighter in color, about 20 seconds. It should look like a thick caramel sauce at this point.
- Stir in the milk. Add the tablespoon of milk and whisk until combined. The batter will look a bit loose, but that’s exactly what we want—it keeps the cookies tender without needing extra fat.
- Combine the dry ingredients. In a separate small bowl, whisk together the whole wheat pastry flour, baking soda, and salt. Make sure there are no lumps—baking soda loves to hide in clumps and can leave a bitter spot in your cookie.
- Fold the dry ingredients into the wet. Add the flour mixture to the bowl with the wet ingredients. Use a rubber spatula to fold gently, scraping the bottom and sides. Stop as soon as you no longer see streaks of flour—overmixing will make the cookies tough. The dough will be soft and slightly sticky, which is perfect.
- Fold in the chocolate chips. Add the chocolate chips and fold just until they are evenly distributed. Reserve a few chips to press into the tops of the cookies before baking—this makes them look bakery-style.
- Portion the dough. Using a cookie scoop or tablespoon, scoop six equal portions of dough onto the prepared baking sheet, spacing them about 2 inches apart. The dough will be soft, so don’t worry if they are not perfect rounds. Press a few extra chocolate chips into the tops of each dough ball.
- Bake immediately. Place the baking sheet in the preheated oven. Bake for 9-11 minutes, rotating the pan halfway through. The cookies are done when the edges are golden brown and the centers look slightly underdone and puffy. They will continue to set as they cool, so do not overbake them.
- Cool on the baking sheet. Let the cookies rest on the hot baking sheet for 5 minutes. This allows them to finish setting up without becoming too crisp. If you sprinkled flaky sea salt, do it now while the tops are still warm and sticky.
- Transfer to a cooling rack. After 5 minutes, carefully move the cookies to a wire rack to cool completely, or eat one warm—I won’t judge. The texture is best after about 10 minutes of cooling, when the centers have set but are still soft.
Cooking Tips & Techniques
I have made these cookies at least a dozen times, and I have definitely learned what not to do. Here are the tips that make the difference between good cookies and great ones.
Don’t skip the cooling step for the butter mixture. The first time I made these, I added the egg yolk right after melting the butter, and it started to cook slightly—like a very sad scrambled egg situation. Let the butter and oil mixture cool for at least two minutes before adding the egg. You want it warm, not hot.
Measure your flour correctly. Whole wheat pastry flour is lighter than all-purpose, but it is easy to pack too much into your measuring cup. Spoon the flour into the cup and level it off with a knife. If you scoop directly with the cup, you will end up with dry, crumbly dough. I learned this the hard way when my cookies came out like hockey pucks.
Rotate your baking sheet halfway through. Ovens have hot spots, and the back corner always bakes faster. I forgot to do this once, and half the batch was overdone while the other half was still pale. A quick rotation at the 5-minute mark ensures even browning.
Trust the visual cues over the timer. Ovens vary, so watch for the edges to turn golden brown and the centers to look slightly puffy and underdone. If you wait until the centers are fully set, the cookies will be hard after cooling. Pull them when they look a little too soft—they will firm up perfectly.
Use a light-colored baking sheet. Dark baking sheets absorb more heat and can cause the bottoms to brown too quickly. If you only have a dark pan, reduce the oven temperature by 25°F and check for doneness a minute earlier.
Variations & Adaptations
These cookies are forgiving enough to adapt to different cravings and dietary needs. Here are a few variations I have tried and loved.
Double Chocolate Version: Replace 1 tablespoon of the flour with unsweetened cocoa powder. Use white chocolate chips or dark chocolate chunks instead of semi-sweet. The result is a rich, fudgy cookie that feels decadent but still fits the lighter profile.
Gluten-Free Adaptation: Swap the whole wheat pastry flour with a good gluten-free 1-to-1 baking flour blend (I like King Arthur Measure for Measure). Add an extra tablespoon of milk since gluten-free flours tend to absorb more liquid. The texture will be slightly more tender, but the flavor is spot on.
Vegan Version: Use all coconut oil (2 tablespoons total) instead of butter, replace the egg yolk with 1 tablespoon of aquafaba (the liquid from a can of chickpeas) or a flax egg (1 tablespoon ground flax + 2.5 tablespoons water, let sit for 5 minutes). Use a plant-based milk. The cookies will be slightly less chewy but still delicious.
Add-In Swaps: Try chopped pecans or walnuts for crunch, dried cherries for a tart pop, or a handful of shredded coconut for texture. I once added a tablespoon of peanut butter to the dough, and it turned into a delicious peanut butter chocolate chip hybrid.
Spiced Version: Add ¼ teaspoon of cinnamon and a pinch of nutmeg to the dry ingredients. It gives the cookies a cozy, almost snickerdoodle-like warmth that pairs beautifully with the chocolate.
Serving & Storage Suggestions
These cookies are best enjoyed warm, about 10 minutes after they come out of the oven. The edges are crisp, the center is soft, and the chocolate is still slightly melted. Serve them with a cold glass of milk, a cup of hot coffee, or a mug of herbal tea for a cozy treat.
For a more indulgent presentation, sandwich two cookies with a scoop of vanilla ice cream or a dollop of whipped cream. They also make a great addition to a dessert board alongside fresh fruit and nuts.
Storage Instructions: Store leftover cookies in an airtight container at room temperature for up to 3 days. Place a slice of bread in the container to keep them soft—the cookies will absorb the moisture from the bread. Change the bread slice every day if you are storing them longer.
Freezing Instructions: These cookies freeze beautifully. Place baked and cooled cookies in a single layer in a freezer-safe bag or container. They will keep for up to 3 months. To reheat, pop a frozen cookie in a 300°F oven for 5-7 minutes, or microwave for 15 seconds for a quick warm treat.
Dough Freezing: You can also freeze the unbaked dough. Scoop the dough into portions, place them on a parchment-lined baking sheet, and freeze until solid. Transfer the frozen dough balls to a freezer bag. Bake directly from frozen, adding 2-3 minutes to the baking time.
The flavors actually deepen after a day or two in the fridge—the brown sugar and vanilla meld together, making the cookies taste even more complex. If you can resist eating them all immediately, try one the next day.
Nutritional Information & Benefits
These lighter small-batch chocolate chip cookies are designed to satisfy your sweet tooth without derailing your healthy eating habits. Here is the estimated nutritional breakdown per cookie (based on six cookies per batch):
- Calories: Approximately 145
- Total Fat: 8g
- Saturated Fat: 5g
- Carbohydrates: 18g
- Fiber: 2g
- Sugar: 11g
- Protein: 3g
Key Health Benefits: Using whole wheat pastry flour adds fiber and nutrients compared to all-purpose flour, helping with digestion and providing steady energy. Coconut oil contains medium-chain triglycerides (MCTs) that may support metabolism. The smaller portion size helps with mindful eating—you get the satisfaction of a cookie without the temptation to overindulge.
Dietary Considerations: This recipe can be adapted for gluten-free, dairy-free, and vegan diets (see variations above). It is lower in sugar than traditional cookie recipes, making it a better option for those monitoring their sugar intake. Always check your chocolate chip brand for potential allergens if you have specific dietary concerns.
I personally love that these cookies let me enjoy a treat without the heavy feeling afterward. They fit into a balanced lifestyle where you don’t have to choose between eating well and eating something delicious.
Conclusion
These lighter small-batch chocolate chip cookies are proof that you don’t need a complicated recipe or a ton of butter to make something truly satisfying. They come together in under 20 minutes, use ingredients you already have, and deliver that perfect chewy-with-crispy-edges texture that makes a cookie unforgettable. Whether you are craving a late-night treat, need a quick dessert for unexpected guests, or just want to prove to yourself that healthy eating can still be fun, this recipe has your back.
I love these cookies because they remind me that cooking doesn’t have to be rigid. That first midnight experiment taught me that sometimes the best recipes come from constraints—limited ingredients, a tired brain, and a craving that won’t be ignored. You can customize them however you like, and they will still turn out great. So go ahead, make a batch tonight. And when you take that first warm, chocolatey bite, I hope you feel exactly what I felt standing over my counter at midnight: a little bit proud, a little bit lucky, and completely satisfied.
If you try this recipe, I would love to hear how it went! Leave a comment below, share your photos, or tell me what variation you tried. Your feedback helps me create more recipes that fit into real life. Happy baking!
Frequently Asked Questions
Can I make these cookies with all-purpose flour instead of whole wheat pastry flour?
Yes, absolutely. Use ½ cup (60g) of all-purpose flour in place of the whole wheat pastry flour. The cookies will be slightly less tender and have a bit less fiber, but they will still taste great. If you want to keep some of the whole grain goodness, try using half all-purpose and half whole wheat pastry flour.
Why do these cookies not need chilling?
This recipe is designed specifically to skip the chilling step. The combination of melted butter and coconut oil creates a dough that spreads just the right amount without needing to firm up in the fridge. The smaller batch size also means the dough doesn’t have time to get too warm while you are portioning it. If you prefer a thicker cookie, you can chill the dough for 30 minutes, but it is not necessary.
Can I double this recipe?
Definitely. To make a full batch of 12 cookies, simply double all the ingredients. Use a whole egg instead of just the yolk, and increase the baking time by 1-2 minutes since the larger batch may cool the oven slightly. You will need two baking sheets or bake in two batches.
My cookies came out too flat. What went wrong?
Flat cookies usually mean the butter mixture was too warm when you added the dry ingredients, or you used too much sugar. Make sure to let the melted butter and coconut oil cool for at least 2 minutes before adding the egg yolk. Also, check that your baking soda is fresh—old baking soda loses its leavening power. Finally, measure your flour correctly by spooning it into the cup and leveling it off.
How do I make these cookies softer and chewier?
For a softer, chewier texture, try these tweaks: Use an extra tablespoon of brown sugar and reduce the granulated sugar by one tablespoon. Add an extra teaspoon of milk to the dough. Bake for the shorter end of the time range (9 minutes) and let them cool completely on the baking sheet without moving them. The residual heat will gently set the centers without making them crisp.
Pin This Recipe!

Best Easy Small-Batch Chocolate Chip Cookies (No Chill)

These lighter small-batch chocolate chip cookies are proof that you don’t need a complicated recipe or a ton of butter to make something truly satisfying. They come together in under 20 minutes, use ingredients you already have, and deliver that perfect chewy-with-crispy-edges texture.
- Prep Time: 10 minutes
- Cook Time: 10 minutes
- Total Time: 20 minutes
- Yield: 6 cookies 1x
- Category: Dessert
- Cuisine: American
Ingredients
- 1 tablespoon (14g) unsalted butter, melted
- 1 tablespoon (14g) coconut oil, melted
- 3 tablespoons (45g) light brown sugar, packed
- 2 tablespoons (25g) granulated sugar
- 1 large egg yolk
- ½ teaspoon vanilla extract
- ½ cup (60g) whole wheat pastry flour
- ¼ teaspoon baking soda
- ¼ teaspoon salt
- 1 tablespoon (15ml) milk (any kind)
- ¼ cup (45g) semi-sweet chocolate chips
- Optional: flaky sea salt for sprinkling
Instructions
- Preheat your oven to 350°F (175°C). Line a small baking sheet with parchment paper.
- Melt the butter and coconut oil together in a small microwave-safe bowl in 20-second bursts until just melted, about 30-40 seconds total. Stir until smooth. Let cool for 2 minutes.
- Whisk in the brown sugar and granulated sugar vigorously for about 30 seconds until it looks like wet sand.
- Add the egg yolk and vanilla extract. Whisk until smooth, creamy, and slightly lighter in color, about 20 seconds.
- Stir in the milk until combined.
- In a separate small bowl, whisk together the whole wheat pastry flour, baking soda, and salt.
- Fold the dry ingredients into the wet ingredients using a rubber spatula until just combined. Do not overmix.
- Fold in the chocolate chips until evenly distributed. Reserve a few chips to press into the tops of the cookies before baking.
- Using a cookie scoop or tablespoon, scoop six equal portions of dough onto the prepared baking sheet, spacing them about 2 inches apart. Press a few extra chocolate chips into the tops.
- Bake immediately for 9-11 minutes, rotating the pan halfway through. The cookies are done when the edges are golden brown and the centers look slightly underdone and puffy.
- Let the cookies rest on the hot baking sheet for 5 minutes. If using flaky sea salt, sprinkle it on now.
- Transfer to a wire rack to cool completely, or eat one warm.
Notes
Don’t skip the cooling step for the butter mixture. Measure your flour correctly by spooning it into the cup and leveling it off. Rotate your baking sheet halfway through. Trust the visual cues over the timer. Use a light-colored baking sheet.
Nutrition
- Serving Size: 1 cookie
- Calories: 145
- Sugar: 11
- Sodium: 95
- Fat: 8
- Saturated Fat: 5
- Carbohydrates: 18
- Fiber: 2
- Protein: 3
Keywords: small-batch chocolate chip cookies, no chill cookies, healthy cookies, whole wheat cookies, lighter cookies, easy cookie recipe


