The Halloween party was in six hours and I’d completely forgotten. It was a Tuesday, of all days — like anyone has time to craft elaborate appetizers on a Tuesday. My neighbor Karen was bringing her famous “graveyard dip” with homemade bread bowls shaped like tombstones. Susan from down the street had spent all weekend on those creepy crawly sausage fingers. And me? I had a dozen hard-boiled eggs in the fridge and a bottle of sriracha that was almost empty.
I stood there staring at those eggs, honestly feeling a little panicked. The party started at seven. It was already one o’clock. My kids were going to be so disappointed if I showed up with a store-bought veggie tray. I mean, they’d already picked out their costumes weeks ago — my daughter was going as a zombie unicorn, which is apparently a thing now.
So I did what any reasonable person would do when faced with a deadline and limited ingredients. I grabbed a knife, cracked open my food coloring stash from last Easter, and started experimenting. The first batch looked more like sad, discolored regular deviled eggs than anything spooky. The second batch? Let me tell you, something clicked. I added a little too much red food coloring by accident, and suddenly those egg whites looked exactly like bloodshot eyeballs.
That was the moment these Spooky Monster Eyeball Deviled Eggs were born. I threw them on a platter with some black olives for pupils and a squiggle of sriracha for veins, and honestly? They stole the show. Karen’s graveyard dip was good. Susan’s fingers were impressive. But people couldn’t stop staring at — and eating — these creepy little eyeballs. Maybe you’ve been there, scrambling at the last minute and accidentally creating something amazing. That’s exactly how this recipe happened, and I’ve been making it every Halloween since.
Why You’ll Love This Recipe
Let’s be real for a second. Halloween appetizers can be a pain. Some of them take hours, require specialty ingredients you’ll never use again, or look better than they taste. These Spooky Monster Eyeball Deviled Eggs solve all of that. They’re the appetizer that looks like you tried really hard when actually, they’re almost embarrassingly simple.
- Quick & Easy: From fridge to platter in about 30 minutes. The eggs boil while you prep the filling. No stress, no fuss.
- Simple Ingredients: Eggs, mayo, mustard, vinegar, food coloring, and olives. That’s it. You probably have most of this stuff right now.
- Perfect for Halloween: These are made for spooky parties, trunk-or-treat events, or even just a fun dinner before the kids go trick-or-treating.
- Crowd-Pleaser: I’ve watched grown adults hesitate before taking one, then come back for three more. Kids love the gross factor. Adults love the taste.
- Unbelievably Delicious: Underneath that creepy exterior is a classic deviled egg that’s creamy, tangy, and perfectly seasoned. The monster look is just a bonus.
What makes these different from every other Halloween deviled egg recipe out there? It’s the texture. I blend the yolks until they’re silky smooth — no lumpy filling here. And the sriracha veins aren’t just for show; they add a tiny kick that cuts through the richness. This isn’t just another gimmicky holiday recipe. It’s a genuinely good deviled egg that happens to look like it’s staring into your soul. That combination of comfort food and creepy fun is hard to beat.
What Ingredients You Will Need
This recipe uses simple, everyday ingredients to create something that looks complicated. Most of these are pantry staples, which is the whole point — you shouldn’t have to hunt down weird ingredients for a last-minute Halloween dish.
- 12 large eggs, hard-boiled and peeled (look for fresh eggs for easier peeling, or use eggs that are a week old — they peel better)
- 1/3 cup mayonnaise (I prefer Duke’s or Hellmann’s for the right balance of creaminess and tang)
- 1 tablespoon yellow mustard (gives that classic deviled egg color and tang; Dijon works too if you want it sharper)
- 1 teaspoon white vinegar (adds brightness; apple cider vinegar is a fine substitute)
- 1/2 teaspoon salt (adjust to taste)
- 1/4 teaspoon black pepper (freshly ground if you have it)
- 1/4 teaspoon paprika (plus more for garnish; smoked paprika adds a nice depth)
- Red and blue food coloring (gel works better than liquid for vibrant color without thinning the egg whites)
- 1 can (6 ounces) large black olives, drained (you need the big ones for the eyeball pupils)
- Sriracha or hot sauce (for the bloodshot veins; ketchup works in a pinch but isn’t as spicy)
For the eyeball effect:
The key to making these look like actual monster eyeballs is the marbling technique. You’ll dye the egg whites in a mixture of red and blue food coloring to create that veiny, bloodshot look. The black olives become the pupils, and a tiny dot of mayo on the olive creates the light reflection that makes them look alive. It’s a little trick that makes a huge difference.
Ingredient selection tips:
If you can find jumbo eggs, use them — bigger eggs mean bigger eyeballs, which are more dramatic on the platter. For the olives, look for the extra-large pitted variety. Regular olives are too small and look more like tiny buttons than pupils. And please, please use real mayonnaise. Miracle Whip has a different flavor that throws off the classic deviled egg taste. I learned that the hard way one year and ended up with a batch nobody wanted to eat.
Substitution guidance:
Need this dairy-free? Most mayonnaise is already dairy-free, but check the label. For a healthier version, swap half the mayo with plain Greek yogurt — it adds protein and tang. If you’re avoiding food coloring, beet juice creates a natural red tint, though it’s not as vibrant. And if sriracha is too spicy for your crew, just skip the veins or use a tiny drop of ketchup for color without heat.
Equipment Needed
You don’t need fancy equipment for these monster eyeballs. A few basic kitchen tools and you’re good to go.
- Large pot for boiling eggs (wide enough that eggs sit in a single layer)
- Mixing bowls (one large, one medium)
- Sharp knife for halving eggs (a serrated knife works surprisingly well for clean cuts)
- Small spoon or melon baller for scooping out yolks
- Fork or potato masher for breaking up yolks
- Piping bag or zip-top bag for filling the eggs (a zip-top bag with the corner snipped off works perfectly)
- Toothpicks for applying olive pupils and sriracha veins
- Paper towels for blotting (trust me, you’ll need these)
If you don’t have a piping bag, don’t sweat it. A sturdy zip-top bag does the same job and costs nothing. I’ve been using the same bag method for years after my actual piping bag cracked mid-squeeze at a party. The mess was memorable, but the technique stuck.
Preparation Method
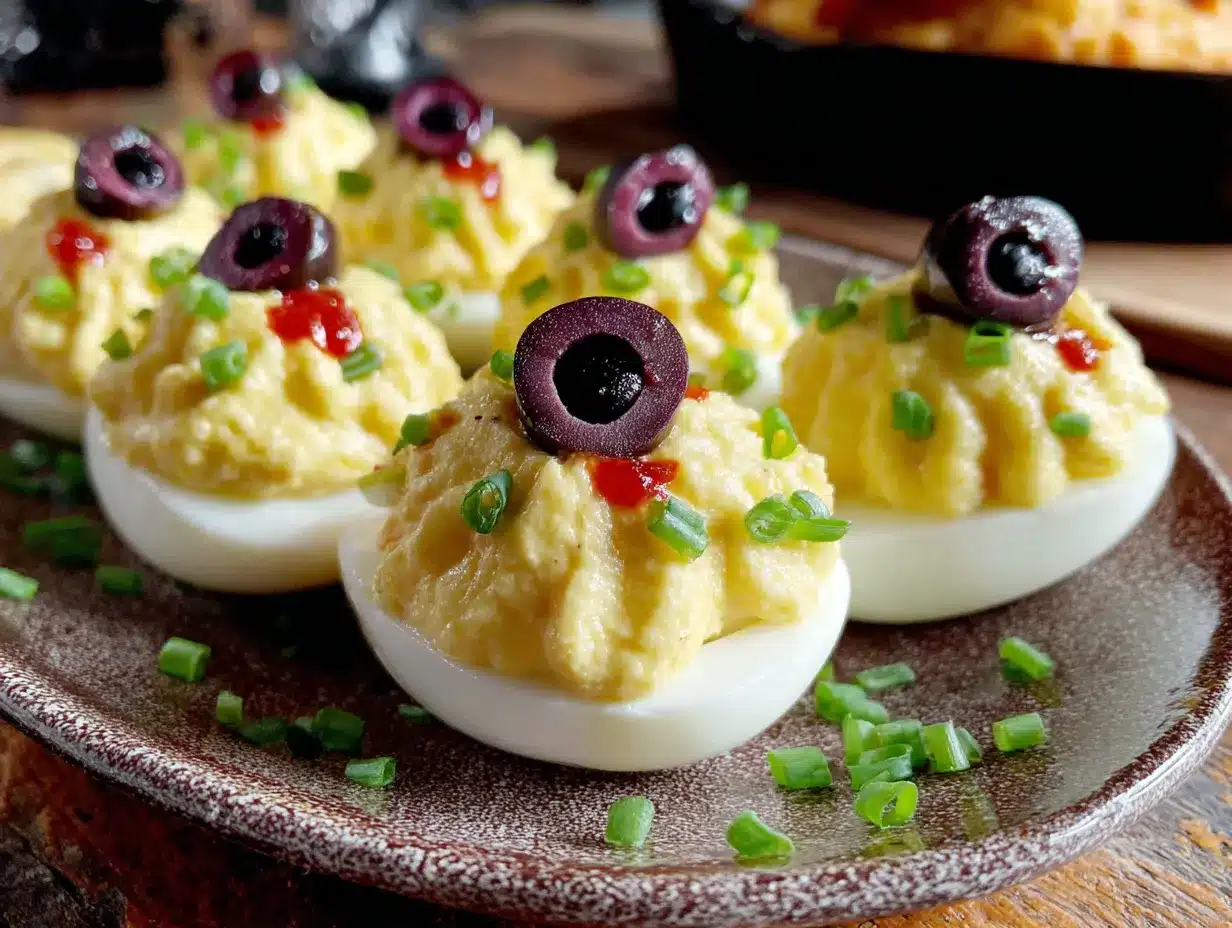
Let’s make some monster eyeballs. This looks complicated, but I promise it’s just regular deviled eggs with a little Halloween magic.
- Boil the eggs. Place 12 eggs in a large pot and cover with cold water by about an inch. Bring to a rolling boil over high heat. Once boiling, cover the pot, remove from heat, and let sit for exactly 12 minutes. Drain and transfer to an ice bath (a bowl of ice water). Let them cool completely — about 10 minutes. This step is crucial for easy peeling.
- Peel and halve. Gently tap each egg on the counter to crack the shell, then roll it between your palms to loosen. Peel under running cold water — it helps the shell slide off. Pat dry with paper towels. Using a sharp knife, cut each egg in half lengthwise. Carefully pop out the yolks into a medium bowl. Arrange the white halves on a paper towel-lined plate to dry completely. Wet egg whites won’t take the food coloring evenly.
- Make the filling. Mash the yolks with a fork until they’re crumbly with no large chunks. Add the mayonnaise, mustard, vinegar, salt, pepper, and paprika. Mix until smooth and creamy. Taste it — adjust salt or mustard to your liking. I always add a tiny extra pinch of salt here. Transfer the filling to a piping bag or zip-top bag and set aside.
- Dye the egg whites. In a small bowl, mix 1 cup cold water with 10 drops red food coloring and 3 drops blue. Stir to combine. Working in batches, drop 4-5 egg white halves into the dye. Let them sit for 30 seconds to 1 minute — longer gives deeper color. Use a spoon to gently move them around so the dye gets into all the crevices. Remove with a slotted spoon and place on a paper towel to drain. Repeat with remaining whites. Don’t leave them too long or they’ll stain all the way through and lose the marbled effect.
- Pipe the filling. Snip a corner off your piping bag (about 1/2 inch opening). Hold each dyed egg white half in your palm and pipe the filling into the cavity, mounding it slightly above the edge. A little swirl at the top looks nice. Place the filled eggs on your serving platter.
- Add the pupils. Cut each black olive in half crosswise (not lengthwise). You want round slices. Place one olive half, cut side down, in the center of each yolk mound. Press gently so it sticks. Here’s the trick: dip a toothpick in mayo and dab a tiny dot on each olive. This creates the light reflection that makes them look like real eyeballs. Don’t skip this — it’s what sells the illusion.
- Draw the veins. Dip a clean toothpick in sriracha. Carefully draw thin lines from the olive outward across the yolk, like bloodshot veins. A few squiggly lines per egg is plenty. Too much and they’ll look messy. I usually do 3-4 veins per eyeball, radiating outward.
- Chill and serve. Refrigerate the platter for at least 15 minutes before serving. This sets the filling and makes the colors pop. Sprinkle a tiny pinch of paprika over the whole platter for extra drama.
Troubleshooting tip: If your egg whites aren’t taking the color evenly, they might still be wet from peeling. Pat them dry thoroughly before dyeing. Also, gel food coloring works way better than liquid — it’s more concentrated and won’t water down the whites.
Cooking Tips & Techniques
I’ve made these monster eyeballs about a dozen times now, and I’ve learned a few things the hard way. Let me save you some trouble.
Perfect hard-boiled eggs every time: The number one mistake people make is overcooking. Those gray-green rings around the yolk? That’s from boiling too long or at too high a temperature. The 12-minute sit time after boiling is non-negotiable. Also, older eggs peel easier than fresh ones. If your eggs are super fresh, add a teaspoon of baking soda to the boiling water — it helps loosen the shells.
The dye bath trick: Don’t skip the blue food coloring in the dye. Just red alone makes the whites look pink, not bloodshot. That tiny drop of blue gives them that realistic veiny, bruised look. I once forgot the blue and ended up with eggs that looked like they belonged at a baby shower, not Halloween. Learn from my mistake.
Multitasking strategy: While the eggs are boiling, prep your dye mixture and slice your olives. While the eggs are cooling in the ice bath, make the filling. This whole recipe comes together in about 30 minutes if you keep moving. The only real waiting time is the 12-minute boil and the 10-minute cool down.
Consistency is key: Your filling should be smooth but not runny. If it’s too thick, add a tiny splash of vinegar or pickle juice. Too thin? Add another yolk if you have one, or a teaspoon of breadcrumbs. The filling should hold its shape when piped but still be creamy enough to spread slightly.
Make-ahead tip: You can boil and peel the eggs up to 3 days ahead. Keep them in the fridge in a covered container. Dye and fill them the day of your party for the freshest look. The dye can bleed over time, so don’t dye them more than a few hours before serving.
Variations & Adaptations
One of the best things about this recipe is how easy it is to customize. Here are some variations I’ve tried over the years.
Alien Eyeballs: Skip the red and blue dye and use green food coloring instead. Add a tiny dot of yellow in the center of the olive for a truly extraterrestrial look. My son’s friends went crazy for these last year — they said they looked like actual alien eyes.
Spicy Diablo Eggs: Add 1 teaspoon of sriracha or chipotle powder to the yolk mixture. The filling gets a warm, smoky kick that pairs perfectly with the bloodshot veins. These are for the adults who want a little heat with their horror.
Vegan Monster Eyeballs: Substitute the eggs with extra-firm tofu, cut into oval shapes and hollowed out slightly. Use vegan mayo and a pinch of kala namak (black salt) for that eggy flavor. The dye works the same way on tofu, and the texture is surprisingly similar.
Zombie Brains: Instead of piping a smooth mound, use a star tip to pipe the filling in a squiggly, brain-like pattern. Skip the olive pupil and just do the sriracha veins. They look like little brains scattered across the platter. I did this one year when I ran out of olives, and honestly, they were a hit.
Dairy-Free Option: Use vegan mayonnaise and skip any butter-based additions. The filling stays creamy without dairy. Most store-bought vegan mayo works well — just avoid the oil-free versions, which can be too thin.
Serving & Storage Suggestions
These monster eyeballs are best served cold, straight from the fridge. The filling firms up nicely after chilling, and the colors look more vibrant against the cool white of the plate.
Presentation ideas: Arrange the eyeballs on a black platter or dark slate board for maximum contrast. Scatter a few fake spiders or plastic bones around the edges for extra spooky vibes. I like to serve them on a bed of fresh parsley or kale — it looks like they’re staring up from a swamp. If you’re feeling extra, add a dry ice effect by placing a small bowl of dry ice in the center of the platter (just make sure it’s food-safe and handled carefully).
What to serve with them: These pair beautifully with other Halloween finger foods. Think mummy hot dogs (crescent dough wrapped around hot dogs with mustard eyes), pumpkin-shaped cheese balls, or a bowl of “witches’ brew” punch. For drinks, a crisp white wine or a dark stout complements the creamy, tangy filling.
Storage instructions: Store leftover eyeballs in an airtight container in the refrigerator for up to 3 days. The dye may bleed slightly into the filling over time, so they won’t look as pristine on day two. But they’ll still taste great. Do not freeze — the texture of the egg whites becomes rubbery and unpleasant.
Reheating: Don’t. These are served cold. If you’ve refrigerated them, just let them sit at room temperature for 10 minutes before serving to take the chill off. The flavors actually meld together a bit more overnight, so leftovers often taste even better.
Flavor development: The filling gets more flavorful after a few hours in the fridge. The mustard and vinegar mellow out and blend with the mayo. If you’re making these a day ahead, hold off on the sriracha veins until just before serving. The hot sauce can soak into the filling and lose its visual impact overnight.
Nutritional Information & Benefits
Let’s be honest — deviled eggs aren’t health food. But they’re not terrible for you either, especially compared to most Halloween party snacks.
Per serving (2 eyeballs): Approximately 140 calories, 11g fat, 2g saturated fat, 185mg cholesterol, 220mg sodium, 2g carbohydrates, 0g fiber, 1g sugar, 7g protein.
Health highlights: Eggs are a fantastic source of high-quality protein and contain all nine essential amino acids. They’re rich in choline, which supports brain health, and lutein, which is good for your eyes (how fitting for an eyeball recipe!). The yolks provide vitamin D, B12, and selenium. Olive oil-based mayonnaise adds healthy monounsaturated fats. And the sriracha? Capsaicin from the chili peppers can boost metabolism slightly.
Dietary considerations: This recipe is naturally gluten-free and low-carb (only about 2g carbs per serving). It’s keto-friendly and works for most low-carb diets. The main allergens are eggs and — depending on your mayo — soy or eggs. For a paleo version, use avocado oil-based mayonnaise. For whole30, check that your mayo is compliant (no added sugar).
My personal take: Look, I’m not a nutritionist. I’m a mom who wants to feed her family something fun for Halloween that isn’t pure sugar. These eggs have protein, healthy fats, and real food ingredients. Compared to a bag of candy corn or a slice of pizza, they’re a win. Plus, the kids are so distracted by the eyeball look that they don’t realize they’re eating something nutritious.
Conclusion
These Spooky Monster Eyeball Deviled Eggs are proof that you don’t need hours of prep or fancy ingredients to create something memorable. They started as a panic-driven experiment on a random Tuesday and turned into the Halloween recipe my family requests every year. That’s the kind of kitchen magic I live for.
The best part? You can make them your own. Adjust the spice level, change the colors, or skip the olives entirely. The base recipe is a solid, classic deviled egg that works for any occasion — the monster look is just a fun bonus. Whether you’re bringing them to a party, serving them at home, or just trying to impress your kids, these eyeballs deliver.
I’d love to hear how yours turn out. Did you try a different color combination? Add a secret ingredient? Did your kids freak out in the best way? Drop a comment below and let me know. And if you’re looking for more Halloween fun, check out our mummy hot dogs or pumpkin cheese ball — they’re perfect for a full spooky spread. Happy Halloween, and happy cooking!
Frequently Asked Questions
Can I make these monster eyeball deviled eggs the night before?
Yes, but with a small catch. You can boil, peel, dye, and fill the eggs up to 24 hours ahead. Just wait to add the olive pupils and sriracha veins until right before serving. The dye can bleed into the filling overnight, and the sriracha can soak in and lose its bright red color. I usually prep everything the night before, then spend 10 minutes finishing them before the party starts.
Why did my egg whites turn out rubbery?
Rubbery egg whites are almost always from overcooking. If you boil the eggs too long or at too high a temperature, the proteins tighten up and get that bouncy texture. Stick to the 12-minute sit time after bringing the water to a boil, and immediately transfer to an ice bath. The cold water stops the cooking process instantly. Also, make sure your eggs aren’t super fresh — older eggs have slightly more air between the white and the shell, which helps them stay tender.
What if I don’t have food coloring?
No problem! You can skip the dye entirely and just make regular deviled eggs with the olive pupils and sriracha veins. They won’t look bloodshot, but they’ll still be creepy and delicious. For a natural red color, try beet juice — boil a few beet slices in water, let it cool, and soak the egg whites for about 15 minutes. The color is more pink than red, but it works. Turmeric creates a yellow-orange tint if you want a different monster vibe.
Can I use a different type of olive?
Absolutely. While large black olives give the best “pupil” effect, you can use green olives stuffed with pimento for a different look. The pimento adds a tiny red dot in the center, which is actually pretty creepy. Kalamata olives work too, but they’re softer and can fall apart when you try to cut them. For a truly scary look, try using caper berries — they’re bigger than capers and have a stem that looks like an optic nerve. Just be creative and see what works.
How do I keep the olive pupils from falling off?
This is actually the most common problem people run into. The key is to press the olive half gently but firmly into the filling so it’s slightly embedded. The filling acts like glue. Also, make sure your filling isn’t too wet or oily — a dry, creamy filling holds the olive better. If you’re still having trouble, dip the flat side of the olive in a tiny bit of extra mayo before pressing it onto the filling. That extra stickiness does the trick every time.
Pin This Recipe!
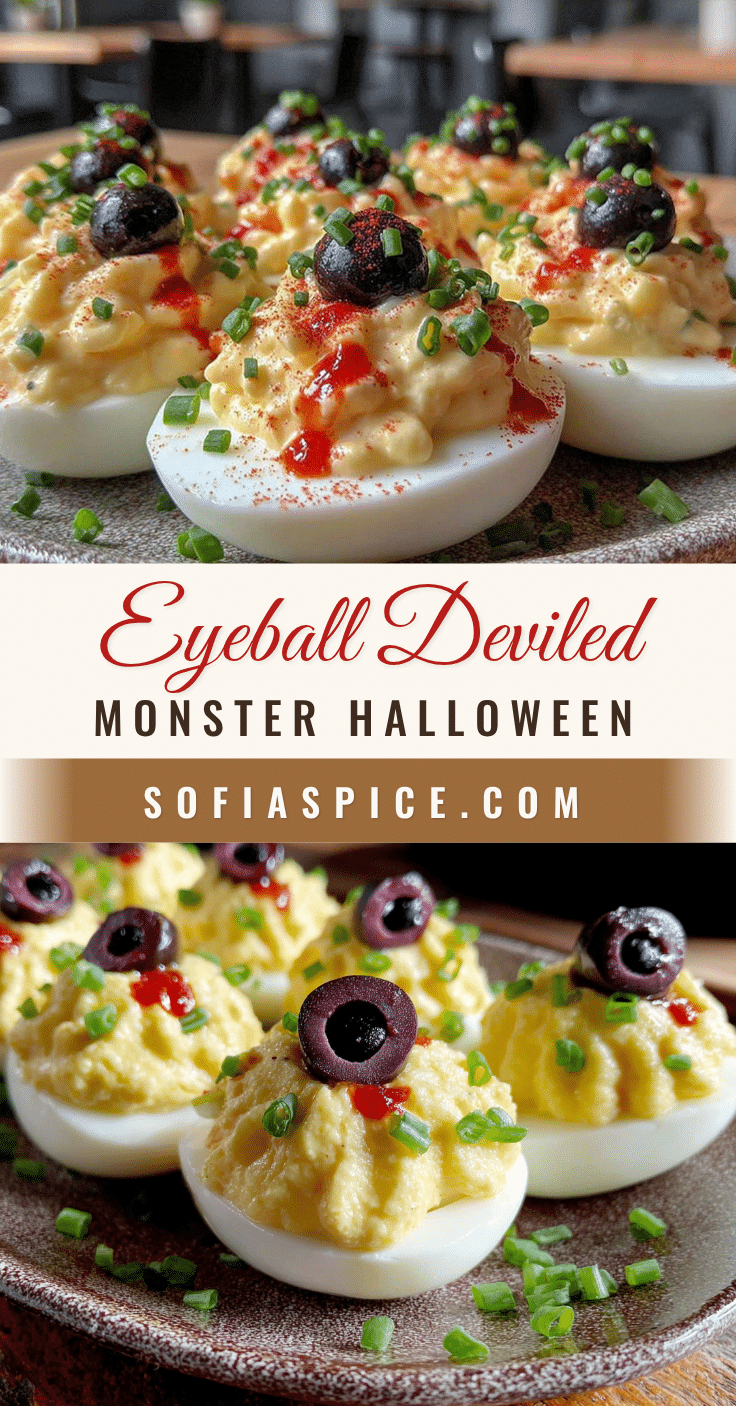
Spooky Monster Eyeball Deviled Eggs: Best Halloween Appetizer
These Spooky Monster Eyeball Deviled Eggs are a quick and easy Halloween appetizer that looks impressively creepy but uses simple ingredients. Perfect for parties, they combine classic deviled egg flavor with a fun, bloodshot eyeball design.
- Prep Time: 15 minutes
- Cook Time: 12 minutes
- Total Time: 30 minutes
- Yield: 24 servings (2 eyeballs per serving) 1x
- Category: Appetizer
- Cuisine: American
Ingredients
- 12 large eggs, hard-boiled and peeled
- 1/3 cup mayonnaise (preferably Duke’s or Hellmann’s)
- 1 tablespoon yellow mustard (or Dijon for sharper flavor)
- 1 teaspoon white vinegar (or apple cider vinegar)
- 1/2 teaspoon salt
- 1/4 teaspoon black pepper (freshly ground preferred)
- 1/4 teaspoon paprika (plus more for garnish; smoked paprika adds depth)
- Red and blue food coloring (gel works better than liquid)
- 1 can (6 ounces) large black olives, drained
- Sriracha or hot sauce (for bloodshot veins; ketchup works in a pinch)
Instructions
- Boil the eggs: Place 12 eggs in a large pot and cover with cold water by about an inch. Bring to a rolling boil over high heat. Once boiling, cover the pot, remove from heat, and let sit for exactly 12 minutes. Drain and transfer to an ice bath (a bowl of ice water). Let them cool completely — about 10 minutes.
- Peel and halve: Gently tap each egg on the counter to crack the shell, then roll it between your palms to loosen. Peel under running cold water. Pat dry with paper towels. Using a sharp knife, cut each egg in half lengthwise. Carefully pop out the yolks into a medium bowl. Arrange the white halves on a paper towel-lined plate to dry completely.
- Make the filling: Mash the yolks with a fork until crumbly with no large chunks. Add the mayonnaise, mustard, vinegar, salt, pepper, and paprika. Mix until smooth and creamy. Taste and adjust seasoning. Transfer the filling to a piping bag or zip-top bag and set aside.
- Dye the egg whites: In a small bowl, mix 1 cup cold water with 10 drops red food coloring and 3 drops blue. Stir to combine. Working in batches, drop 4-5 egg white halves into the dye. Let them sit for 30 seconds to 1 minute — longer gives deeper color. Use a spoon to gently move them around. Remove with a slotted spoon and place on a paper towel to drain. Repeat with remaining whites.
- Pipe the filling: Snip a corner off your piping bag (about 1/2 inch opening). Hold each dyed egg white half in your palm and pipe the filling into the cavity, mounding it slightly above the edge. A little swirl at the top looks nice. Place the filled eggs on your serving platter.
- Add the pupils: Cut each black olive in half crosswise (not lengthwise). Place one olive half, cut side down, in the center of each yolk mound. Press gently so it sticks. Dip a toothpick in mayo and dab a tiny dot on each olive to create a light reflection.
- Draw the veins: Dip a clean toothpick in sriracha. Carefully draw thin lines from the olive outward across the yolk, like bloodshot veins. Use 3-4 veins per eyeball, radiating outward.
- Chill and serve: Refrigerate the platter for at least 15 minutes before serving. Sprinkle a tiny pinch of paprika over the whole platter for extra drama.
Notes
For best results, use gel food coloring for vibrant color without thinning the egg whites. Older eggs peel easier than fresh ones. If using fresh eggs, add a teaspoon of baking soda to the boiling water to help loosen shells. The dye can bleed over time, so dye and fill eggs the day of your party for the freshest look. Store leftovers in an airtight container in the refrigerator for up to 3 days; do not freeze.
Nutrition
- Serving Size: 2 eyeballs
- Calories: 140
- Sugar: 1
- Sodium: 220
- Fat: 11
- Saturated Fat: 2
- Carbohydrates: 2
- Protein: 7
Keywords: Halloween deviled eggs, monster eyeball deviled eggs, spooky appetizer, Halloween party food, easy Halloween recipe, deviled eggs with olives, bloodshot deviled eggs


