I was sorting through a dusty bin of vintage Christmas ornaments at an estate sale last October when the elderly woman running the sale started talking about cookies. Not just any cookies, mind you—she was describing these adorable witch hat cookies she used to make every year for her grandchildren’s Halloween parties. I wasn’t expecting baking advice from an 82-year-old estate sale organizer, but there I was, holding a chipped ceramic pumpkin, listening to her explain exactly how to shape the chocolate cones and pipe the orange icing. She scribbled the recipe on the back of a receipt from 1998, and honestly, I almost lost it twice before I made it to my car. But I’m so glad I held onto that crumpled piece of paper.
These Kid-Approved Pumpkin Spice Witch Hat Cookies are everything you want in a Halloween treat—cute enough to impress at the school party, simple enough that you won’t lose your mind making them, and packed with that cozy pumpkin spice flavor that makes fall feel like fall. I mean, let’s face it, most Halloween cookies are either too complicated or they taste like pure sugar with no real substance. These little hats? They’ve got substance. The base is a soft, spiced pumpkin cookie, topped with a chocolate kiss for the hat tip, and finished with orange icing and a green candy buckle. My kids called them “the best thing I’ve ever made” and that’s saying something in my house.
The first time I made these, I forgot to chill the dough and ended up with flat, sad-looking hats that melted into puddles. My six-year-old still ate three of them and asked for more, so I knew I was onto something. After a few tweaks and a proper chill time, these cookies came out looking like they belonged in a bakery window. You know that feeling when a recipe finally clicks? That was this moment for me. Maybe you’ve been there—staring at a pan of cookies that didn’t quite work, wondering if you should just give up and buy something from the store. Don’t. These witch hat cookies are worth the little bit of effort, and I promise they’ll become a Halloween tradition in your house too.
Why You’ll Love This Recipe
Let me tell you why these pumpkin spice witch hat cookies have earned a permanent spot in my fall baking rotation. I’ve tested this recipe four times now, tweaking the spice blend, adjusting the bake time, and figuring out the best way to keep those chocolate kisses from sliding off. My neighbor, who’s a professional baker, even gave it her stamp of approval after I brought a batch to our street’s Halloween block party. So trust me when I say this recipe works.
- Quick & Easy : These come together in about 45 minutes total, including chill time. The active prep is maybe 20 minutes, which is perfect for busy weeknights when you promised to bring treats to the school party tomorrow morning.
- Simple Ingredients : No fancy grocery trips needed. You probably have most of this stuff in your pantry right now—flour, sugar, pumpkin puree, pumpkin pie spice, and chocolate kisses. I buy my kisses in bulk around Halloween because they go on sale everywhere.
- Perfect for Halloween Parties : These are great for classroom celebrations, trunk-or-treat events, or just a fun afternoon baking session with the kids. They’re festive without being scary, so even the littlest ghosts and goblins will love them.
- Crowd-Pleaser : My kids devoured an entire batch in two days, and my husband kept sneaking them from the cookie jar when he thought I wasn’t looking. They’re that good.
- Unbelievably Delicious : The combination of soft, spiced pumpkin cookie with rich chocolate and sweet orange icing is next-level comfort food. The texture is tender and cake-like, not dry or crumbly like some pumpkin cookies can be.
What makes these different from every other witch hat cookie recipe out there? It’s the balance of spices. I use a blend of cinnamon, ginger, nutmeg, and a pinch of cloves that gives the cookies that deep, warm pumpkin spice flavor without being overpowering. Plus, I add a tablespoon of molasses to the dough, which keeps the cookies soft for days and adds a subtle richness you don’t get from sugar alone. This isn’t just another version of a Halloween cookie—it’s the best version I’ve ever made.
Honestly, these cookies make me close my eyes after the first bite every single time. They’re comfort food reimagined for the Halloween season—faster than making a pie, easier than decorating a cake, but with the same soul-soothing satisfaction. Perfect for impressing other parents at the school party without spending hours in the kitchen, or turning a regular Tuesday afternoon into something memorable with your kids.
What Ingredients You Will Need
This recipe uses simple, wholesome ingredients to deliver bold pumpkin spice flavor and that perfect soft cookie texture. Most of these are pantry staples, especially if you do any fall baking at all. Here’s what you’ll need and why each ingredient matters.
For the Cookie Dough
- 1 ¾ cups all-purpose flour (I use King Arthur Flour for consistent results—it has a slightly higher protein content that gives these cookies a nice structure without making them tough)
- 1 teaspoon baking soda (make sure it’s fresh—test it by dropping a pinch into vinegar; if it fizzes, you’re good)
- ½ teaspoon salt (fine sea salt works best; it balances the sweetness and enhances the spices)
- 2 teaspoons pumpkin pie spice (store-bought is fine, but I make my own with 1 teaspoon cinnamon, ½ teaspoon ginger, ¼ teaspoon nutmeg, and ¼ teaspoon cloves—it’s fresher and you can adjust it to your taste)
- ½ cup unsalted butter, softened (I prefer unsalted so I can control the salt level; let it sit out for about 30 minutes before you start)
- ½ cup granulated sugar (adds sweetness and helps with spreading)
- ⅓ cup packed brown sugar (light or dark works—dark brown sugar adds more molasses flavor and moisture)
- 1 large egg, room temperature (if you forget to take it out ahead of time, place it in a bowl of warm water for 5 minutes)
- 1 teaspoon vanilla extract (pure vanilla extract is worth the splurge here—it rounds out the spices beautifully)
- 1 tablespoon molasses (this is my secret ingredient—it keeps the cookies soft and adds a deep, almost caramel-like note that pairs perfectly with pumpkin)
- ¾ cup pumpkin puree (not pumpkin pie filling—make sure you grab the 100% pure pumpkin. Libby’s is my go-to brand because it’s consistently thick and not watery)
For Decorating
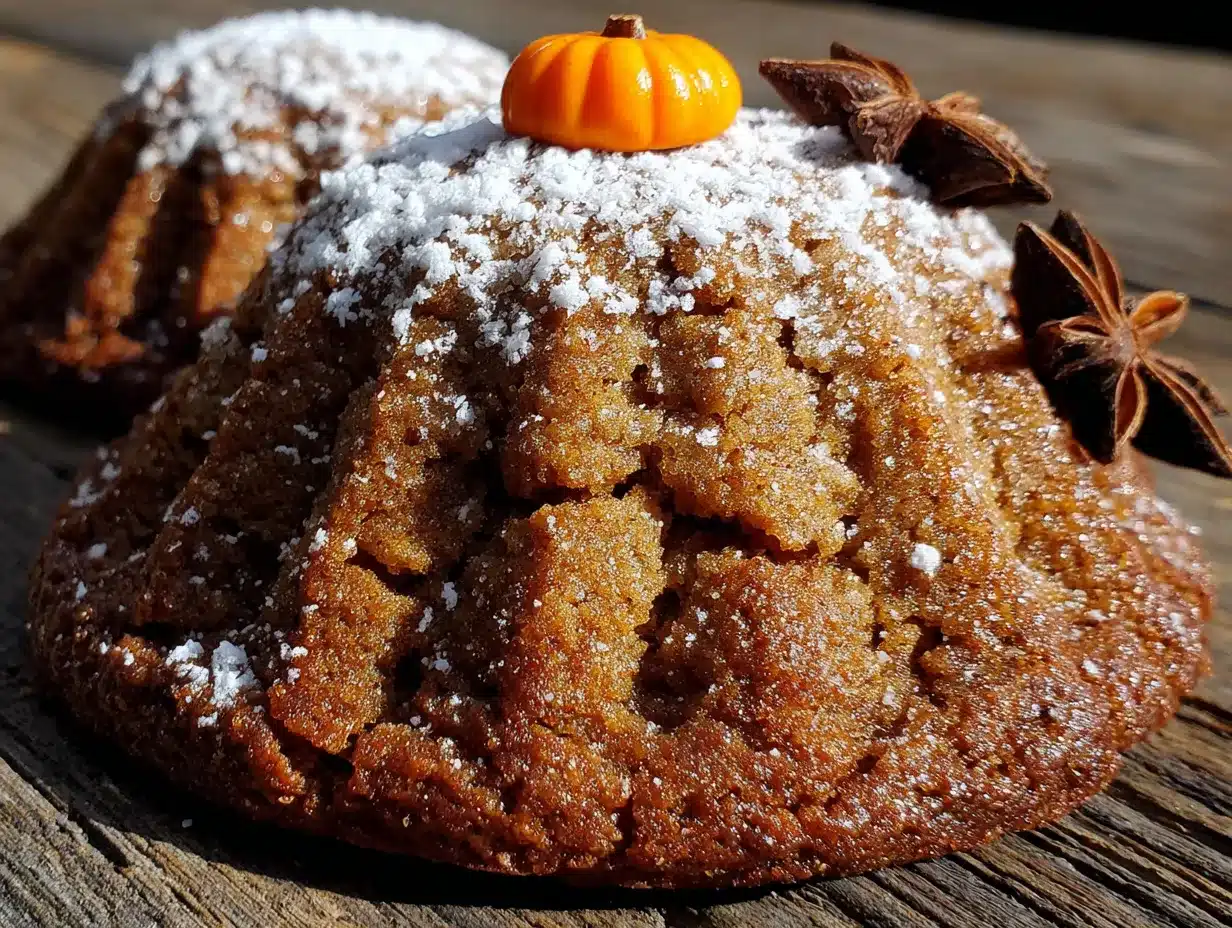
- 48 chocolate kisses, unwrapped (Hershey’s are the classic choice, but any brand works. You’ll need one per cookie)
- 1 cup powdered sugar (for the icing)
- 2 tablespoons milk (whole milk gives the best consistency, but any milk works)
- ½ teaspoon vanilla extract (adds flavor to the icing)
- Orange gel food coloring (I prefer gel over liquid because it doesn’t thin out the icing—Wilton brand is reliable)
- Green candy melts or green M&M’s (for the buckle on the hat—I’ve used both and prefer the candy melts because they’re easier to shape)
- Black decorating gel or black icing (optional, for adding a ribbon detail around the hat—my kids love this step)
Substitution Guidance: If you’re gluten-free, use a 1:1 gluten-free baking flour blend. I’ve tested this with Bob’s Red Mill and it worked great—just add an extra tablespoon of flour because gluten-free dough tends to be stickier. For a dairy-free version, use vegan butter sticks (not the spreadable kind) and dairy-free chocolate kisses. If you don’t have pumpkin pie spice, mix 1 teaspoon cinnamon, ½ teaspoon ginger, ¼ teaspoon nutmeg, and ¼ teaspoon allspice instead.
Equipment Needed
You don’t need any fancy equipment for these witch hat cookies, which is part of why I love this recipe. Here’s what you’ll need:
- Large mixing bowl and electric mixer (a hand mixer works perfectly—I use my KitchenAid stand mixer, but honestly, a whisk and some elbow grease will do the job too)
- Medium mixing bowl (for whisking dry ingredients together)
- Baking sheets (I recommend two so you can rotate batches—I use Nordic Ware aluminum sheets because they heat evenly and don’t warp)
- Parchment paper or silicone baking mats (parchment paper is cheaper and works great; silicone mats are reusable and non-stick)
- Cookie scoop or tablespoon (a 1.5-tablespoon scoop gives you evenly sized cookies—mine was $8 at the grocery store and it’s one of my most-used tools)
- Cooling rack (essential for getting those cookies to cool properly before decorating)
- Small piping bag or zip-top bag (for the orange icing—a zip-top bag with a tiny corner snipped off works perfectly and costs nothing)
- Small microwave-safe bowl (for melting green candy melts)
If you don’t have a cookie scoop, just use two spoons—one to scoop and one to push the dough off. It’s a little messier but works fine. And if you don’t have a cooling rack, transfer the cookies to a plate lined with paper towels. They’ll cool eventually, just give them a little extra time.
Preparation Method
Alright, let’s make some witch hat cookies! I’ve broken this down into clear steps so you can follow along without any confusion. Take your time with the decorating part—it’s the most fun step, especially if you’ve got little helpers in the kitchen.
- Preheat your oven to 350°F (175°C). Line two baking sheets with parchment paper or silicone baking mats. Set them aside while you make the dough.
- Whisk the dry ingredients together. In a medium bowl, combine 1 ¾ cups all-purpose flour, 1 teaspoon baking soda, ½ teaspoon salt, and 2 teaspoons pumpkin pie spice. Whisk until everything is evenly distributed. This step ensures you don’t end up with a pocket of baking soda in one cookie—trust me, I learned that lesson the hard way.
- Cream the butter and sugars. In a large mixing bowl, beat ½ cup softened unsalted butter with ½ cup granulated sugar and ⅓ cup packed brown sugar on medium speed until light and fluffy, about 2-3 minutes. Scrape down the sides of the bowl halfway through. The mixture should look pale and slightly increased in volume.
- Add the wet ingredients. Beat in 1 large egg, 1 teaspoon vanilla extract, and 1 tablespoon molasses until combined. The mixture might look a little separated at this point—that’s normal. Add ¾ cup pumpkin puree and beat on low speed until just incorporated. Don’t overmix here, or the cookies will be tough.
- Combine wet and dry ingredients. Gradually add the flour mixture to the pumpkin mixture, mixing on low speed until just combined. You should see a few streaks of flour remaining—stop mixing at this point. Overmixing develops gluten and makes cookies dense instead of tender.
- Chill the dough. This step is non-negotiable. Cover the bowl with plastic wrap and refrigerate for at least 30 minutes. The dough will be very sticky at first, and chilling it makes it scoopable and prevents the cookies from spreading too much in the oven. I’ve skipped this step before and ended up with flat, pancake-like cookies that looked nothing like hats.
- Scoop and shape the cookies. Using a 1.5-tablespoon cookie scoop, portion out the dough and roll each piece into a ball. Place them on the prepared baking sheets, spacing them about 2 inches apart. You should get about 24 cookies, so plan for two batches or use two baking sheets.
- Bake the cookies. Bake at 350°F (175°C) for 10-12 minutes, or until the edges are set and the tops look slightly puffed and cracked. The centers will still look soft—that’s perfect. Don’t overbake them, or they’ll dry out. Remove from the oven and let the cookies cool on the baking sheet for 5 minutes before transferring to a cooling rack. The cookies will continue to set as they cool.
- Press the chocolate kisses. While the cookies are still warm (after about 2 minutes of cooling on the sheet), gently press one chocolate kiss, pointy side up, into the center of each cookie to form the tip of the witch hat. Press just until it’s secure—don’t push all the way through. Let the cookies cool completely on the rack before decorating.
- Make the orange icing. In a small bowl, whisk together 1 cup powdered sugar, 2 tablespoons milk, and ½ teaspoon vanilla extract until smooth. Add orange gel food coloring one drop at a time, stirring after each drop, until you reach your desired shade. I usually use about 4-5 drops for a vibrant orange. The icing should be thick but pipeable—if it’s too thin, add a little more powdered sugar; if it’s too thick, add milk a drop at a time.
- Pipe the hat brim. Transfer the orange icing to a small piping bag or a zip-top bag with a tiny corner snipped off. Pipe a ring of icing around the base of each chocolate kiss, creating the brim of the witch hat. You can also pipe a small ribbon detail around the base of the kiss if you want—my kids love this part.
- Add the hat buckle. Melt a few green candy melts in a small microwave-safe bowl according to package directions (usually 30-second intervals, stirring in between). Transfer to a small piping bag or zip-top bag and pipe a small rectangular buckle shape on the front of each hat, right where the brim meets the kiss. If you’re using green M&M’s, just press one gently into the wet icing.
- Let the icing set. Allow the decorated cookies to sit at room temperature for about 20-30 minutes until the icing is firm. If you can’t wait that long (I never can), pop them in the refrigerator for 10 minutes to speed things up.
Sensory Cues: When you cream the butter and sugar, it should look pale and fluffy, like whipped frosting. When you add the pumpkin puree, the dough will smell warm and spicy—that’s the cinnamon and nutmeg doing their thing. The cookies are done when the edges are just barely golden and the tops look set but soft. If you gently touch the center, it should spring back slightly.
Troubleshooting: If your dough is too sticky to scoop after chilling, dust your hands with a little flour. If the cookies spread too much in the oven, your butter was too soft or you didn’t chill the dough long enough. If the chocolate kisses slide off after baking, you pressed them in too early—wait another minute or two next time.
Cooking Tips & Techniques
After making these pumpkin spice witch hat cookies about a dozen times, I’ve picked up a few tricks that make the process smoother and the results more consistent. Let me share what I’ve learned the hard way so you don’t have to.
Chill the dough properly. I cannot stress this enough. The first time I made these, I was in a hurry and only chilled the dough for 10 minutes. Big mistake. The cookies spread into flat discs, and the chocolate kisses looked more like sad little buttons than witch hat tips. Give it the full 30 minutes, or even an hour if you have the time. The dough firms up, the flavors meld together, and the cookies hold their shape beautifully. If you’re making these ahead, you can chill the dough for up to 48 hours—just wrap it tightly in plastic wrap.
Use a cookie scoop for even sizing. This is one of those tips that seems small but makes a huge difference. When all your cookies are the same size, they bake evenly, and they look professional when you’re done decorating. I use a 1.5-tablespoon scoop, and it’s perfect for this recipe. If you don’t have one, use two spoons to portion out equal amounts of dough.
Don’t overmix the dough. I know I’ve said this before, but it’s worth repeating. Overmixing develops gluten, which makes cookies tough and dense instead of soft and tender. Mix just until the flour disappears into the dough, then stop. A few streaks of flour are fine—they’ll incorporate as you scoop and shape the cookies.
Press the kisses in at the right time. This is the trickiest part of the recipe. If you press the chocolate kisses in while the cookies are too hot, they’ll melt into puddles. If you wait too long, the cookies will be too firm and the kisses won’t stick. The sweet spot is about 2 minutes after the cookies come out of the oven. The edges should be set but the centers should still be soft. Gently press the kiss into the center until it feels secure, but don’t push all the way through to the bottom.
Work in batches. Don’t try to bake all the cookies at once unless you have a convection oven that bakes evenly. Bake one sheet at a time on the middle rack, and let the other sheet chill in the refrigerator while you wait. This keeps the dough cold and prevents spreading.
Make the icing while the cookies cool. Use the 20-30 minutes while your cookies are cooling to make the orange icing and melt the green candy melts. This way, everything is ready to go when the cookies are cool enough to decorate. Multitasking like this saves time and keeps the process flowing smoothly.
Variations & Adaptations
One of the best things about this recipe is how flexible it is. I’ve tried several variations over the years, and they’ve all turned out delicious in their own way. Here are some ideas to make these witch hat cookies your own.
Dietary Variations: For a gluten-free version, use a 1:1 gluten-free baking flour blend. I’ve tested this with Bob’s Red Mill and King Arthur Flour’s gluten-free blend, and both worked well. Just add an extra tablespoon of flour to compensate for the extra moisture in gluten-free blends. For a dairy-free version, use vegan butter (I like Miyoko’s or Earth Balance) and dairy-free chocolate kisses. Enjoy Life makes a good dairy-free chocolate option that melts nicely.
Flavor Twists: If you’re not a pumpkin spice fan (I know, who are you?), try swapping the pumpkin puree for sweet potato puree and using a different spice blend. Apple pie spice works beautifully, or try a chai-inspired blend with cardamom and black pepper. For a chocolate version, add ¼ cup cocoa powder to the dry ingredients and reduce the flour by 2 tablespoons. The chocolate-pumpkin combo is surprisingly good—like a pumpkin brownie in cookie form.
Decorating Variations: Instead of orange icing, try purple or green for a different witchy vibe. You can also skip the icing altogether and just press a green candy melt into the center of each kiss for a simpler look. My kids once made a batch with red icing and called them “witch hat Santa cookies”—they were hilarious and delicious. For a more elaborate look, pipe a spider web pattern on the cookies using black decorating gel, or add edible glitter for some sparkle.
Size Variations: For mini witch hat cookies, use a teaspoon scoop and bake for 8-10 minutes. Use mini chocolate kisses for the tips. These are perfect for party platters or lunchbox surprises. For giant cookies, use a 3-tablespoon scoop and bake for 14-16 minutes. You’ll need larger chocolate kisses or even chocolate truffles for the tips.
Seasonal Adaptations: These cookies work for more than just Halloween. For Thanksgiving, skip the witch hat decorations and just drizzle with orange icing and sprinkle with chopped pecans. For Christmas, use red and green icing and call them “elf hats.” For a fall harvest party, leave off the chocolate kisses and top with a dollop of cream cheese frosting and a sprinkle of cinnamon.
Serving & Storage Suggestions
These witch hat cookies are best served at room temperature, which lets the pumpkin spice flavor really shine through. I like to arrange them on a platter in a circular pattern, with the hat tips pointing toward the center. It makes a really cute presentation for Halloween parties. If you’re bringing them to a school event, place them in a single layer in a decorative tin or on a disposable platter covered with plastic wrap.
What to Serve With Them: These cookies pair beautifully with a glass of cold milk, a warm apple cider, or a pumpkin spice latte. For a Halloween party spread, serve them alongside caramel apples, popcorn balls, and hot chocolate. They also make a great addition to a Halloween dessert charcuterie board with candy corn, pretzel sticks, and chocolate-covered raisins.
Storage Instructions: Store the decorated cookies in an airtight container at room temperature for up to 5 days. Layer them between sheets of parchment paper to prevent the icing from smudging. Do not refrigerate them—the refrigerator dries out the cookies and makes the icing weep. If you live in a humid climate, add a silica gel packet to the container to absorb excess moisture.
Freezing Instructions: You can freeze the undecorated cookies for up to 3 months. Bake and cool the cookies completely, then place them in a single layer on a baking sheet and freeze until solid (about 1 hour). Transfer to a freezer-safe bag or container, layering parchment paper between each layer. When you’re ready to serve, thaw the cookies at room temperature, then press in the chocolate kisses and decorate as directed. The cookies taste just as fresh as the day you baked them.
Reheating Tips: These cookies are meant to be eaten at room temperature, but if you want a warm treat, pop one in the microwave for 5-7 seconds. The chocolate kiss will get slightly melty, and the cookie will taste like it just came out of the oven. Just don’t overdo it, or the icing will melt into a puddle.
Flavor Development: These cookies actually taste better the day after you make them. The pumpkin spice flavors have time to meld together, and the texture becomes even softer and more tender. I’ve had people tell me they preferred the cookies on day three—if they last that long in your house.
Nutritional Information & Benefits
Let’s be real—these are cookies, not health food. But they do have some redeeming qualities, especially compared to store-bought Halloween treats. Here’s the estimated nutritional breakdown per cookie (based on 24 cookies):
- Calories: 165
- Total Fat: 7g
- Saturated Fat: 4g
- Cholesterol: 18mg
- Sodium: 95mg
- Total Carbohydrates: 24g
- Dietary Fiber: 1g
- Sugars: 15g
- Protein: 2g
Health Benefits of Key Ingredients: Pumpkin puree is packed with vitamin A, which is great for eye health and immune function. It also contains fiber, which helps with digestion and keeps you feeling full. The pumpkin pie spice blend—cinnamon, ginger, nutmeg, and cloves—has anti-inflammatory properties and can help regulate blood sugar levels. And molasses contains iron, calcium, and magnesium, so there’s a tiny bit of nutrition in every bite.
Dietary Considerations: This recipe contains wheat (gluten), dairy (butter, milk), and eggs. For a gluten-free version, use a 1:1 gluten-free flour blend. For a dairy-free version, use vegan butter and dairy-free chocolate. For an egg-free version, substitute with a flax egg (1 tablespoon ground flaxseed mixed with 3 tablespoons water, let sit for 5 minutes). The cookies will be slightly denser but still delicious.
Potential Allergens: This recipe contains wheat, dairy, eggs, and soy (in the chocolate kisses). Check your chocolate kiss packaging for potential cross-contamination warnings if you have severe allergies. The green candy melts may also contain soy lecithin.
I’m not a nutritionist, and I don’t pretend to be one. These are cookies meant for a fun Halloween treat, not a daily snack. But compared to the ultra-processed, artificially colored Halloween candies you’d buy at the store, these homemade witch hat cookies are a much better choice. You know exactly what’s in them, and you can control the quality of the ingredients. Plus, the process of making them together as a family is good for the soul—and that counts for something too.
Conclusion
These Kid-Approved Pumpkin Spice Witch Hat Cookies have become a non-negotiable tradition in my house every October. They’re the perfect combination of fun and delicious—the kind of recipe that gets kids excited about baking and makes adults feel like they’ve accomplished something special. I love that they’re simple enough to make on a busy Tuesday afternoon but impressive enough to bring to any Halloween gathering.
I hope you’ll give these a try and make them your own. Maybe you’ll add extra cinnamon because that’s what your family loves. Maybe you’ll use purple icing instead of orange because your kid insists purple is more witchy. Maybe you’ll skip the hat buckle altogether and just enjoy the cookies plain. However you make them, they’re going to be amazing because you put love into them.
Honestly, the best part of this recipe isn’t the cookies themselves—it’s the memories you make while baking them. The flour on your kid’s nose. The giggles when a kiss falls off and you have to eat it (the rule in my house is “if it falls, you eat it”). The proud smile on your child’s face when they present their witch hat cookies to friends and family. That’s what keeps me coming back to this recipe year after year.
So grab your mixing bowl, preheat that oven, and let’s make some magic happen. And when you do, I’d love to hear about it—leave a comment below and tell me how your witch hat cookies turned out. Did your kids help decorate? Did you try a fun variation? Share your photos and tag me so I can see your beautiful creations. Happy Halloween baking, friends!
Frequently Asked Questions
Can I make these cookies ahead of time?
Absolutely! You can make the dough up to 48 hours in advance and keep it refrigerated. You can also bake the cookies and freeze them undecorated for up to 3 months. Just thaw, press in the kisses, and decorate when you’re ready to serve.
Why did my cookies spread so much?
This usually happens when the dough isn’t chilled long enough or the butter was too soft. Make sure you chill the dough for at least 30 minutes, and if your kitchen is warm, pop the scooped dough balls in the fridge for 10 minutes before baking.
Can I use pumpkin pie filling instead of pumpkin puree?
No, please don’t! Pumpkin pie filling is pre-sweetened and spiced, which will throw off the sugar and spice balance in this recipe. Stick with 100% pure pumpkin puree for the best results.
How do I keep the chocolate kisses from falling off?
Press the kisses in about 2 minutes after the cookies come out of the oven, when the centers are still soft but not too hot. Don’t press too hard—just enough to make them secure. The cookie will set around the kiss as it cools, holding it in place.
My icing is too thin. What should I do?
Just add a little more powdered sugar, one tablespoon at a time, until it reaches a thick but pipeable consistency. If it’s too thick, add milk a drop at a time. The icing should hold its shape when piped but still be smooth enough to flow through the piping bag.
Pin This Recipe!
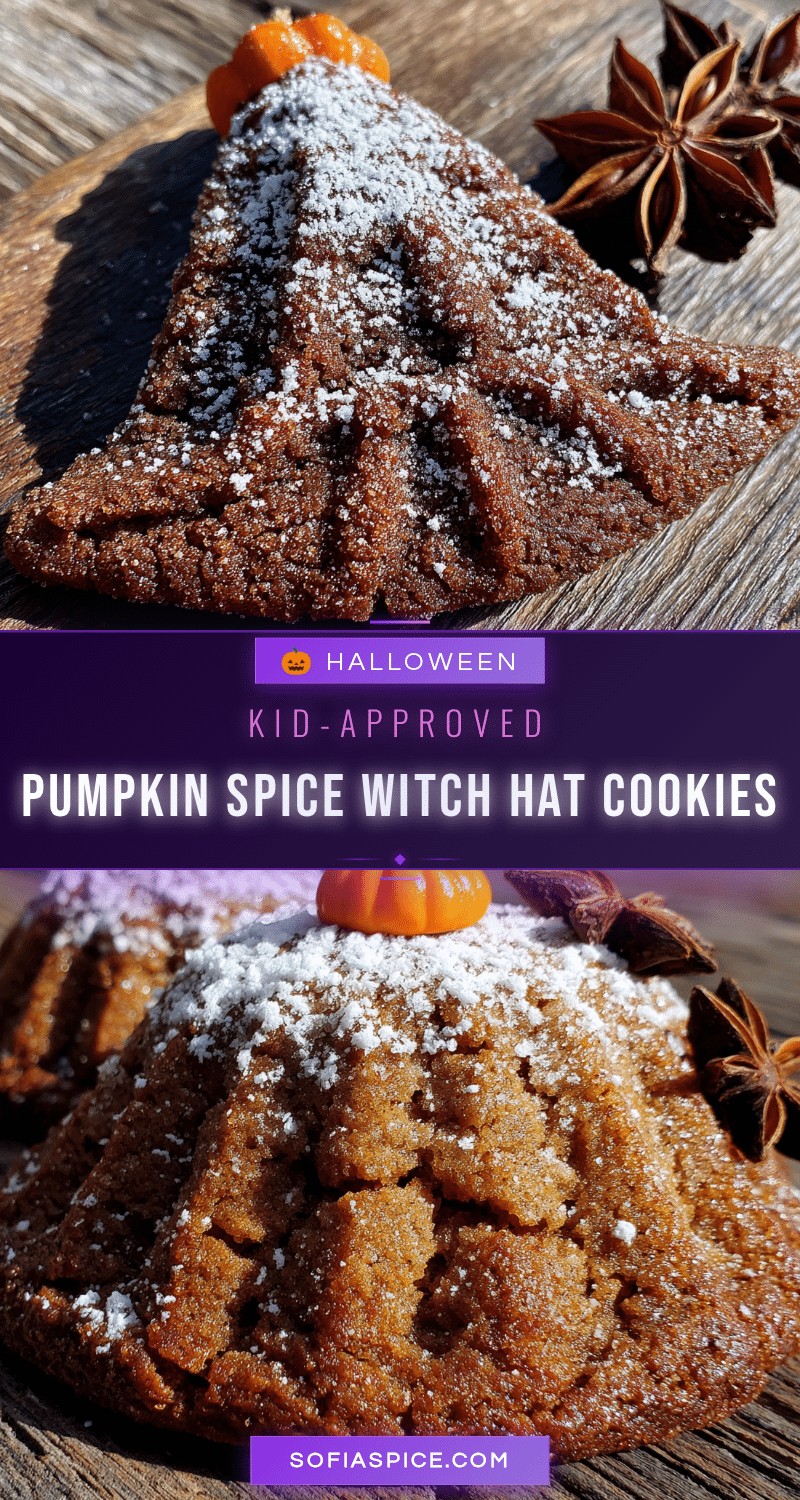
Easy Kid-Approved Pumpkin Spice Witch Hat Cookies
These adorable witch hat cookies feature a soft, spiced pumpkin cookie base topped with a chocolate kiss, orange icing, and a green candy buckle. They’re perfect for Halloween parties and are simple enough to make with kids.
- Prep Time: 20 minutes
- Cook Time: 12 minutes
- Total Time: 45 minutes
- Yield: 24 cookies 1x
- Category: Dessert
- Cuisine: American
Ingredients
- 1 ¾ cups all-purpose flour
- 1 teaspoon baking soda
- ½ teaspoon salt
- 2 teaspoons pumpkin pie spice
- ½ cup unsalted butter, softened
- ½ cup granulated sugar
- ⅓ cup packed brown sugar
- 1 large egg, room temperature
- 1 teaspoon vanilla extract
- 1 tablespoon molasses
- ¾ cup pumpkin puree
- 48 chocolate kisses, unwrapped
- 1 cup powdered sugar
- 2 tablespoons milk
- ½ teaspoon vanilla extract
- Orange gel food coloring
- Green candy melts or green M&M’s
- Black decorating gel or black icing (optional)
Instructions
- Preheat your oven to 350°F (175°C). Line two baking sheets with parchment paper or silicone baking mats.
- In a medium bowl, whisk together 1 ¾ cups all-purpose flour, 1 teaspoon baking soda, ½ teaspoon salt, and 2 teaspoons pumpkin pie spice.
- In a large mixing bowl, beat ½ cup softened unsalted butter with ½ cup granulated sugar and ⅓ cup packed brown sugar on medium speed until light and fluffy, about 2-3 minutes. Scrape down the sides of the bowl halfway through.
- Beat in 1 large egg, 1 teaspoon vanilla extract, and 1 tablespoon molasses until combined. Add ¾ cup pumpkin puree and beat on low speed until just incorporated.
- Gradually add the flour mixture to the pumpkin mixture, mixing on low speed until just combined. Do not overmix.
- Cover the bowl with plastic wrap and refrigerate for at least 30 minutes.
- Using a 1.5-tablespoon cookie scoop, portion out the dough and roll each piece into a ball. Place them on the prepared baking sheets, spacing them about 2 inches apart.
- Bake at 350°F (175°C) for 10-12 minutes, or until the edges are set and the tops look slightly puffed and cracked. Remove from the oven and let the cookies cool on the baking sheet for 5 minutes before transferring to a cooling rack.
- While the cookies are still warm (after about 2 minutes of cooling on the sheet), gently press one chocolate kiss, pointy side up, into the center of each cookie to form the tip of the witch hat. Let the cookies cool completely on the rack before decorating.
- In a small bowl, whisk together 1 cup powdered sugar, 2 tablespoons milk, and ½ teaspoon vanilla extract until smooth. Add orange gel food coloring one drop at a time until you reach your desired shade.
- Transfer the orange icing to a small piping bag or a zip-top bag with a tiny corner snipped off. Pipe a ring of icing around the base of each chocolate kiss to create the brim of the witch hat.
- Melt a few green candy melts in a small microwave-safe bowl according to package directions. Transfer to a small piping bag or zip-top bag and pipe a small rectangular buckle shape on the front of each hat. If using green M&M’s, press one gently into the wet icing.
- Allow the decorated cookies to sit at room temperature for about 20-30 minutes until the icing is firm.
Notes
Chill the dough for at least 30 minutes to prevent spreading. Press chocolate kisses into cookies about 2 minutes after baking for best adhesion. Cookies taste even better the next day.
Nutrition
- Serving Size: 1 cookie
- Calories: 165
- Sugar: 15
- Sodium: 95
- Fat: 7
- Saturated Fat: 4
- Carbohydrates: 24
- Fiber: 1
- Protein: 2
Keywords: Halloween cookies, witch hat cookies, pumpkin spice cookies, kid-friendly, fall baking, easy Halloween treats


