I was standing in line at the hardware store, of all places, holding a bag of lightbulbs and a new paint roller, when the elderly man behind me started describing the best pumpkin dessert he’d ever eaten. I wasn’t expecting cooking advice from a stranger in the lighting aisle, but there I was, clutching my hardware supplies, listening to him explain the exact ratio of cream cheese to pumpkin puree that made his wife’s bars famous at every church potluck in town. He told me the recipe came from a stained index card his mother-in-law had written in pencil sometime in the 1970s, and that the secret was using a water bath for the creamiest texture. Honestly, I almost forgot to buy the lightbulbs.
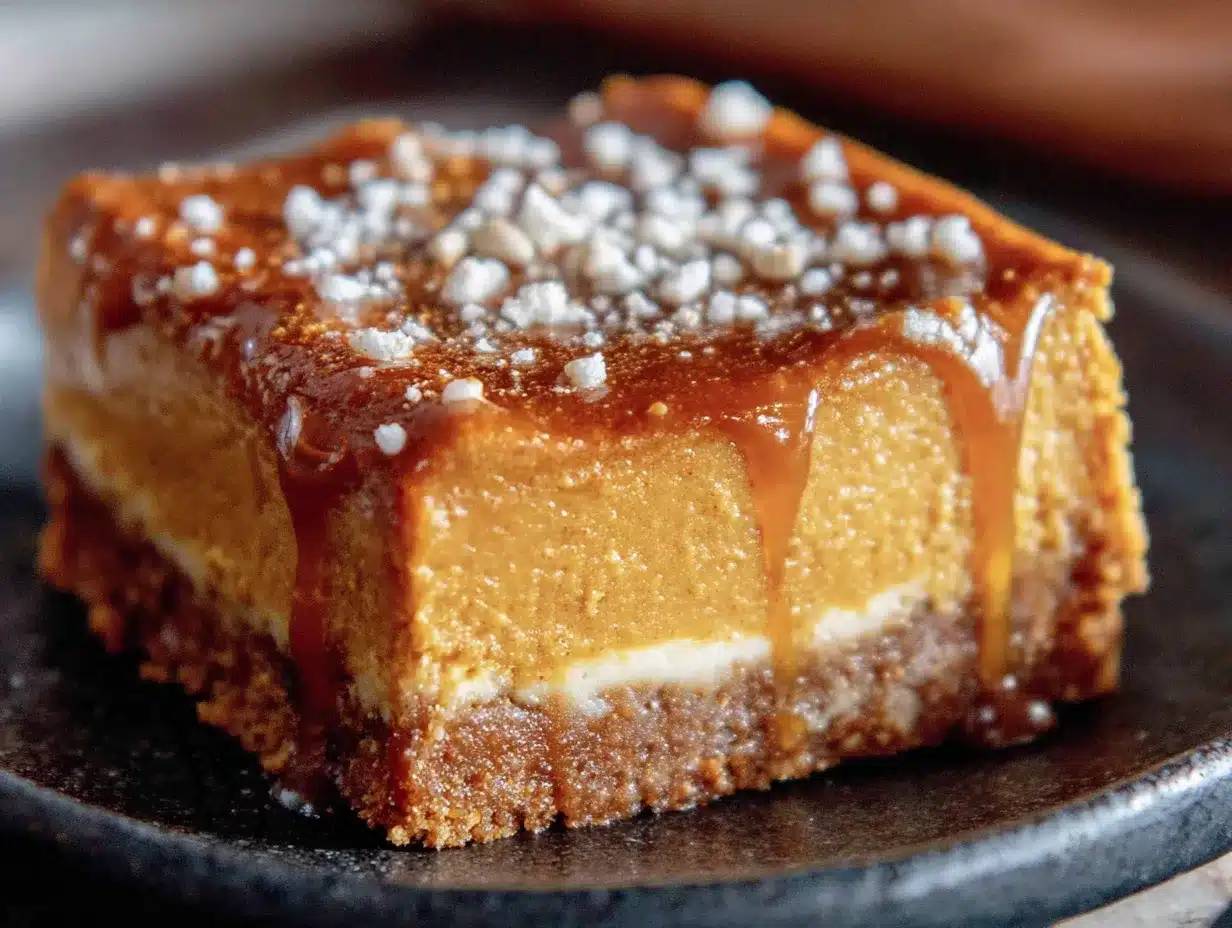
I scribbled the details on the back of my receipt while he talked, and I went home that afternoon with paint supplies in one hand and the blueprint for these Crowd-Pleasing Pumpkin Cheesecake Bars with Graham Crust in the other. The first time I made them, I forgot to line the pan with parchment paper, and let me tell you, getting those bars out in one piece was a minor miracle involving a butter knife and some creative swearing. But that first bite? Pure, creamy, spiced perfection. The graham cracker crust stayed buttery and crisp, the cheesecake layer was silky smooth, and the pumpkin layer had just the right amount of warmth from cinnamon and ginger.
Maybe you’ve been there—standing in a random place, not looking for a recipe at all, and suddenly you’ve got one that changes your baking game forever. That’s exactly what happened to me, and I’ve been making these bars every fall since. They’re the kind of dessert that makes people close their eyes after the first forkful, and they’ve become my go-to for every gathering where I need to impress without spending all day in the kitchen.
Why You’ll Love This Recipe
These pumpkin cheesecake bars aren’t just another fall dessert—they’re the one that disappears first at every party. I’ve tested this recipe at least a dozen times, tweaking the spice blend and adjusting the baking time until the texture was absolutely perfect. Here’s why they’ll become your new favorite too:
- Quick & Easy: No water bath needed, no cracking worries, and no fussy crust rolling. You can have these in the oven in about 20 minutes flat.
- Simple Ingredients: Everything comes from a standard grocery store. No hunting down specialty items or expensive imports.
- Perfect for Hosting: These bars are designed to feed a crowd. They slice cleanly, travel well, and look stunning on a dessert table with minimal effort.
- Crowd-Pleaser: Kids devour them, adults rave about them, and even the pickiest eaters ask for seconds. I’ve never brought home leftovers.
- Unbelievably Delicious: The contrast between the crunchy graham crust, the tangy cheesecake, and the spiced pumpkin layer is next-level comfort food. It’s like having two desserts in one bite.
What makes these bars different from every other recipe out there? It’s the technique of pre-baking the crust until it’s deeply golden and the careful balance of cream cheese to pumpkin that keeps the filling from getting too dense. I’ve tried versions that were too eggy, too sweet, or just plain soggy in the middle. This one hits every mark. It’s the kind of dessert that makes you look like a pastry chef without actually having to be one.
These bars are comfort food reimagined—familiar enough to feel nostalgic, but elevated just enough to feel special. Perfect for impressing guests at a dinner party without stress, or turning a simple fall gathering into something memorable.
What Ingredients You Will Need
This recipe uses simple, wholesome ingredients to deliver bold flavor and satisfying texture without the fuss. Most of these are pantry staples, especially if you do any fall baking at all.
For the Graham Cracker Crust
- Graham cracker crumbs – 2 cups (about 16 full sheets, finely crushed). I recommend using store-bought crumbs for consistency, but you can crush your own in a zip-top bag with a rolling pin.
- Granulated sugar – 1/4 cup (adds sweetness and helps the crust hold together)
- Unsalted butter – 1/2 cup (1 stick), melted. Use salted butter if that’s all you have, but reduce the added salt in the crust slightly.
- Salt – 1/4 teaspoon (balances the sweetness)
For the Cheesecake Layer
- Full-fat cream cheese – 16 ounces (two 8-ounce blocks), softened to room temperature. Do not use reduced-fat—it won’t set properly and the texture will be gummy.
- Granulated sugar – 1/2 cup
- Large eggs – 2, at room temperature
- Vanilla extract – 1 teaspoon (use pure, not imitation, for the best flavor)
- Sour cream – 1/4 cup (adds tanginess and keeps the cheesecake silky smooth)
For the Pumpkin Layer
- Pumpkin puree – 1 cup (not pumpkin pie filling—make sure it’s 100% pure pumpkin)
- Granulated sugar – 1/4 cup
- Light brown sugar – 1/4 cup, packed (adds depth and molasses notes)
- Large egg – 1, at room temperature
- Vanilla extract – 1/2 teaspoon
- Ground cinnamon – 1 teaspoon
- Ground ginger – 1/2 teaspoon
- Ground nutmeg – 1/4 teaspoon
- Ground cloves – 1/8 teaspoon (a little goes a long way)
- Salt – 1/4 teaspoon
Equipment Needed
You don’t need a fancy kitchen to pull these off. Here’s what you’ll need:
- 9×13-inch baking pan – Metal or glass both work, but metal gives a slightly crisper crust. Avoid using a dark non-stick pan, as it can over-brown the edges.
- Parchment paper – For lining the pan. This is non-negotiable if you want to lift the bars out cleanly. I learned this the hard way.
- Large mixing bowls – At least two: one for the crust, one for the cheesecake batter.
- Electric hand mixer or stand mixer – You can mix by hand, but an electric mixer makes the cream cheese silky smooth without lumps.
- Measuring cups and spoons – For accuracy, especially with the spices.
- Spatula – A rubber spatula for scraping down the bowl and spreading the layers evenly.
- Sharp knife – For clean slices. Run it under hot water and wipe it dry between cuts for the best results.
Preparation Method
- Preheat your oven to 350°F (175°C). Line your 9×13-inch baking pan with parchment paper, leaving a 2-inch overhang on the long sides. This creates handles for lifting the bars out later.
- Make the crust: In a medium bowl, combine the graham cracker crumbs, 1/4 cup granulated sugar, and 1/4 teaspoon salt. Pour in the melted butter and stir until every crumb is moistened. The mixture should look like wet sand and hold together when you squeeze it.
- Press the crust: Dump the crumbs into the prepared pan. Use the bottom of a measuring cup or a flat glass to press them down firmly and evenly. Don’t skip this step—a loosely packed crust will crumble when you cut the bars. Bake for 10 minutes, until fragrant and lightly golden. Set aside to cool while you make the fillings.
- Make the cheesecake layer: In a large bowl, beat the softened cream cheese with an electric mixer on medium speed until smooth and creamy, about 2 minutes. Scrape down the sides of the bowl. Add 1/2 cup granulated sugar and beat until combined, then add the eggs one at a time, mixing on low after each addition. Stir in the vanilla extract and sour cream. Mix just until smooth—overmixing at this stage can incorporate too much air and cause cracks later.
- Make the pumpkin layer: In a separate bowl, whisk together the pumpkin puree, 1/4 cup granulated sugar, and 1/4 cup packed brown sugar until smooth. Add the egg, vanilla, cinnamon, ginger, nutmeg, cloves, and salt. Whisk until fully combined and fragrant.
- Assemble the layers: Pour the cheesecake batter over the pre-baked crust and spread it into an even layer with a spatula. Then, carefully spoon the pumpkin mixture over the cheesecake in dollops. Use a butter knife or skewer to gently swirl the two layers together—just a few figure-eight motions. You want distinct ribbons of cheesecake and pumpkin, not a fully blended mixture.
- Bake: Place the pan in the preheated oven and bake for 30 to 35 minutes. The edges should look set and slightly puffed, but the center should still jiggle slightly when you gently shake the pan. That jiggle is your friend—it means the bars will be creamy, not dry.
- Cool completely: Transfer the pan to a wire rack and let it cool to room temperature, about 1 hour. Then, cover the pan with plastic wrap and refrigerate for at least 4 hours, or overnight. This is the hardest part, I know, but it’s essential. The bars need time to fully set so they slice cleanly.
- Slice and serve: Once chilled, use the parchment paper handles to lift the entire block out of the pan. Place it on a cutting board and use a sharp knife to slice into 24 squares. For the cleanest cuts, wipe the knife clean between each slice.
Cooking Tips & Techniques
After making these bars more times than I can count, I’ve picked up a few tricks that make a real difference. Here’s what I’ve learned:
Room temperature ingredients matter. Cold cream cheese creates lumps that no amount of mixing can fully fix. Take it out of the fridge at least 30 minutes before you start. Same goes for the eggs—if you forget, place them in a bowl of warm water for 5 minutes.
Don’t overbake. This is the number one mistake I made early on. I kept waiting for the center to look fully firm, and every time, the bars came out dry and cracked around the edges. The center should wobble like Jell-O when you pull the pan out. It will continue to set as it cools.
Line your pan properly. I cannot stress this enough. I once skipped the parchment paper because I was out, and I spent 20 minutes chiseling bars out of the pan with a spatula. The parchment overhang is your best friend for clean, beautiful slices.
Let them chill fully. I know it’s tempting to cut into them after an hour, but trust me on this. Four hours minimum, overnight is better. The bars are much easier to slice when they’re fully cold, and the flavors meld together beautifully.
Use a hot knife for slicing. Run your knife under hot water, dry it off, and make your cut. Repeat between each slice. This gives you those gorgeous, clean edges that look like they came from a bakery.
Variations & Adaptations
One of the best things about this recipe is how flexible it is. Here are some ways to make it your own:
Gluten-Free Version: Swap the graham crackers for gluten-free graham crackers or use crushed gluten-free shortbread cookies. The rest of the ingredients are naturally gluten-free, so this is an easy swap.
Dairy-Free Adaptation: Use dairy-free cream cheese and a dairy-free butter substitute. I’ve had good luck with brands like Kite Hill and Miyoko’s. The texture will be slightly softer, so plan to chill the bars for a full 8 hours before slicing.
Spice It Up: If you love a warmer pumpkin flavor, add 1/4 teaspoon of cardamom or allspice to the pumpkin layer. I tried a version with a pinch of cayenne pepper once, and it was surprisingly good—just a tiny hint of heat at the end.
Nutty Crust: Replace half a cup of the graham cracker crumbs with finely chopped pecans or walnuts. Toast them first for extra flavor. This adds a lovely crunch and pairs beautifully with the pumpkin.
Chocolate Drizzle: After the bars have chilled and been sliced, drizzle melted dark chocolate over the top. The bitterness of the chocolate balances the sweetness of the cheesecake perfectly. I did this for a holiday party and they vanished in minutes.
Serving & Storage Suggestions
These bars are incredibly versatile when it comes to serving. Here’s how to get the most out of them:
Serving Temperature: I prefer them straight from the fridge—cold, firm, and creamy. But they’re also delicious at room temperature if you let them sit out for 15 minutes. The texture softens slightly and the flavors become more pronounced.
Presentation: Arrange the bars on a platter and dust them lightly with cinnamon or powdered sugar. A dollop of whipped cream on each bar makes them look extra special for dinner parties. For a fall gathering, I like to place them on a wooden board with small bowls of caramel sauce and toasted pecans on the side.
What to Serve Alongside: These bars pair beautifully with a warm cup of coffee, spiced apple cider, or a glass of dessert wine like late-harvest Riesling. If you’re serving them as part of a dessert spread, they go well with apple crisp, pecan pie, or even a simple vanilla ice cream.
Storage: Store the bars in an airtight container in the refrigerator for up to 5 days. Layer them with parchment paper between the slices to prevent sticking. The flavors actually improve after a day or two as the spices meld with the cheesecake.
Freezing: These bars freeze beautifully. Wrap individual slices tightly in plastic wrap, then place them in a freezer-safe bag or container. They’ll keep for up to 3 months. To thaw, transfer a slice to the refrigerator overnight. Don’t microwave them—it ruins the texture.
Nutritional Information & Benefits
Here’s the approximate nutritional breakdown for one bar (based on 24 servings):
- Calories: 215
- Fat: 14g
- Saturated Fat: 8g
- Carbohydrates: 20g
- Sugar: 14g
- Protein: 4g
- Fiber: 1g
- Sodium: 180mg
Health Benefits: Pumpkin is packed with vitamin A, which supports eye health and immune function. It’s also a good source of fiber and potassium. The cream cheese provides calcium and protein, while the cinnamon and ginger offer anti-inflammatory properties. This dessert is about balance—it’s indulgent enough to feel like a treat, but made with real, whole ingredients.
Dietary Considerations: This recipe contains gluten, dairy, and eggs. For gluten-free and dairy-free adaptations, see the variations section above. It is naturally nut-free if you stick with the graham cracker crust.
Conclusion
These Crowd-Pleasing Pumpkin Cheesecake Bars with Graham Crust have become my signature fall dessert for a reason. They’re forgiving enough for a beginner baker, impressive enough for a holiday table, and delicious enough to make everyone ask for the recipe. That chance encounter in the hardware store turned into one of my most treasured kitchen staples, and I hope these bars become one of yours too.
Don’t be afraid to play around with the spices or try one of the variations I mentioned. The best recipes are the ones that feel like your own. I’d love to hear how yours turn out—leave a comment below and let me know if you added your own twist, or tag me in your photos on social media. Happy baking, friends!
Frequently Asked Questions
Can I use a different crust instead of graham crackers?
Absolutely. Crushed vanilla wafers, shortbread cookies, or even ginger snaps all work beautifully. Ginger snaps add an extra layer of warm spice that pairs perfectly with the pumpkin.
Why did my cheesecake layer crack?
Cracking usually happens from overbaking or sudden temperature changes. Make sure you pull the bars out while the center still jiggles slightly, and let them cool gradually on the counter before refrigerating.
Can I make these bars ahead of time?
Yes, and I actually recommend it. These bars taste even better after a day in the fridge. You can make them up to 48 hours in advance and keep them covered in the refrigerator until you’re ready to serve.
How do I get clean, sharp slices?
Chill the bars for at least 4 hours, use a sharp knife, and run it under hot water between each cut. Wipe the blade dry before making the next slice. This prevents the layers from smearing.
Can I use pumpkin pie filling instead of pure pumpkin?
I wouldn’t recommend it. Pumpkin pie filling already has sugar and spices added, which will throw off the balance of the recipe. Stick with 100% pure pumpkin puree for the best results.
Pin This Recipe!
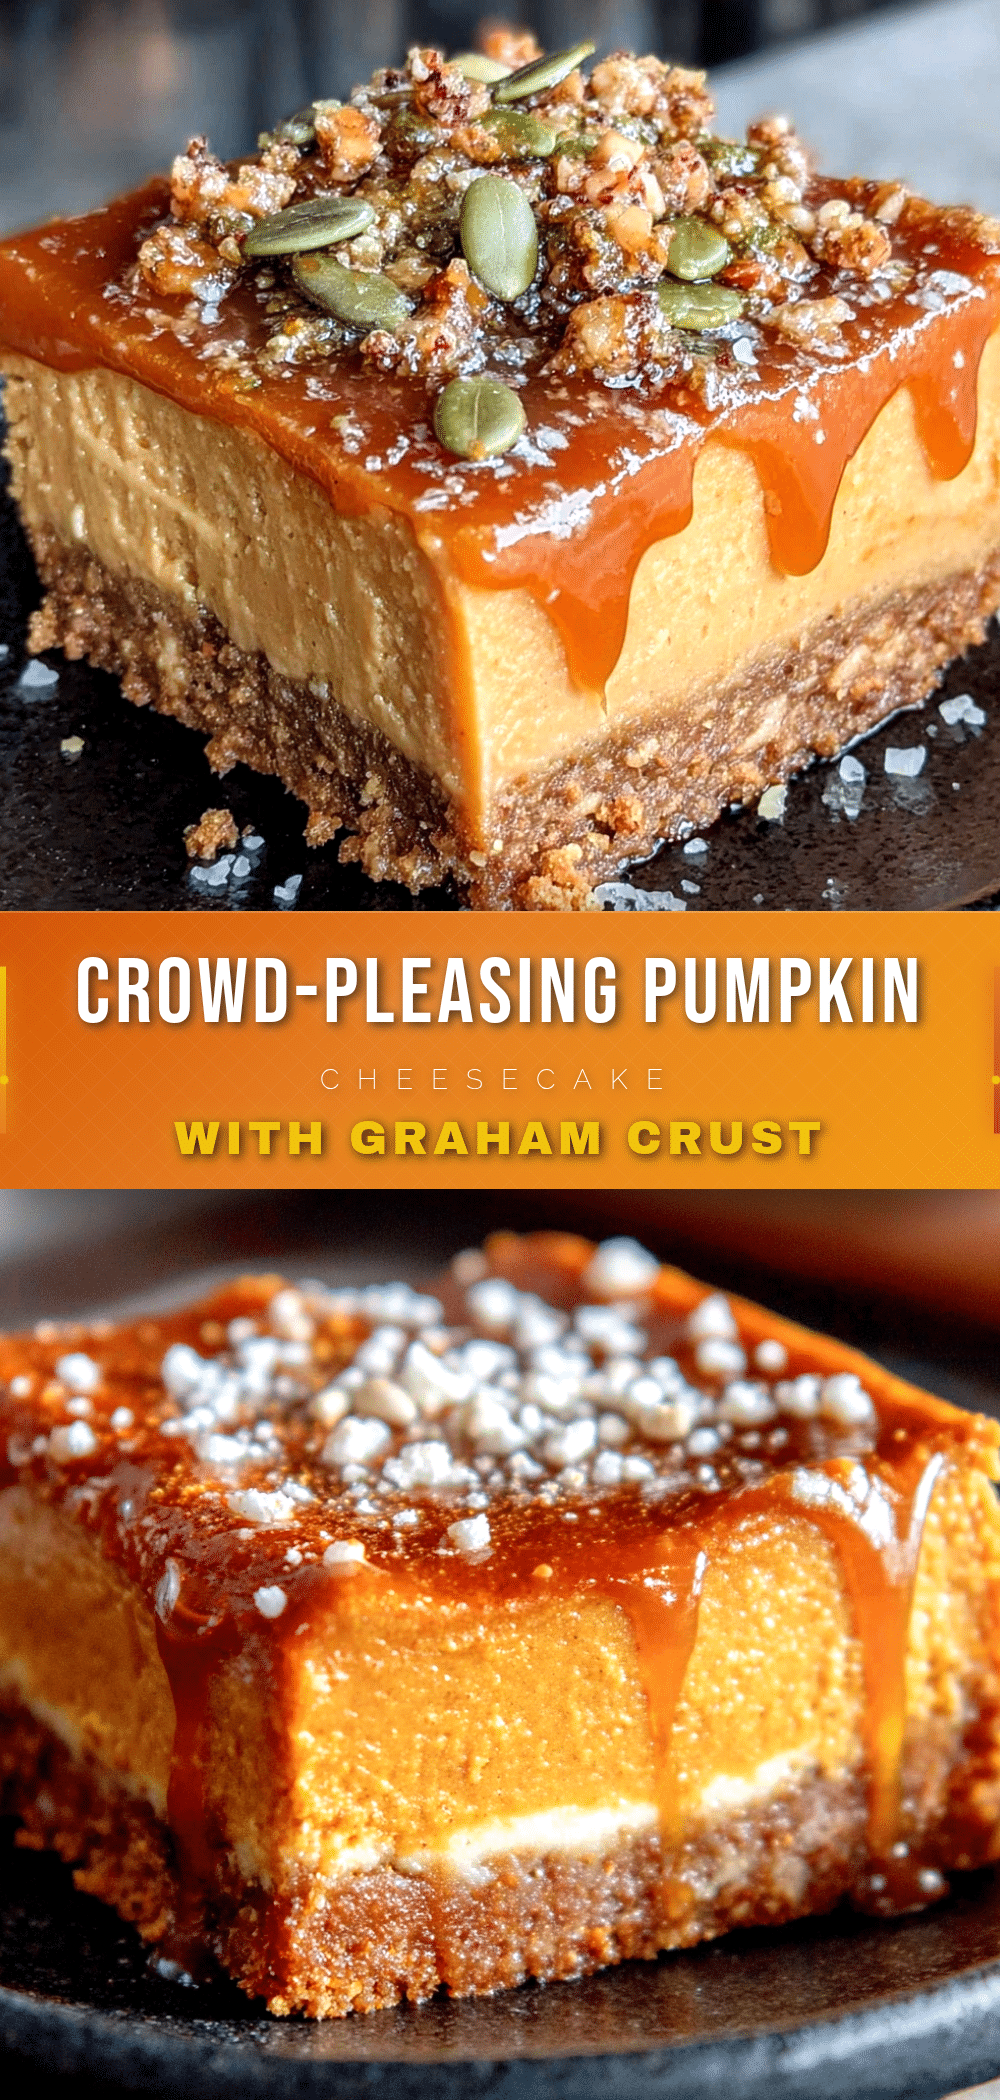
Best Easy Pumpkin Cheesecake Bars with Graham Crust Recipe
These crowd-pleasing pumpkin cheesecake bars feature a buttery graham cracker crust, a silky smooth cheesecake layer, and a spiced pumpkin layer. They’re quick to make, perfect for hosting, and disappear first at every party.
- Prep Time: 20 minutes
- Cook Time: 35 minutes
- Total Time: 4 hours 55 minutes (includes chilling)
- Yield: 24 servings 1x
- Category: Dessert
- Cuisine: American
Ingredients
- 2 cups graham cracker crumbs (about 16 full sheets, finely crushed)
- 1/4 cup granulated sugar (for crust)
- 1/2 cup unsalted butter, melted
- 1/4 teaspoon salt (for crust)
- 16 ounces full-fat cream cheese, softened
- 1/2 cup granulated sugar (for cheesecake layer)
- 2 large eggs, at room temperature
- 1 teaspoon vanilla extract
- 1/4 cup sour cream
- 1 cup pumpkin puree (100% pure pumpkin)
- 1/4 cup granulated sugar (for pumpkin layer)
- 1/4 cup light brown sugar, packed
- 1 large egg, at room temperature
- 1/2 teaspoon vanilla extract
- 1 teaspoon ground cinnamon
- 1/2 teaspoon ground ginger
- 1/4 teaspoon ground nutmeg
- 1/8 teaspoon ground cloves
- 1/4 teaspoon salt (for pumpkin layer)
Instructions
- Preheat oven to 350°F (175°C). Line a 9×13-inch baking pan with parchment paper, leaving a 2-inch overhang on the long sides.
- Make the crust: In a medium bowl, combine graham cracker crumbs, 1/4 cup granulated sugar, and 1/4 teaspoon salt. Pour in melted butter and stir until every crumb is moistened. The mixture should look like wet sand and hold together when squeezed.
- Press the crust into the prepared pan firmly and evenly using the bottom of a measuring cup or flat glass. Bake for 10 minutes, until fragrant and lightly golden. Set aside to cool.
- Make the cheesecake layer: In a large bowl, beat softened cream cheese with an electric mixer on medium speed until smooth and creamy, about 2 minutes. Scrape down sides. Add 1/2 cup granulated sugar and beat until combined. Add eggs one at a time, mixing on low after each. Stir in vanilla extract and sour cream. Mix just until smooth.
- Make the pumpkin layer: In a separate bowl, whisk together pumpkin puree, 1/4 cup granulated sugar, and 1/4 cup packed brown sugar until smooth. Add egg, vanilla, cinnamon, ginger, nutmeg, cloves, and salt. Whisk until fully combined.
- Assemble: Pour cheesecake batter over pre-baked crust and spread evenly. Spoon pumpkin mixture over cheesecake in dollops. Gently swirl with a butter knife or skewer in figure-eight motions to create ribbons.
- Bake for 30 to 35 minutes. Edges should be set and slightly puffed, but center should still jiggle slightly when shaken.
- Cool completely on a wire rack (about 1 hour), then cover with plastic wrap and refrigerate for at least 4 hours or overnight.
- Slice and serve: Use parchment handles to lift the block out of the pan. Place on a cutting board and slice into 24 squares with a sharp knife, wiping clean between cuts.
Notes
Room temperature ingredients are crucial for a smooth texture. Do not overbake; the center should jiggle slightly. Chill for at least 4 hours before slicing for clean cuts. For gluten-free, use gluten-free graham crackers. For dairy-free, use dairy-free cream cheese and butter substitute.
Nutrition
- Serving Size: 1 bar
- Calories: 215
- Sugar: 14
- Sodium: 180
- Fat: 14
- Saturated Fat: 8
- Carbohydrates: 20
- Fiber: 1
- Protein: 4
Keywords: pumpkin cheesecake bars, graham cracker crust, fall dessert, easy cheesecake bars, pumpkin dessert, crowd-pleasing dessert


