My neighbor Carol wasn’t trying to impress anyone. I’d stopped by to borrow a ladder—mine had mysteriously vanished after the last garage sale—and the smell hit me before I even knocked. It wasn’t just pumpkin, though that was there, warm and familiar. It was something else, something that made me forget why I’d come over in the first place. Cardamom, maybe. Ginger. The kind of scent that wraps around you like a blanket you didn’t know you needed.
Carol opened the door holding a baking sheet, these little triangular things with white drips running down their sides. “Oh, these?” she said, when I practically drooled on her welcome mat. “Just messing around with some scones. They’re nothing special.” She handed me one, still warm, and I took a bite. Honestly, I almost cried. Not in a dramatic way, but in that quiet way you do when something tastes exactly like what you needed without knowing you needed it. The spice hit first—not sharp, but cozy, like a chai latte you can eat. Then the pumpkin, subtle and sweet. And that glaze on top? Maple, obviously, but the real kind, not the sticky syrup from a plastic jug.
I stood there on her porch, ladder completely forgotten, eating a second scone while she talked about her sourdough starter. That’s the thing about recipes like this—they sneak up on you. You don’t plan to fall in love with a scone on a random Tuesday afternoon. But here I am, years later, still making Carol’s accidental masterpiece every single fall. Maybe you’ve been there—that moment when a completely ordinary interaction leads to something you’ll recreate in your own kitchen for years. That’s this recipe. It’s not fancy. It’s not trying to be. It’s just really, really good.
Why You’ll Love This Recipe
Let me tell you why these scones have earned a permanent spot in my fall baking rotation. I’ve tested this recipe at least a dozen times—tweaking the spice blend, adjusting the wet-to-dry ratio, figuring out exactly how cold the butter needs to be for that perfect flaky texture. This isn’t just another pumpkin scone recipe thrown together. It’s the one I keep coming back to, and I think you will too.
- Quick & Easy: From mixing bowl to cooling rack in under 35 minutes. Perfect for those mornings when you want something special but don’t have two hours to spend in the kitchen.
- Simple Ingredients: No weird extracts or specialty flours. You probably have most of this in your pantry right now—flour, sugar, butter, pumpkin puree. The spices are the only thing you might need to grab, and they’re worth it.
- Perfect for Cozy Mornings: These scones were made for chilly fall days, lazy weekends, or any time you need a little warmth in your life. They pair beautifully with a hot cup of coffee or tea.
- Crowd-Pleaser: I’ve brought these to brunches, book clubs, and casual get-togethers. People go quiet when they take a bite. That’s the highest compliment, right?
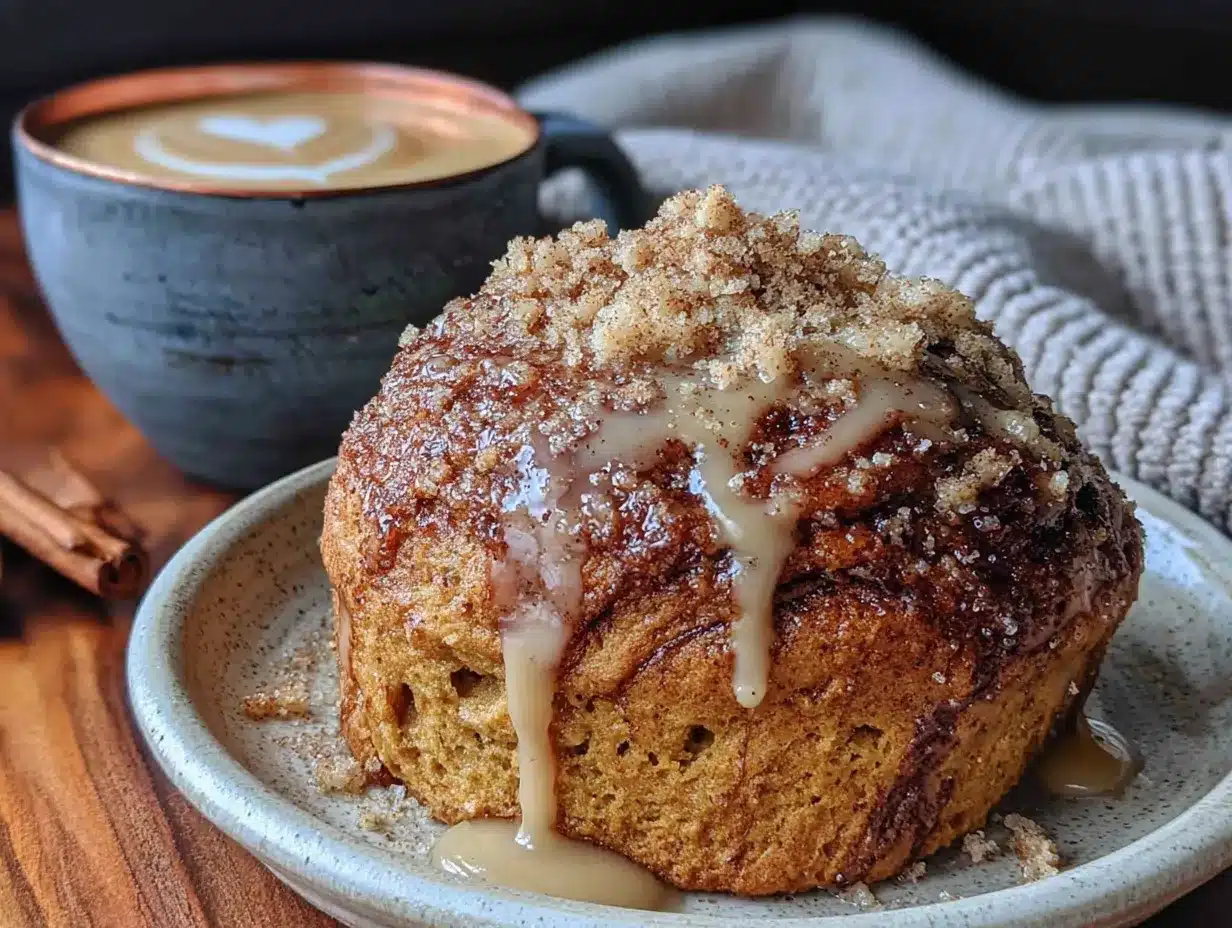
- Unbelievably Delicious: The texture is where these shine—crispy on the outside, tender and almost creamy on the inside. The chai spices aren’t overpowering; they’re just present enough to make you take notice. And that maple glaze? It seeps into the warm scone and creates little pockets of sweetness that’ll make you close your eyes.
What makes this recipe different from all the other pumpkin scone recipes out there? It’s the spice blend, honestly. Most recipes just dump pumpkin pie spice in and call it a day. But I spent time figuring out the exact ratio of cardamom to ginger to cinnamon that mimics a real chai latte. It’s subtle, but you’ll taste the difference. Plus, the technique of freezing the butter and grating it into the flour? Game changer. No cutting in butter, no worrying about it melting. Just perfect, flaky scones every single time.
This is comfort food at its finest. It’s the kind of recipe that makes your kitchen smell like a bakery and your heart feel full. Whether you’re making them for a special occasion or just because it’s Tuesday, these scones deliver that soul-soothing satisfaction we all crave.
What Ingredients You Will Need
This recipe uses simple, wholesome ingredients to deliver bold flavor and satisfying texture without the fuss. Most of these are pantry staples, and the ones that aren’t are worth seeking out for the incredible result.
For the Scones
- All-purpose flour, 2 cups (250g) – I prefer King Arthur Flour for consistent results, but any brand works fine.
- Granulated sugar, 1/3 cup (65g) – Just enough sweetness without making these taste like cookies.
- Baking powder, 1 tablespoon – Make sure it’s fresh! Expired baking powder is the #1 reason scones don’t rise.
- Salt, 1/2 teaspoon – Balances the sweetness and enhances the spices.
- Unsalted butter, 6 tablespoons (85g), frozen – This is crucial. Freeze the butter solid, then grate it into the flour. No cutting in, no mess, just perfect flaky layers.
- Pumpkin puree, 1/2 cup (120g) – Not pumpkin pie filling! Make sure you grab 100% pure pumpkin. Libby’s is my go-to.
- Heavy cream, 1/4 cup (60ml) – Adds richness and tenderness. You can substitute half-and-half in a pinch, but the scones won’t be quite as luxurious.
- Vanilla extract, 1 teaspoon – Pure vanilla, not imitation. It makes a difference.
- Large egg, 1 – Room temperature is best, but if you forget (I always do), just run it under warm water for 30 seconds.
For the Chai Spice Blend
- Ground cinnamon, 1 teaspoon – The backbone of the spice blend.
- Ground ginger, 1/2 teaspoon – Adds warmth and a little bite.
- Ground cardamom, 1/2 teaspoon – This is what makes it taste like chai. Don’t skip it! (adds that distinct chai flavor)
- Ground cloves, 1/4 teaspoon – A little goes a long way. It’s potent but necessary.
- Ground nutmeg, 1/4 teaspoon – Freshly grated if you have it, but pre-ground works perfectly.
- Ground allspice, 1/4 teaspoon – Ties all the flavors together beautifully.
For the Maple Glaze
- Powdered sugar, 1 cup (120g) – Sift it if it’s lumpy. Nobody wants a lumpy glaze.
- Pure maple syrup, 2 tablespoons – Not pancake syrup! Real maple syrup is worth the splurge here.
- Heavy cream or milk, 1-2 tablespoons – To thin the glaze to the perfect drizzling consistency.
- Vanilla extract, 1/2 teaspoon – Optional but lovely.
Ingredient Tips: For the best texture, make sure your pumpkin puree isn’t watery. If it looks thin, pat it dry with a paper towel before using. I learned this the hard way after making a batch of soggy scones that never quite set up right. Also, if you don’t have all the individual spices, you can use 2 teaspoons of pumpkin pie spice plus an extra 1/2 teaspoon of cardamom. Not quite the same, but close enough in a pinch.
Equipment Needed
You don’t need a fancy kitchen to make these scones. Here’s what you’ll actually use:
- Large mixing bowl – For combining dry ingredients.
- Medium mixing bowl – For whisking wet ingredients.
- Box grater – This is your secret weapon. Grating frozen butter is way easier than cutting it in with a pastry blender or your fingers.
- Baking sheet – Line it with parchment paper for easy cleanup. I use a half-sheet pan.
- Parchment paper – Non-negotiable. The scones won’t stick, and you won’t have to scrub the pan.
- Pastry brush or spatula – For brushing the tops with cream before baking.
- Cooling rack – Essential for letting the glaze set properly. If you leave them on the pan, the bottoms get soggy.
- Whisk – For mixing the glaze until smooth.
- Sharp knife or bench scraper – For cutting the dough into triangles. A bench scraper works best because it doesn’t squish the dough.
If you don’t have a box grater, you can use a food processor with a grating disc, or just cut the butter into small cubes with a knife. But honestly, the box grater method is so easy, you’ll never go back. I picked up a basic one at the grocery store for like eight bucks, and it’s still going strong years later.
Preparation Method
Alright, let’s make some scones! I’ll walk you through every step so you get perfect results even if you’ve never made scones before.
- Preheat your oven to 400°F (200°C). Line a baking sheet with parchment paper. Getting the oven hot before you start is key—scones need that initial blast of heat to rise properly.
- Grate your frozen butter. Take the 6 tablespoons of unsalted butter straight from the freezer and grate it on the large holes of a box grater. Work quickly—if the butter starts to soften, pop the grated pieces back in the freezer for a few minutes. You want little butter shards, not a greasy mess. This step changed my scone game completely. No more worrying about pea-sized butter pieces or overworking the dough.
- Mix the dry ingredients. In a large bowl, whisk together 2 cups all-purpose flour, 1/3 cup granulated sugar, 1 tablespoon baking powder, 1/2 teaspoon salt, and all the chai spices (1 teaspoon cinnamon, 1/2 teaspoon ginger, 1/2 teaspoon cardamom, 1/4 teaspoon cloves, 1/4 teaspoon nutmeg, 1/4 teaspoon allspice). Give it a good whisk to make sure everything is evenly distributed.
- Add the grated butter. Toss the frozen butter shards into the flour mixture. Use your fingers or a fork to gently coat each piece with flour. You’re not trying to incorporate the butter into the flour—you just want it evenly distributed. The little chunks of butter are what create those flaky layers.
- Mix the wet ingredients. In a separate medium bowl, whisk together 1/2 cup pumpkin puree, 1/4 cup heavy cream, 1 teaspoon vanilla extract, and 1 large egg. Whisk until smooth and well combined. The mixture should look uniform and slightly thick.
- Combine wet and dry. Pour the wet ingredients into the dry ingredients. Use a spatula or wooden spoon to stir until just combined. Here’s the most important tip: stop mixing as soon as you can’t see any more dry flour. Overmixing develops gluten, which makes scones tough and dense. A few streaks of flour are totally fine. The dough will look shaggy and messy—that’s exactly what you want.
- Shape the dough. Turn the dough out onto a lightly floured surface. Gently bring it together with your hands, patting it into a circle about 3/4-inch thick. Don’t knead it! Just press it together gently. If it’s sticking too much, dust your hands and the surface with a little more flour.
- Cut the scones. Use a sharp knife or bench scraper to cut the circle into 8 wedges, like a pizza. A bench scraper is ideal because it cuts cleanly without dragging through the dough. If you use a knife, press straight down—don’t saw back and forth. That seals the edges and prevents them from rising properly.
- Transfer to baking sheet. Carefully place the scones on the prepared baking sheet, spacing them about 2 inches apart. They’ll spread a little, so give them room to breathe. At this point, you can brush the tops with a little extra cream for a golden, shiny crust. I always do this—it makes them look bakery-worthy.
- Bake. Place the baking sheet in the preheated oven and bake for 14-16 minutes, or until the scones are golden brown on the bottom and just barely golden on top. The tops should look set and feel firm to the touch. Don’t overbake! They continue to cook a bit after you take them out. I usually pull them at 15 minutes.
- Cool. Let the scones cool on the baking sheet for 5 minutes, then transfer them to a wire rack to cool completely before glazing. If you glaze them while they’re still hot, the glaze will melt right off and pool on the rack. Trust me on this—I’ve made that mistake more than once.
- Make the glaze. While the scones cool, whisk together 1 cup powdered sugar, 2 tablespoons pure maple syrup, and 1-2 tablespoons heavy cream (or milk) until smooth. Start with 1 tablespoon of cream and add more if needed to reach a drizzling consistency. The glaze should be thick enough to coat the back of a spoon but thin enough to drip slowly off a whisk.
- Glaze the scones. Once the scones are completely cool, drizzle the maple glaze over the tops. I like to use a spoon and zigzag it back and forth for a rustic look. Let the glaze set for about 10 minutes before serving. If you’re impatient (like me), you can eat them right away—the glaze just won’t be as pretty.
Cooking Tips & Techniques
I’ve made these scones more times than I can count, and I’ve learned a few things along the way. Here are my best tips for scone success.
Keep everything cold. This is the golden rule of scone-making. Cold butter creates steam pockets in the oven, which gives you those flaky layers. If your butter softens before baking, pop the shaped scones in the freezer for 10-15 minutes. I’ve done this many times when my kitchen was too warm, and it works like a charm.
Don’t overwork the dough. I cannot stress this enough. Scone dough should be handled as little as possible. The more you mess with it, the tougher they get. Mix until just combined, pat into shape gently, and cut cleanly. That’s it. My first few batches were hockey pucks because I kept kneading and re-shaping. Learn from my mistakes!
Use a bench scraper. If you don’t have one, get one. They’re cheap and they make cutting scones so much easier. A knife drags through the dough and seals the edges, which prevents them from rising. A bench scraper cuts cleanly and gives you those beautiful, tall scones.
Check your baking powder. This is the most common reason scones don’t rise. If your baking powder is more than 6 months old, it might not be active enough. Test it by dropping a spoonful into hot water—if it fizzes vigorously, it’s good. If not, buy a new can.
Bake on the middle rack. The middle rack provides the most even heat. If you bake too close to the top, the bottoms might burn before the tops are done. Too close to the bottom, and the tops won’t brown properly. Middle rack, every time.
Let them cool properly. I know it’s tempting to eat them straight from the oven, but letting them cool on a wire rack is important. It allows air to circulate around the scones, preventing the bottoms from getting soggy. Plus, the glaze sets better on cool scones. Patience pays off here.
Double the batch. These scones freeze beautifully (more on that later), so I always make a double batch. It’s the same amount of work, and you’ll thank yourself later when you have scones ready to go for unexpected guests or lazy weekend mornings.
Variations & Adaptations
One of the best things about this recipe is how adaptable it is. Here are some variations I’ve tried and loved.
Gluten-Free Version: Substitute the all-purpose flour with a 1:1 gluten-free baking flour blend. I’ve had great results with King Arthur’s Measure for Measure flour. The texture is slightly more delicate, but the flavor is spot on. Just be gentle with the dough—gluten-free flour blends tend to be more fragile.
Vegan Adaptation: Use vegan butter (I like Miyoko’s) and replace the heavy cream with full-fat coconut cream. For the egg, use a flax egg (1 tablespoon ground flaxseed mixed with 3 tablespoons water, let sit for 5 minutes). The scones won’t be quite as flaky, but they’re still delicious. The maple glaze works perfectly with plant-based milk.
Extra Spicy Version: If you love heat, add 1/4 teaspoon of cayenne pepper to the spice blend. It sounds weird, but the subtle warmth pairs beautifully with the maple glaze. I tried this on a whim one fall afternoon and it’s become my secret-weapon version for spice lovers.
Pumpkin Seed Topping: Before baking, sprinkle the tops with pumpkin seeds (pepitas) for a little crunch. Press them gently into the dough so they stick. It adds a lovely texture contrast and makes them look extra fancy.
Dark Chocolate Chips: Fold in 1/2 cup of dark chocolate chips along with the wet ingredients. The chocolate pairs beautifully with the chai spices. My kids go crazy for this version, and honestly, so do I.
Maple-Bourbon Glaze: For an adult twist, replace 1 tablespoon of the maple syrup with bourbon. The smoky sweetness of bourbon complements the chai spices perfectly. Just don’t skip the vanilla extract—it rounds everything out.
Savory-Sweet Version: Reduce the sugar to 2 tablespoons and add 1/2 cup of sharp cheddar cheese, shredded. The combination of chai spices and cheddar is surprisingly good. Serve these with a bowl of soup for the ultimate fall meal.
Serving & Storage Suggestions
These scones are best served warm, but they’re pretty fantastic at room temperature too. Here’s how to make the most of them.
Serving Temperature: If you’re serving them fresh, let the glaze set for about 10 minutes before digging in. The scones should be at room temperature or just slightly warm. If you’ve stored them, pop them in a 300°F (150°C) oven for 5 minutes to refresh them. Microwaving works in a pinch, but the texture gets a little soft.
Presentation Ideas: Arrange the scones on a wooden board or a pretty plate. Dust with a little cinnamon for a finishing touch. They look beautiful on a breakfast table or brunch spread. I like to serve them with a side of fresh fruit and a hot cup of chai latte for the full experience.
What to Serve With Them: These scones are perfect with coffee (especially a latte or cappuccino), tea (chai or Earl Grey are my favorites), or a glass of cold milk. For a brunch spread, pair them with scrambled eggs, fresh fruit, and maybe some crispy bacon. The sweetness of the scones balances the savory elements beautifully.
Storage Instructions: Store unglazed scones in an airtight container at room temperature for up to 3 days. If you’ve already glazed them, layer them with parchment paper between each layer to prevent sticking. I’ve found that glazed scones are best eaten within 2 days—the glaze can get a little sticky after that.
Freezing Instructions: These scones freeze beautifully. You have two options. First, freeze the unbaked shaped scones on a baking sheet until solid, then transfer to a freezer bag. Bake from frozen, adding 2-3 minutes to the baking time. Second, freeze baked, unglazed scones for up to 3 months. Thaw at room temperature, refresh in the oven, then glaze. I always keep a batch in the freezer for emergencies. You know, like when you need a scone at 10 PM on a Tuesday. Not that I’ve done that.
Flavor Development: Here’s something interesting—the flavors actually deepen after a day or two. The spices meld together and become more complex. So if you can resist eating them all on day one, day two is even better. The texture might be slightly less crisp, but the flavor payoff is worth it.
Nutritional Information & Benefits
Let’s be real—these scones are a treat, not a health food. But they do have some redeeming qualities. Here’s a rough breakdown per scone (based on 8 servings):
| Nutrient | Amount |
|---|---|
| Calories | ~320 kcal |
| Total Fat | 14g |
| Saturated Fat | 8g |
| Carbohydrates | 45g |
| Sugar | 22g |
| Protein | 5g |
| Fiber | 2g |
| Vitamin A | 45% DV |
Health Highlights: Pumpkin is packed with vitamin A, which supports eye health and immune function. The chai spices—cinnamon, ginger, cardamom, cloves—are all anti-inflammatory and rich in antioxidants. So while these scones aren’t exactly a salad, they’re not empty calories either. They’re comfort food with a little something extra.
Dietary Considerations: This recipe contains gluten, dairy, and eggs. For gluten-free and vegan options, see the variations section above. The scones are nut-free as written, but check your ingredients if you have allergies. The maple glaze is naturally vegan if you use plant-based milk.
My Wellness Perspective: I believe in balance. These scones are part of a happy life. They’re for mornings when you need something special, for sharing with people you love, for those moments when only a warm, spiced, glazed scone will do. Enjoy them without guilt, and maybe take a walk afterward. That’s my philosophy anyway.
Conclusion
These chai-spiced pumpkin scones with maple glaze are the kind of recipe that becomes a tradition. They’re the ones you make when the leaves start turning, when you pull out your cozy sweaters, when you need a little warmth on a chilly day. They’re not complicated. They’re not fancy. They’re just really, really good—the kind of good that makes you close your eyes after the first bite.
I hope you’ll make these scones your own. Adjust the spices to your liking. Add chocolate chips if that’s your thing. Double the glaze—I won’t judge. The beauty of this recipe is that it’s forgiving and adaptable. It’s meant to be played with, shared, and enjoyed.
If you make these scones, I’d love to hear about it. Leave a comment below and tell me how they turned out. Did you try a variation? Did you burn the first batch like I did? (It happens. Just scrape off the burnt parts and try again.) Share your photos, your stories, your scone triumphs. This recipe brought a little joy to my kitchen, and I hope it does the same for yours.
Now go preheat that oven. Your cozy morning awaits.
Frequently Asked Questions
Can I use canned pumpkin pie filling instead of pure pumpkin?
No, please don’t! Pumpkin pie filling has added sugar and spices, which will throw off the balance of this recipe. Stick with 100% pure pumpkin puree. Libby’s is the most common brand, and it works perfectly. If you accidentally grab the wrong can, just save it for making a pie later.
Why did my scones turn out dry?
Dry scones usually come from one of two issues: overmixing the dough or overbaking. Mix just until the ingredients come together—a few streaks of flour are fine. And pull them from the oven when they’re just barely golden on top. They’ll continue to cook from residual heat. If they’re still dry after that, try adding an extra tablespoon of cream to the wet ingredients next time.
Can I make the dough ahead of time?
Absolutely! You can prepare the dough, shape the scones, and refrigerate them on the baking sheet for up to 24 hours before baking. Just cover them loosely with plastic wrap. You can even freeze the shaped scones for up to 3 months. Bake from frozen, adding a couple extra minutes to the baking time. This is my favorite trick for having fresh scones without the morning mess.
My glaze is too runny. How do I fix it?
If your glaze is thinner than you’d like, just whisk in a little more powdered sugar, one tablespoon at a time, until it reaches the right consistency. If it’s too thick, add a tiny splash of cream or milk. The perfect glaze should coat the back of a spoon and drip off slowly. Don’t stress—it’s very forgiving.
Can I use a different type of milk in the glaze?
Yes, any milk will work. Whole milk, 2%, almond milk, oat milk—they all do the job. Keep in mind that different milks have different fat contents, which will affect the thickness. Start with less liquid and add more as needed. I’ve used oat milk many times when I ran out of cream, and the glaze was still delicious.
Pin This Recipe!

Cozy Chai-Spiced Pumpkin Scones with Maple Glaze

These chai-spiced pumpkin scones with maple glaze are the perfect fall treat—crispy on the outside, tender on the inside, with a cozy spice blend that mimics a real chai latte. Quick and easy to make in under 35 minutes, they’re ideal for chilly mornings, brunches, or any time you need a little warmth.
- Prep Time: 15 minutes
- Cook Time: 16 minutes
- Total Time: 31 minutes
- Yield: 8 servings 1x
- Category: Breakfast
- Cuisine: American
Ingredients
- 2 cups (250g) all-purpose flour
- 1/3 cup (65g) granulated sugar
- 1 tablespoon baking powder
- 1/2 teaspoon salt
- 6 tablespoons (85g) unsalted butter, frozen
- 1/2 cup (120g) pumpkin puree (100% pure, not pie filling)
- 1/4 cup (60ml) heavy cream
- 1 teaspoon vanilla extract
- 1 large egg, room temperature
- 1 teaspoon ground cinnamon
- 1/2 teaspoon ground ginger
- 1/2 teaspoon ground cardamom
- 1/4 teaspoon ground cloves
- 1/4 teaspoon ground nutmeg
- 1/4 teaspoon ground allspice
- 1 cup (120g) powdered sugar, sifted
- 2 tablespoons pure maple syrup
- 1–2 tablespoons heavy cream or milk
- 1/2 teaspoon vanilla extract (optional)
Instructions
- Preheat your oven to 400°F (200°C). Line a baking sheet with parchment paper.
- Grate the frozen butter on the large holes of a box grater. Work quickly and if the butter softens, pop the grated pieces back in the freezer for a few minutes.
- In a large bowl, whisk together the flour, sugar, baking powder, salt, and all the chai spices (cinnamon, ginger, cardamom, cloves, nutmeg, allspice).
- Add the grated butter to the flour mixture and toss gently with your fingers or a fork to coat each piece with flour. Do not incorporate the butter into the flour—just distribute it evenly.
- In a separate medium bowl, whisk together the pumpkin puree, heavy cream, vanilla extract, and egg until smooth.
- Pour the wet ingredients into the dry ingredients. Stir with a spatula or wooden spoon until just combined. Stop mixing as soon as you can’t see any more dry flour. The dough will look shaggy—that’s perfect.
- Turn the dough out onto a lightly floured surface. Gently bring it together with your hands and pat it into a circle about 3/4-inch thick. Do not knead.
- Use a sharp knife or bench scraper to cut the circle into 8 wedges, like a pizza. Press straight down—don’t saw back and forth.
- Place the scones on the prepared baking sheet, spacing them about 2 inches apart. Brush the tops with a little extra cream for a golden crust.
- Bake for 14-16 minutes, until the scones are golden brown on the bottom and just barely golden on top. The tops should feel firm to the touch.
- Let the scones cool on the baking sheet for 5 minutes, then transfer to a wire rack to cool completely before glazing.
- While the scones cool, whisk together the powdered sugar, maple syrup, and 1-2 tablespoons of cream (or milk) until smooth. Start with 1 tablespoon of cream and add more if needed to reach a drizzling consistency.
- Once the scones are completely cool, drizzle the maple glaze over the tops. Let the glaze set for about 10 minutes before serving.
Notes
For best texture, ensure pumpkin puree isn’t watery—pat dry with a paper towel if needed. Keep all ingredients cold for flaky layers. Do not overmix the dough. Scones can be frozen unbaked or baked (unglazed) for up to 3 months. The flavors deepen after a day or two.
Nutrition
- Serving Size: 1 scone
- Calories: 320
- Sugar: 22
- Sodium: 320
- Fat: 14
- Saturated Fat: 8
- Carbohydrates: 45
- Fiber: 2
- Protein: 5
Keywords: pumpkin scones, chai spiced scones, maple glaze, fall baking, breakfast scones, easy scone recipe


