The woman at the next stall watched me sniffing a jar of her brown butter powder for what felt like forever. I was at the farmers’ market last October, completely stalled between the apple cider donuts and a pile of the most perfect-looking delicata squash, and I could not make up my mind. She finally laughed and said, “You know, that stuff is magic in cookies.” She didn’t offer me a recipe right then—she just handed me a small sample and told me to try it in my next batch of snickerdoodles. I nodded, thanked her, and honestly, I forgot about the powder for a week. Then one rainy Tuesday, I found it shoved behind a bag of oats, and I decided to give it a shot. I also had a half-can of pumpkin puree staring at me from the fridge, and I figured, why not? That first batch was a happy accident. The brown butter flavor was nutty and deep, the pumpkin made everything impossibly soft, and the cinnamon-sugar coating? Let’s just say I ate three before they even cooled down. I have tweaked the recipe since then—lightened it up with less butter and a smart swap for the sugar—but that original spark came from a stranger’s simple suggestion. Maybe you’ve been there, standing in a market with no plan, and a random comment changes your baking forever. These cookies are my tribute to that moment.
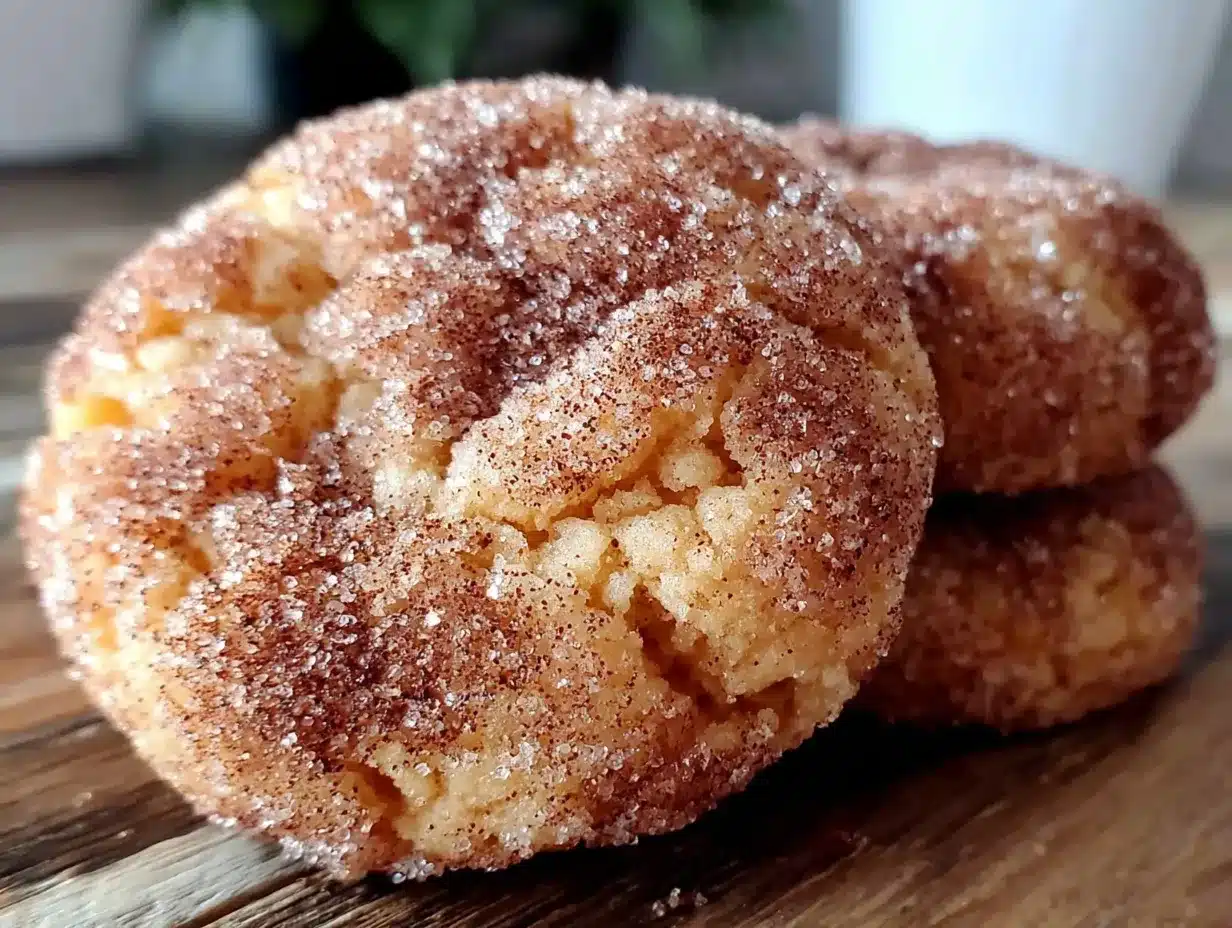
This recipe for Lighter Brown Butter Pumpkin Snickerdoodle Cookies is the fall dessert you didn’t know you needed. They have all the cozy, spiced warmth of a classic snickerdoodle, but with a tender, cake-like crumb from the pumpkin and a deep, nutty richness from the brown butter. And the best part? They are lighter than your average cookie, so you can absolutely have two without a second thought. I mean, honestly, that’s the dream, right?
Why You’ll Love This Recipe
Let me tell you why these cookies have earned a permanent spot in my fall baking rotation. I’ve tested this recipe at least six times—yes, six—to get the texture just right. The first batch was too flat. The second was too cakey. The third? Well, let’s not talk about the third. But now, I’ve nailed it. These cookies are soft, chewy, and absolutely bursting with fall flavor, but they won’t weigh you down.
- Quick & Easy: From start to finish, these cookies come together in about 30 minutes. Perfect for a last-minute bake when you need something sweet, stat.
- Simple Ingredients: You probably have most of these in your pantry right now. No weird, hard-to-find stuff. Just real food.
- Perfect for Fall Gatherings: Bring these to a potluck, a Friendsgiving, or just a cozy night in. They are guaranteed to disappear fast.
- Crowd-Pleaser: Kids love them. Adults love them. Even my friend who swears she doesn’t like pumpkin asked for the recipe.
- Unbelievably Delicious: The combo of nutty brown butter, warm pumpkin, and that classic cinnamon-sugar coating is pure magic. Seriously, you’ll close your eyes after the first bite.
What makes these different from every other pumpkin cookie out there? It’s the brown butter. That simple step of browning the butter adds a toasty, caramel-like depth that regular butter just can’t match. And by cutting back on the butter and using a smart blend of sugars, we keep the cookies light without sacrificing any of the flavor. This isn’t just another pumpkin cookie—it’s your new favorite fall tradition.
These cookies are comfort food reimagined. They feel indulgent, but they won’t leave you feeling sluggish. Perfect for impressing guests without any stress, or turning a random Tuesday into something a little more special.
What Ingredients You Will Need
This recipe uses simple, wholesome ingredients to deliver big flavor and a satisfying texture. Most of these are pantry staples, which makes these cookies perfect for a spontaneous bake.
For the Cookies
- Unsalted butter, 6 tablespoons (85g) — We’ll brown this for that nutty flavor. I prefer using unsalted so I can control the salt level.
- Granulated sugar, ½ cup (100g) — Adds sweetness and helps with browning.
- Light brown sugar, ¼ cup (50g), packed — Adds moisture and a deeper, molasses-like flavor. (Use dark brown sugar for an even richer taste.)
- Pumpkin puree, ½ cup (120g) — Not pumpkin pie filling! Make sure it’s 100% pure pumpkin. I like Libby’s for its consistent texture.
- Large egg, 1 — Room temperature is best for a smooth batter.
- Vanilla extract, 1 teaspoon — Enhances all the warm flavors.
- All-purpose flour, 1 ¾ cups (220g) — Spoon and level it for accuracy. Too much flour makes cookies dry.
- Baking soda, ½ teaspoon — Helps the cookies spread just a little.
- Baking powder, ½ teaspoon — Gives them a gentle lift.
- Salt, ½ teaspoon — Balances the sweetness.
- Pumpkin pie spice, 1 ½ teaspoons — You can use store-bought or make your own with cinnamon, nutmeg, ginger, and cloves.
- Cinnamon, ½ teaspoon — For extra warmth.
For the Coating
- Granulated sugar, ¼ cup (50g)
- Ground cinnamon, 1 tablespoon
Ingredient Tip: For the best texture, make sure your pumpkin puree isn’t too watery. If it looks loose, pat it dry with a paper towel before using. And yes, you can substitute the all-purpose flour with a good 1:1 gluten-free baking flour if needed.
Equipment Needed
You don’t need a ton of fancy equipment for these cookies. Here’s what I use:
- Mixing bowls: One medium, one large. I prefer glass or stainless steel.
- Whisk and wooden spoon: A whisk for the dry ingredients, a wooden spoon for the wet.
- Small saucepan: For browning the butter. A light-colored pan helps you see the color change.
- Baking sheets: Two standard half-sheet pans work great. Line them with parchment paper for easy cleanup.
- Cookie scoop: A 1.5-tablespoon scoop makes uniform cookies. No scoop? Just use two spoons.
- Cooling rack: Lets the cookies cool evenly so they don’t get soggy on the bottom.
Budget Tip: If you don’t have a light-colored saucepan, just watch the butter closely—it can go from browned to burnt in seconds. And parchment paper is your best friend here; it prevents sticking without adding extra fat.
Preparation Method
Ready to bake? Let’s do this. I’ll walk you through every step so you get perfect cookies every time.
- Brown the butter: Place the 6 tablespoons of butter in a small saucepan over medium heat. Stir it occasionally with a wooden spoon. First, it will melt, then it will start to foam. Watch for tiny brown specks forming at the bottom—that’s the milk solids toasting. Once it smells nutty and turns a golden-amber color (about 5-7 minutes), remove it from the heat immediately. Pour it into a heatproof bowl and let it cool for 10 minutes. Don’t skip the cooling step, or you’ll end up with scrambled eggs later!
- Mix the wet ingredients: In a large bowl, whisk together the cooled brown butter, ½ cup granulated sugar, and ¼ cup packed brown sugar until smooth. It should look like wet sand. Add the pumpkin puree, the egg, and the vanilla extract. Whisk until everything is fully combined and glossy. The mixture will be thick and a little shiny.
- Combine the dry ingredients: In a separate medium bowl, whisk together the flour, baking soda, baking powder, salt, pumpkin pie spice, and cinnamon. Make sure there are no clumps—especially with the spices.
- Bring it together: Gradually add the dry ingredients to the wet mixture, stirring with a wooden spoon or spatula until just combined. Do not overmix! A few streaks of flour are okay. The dough will be soft and slightly sticky. Cover the bowl with plastic wrap and chill it in the fridge for at least 30 minutes. This step is crucial—chilling prevents the cookies from spreading too much and deepens the flavor.
- Preheat and prep: While the dough chills, preheat your oven to 350°F (175°C). Line two baking sheets with parchment paper.
- Make the coating: In a small bowl, mix the ¼ cup granulated sugar with the 1 tablespoon of cinnamon. Set aside.
- Scoop and roll: Use your cookie scoop (or a spoon) to portion out rounded tablespoons of dough. Roll each ball between your palms until smooth, then roll it in the cinnamon-sugar mixture until fully coated. Place them on the prepared baking sheets, spacing them about 2 inches apart. You should get about 18 cookies.
- Bake: Bake one sheet at a time for 10-12 minutes. The cookies will look puffed and slightly cracked on top. The edges should be set but the centers will still look a little soft. Don’t overbake! They continue to set as they cool.
- Cool: Let the cookies sit on the baking sheet for 5 minutes. This helps them firm up. Then transfer them to a cooling rack to cool completely. Or, you know, eat one warm. I won’t judge.
Cooking Tips & Techniques
I’ve made my share of mistakes with these cookies, so let me save you the trouble. Here are my top tips:
- Watch the butter like a hawk. I once walked away to answer a text, and my butter went from perfectly browned to burnt and bitter in under a minute. Stay at the stove, and swirl the pan constantly once it starts foaming.
- Don’t skip the chill time. I know it’s tempting to rush, but warm dough will spread into flat, sad puddles. Chilled dough gives you thick, bakery-style cookies. Trust me on this one.
- Use a cookie scoop for even cookies. Uniform size means even baking. No more burnt edges and raw middles.
- Rotate your pan halfway through. Ovens have hot spots. Turning the pan at the 6-minute mark ensures all your cookies bake evenly.
- Let them rest on the pan. Those 5 minutes on the hot sheet are not optional. It’s when the cookies finish setting up. Move them too soon, and they’ll fall apart.
Variations & Adaptations
One of the best things about this recipe is how easy it is to tweak. Here are a few ways I’ve played with it:
- Gluten-Free Version: Swap the all-purpose flour with a 1:1 gluten-free baking blend. I’ve used King Arthur’s Measure for Measure with great results. Just add an extra tablespoon of flour if the dough seems too sticky.
- Dairy-Free Option: Use vegan butter for the browning step. Miyoko’s or Country Crock Plant Butter work well. The flavor will be slightly different, but still delicious.
- Spice It Up: Add a pinch of cayenne pepper or cardamom to the cinnamon-sugar coating for a surprising kick. I tried this last Thanksgiving, and it was a huge hit.
- Add Some Crunch: Fold in ½ cup of chopped pecans or walnuts after mixing the dough. The nuts add a lovely texture that pairs beautifully with the pumpkin.
- Make Them Sandwich Cookies: Once cooled, spread a little cream cheese frosting between two cookies. It’s over-the-top in the best way.
Serving & Storage Suggestions
These cookies are best served slightly warm, when the centers are still soft and the cinnamon-sugar coating is at its crunchiest. Pair them with a hot cup of chai, a pumpkin spice latte, or just a cold glass of milk. They also make a fantastic dessert for a fall brunch table—stack them on a rustic wooden board and watch them disappear.
Storage: Keep the cookies in an airtight container at room temperature for up to 4 days. Place a slice of bread in the container to help them stay soft—the cookies will absorb the moisture from the bread. Genius, right?
Freezing: You can freeze the baked cookies for up to 3 months. Just layer them between sheets of parchment paper in a freezer-safe container. Thaw at room temperature for about 20 minutes before serving. Or, freeze the unbaked dough balls (without the cinnamon-sugar coating) for up to 3 months. When ready to bake, roll them in the coating and add 2-3 extra minutes to the baking time.
Flavor Note: These cookies actually taste even better the next day. The pumpkin and spice flavors have time to meld, and the texture becomes perfectly tender. So don’t be afraid to make them a day ahead!
Nutritional Information & Benefits
Because these are “lighter” cookies, I wanted to give you a rough idea of what you’re working with. Per cookie (based on 18 cookies):
- Calories: ~130
- Fat: 5g
- Carbohydrates: 20g
- Sugar: 12g
- Protein: 2g
- Fiber: 1g
Health Benefits: Pumpkin is packed with vitamin A and fiber, which are great for your immune system and digestion. By using less butter and a mix of sugars, we’ve cut down on the overall fat and calories without losing any of the flavor. These cookies are a smart choice for a mindful treat—they satisfy your sweet tooth while giving you a little nutritional boost.
Dietary Note: This recipe is vegetarian and can be made gluten-free and dairy-free with the swaps mentioned above. It does contain gluten and dairy in its standard form.
Conclusion
These Lighter Brown Butter Pumpkin Snickerdoodle Cookies are everything I want in a fall dessert—cozy, spiced, and just sweet enough, but without the heavy feeling that often comes with holiday baking. They are proof that you don’t need a ton of butter and sugar to make something truly memorable. Whether you’re baking for a crowd or just for yourself on a quiet Sunday afternoon, these cookies deliver every single time.
I would love to hear how they turn out for you! Did you try any of the variations? Did you add a secret ingredient? Drop a comment below and let me know—I read every single one. And if you share a photo on Pinterest or Instagram, tag me so I can see your beautiful creations. Happy baking, friends!
Frequently Asked Questions
Can I use canned pumpkin pie filling instead of pure pumpkin?
No, please don’t! Pumpkin pie filling has added sugar and spices, which will throw off the balance of the recipe. Stick with 100% pure pumpkin puree for the best results.
Why did my cookies turn out flat?
Flat cookies usually mean the dough was too warm when it went into the oven, or the butter wasn’t cooled enough after browning. Make sure to chill the dough for at least 30 minutes, and let the brown butter cool for a full 10 minutes before mixing.
Can I make the dough ahead of time?
Absolutely! You can refrigerate the dough (without the coating) for up to 3 days. When you’re ready to bake, just roll it into balls, coat it in the cinnamon sugar, and bake as directed. You might need to add an extra minute to the baking time if the dough is very cold.
Can I freeze these cookies?
Yes! Baked cookies freeze beautifully for up to 3 months. You can also freeze the unbaked dough balls (without the coating) for up to 3 months. When baking from frozen, add 2-3 minutes to the baking time and roll them in the coating just before baking.
How do I know when the cookies are done?
Look for puffed centers and slightly cracked tops. The edges should be set but not brown. The centers will look soft and underdone—that’s exactly what you want. They will continue to set as they cool on the baking sheet.
Pin This Recipe!
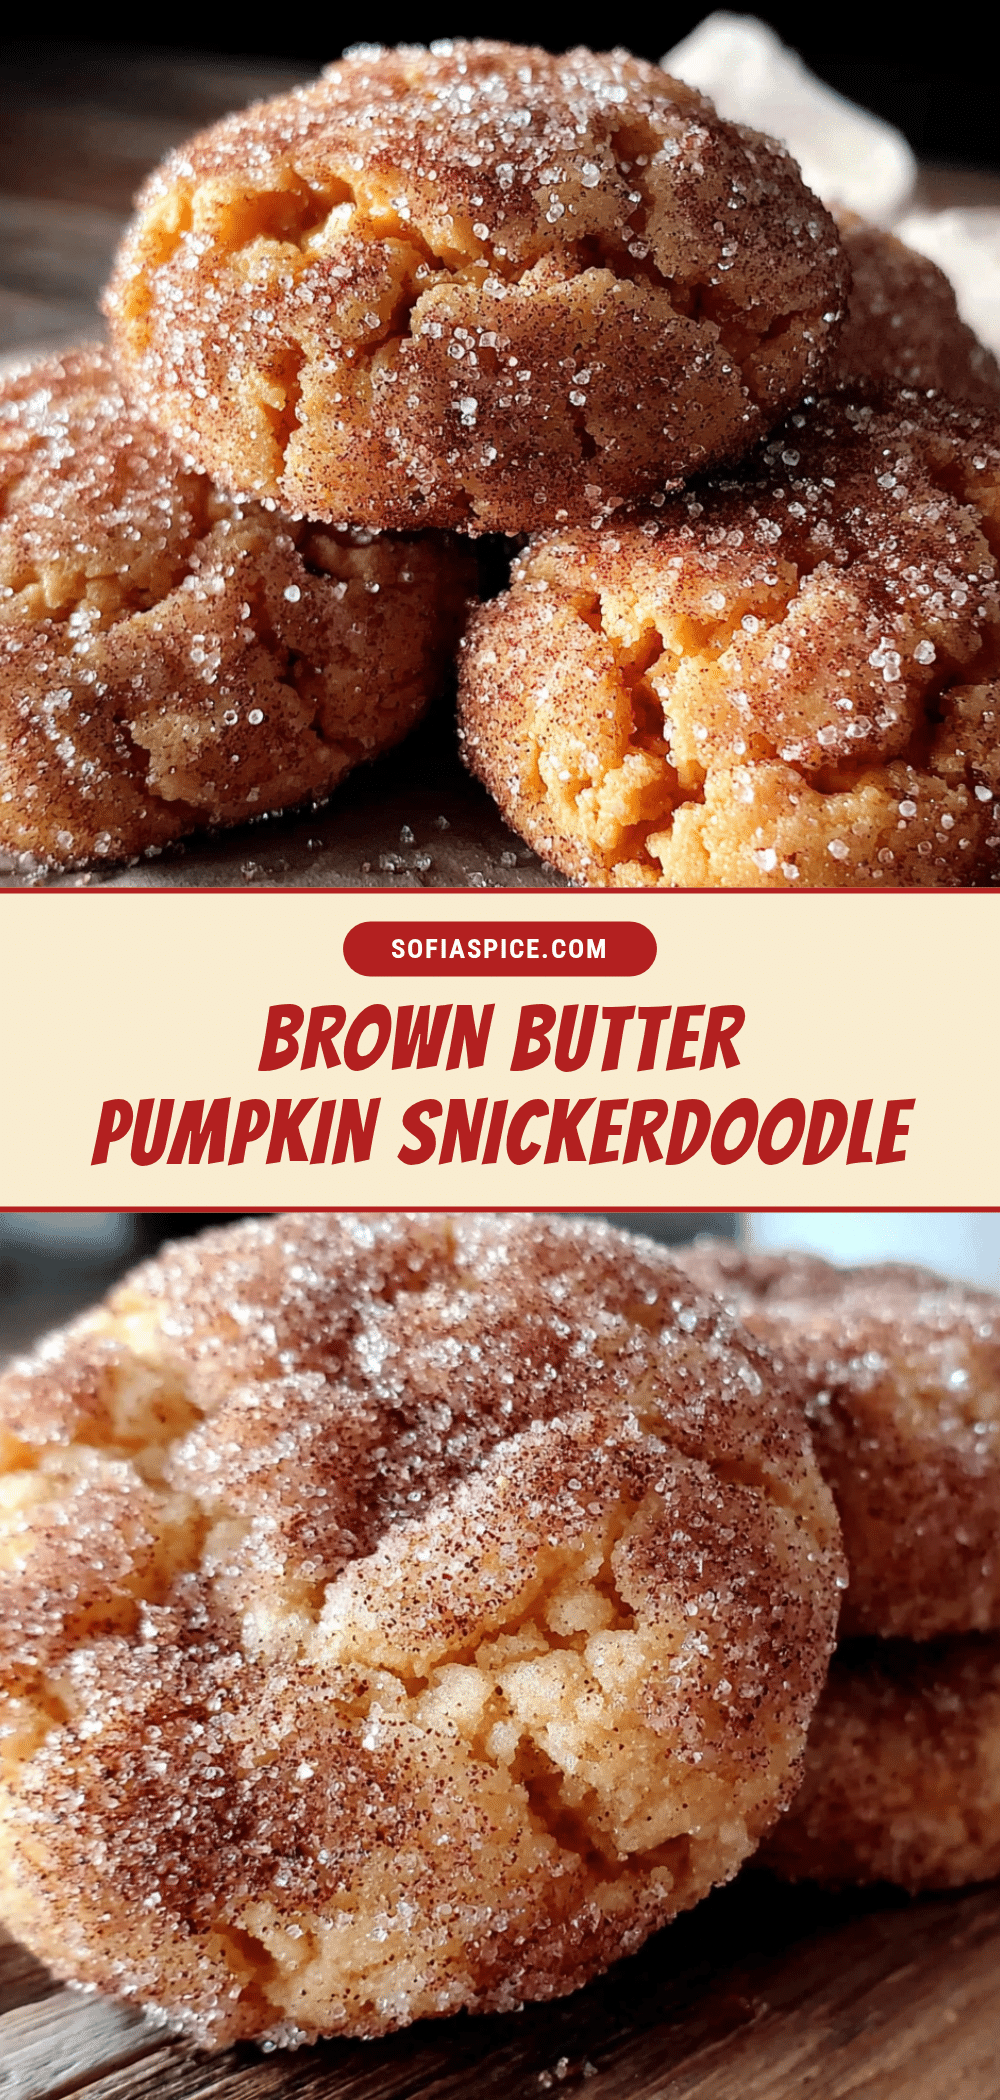
Lighter Brown Butter Pumpkin Snickerdoodle Cookies (Easy Fall Recipe)
These Lighter Brown Butter Pumpkin Snickerdoodle Cookies are the fall dessert you didn’t know you needed. They have all the cozy, spiced warmth of a classic snickerdoodle, but with a tender, cake-like crumb from the pumpkin and a deep, nutty richness from the brown butter, and they are lighter than your average cookie.
- Prep Time: 15 minutes
- Cook Time: 12 minutes
- Total Time: 57 minutes (includes 30 minutes chilling)
- Yield: 18 cookies 1x
- Category: Dessert
- Cuisine: American
Ingredients
- 6 tablespoons (85g) unsalted butter
- ½ cup (100g) granulated sugar
- ¼ cup (50g) light brown sugar, packed
- ½ cup (120g) pumpkin puree (100% pure pumpkin)
- 1 large egg, room temperature
- 1 teaspoon vanilla extract
- 1 ¾ cups (220g) all-purpose flour
- ½ teaspoon baking soda
- ½ teaspoon baking powder
- ½ teaspoon salt
- 1 ½ teaspoons pumpkin pie spice
- ½ teaspoon ground cinnamon
- ¼ cup (50g) granulated sugar (for coating)
- 1 tablespoon ground cinnamon (for coating)
Instructions
- Brown the butter: Place 6 tablespoons of butter in a small saucepan over medium heat. Stir occasionally with a wooden spoon. It will melt, then foam. Watch for tiny brown specks forming at the bottom. Once it smells nutty and turns golden-amber (about 5-7 minutes), remove from heat immediately. Pour into a heatproof bowl and let cool for 10 minutes.
- Mix the wet ingredients: In a large bowl, whisk together the cooled brown butter, ½ cup granulated sugar, and ¼ cup packed brown sugar until smooth. Add pumpkin puree, egg, and vanilla extract. Whisk until fully combined and glossy.
- Combine the dry ingredients: In a separate medium bowl, whisk together flour, baking soda, baking powder, salt, pumpkin pie spice, and cinnamon until no clumps remain.
- Bring it together: Gradually add dry ingredients to wet mixture, stirring with a wooden spoon or spatula until just combined. Do not overmix. Cover bowl with plastic wrap and chill in fridge for at least 30 minutes.
- Preheat and prep: Preheat oven to 350°F (175°C). Line two baking sheets with parchment paper.
- Make the coating: In a small bowl, mix ¼ cup granulated sugar with 1 tablespoon cinnamon. Set aside.
- Scoop and roll: Use a cookie scoop to portion out rounded tablespoons of dough. Roll each ball between palms until smooth, then roll in cinnamon-sugar mixture until fully coated. Place on prepared baking sheets, spacing 2 inches apart. Makes about 18 cookies.
- Bake: Bake one sheet at a time for 10-12 minutes. Cookies will look puffed and slightly cracked on top. Edges should be set but centers still soft. Do not overbake.
- Cool: Let cookies sit on baking sheet for 5 minutes to firm up, then transfer to a cooling rack to cool completely.
Notes
Watch the butter closely when browning—it can go from browned to burnt quickly. Don’t skip chilling the dough; it prevents spreading and deepens flavor. Let cookies rest on the baking sheet for 5 minutes after baking to set properly. For best texture, ensure pumpkin puree isn’t too watery; pat dry with a paper towel if needed. Cookies taste even better the next day.
Nutrition
- Serving Size: 1 cookie
- Calories: 130
- Sugar: 12
- Fat: 5
- Carbohydrates: 20
- Fiber: 1
- Protein: 2
Keywords: brown butter, pumpkin, snickerdoodle, cookies, fall recipe, easy, lighter


