My brother-in-law Mark had claimed to hate apple desserts for as long as I’d known him. “Too mushy,” he’d say, waving away a slice of pie. “The texture is just wrong.” For years, I believed him. I’d make apple crisp for family gatherings and watch him load up on the brownie platter instead, never once offering him a spoonful. Then last fall, I was testing a new cookie recipe on a rainy Tuesday afternoon. The kitchen smelled like a candle shop exploded — cinnamon, nutmeg, and boiled cider all tangled up together. I’d pulled a tray of these apple cider cookies out of the oven maybe ten minutes earlier when I heard footsteps. Mark walked in, grabbed a cookie right off the cooling rack — still warm, the glaze barely set — and took a bite. He stopped mid-chew, looked at the cookie in his hand like it had personally betrayed him, and said, “Okay, fine. These are amazing.” I didn’t say a word. I just handed him a napkin and went back to my mixing bowl.
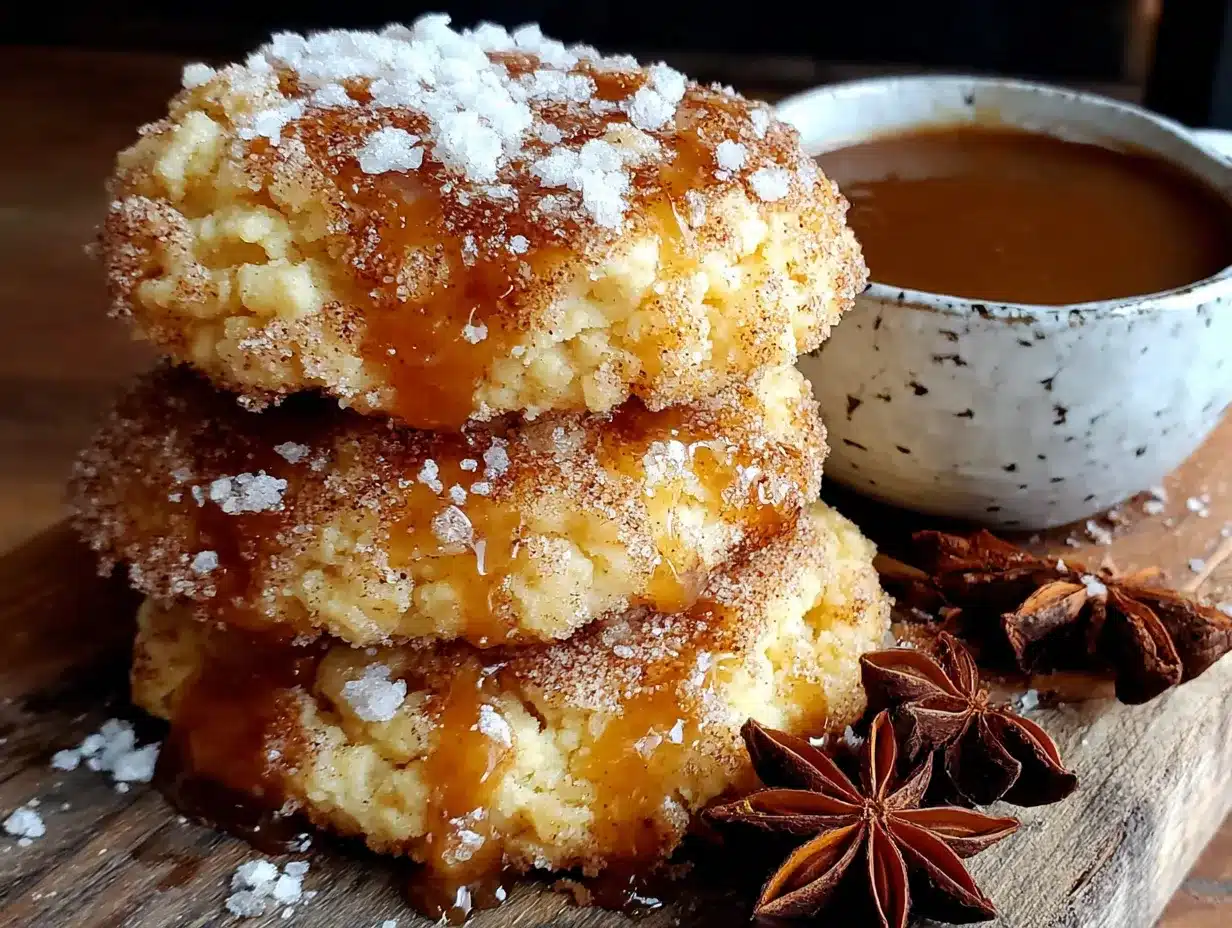
Honestly, that moment stuck with me more than any recipe win. It wasn’t about proving him wrong, you know? It was about how one specific version of something can completely flip a script you thought was permanent. These aren’t just any apple cookies. They’re soft-baked, almost cake-like, with a concentrated apple flavor that comes from reducing fresh cider down to a syrupy glaze. The edges are barely golden, the centers stay pillowy for days, and that cider glaze on top? It crackles just a little when you bite into it. I’ve brought them to potlucks, served them at book club, and watched people who swore they were “not dessert people” reach for a second one. Maybe you’ve been there — that moment when a recipe you weren’t even trying to show off becomes the one everyone asks for. That’s this cookie.
Why You’ll Love This Recipe
Let me tell you why these cookies earn a permanent spot in my fall baking rotation. First off, the texture is unreal — soft, tender, almost like a little cake in cookie form. I’ve tested this recipe at least six times to get the balance right between a sturdy cookie that holds its shape and one that practically melts when you bite into it.
- Perfect for Hosting: This recipe scales beautifully for a crowd. I’ve made double batches for Thanksgiving dessert tables and small batches for casual game nights. They disappear either way.
- Simple Ingredients: You probably have most of this in your pantry already. No obscure extracts or specialty flours needed — just good, basic baking staples plus apple cider.
- Make-Ahead Friendly: The dough chills for an hour, which means you can prep it before guests arrive and bake fresh cookies in batches. Nothing beats warm cookies coming out of the oven when people are mingling.
- Crowd-Pleaser for All Ages: I’ve seen toddlers grab these off a platter next to their grandmas. The apple flavor is familiar but elevated — not too sweet, not too spicy.
- That Glaze: The cider reduction gets stirred into both the dough and the glaze, so you get a double hit of apple flavor. It’s the kind of detail that makes people ask, “Wait, what’s in these?”
What makes this recipe different from other apple cookies I’ve tried is the cider reduction step. Instead of just dumping in regular cider, you boil it down until it’s thick and concentrated — almost like a syrup. That little extra step is what gives these cookies their deep, almost caramelized apple taste without making the dough too wet. I’ve tested shortcuts, and honestly, nothing compares to the flavor you get from reducing it yourself. This isn’t just another fall cookie recipe. It’s the one that’ll have people texting you for the link after every gathering.
What Ingredients You Will Need
This recipe uses simple, wholesome ingredients to deliver that concentrated apple flavor and soft-baked texture. Most of these are pantry staples, so you might only need to pick up fresh apple cider and maybe some cinnamon if you’re running low.
- Apple Cider: 1 cup (240 ml) — Use the good stuff, not apple juice. Cider has more body and flavor. I like local farm ciders when they’re in season.
- Unsalted Butter: ½ cup (113 g), softened to room temperature — This gives the cookies richness and helps them spread just enough. If you only have salted butter, reduce the added salt to ¼ teaspoon.
- Granulated Sugar: ½ cup (100 g) — Adds sweetness and helps with browning.
- Light Brown Sugar: ½ cup (100 g), packed — The molasses in brown sugar adds depth and keeps the cookies soft.
- Large Egg: 1, at room temperature — Binds everything together and adds structure.
- Vanilla Extract: 1 teaspoon — Pure vanilla is worth it here, but imitation works fine.
- All-Purpose Flour: 2 cups (250 g) — Spoon and level it for accuracy. Too much flour makes cookies dry.
- Baking Soda: ½ teaspoon — Helps with spread and tenderness.
- Baking Powder: ½ teaspoon — Gives them a little lift.
- Salt: ½ teaspoon — Balances sweetness and enhances flavor.
- Ground Cinnamon: 1 teaspoon — Warm spice that pairs perfectly with apple. I use Vietnamese cinnamon for extra punch.
- Ground Nutmeg: ¼ teaspoon — Just a hint, don’t overdo it.
- Ground Cloves: ⅛ teaspoon — Optional, but adds that cozy holiday feel.
- Powdered Sugar: 1 cup (120 g) — For the glaze.
- Heavy Cream or Milk: 2 to 3 tablespoons — Thins the glaze to the right drizzling consistency.
Ingredient Tips: For the best texture, make sure your butter and egg are truly at room temperature. Cold ingredients don’t cream together properly, and you’ll end up with denser cookies. I recommend using a high-quality cinnamon like Saigon or Vietnamese — the flavor difference is noticeable. If you can’t find fresh apple cider, look for unfiltered apple juice; it’s closer in texture than the clear stuff.
Equipment Needed
You don’t need a fancy kitchen setup for these cookies. Here’s what I use:
- Medium Saucepan: For reducing the apple cider. A 2-quart pan works great.
- Mixing Bowls: One large for the wet ingredients, one medium for the dry. I prefer glass or stainless steel.
- Electric Mixer: Hand mixer or stand mixer with paddle attachment. You can cream by hand, but it takes some elbow grease.
- Rubber Spatula: For scraping down the bowl and folding in dry ingredients.
- Baking Sheets: Two rimmed baking sheets work best so you can rotate trays between racks.
- Parchment Paper: Non-stick and makes cleanup a breeze. Silicone mats also work.
- Cookie Scoop: A 1.5-tablespoon scoop gives uniform cookies. I’ve used spoons in a pinch, but the scoop is worth it.
- Wire Cooling Rack: Essential for even cooling and setting the glaze.
- Whisk: For the glaze — small whisk works better than a fork.
Budget-Friendly Alternatives: No cookie scoop? Use two spoons to drop rounded tablespoons of dough. No parchment? Grease the baking sheet lightly, but watch for more spread. No wire rack? Cool cookies on the baking sheet for 5 minutes, then transfer to a plate.
Preparation Method
Step 1: Reduce the Apple Cider
Pour 1 cup of apple cider into a medium saucepan. Bring it to a boil over medium-high heat, then reduce to a simmer. Let it cook, stirring occasionally, until it reduces to about ¼ cup. This takes 12 to 15 minutes. You’ll notice it thickens and smells intensely of apples. Watch it carefully toward the end — it can burn quickly. Pour the reduced cider into a small bowl and let it cool completely. You need it at room temperature for the dough.
Step 2: Cream Butter and Sugars
In a large mixing bowl, beat the softened butter, granulated sugar, and brown sugar together on medium speed until light and fluffy, about 2 to 3 minutes. Scrape down the sides and bottom of the bowl with a spatula. The mixture should look pale and airy.
Step 3: Add Egg, Vanilla, and Reduced Cider
Beat in the egg and vanilla extract until combined. Then add the cooled reduced cider and mix on low until just incorporated. The batter might look slightly curdled at this point — that’s normal, don’t panic. It’ll come together once you add the flour.
Step 4: Whisk Dry Ingredients
In a separate medium bowl, whisk together the flour, baking soda, baking powder, salt, cinnamon, nutmeg, and cloves. Whisking ensures the leaveners and spices are evenly distributed — no random pockets of baking soda.
Step 5: Combine Wet and Dry
Add the dry ingredients to the wet mixture in two additions, mixing on low speed after each until just combined. Use a spatula to fold the last bits of flour in by hand. Overmixing at this stage develops gluten, which makes cookies tough. Stop as soon as you don’t see streaks of flour.
Step 6: Chill the Dough
Cover the bowl with plastic wrap and refrigerate for at least 1 hour. Chilling solidifies the butter, which prevents the cookies from spreading too much during baking. You can chill it up to 3 days — the flavor actually deepens overnight. If you’re in a rush, 30 minutes is the absolute minimum, but the cookies will spread more.
Step 7: Preheat and Prep
Preheat your oven to 350°F (175°C). Line two baking sheets with parchment paper. Remove the chilled dough from the fridge.
Step 8: Scoop and Shape
Use a 1.5-tablespoon cookie scoop to portion the dough. Roll each portion into a smooth ball between your palms. Place them 2 inches apart on the prepared baking sheets — these cookies spread moderately. You should get about 24 cookies.
Step 9: Bake
Bake one sheet at a time on the middle rack for 10 to 12 minutes. The edges should look set and lightly golden, but the centers will still look soft and slightly puffy. They’ll continue to set as they cool. If you bake them until they look fully done in the oven, they’ll be overbaked once cooled.
Step 10: Cool and Glaze
Let the cookies cool on the baking sheet for 5 minutes — this helps them firm up. Then transfer them to a wire cooling rack to cool completely. While they cool, make the glaze. Whisk together the powdered sugar and 2 tablespoons of heavy cream or milk. Add more liquid 1 teaspoon at a time until the glaze is thick but drizzles off the whisk in a steady ribbon. Drizzle or spread the glaze over the cooled cookies. Let the glaze set for about 15 minutes before serving.
Troubleshooting Tip: If your cookies spread too much, the dough was likely too warm. Pop it back in the fridge for 15 minutes before baking the next batch. If they’re too puffy and don’t spread, your butter might have been too cold when you creamed it, or you added too much flour.
Cooking Tips & Techniques
Here are some things I learned the hard way so you don’t have to. The first time I made these, I skipped the chilling step because I was impatient. The cookies spread into flat, sad discs that merged into one giant cookie sheet. They still tasted good, but they looked like a mess. Trust the chill time.
Watch the Cider Reduction Like a Hawk: I burned my first batch of reduced cider because I walked away to answer a text. The difference between perfectly syrupy and burnt apple sludge is about 30 seconds. As soon as it looks syrupy and coats the back of a spoon, pull it off the heat. Pour it into a cool bowl immediately so it stops cooking.
Room Temperature Ingredients Matter: Cold butter doesn’t cream properly with sugar, and cold egg can make the batter seize up. Take your butter and egg out of the fridge 30 to 45 minutes before you start baking. If you forgot, cut the butter into small cubes and let it sit for 15 minutes. For the egg, place it in a bowl of warm water for 5 minutes.
Use a Kitchen Scale for Flour: I know, I know, it’s an extra step. But flour volume can vary wildly depending on how you scoop. A cup of flour can range from 120 grams to 150 grams depending on packing. For consistently soft cookies, weigh your flour at 125 grams per cup. If you don’t have a scale, spoon the flour into your measuring cup and level it off with a knife.
Bake One Sheet at a Time: If you try to bake two sheets at once, the heat distribution gets uneven. The cookies on the bottom rack might brown too fast while the ones on top stay pale. Just bake one tray at a time in the middle of the oven. The extra 10 minutes is worth it.
Glaze Timing: Don’t glaze the cookies while they’re still warm, or the glaze will melt into a sticky puddle. Wait until they’re completely cool to the touch. If you’re serving these at a party, you can glaze them up to 4 hours ahead and let them set at room temperature.
Variations & Adaptations
Dairy-Free Version: Swap the butter with vegan butter sticks (not tub margarine) and use oat milk or almond milk in the glaze. The texture is slightly less tender but still delicious. I’ve tested this with Miyoko’s European Style Cultured Vegan Butter and it worked beautifully.
Gluten-Free Adaptation: Use a 1:1 gluten-free baking flour blend that contains xanthan gum. I like King Arthur Measure for Measure or Bob’s Red Mill. The cookies will be a bit more delicate, so handle them gently. Chill the dough for an extra 30 minutes to help them hold shape.
Spice It Up: Add ¼ teaspoon of ground ginger and a pinch of cardamom for a more complex spice profile. I made a batch with chai spice blend once and they disappeared before the glaze even set.
Add Mix-Ins: Fold in ½ cup of finely diced dried apples or ½ cup of toasted pecans after the flour is incorporated. Dried apples add little chewy pockets of apple flavor. Toasted pecans add crunch and contrast with the soft cookie.
Maple Twist: Replace half the granulated sugar with maple sugar, or add 1 tablespoon of maple syrup to the glaze instead of vanilla. The maple-apple combo is dangerously good.
Personal Variation: Last Thanksgiving, I made a batch with a pinch of smoked sea salt sprinkled on top right after glazing. The salty-sweet thing with the apple flavor was incredible. My sister-in-law asked for the recipe three times in one evening.
Serving & Storage Suggestions
These cookies are best served at room temperature with a cold glass of milk or a hot cup of coffee. The glaze should be fully set but still have a slight give when you bite into it. For a party presentation, arrange them on a wooden board or a simple white platter. They look beautiful next to a pile of cinnamon sticks or small apples as decoration.
What to Serve Alongside: These cookies pair wonderfully with a scoop of vanilla bean ice cream for a dessert plate. For a fall brunch, serve them alongside pumpkin bread, apple slices, and mulled cider. They also make a great addition to a cookie platter with shortbread and ginger snaps.
Storage Instructions: Store baked and glazed cookies in an airtight container at room temperature for up to 4 days. Place a piece of bread in the container to keep them soft — the cookies will absorb moisture from the bread. Change the bread slice every other day. Do not refrigerate them, as the cold dries them out.
Freezing Instructions: You can freeze the unbaked cookie dough balls on a baking sheet until solid, then transfer them to a freezer bag. Bake from frozen, adding 1 to 2 minutes to the baking time. Baked cookies also freeze well without the glaze. Wrap them tightly in plastic wrap and foil, then freeze for up to 3 months. Thaw at room temperature, then glaze before serving.
Flavor Development: Honestly, these cookies taste even better on day two. The apple flavor deepens and the spices mellow into the background. If you can resist eating them all on day one, you’re in for a treat.
Nutritional Information & Benefits
Per cookie (based on 24 cookies): approximately 145 calories, 6g fat, 22g carbohydrates, 1g fiber, 13g sugar, 2g protein. These values are estimates and will vary based on exact ingredients and portion sizes.
Health Highlights: Apple cider contains antioxidants called polyphenols, which may support heart health. Cinnamon is known for its anti-inflammatory properties and can help regulate blood sugar. While these are definitely a treat, they’re made with simple, recognizable ingredients without artificial preservatives or flavors.
Dietary Considerations: This recipe contains gluten, dairy, and eggs. For gluten-free and dairy-free adaptations, see the Variations section above. These cookies are nut-free as written, making them safe for school events or parties where nut allergies are a concern.
My Perspective: I’m not one to pretend cookies are health food. But I do believe in using good ingredients and enjoying treats in balance. These cookies feel special without being over-the-top indulgent. A couple of these with an afternoon tea feels like a small, lovely ritual.
Conclusion
So here’s the thing about these apple cider cookies — they’re not trying to reinvent the wheel. They’re just doing one thing really, really well. Soft, tender, packed with real apple flavor from that concentrated cider, and finished with a simple glaze that makes them look like you tried way harder than you actually did. They’re the kind of cookie that makes people close their eyes when they take the first bite, and honestly, that never gets old.
I hope you give these a try for your next fall gathering, or honestly, just for a random Tuesday when you want the kitchen to smell amazing. Play around with the spices if you want. Add some pecans. Sprinkle on that sea salt. Make them your own. That’s the whole point of baking, right? Taking a good recipe and turning it into your version of perfect.
If you make these, I’d love to hear about it. Drop a comment below and tell me how they turned out, what you served them with, or if you tried any fun variations. Tag me in your photos on social media — I’m always looking for baking inspiration. Happy baking, friends. Your kitchen is about to smell incredible.
Frequently Asked Questions
Can I use apple juice instead of apple cider?
You can, but the flavor won’t be as rich. Apple juice is thinner and less concentrated in flavor. If you use juice, reduce it the same way, but expect a milder apple taste. For best results, stick with real apple cider.
Why did my cookies spread too much?
Most likely the dough wasn’t chilled long enough, or your butter was too soft when you creamed it. Make sure you chill the dough for at least 1 hour. If your kitchen is warm, pop the baking sheet in the fridge for 10 minutes before baking.
Can I make the dough ahead of time?
Absolutely. The dough can be refrigerated for up to 3 days. Let it sit at room temperature for 10 to 15 minutes before scooping if it’s too firm. You can also freeze the dough balls for up to 3 months.
How do I know when the cookies are done baking?
Look for set edges that are lightly golden, while the centers still look soft and slightly puffy. They will continue to bake on the hot sheet after you pull them out. If the centers look fully set in the oven, they’ll be overbaked once cooled.
Can I skip the glaze?
Sure, but the cookies are much sweeter and more special with it. The glaze adds a nice crackly texture and extra apple flavor. If you want a simpler version, dust the baked cookies with powdered sugar instead.
Pin This Recipe!
Best Soft-Baked Apple Cider Cookies: Easy Recipe

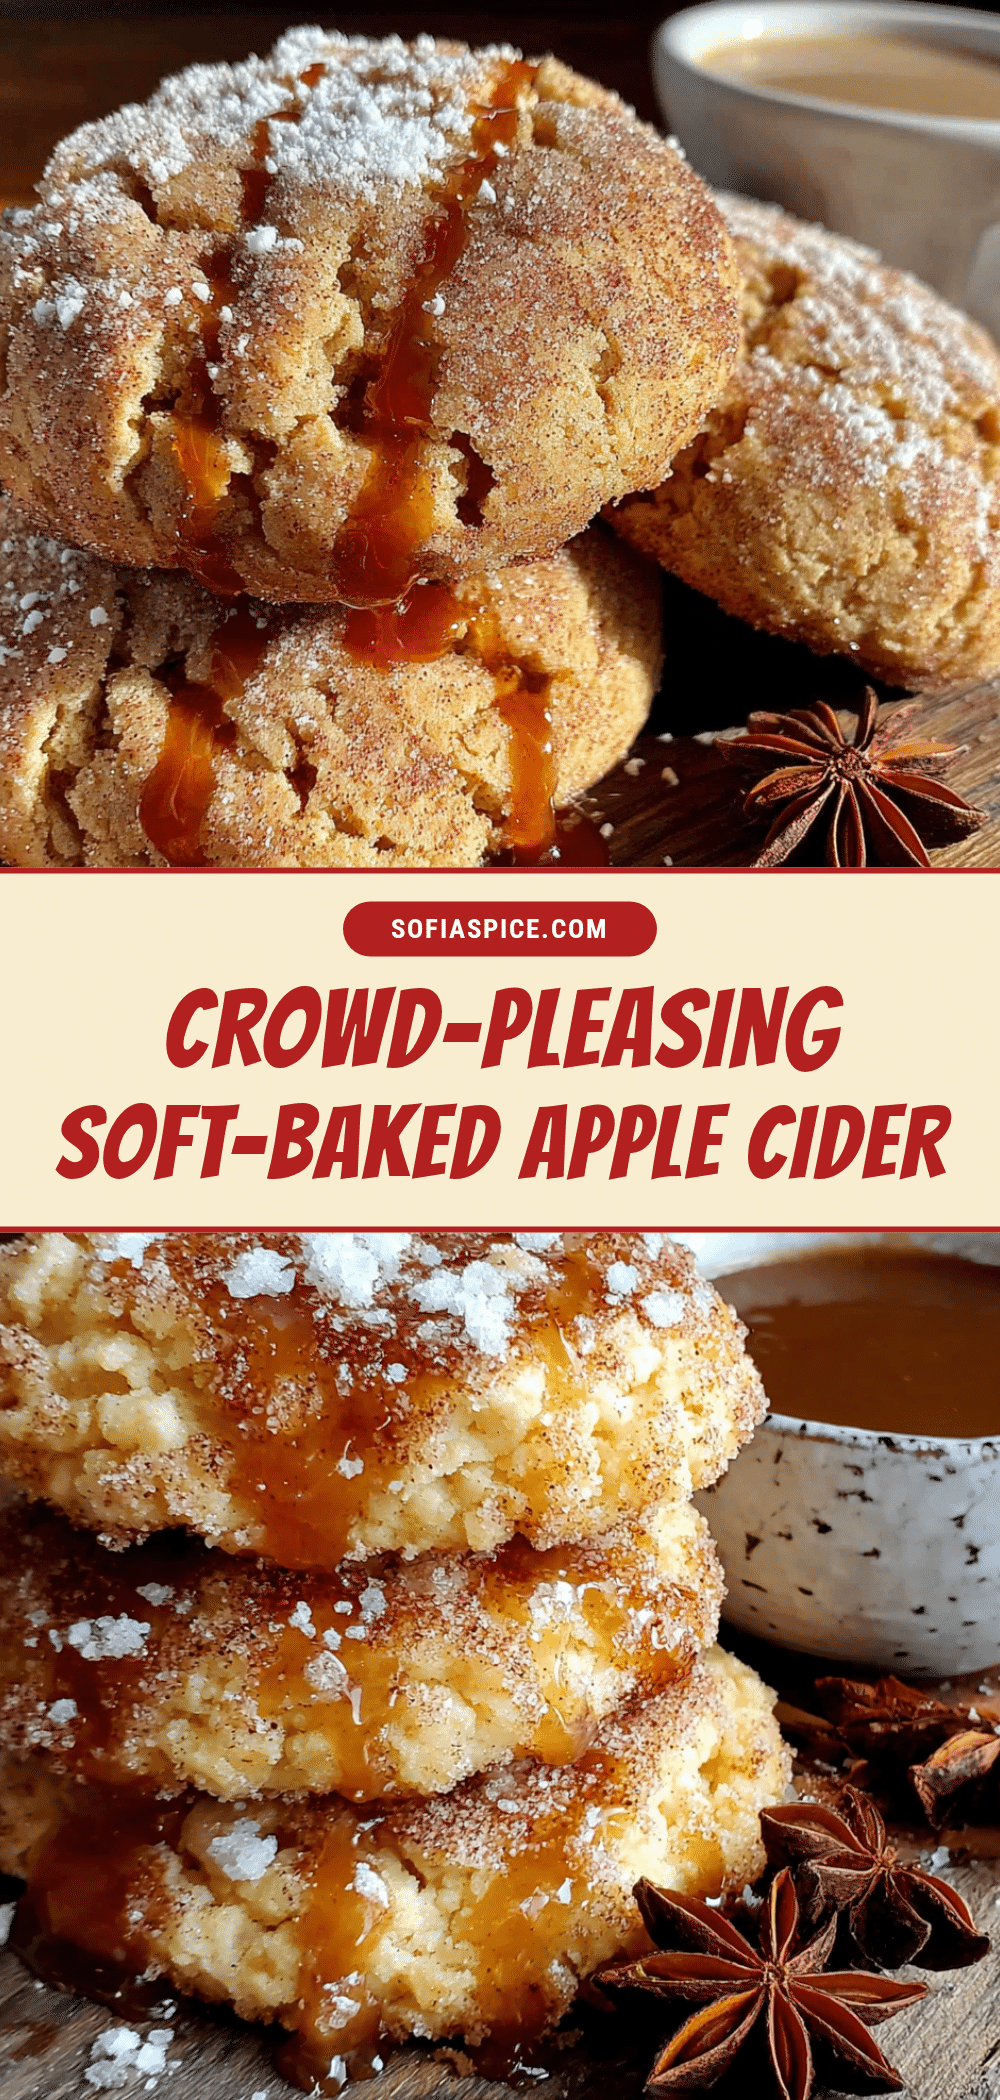
These soft-baked apple cider cookies are tender, almost cake-like, with a concentrated apple flavor from reduced cider and a simple glaze that crackles when you bite into it. They’re the perfect fall treat that will have everyone asking for the recipe.
- Prep Time: 20 minutes
- Cook Time: 12 minutes
- Total Time: 1 hour 32 minutes (includes 1 hour chilling)
- Yield: 24 cookies 1x
- Category: Dessert
- Cuisine: American
Ingredients
- 1 cup (240 ml) apple cider
- ½ cup (113 g) unsalted butter, softened to room temperature
- ½ cup (100 g) granulated sugar
- ½ cup (100 g) light brown sugar, packed
- 1 large egg, at room temperature
- 1 teaspoon vanilla extract
- 2 cups (250 g) all-purpose flour
- ½ teaspoon baking soda
- ½ teaspoon baking powder
- ½ teaspoon salt
- 1 teaspoon ground cinnamon
- ¼ teaspoon ground nutmeg
- ⅛ teaspoon ground cloves (optional)
- 1 cup (120 g) powdered sugar
- 2 to 3 tablespoons heavy cream or milk
Instructions
- Reduce the apple cider: Pour 1 cup of apple cider into a medium saucepan. Bring to a boil over medium-high heat, then reduce to a simmer. Cook, stirring occasionally, until reduced to about ¼ cup (12-15 minutes). Pour into a small bowl and let cool completely.
- Cream butter and sugars: In a large mixing bowl, beat the softened butter, granulated sugar, and brown sugar together on medium speed until light and fluffy, about 2-3 minutes. Scrape down the sides and bottom of the bowl.
- Add egg, vanilla, and reduced cider: Beat in the egg and vanilla extract until combined. Add the cooled reduced cider and mix on low until just incorporated.
- Whisk dry ingredients: In a separate medium bowl, whisk together the flour, baking soda, baking powder, salt, cinnamon, nutmeg, and cloves.
- Combine wet and dry: Add the dry ingredients to the wet mixture in two additions, mixing on low speed after each until just combined. Use a spatula to fold in any remaining flour by hand. Do not overmix.
- Chill the dough: Cover the bowl with plastic wrap and refrigerate for at least 1 hour (up to 3 days).
- Preheat and prep: Preheat oven to 350°F (175°C). Line two baking sheets with parchment paper.
- Scoop and shape: Use a 1.5-tablespoon cookie scoop to portion the dough. Roll each portion into a smooth ball. Place 2 inches apart on prepared baking sheets.
- Bake: Bake one sheet at a time on the middle rack for 10-12 minutes. Edges should be set and lightly golden, centers still soft and slightly puffy.
- Cool and glaze: Let cookies cool on baking sheet for 5 minutes, then transfer to a wire rack to cool completely. Whisk together powdered sugar and 2 tablespoons heavy cream or milk. Add more liquid 1 teaspoon at a time until glaze is thick but drizzles in a steady ribbon. Drizzle or spread glaze over cooled cookies. Let set for 15 minutes before serving.
Notes
Chill dough for at least 1 hour to prevent spreading. Watch cider reduction carefully to avoid burning. Use room temperature ingredients for best texture. For softer cookies, store with a slice of bread in an airtight container. Cookies taste even better on day two.
Nutrition
- Serving Size: 1 cookie
- Calories: 145
- Sugar: 13
- Sodium: 95
- Fat: 6
- Saturated Fat: 3.5
- Carbohydrates: 22
- Fiber: 1
- Protein: 2
Keywords: apple cider cookies, soft baked cookies, fall cookies, apple cookies, easy cookie recipe, cider glaze


