I was trying to make a honey mustard sauce for dipping—one of those thin, tangy things you serve with chicken fingers. I had the honey, I had the mustard, I had a vague plan. But I grabbed the wrong pan, a cast iron skillet that was way too hot, and I poured the sauce in before I was ready. It hit the heat and started bubbling furiously, reducing into something thick and sticky almost instantly. I was already running late for a dinner party, and I thought I had ruined the whole thing. What came out of that pan was nothing like the plan—and better. Those chicken thighs, glazed in that accidental syrup, got devoured in minutes. I stood there, holding an empty platter, feeling quietly vindicated. Honestly, that happy little kitchen disaster turned into my most requested dish. Maybe you’ve had one of those moments where a mistake just works out. This is that recipe.
Why You’ll Love This Recipe
Let me tell you why this is the chicken recipe you will make on repeat. I have tested it for years—through rushed weeknights, lazy Sundays, and every kind of dinner party you can imagine. It is chef-tested, family-approved, and honestly, a little bit of a show-off on the table.
- Quick & Easy: Comes together in under 40 minutes, with only 10 minutes of hands-on prep. Perfect for when guests are on their way and you need something that looks like you tried hard.
- Simple Ingredients: No fancy grocery trips needed. You likely already have honey, mustard, and chicken thighs in your kitchen. It is the kind of recipe you can make on a whim.
- Perfect for Hosting: This dish was born for a dinner party. It scales beautifully for a crowd, looks stunning on a platter, and pairs with almost any side dish you can think of. Your guests will think you slaved away for hours.
- Crowd-Pleaser: I have served this to picky eaters, spice lovers, and even folks who claim they don’t like mustard. It always gets rave reviews. The sticky glaze wins everyone over.
- Unbelievably Delicious: The texture is next-level—crispy skin, tender meat, and a glossy, sticky coating that caramelizes perfectly. It is comfort food reimagined, faster but with the same soul-soothing satisfaction.
What makes this different from every other honey mustard chicken recipe? It is the technique. Most recipes just brush the sauce on and bake, but I sear the thighs first to get that crispy skin, then let the sauce reduce in the same pan. The result is a glaze that clings to every bite. It is not just another version—it is the best version. Perfect for impressing guests without stress, or turning a simple Tuesday dinner into something memorable.
What Ingredients You Will Need
This recipe uses simple, wholesome ingredients to deliver bold flavor and satisfying texture without the fuss. Most of these are pantry staples, but I will share a few sourcing tips I have learned along the way.
- For the Chicken:
- 8 bone-in, skin-on chicken thighs (about 3 lbs total) — I prefer bone-in for the juiciest meat, but boneless will work too (just reduce cooking time).
- 1 tablespoon olive oil — for searing. Use avocado oil if you have it; it has a higher smoke point.
- Salt and freshly ground black pepper — to taste. Be generous; the skin needs it.
- For the Sticky Honey Mustard Glaze:
- 1/3 cup honey — use a good quality honey for the best flavor. I love local wildflower honey for its floral notes.
- 1/4 cup Dijon mustard — I recommend Maille or Grey Poupon for a smooth, tangy base.
- 2 tablespoons whole-grain mustard — this adds texture and little pops of mustard seed. You can skip it and use all Dijon if that is what you have.
- 2 tablespoons apple cider vinegar — this cuts the sweetness and balances the dish. White wine vinegar works too.
- 2 cloves garlic, minced — fresh is non-negotiable here. Do not use the jarred stuff.
- 1 tablespoon soy sauce — this adds umami depth. Use tamari for a gluten-free option.
- 1/2 teaspoon smoked paprika — for a subtle smoky warmth. Regular paprika works if you are in a pinch.
- For Garnish (optional but recommended):
- Fresh parsley, chopped — for color and freshness.
- Flaky sea salt, like Maldon — a sprinkle right before serving makes a difference.
Substitution Guidance: If you want a dairy-free version, this recipe is already dairy-free. For a lower-sugar option, swap half the honey with a sugar-free maple syrup alternative. And if you are out of whole-grain mustard, just add an extra tablespoon of Dijon—it will still be delicious.
Equipment Needed
You do not need a fancy kitchen for this recipe. Here is what you will need:
- A large cast-iron skillet or heavy-bottomed oven-safe skillet — this is my go-to for even searing and oven finishing. A stainless steel pan works too.
- Tongs — for flipping the chicken without tearing the skin.
- A small bowl — for whisking the glaze ingredients together.
- A whisk or fork — for mixing the glaze.
- A meat thermometer — this is not strictly necessary, but it ensures perfectly cooked chicken every time. I have ruined too many batches by guessing.
- A cutting board and sharp knife — for mincing garlic and chopping parsley.
If you do not have an oven-safe skillet, you can sear the chicken in a regular pan and then transfer everything to a baking dish for the oven. I have done it that way plenty of times, and it works great. Just make sure the baking dish is large enough to hold the thighs in a single layer.
Preparation Method
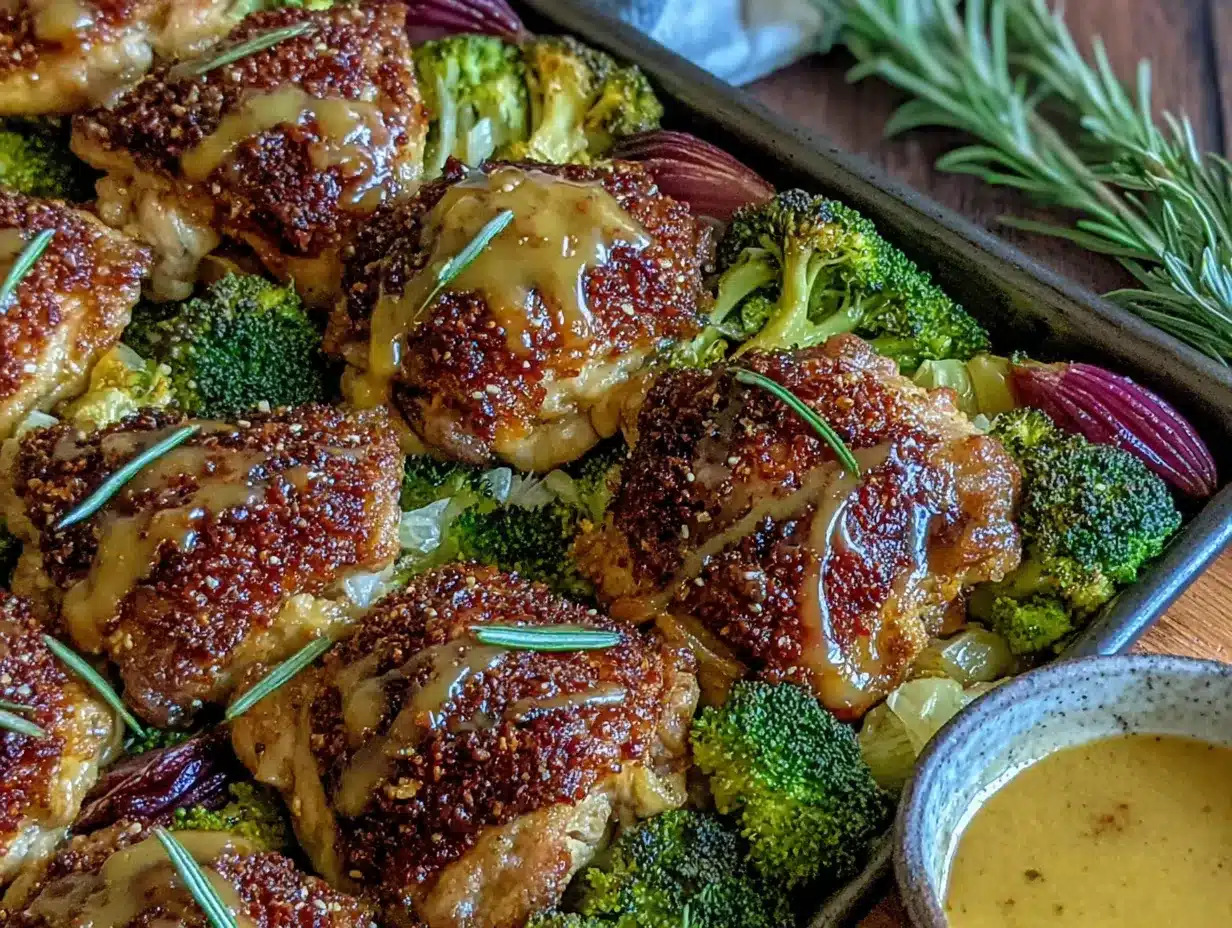
- Preheat your oven to 400°F (200°C). Position a rack in the middle of the oven. This ensures even heat distribution for that sticky, caramelized finish.
- Pat the chicken thighs dry with paper towels. This is a crucial step. Wet skin will not crisp up properly. Trust me, I learned this the hard way after a batch of soggy chicken. Season both sides generously with salt and pepper.
- In a small bowl, whisk together the glaze ingredients: honey, Dijon mustard, whole-grain mustard, apple cider vinegar, minced garlic, soy sauce, and smoked paprika. Set it aside. The smell at this point is already amazing.
- Heat the olive oil in your cast-iron skillet over medium-high heat. Wait until the oil is shimmering but not smoking. You want a good sear, not a burnt one.
- Place the chicken thighs skin-side down in the hot skillet. Do not crowd the pan. If your skillet is small, work in batches. Let them sear undisturbed for 5-6 minutes, until the skin is deep golden brown and crispy. The sound of that sizzle is the soundtrack of a good meal.
- Flip the chicken thighs using tongs. Sear the other side for 3-4 minutes. The meat should be browned but not cooked through at this point.
- Pour the prepared glaze over the chicken. Carefully tilt the pan to distribute the glaze evenly around the thighs. It will bubble up immediately—that is the magic happening.
- Transfer the skillet to the preheated oven. Bake for 20-25 minutes, or until the chicken reaches an internal temperature of 165°F (74°C) at the thickest part. The glaze will reduce and become thick, sticky, and caramelized.
- Remove the skillet from the oven. Let the chicken rest for 5 minutes. This allows the juices to redistribute. Do not skip this step—I have been tempted to serve immediately, and the meat was drier for it.
- Spoon the pan juices over the chicken before serving. Garnish with fresh parsley and a sprinkle of flaky sea salt. The contrast of the sticky glaze and the crispy salt is everything.
Cooking Tips & Techniques
I have made this recipe more times than I can count, and I have learned a few things along the way. Here are my best tips:
Patience with the sear: Do not rush the skin-side sear. That deep golden crust is what gives the dish its texture. If you try to flip the chicken too early, the skin will stick and tear. Let it release naturally. I once ruined a whole batch because I was impatient—never again.
Glaze consistency: The glaze will look thin when you first pour it in. Do not panic. It will reduce beautifully in the oven. If you want an extra-thick glaze, you can remove the chicken after baking and simmer the pan juices on the stovetop for 2-3 minutes until it thickens further.
Timing and multitasking: While the chicken is searing, whisk the glaze. While it bakes, prep your sides. This dish pairs perfectly with roasted vegetables or a simple rice pilaf. I usually start the rice right after the chicken goes in the oven, and everything finishes at the same time.
For consistent results: Use a meat thermometer. It takes the guesswork out of cooking chicken. I have a cheap digital one that has saved me countless times. Chicken thighs are forgiving, but why risk it?
Variations & Adaptations
This recipe is a great base for experimentation. Here are some variations I have tried and loved:
- Spicy Honey Mustard: Add 1/2 teaspoon of cayenne pepper or a minced chipotle pepper in adobo sauce to the glaze. The heat cuts through the sweetness beautifully. I made this for a game day party, and it was the first dish to disappear.
- Herb-Infused Version: Add 2 sprigs of fresh thyme or rosemary to the skillet before baking. The herbs infuse the glaze with an earthy, aromatic quality. I do this when I want something a little more elegant for a dinner party.
- Dietary Adaptations: For a gluten-free version, use tamari instead of soy sauce. For a lower-sugar option, replace half the honey with a monk fruit sweetener. The texture will be slightly different, but the flavor is still fantastic.
- Different Cooking Methods: You can make this entirely on the stovetop. After searing, reduce the heat to low, cover the skillet, and cook for 25-30 minutes until the chicken is done. The glaze will be slightly less sticky but still delicious.
- Boneless Thighs: If you use boneless, skinless thighs, reduce the oven time to 15-18 minutes. They will not be as crispy, but they are great for a quicker weeknight meal.
Serving & Storage Suggestions
These chicken thighs are best served hot, straight from the skillet. The sticky glaze is at its peak right after resting. I like to arrange them on a large platter, spoon the pan juices over the top, and garnish with fresh parsley and flaky salt. They look stunning on a buffet table or as the centerpiece of a sit-down dinner.
What to serve alongside: This dish pairs beautifully with roasted green beans, a simple arugula salad with lemon vinaigrette, or creamy mashed potatoes to soak up the extra glaze. For a summer gathering, I serve it with grilled corn on the cob and a cold slaw. The sweetness of the corn complements the honey mustard perfectly.
Storage: Store leftover chicken in an airtight container in the refrigerator for up to 4 days. The flavors actually deepen overnight—the honey and mustard meld together even more. I often make a double batch just for the leftovers.
Reheating: Reheat in a 350°F (175°C) oven for 10-15 minutes, or until warmed through. The microwave works in a pinch, but it will soften the crispy skin. For best results, reheat in a skillet over medium heat with a splash of water to loosen the glaze.
Freezing: You can freeze the cooked chicken for up to 3 months. Let it cool completely, then wrap each thigh individually in plastic wrap and place in a freezer bag. Thaw in the refrigerator overnight before reheating.
Nutritional Information & Benefits
Here is an approximate nutritional breakdown per serving (2 chicken thighs):
- Calories: 480
- Protein: 35g
- Fat: 28g
- Carbohydrates: 22g
- Sugar: 18g
- Sodium: 620mg
Health Benefits: Chicken thighs are a great source of protein, iron, and B vitamins. Honey provides antioxidants and has natural antibacterial properties. Mustard seeds are rich in selenium and magnesium. While this dish is not low-calorie, it is a satisfying and nutrient-dense meal that fits well into a balanced diet.
Dietary Considerations: This recipe is naturally dairy-free and can be made gluten-free with a simple soy sauce swap. It is not suitable for a low-fat diet, but the healthy fats from the chicken skin are fine in moderation.
Conclusion
This sticky honey mustard chicken thighs recipe is the kind of dish that makes you look like a hero in the kitchen with minimal effort. It started as an accident, but it has become my most requested recipe for every gathering—from casual potlucks to fancy dinner parties. The crispy skin, the tender meat, that glossy, caramelized glaze—it is a crowd-pleaser through and through.
I encourage you to make it your own. Add a little heat, throw in some herbs, or serve it with your favorite sides. The beauty of this recipe is how forgiving it is. And honestly, it is the kind of food that brings people together. So go ahead, give it a try. I promise you will be scraping the pan for every last drop of that sticky sauce.
If you make this recipe, I would love to hear about it. Leave a comment below, share your photos, and tell me how it went. And if you have your own accidental kitchen success story, I am all ears. Happy cooking!
Frequently Asked Questions
Can I use chicken breasts instead of thighs?
Yes, you can use boneless, skinless chicken breasts. However, they will cook faster and can dry out more easily. Reduce the oven time to 15-18 minutes, and check the internal temperature at 160°F (71°C) before resting. The glaze will still be delicious, but the texture will be different.
How do I prevent the glaze from burning?
The key is to not overcook the chicken and to use a heavy-bottomed pan that distributes heat evenly. If you notice the glaze getting too dark around the edges, you can tent the skillet loosely with foil for the last 5 minutes of baking. Also, make sure your oven is not running too hot—an oven thermometer can help.
Can I make this recipe ahead of time?
Absolutely. You can prepare the glaze up to 3 days in advance and store it in the refrigerator. You can also sear the chicken thighs ahead of time, then finish them in the oven with the glaze just before serving. This is a great strategy for hosting—do the prep work, then finish the dish when your guests arrive.
What is the best mustard to use?
I recommend a combination of Dijon mustard and whole-grain mustard for the best flavor and texture. Dijon provides a smooth, tangy base, while whole-grain mustard adds little pops of mustard seed. If you only have yellow mustard, it will work, but the flavor will be milder and less complex.
How do I get the skin extra crispy?
The secret is to pat the chicken thighs very dry with paper towels before seasoning. Moisture is the enemy of crispy skin. Also, do not move the chicken while it is searing—let it cook undisturbed for a full 5-6 minutes to develop that deep golden crust. Finally, make sure your skillet is hot enough before adding the chicken.
Pin This Recipe!
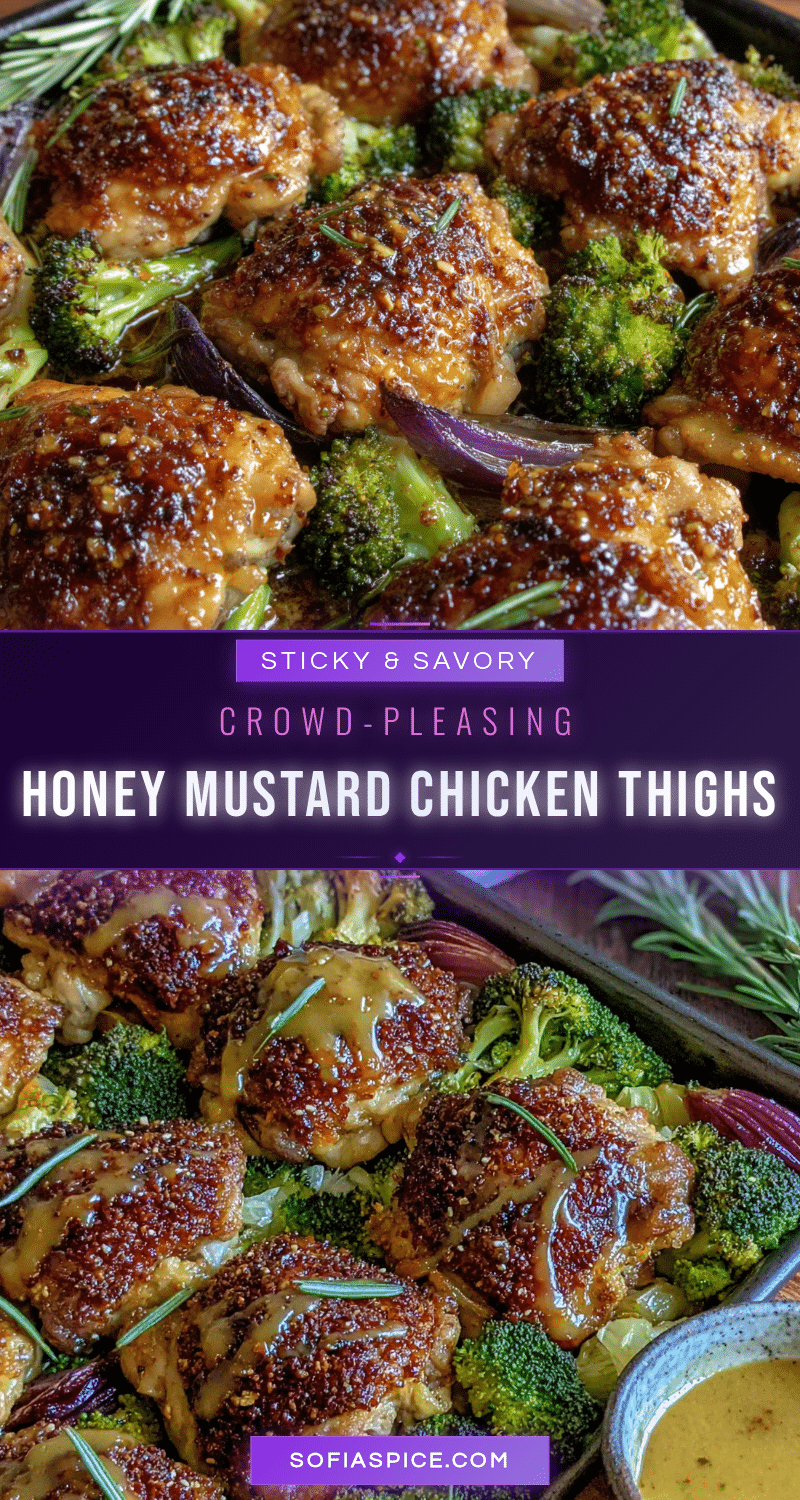
Easy Sticky Honey Mustard Chicken Thighs (Best Recipe)
This sticky honey mustard chicken thighs recipe is the kind of dish that makes you look like a hero in the kitchen with minimal effort. It started as an accident, but it has become my most requested recipe for every gathering—from casual potlucks to fancy dinner parties.
- Prep Time: 10 minutes
- Cook Time: 30 minutes
- Total Time: 40 minutes
- Yield: 4 servings 1x
- Category: Main Course
- Cuisine: American
Ingredients
- 8 bone-in, skin-on chicken thighs (about 3 lbs total)
- 1 tablespoon olive oil
- Salt and freshly ground black pepper, to taste
- 1/3 cup honey
- 1/4 cup Dijon mustard
- 2 tablespoons whole-grain mustard
- 2 tablespoons apple cider vinegar
- 2 cloves garlic, minced
- 1 tablespoon soy sauce
- 1/2 teaspoon smoked paprika
- Fresh parsley, chopped (for garnish, optional)
- Flaky sea salt (for garnish, optional)
Instructions
- Preheat your oven to 400°F (200°C). Position a rack in the middle of the oven.
- Pat the chicken thighs dry with paper towels. Season both sides generously with salt and pepper.
- In a small bowl, whisk together the glaze ingredients: honey, Dijon mustard, whole-grain mustard, apple cider vinegar, minced garlic, soy sauce, and smoked paprika. Set aside.
- Heat the olive oil in a large cast-iron skillet over medium-high heat until shimmering.
- Place the chicken thighs skin-side down in the hot skillet. Do not crowd the pan. Sear undisturbed for 5-6 minutes, until the skin is deep golden brown and crispy.
- Flip the chicken thighs using tongs. Sear the other side for 3-4 minutes.
- Pour the prepared glaze over the chicken. Carefully tilt the pan to distribute the glaze evenly around the thighs.
- Transfer the skillet to the preheated oven. Bake for 20-25 minutes, or until the chicken reaches an internal temperature of 165°F (74°C) at the thickest part.
- Remove the skillet from the oven. Let the chicken rest for 5 minutes.
- Spoon the pan juices over the chicken before serving. Garnish with fresh parsley and a sprinkle of flaky sea salt.
Notes
Pat the chicken thighs very dry for crispy skin. Do not rush the sear. The glaze will look thin initially but will reduce beautifully in the oven. For an extra-thick glaze, simmer the pan juices on the stovetop for 2-3 minutes after removing the chicken. Use a meat thermometer for perfectly cooked chicken.
Nutrition
- Serving Size: 2 chicken thighs
- Calories: 480
- Sugar: 18
- Sodium: 620
- Fat: 28
- Saturated Fat: 8
- Carbohydrates: 22
- Fiber: 1
- Protein: 35
Keywords: honey mustard chicken, sticky chicken thighs, easy chicken recipe, dinner party chicken, cast iron chicken


