It was 10:47 PM on a Thursday, and I had that familiar, nagging craving for something warm and cheesy. But the fridge was looking pretty sad—just some chicken thighs, a half-empty carton of chicken broth, and the end of a block of Parmesan. I didn’t have the energy for a multi-pan, sink-full-of-dishes kind of meal. The idea just arrived, like a little kitchen miracle: what if I threw it all in one pan, let the rice soak up all that garlicky, cheesy goodness, and called it dinner? Honestly, it felt a little reckless at that hour.
I mean, I was tired. It had been one of those days where the kids asked for snacks approximately forty-seven times, and I’d already mentally checked out. But something about the late-night quiet made me bold. I chopped the garlic, seasoned the chicken, and started building layers of flavor right there in my trusty cast iron skillet. No fancy techniques, no complicated steps—just good, honest food coming together in a way that felt almost too easy.
You know that feeling when you’re cooking on autopilot and something just works? That was this night. The rice absorbed the broth and the rendered chicken fat, the garlic mellowed into something sweet and savory, and the Parmesan melted into a golden, almost crusty top layer. I pulled it out of the oven, let it rest for a few minutes, and took a bite right from the pan. And I knew, right then, this was going to be a regular in our rotation. It was cozy, it was satisfying, and it didn’t cost a fortune. This is the kind of meal that makes you feel like you’ve got dinner figured out.
Why You’ll Love This Recipe
Let’s be real for a second. We all want meals that are delicious, but we also need them to be practical. This one-pan garlic Parmesan chicken and rice checks every box for a busy family. It’s the kind of recipe you’ll come back to again and again, and here’s why it’s earned a permanent spot in my kitchen.
- Quick & Easy: This whole meal comes together in about 45 minutes, and most of that is hands-off oven time. You’re looking at maybe 10 minutes of active prep—chopping garlic, seasoning chicken, and measuring your rice. It’s perfect for those weeknights when you walk in the door at 5:30 and need dinner on the table by 6:15.
- Simple Ingredients: I bet you already have most of this stuff in your pantry and fridge. Chicken, rice, broth, garlic, Parmesan, butter. No trips to a specialty store, no weird ingredients you’ll use once and forget about. This is real, honest cooking with what you’ve got.
- Perfect for Family Meals: This dish is a certified crowd-pleaser. My kids, who usually pick around anything green or suspicious, actually ask for seconds. The rice gets all fluffy and flavorful, the chicken stays tender, and that cheesy top layer is like a warm hug on a plate. It’s ideal for a Sunday supper or a Tuesday that needs a little cheering up.
- Crowd-Pleaser: I’ve brought this to a potluck and watched it disappear. It’s not flashy, but it’s the kind of comfort food that everyone loves. The garlic and Parmesan are a classic combo that appeals to kids and adults alike. It’s hard to go wrong with melted cheese and savory rice.
- Unbelievably Delicious: The texture here is what gets me every time. The rice cooks in the chicken broth and the rendered fat from the chicken, so it’s incredibly flavorful. The top gets a little bit of a crust from the cheese, while the bottom stays creamy. It’s comfort food at its finest, and it tastes like you spent way more effort than you actually did.
This recipe isn’t just good—it’s the kind that makes you close your eyes after the first bite. It’s comfort food reimagined for a busy family: faster, simpler, but with the same soul-soothing satisfaction. Perfect for impressing your family without the stress, or turning a simple Tuesday into something memorable.
What Ingredients You Will Need
This recipe uses simple, wholesome ingredients to deliver bold flavor and satisfying texture without the fuss. Most of these are pantry staples, so you can probably whip this up without a special trip to the store.
For the Chicken and Rice
- 1 ½ pounds boneless, skinless chicken thighs (or breasts, but thighs stay juicier) — (adds richness and flavor to the rice)
- 1 tablespoon olive oil — (for searing the chicken)
- 4 tablespoons unsalted butter, divided — (adds richness and helps sauté the garlic)
- 4 cloves garlic, minced — (the star of the show, use fresh for best results)
- 1 cup long-grain white rice (like jasmine or basmati) — (rinsed well to remove excess starch)
- 2 ½ cups low-sodium chicken broth — (adds savory depth, low-sodium lets you control the salt)
- ½ cup heavy cream — (adds creaminess, can substitute with half-and-half)
- 1 cup freshly grated Parmesan cheese — (please skip the pre-shredded stuff, it melts so much better when you grate it yourself)
- 1 teaspoon dried Italian seasoning — (or a mix of dried oregano, basil, and thyme)
- ½ teaspoon onion powder — (adds a subtle savory note)
- Salt and freshly ground black pepper — (to taste)
- 2 tablespoons fresh parsley, chopped — (for garnish, optional but pretty)
Ingredient Selection Tips
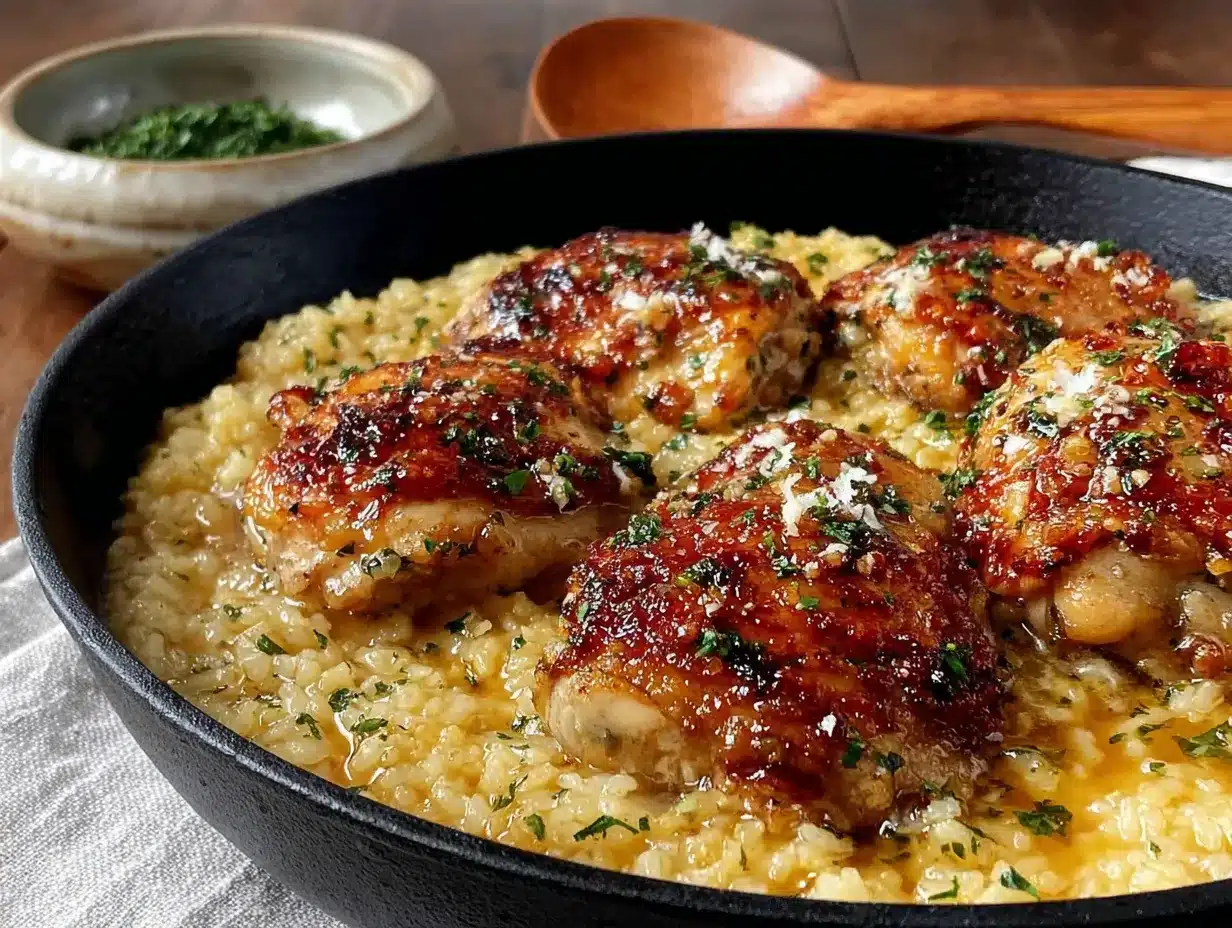
I really recommend using chicken thighs here. They stay moist and tender during the baking time, and they add a lot of flavor to the rice as they cook. If you use chicken breasts, keep an eye on them so they don’t dry out. For the Parmesan, I’ve found that a good block from the deli section melts much more smoothly than the pre-grated stuff in the canister. It’s a small thing that makes a big difference. And for the broth, I always use low-sodium so I can adjust the salt level myself.
Substitution Guidance
Need to make this gluten-free? Just use a certified gluten-free chicken broth, and you’re good to go—rice is naturally gluten-free. If you’re out of heavy cream, you can use whole milk mixed with a tablespoon of melted butter, or just use half-and-half. For a dairy-free version, you could try a good quality plant-based butter and a dairy-free Parmesan alternative, but I can’t promise the same creamy texture. I’ve also made this with brown rice, but you’ll need to increase the baking time by about 20 minutes and add an extra half cup of broth.
Equipment Needed
You don’t need a lot of fancy gadgets for this one, which is part of the beauty of it. Here’s what you’ll need to get the job done.
- A large oven-safe skillet or Dutch oven — I use a 12-inch cast iron skillet, and it works perfectly. Any oven-safe pan with a lid will do. If you don’t have a lid, you can use a sheet of aluminum foil tightly crimped around the edges.
- Cutting board and chef’s knife — For chopping the garlic and parsley. A sharp knife makes this part so much easier.
- Measuring cups and spoons — For accurate measurements. I’ve learned the hard way that eyeballing the rice can lead to a mushy or crunchy disaster.
- Wooden spoon or spatula — For stirring the rice and scraping up the browned bits from the bottom of the pan (that’s where the flavor lives).
- Fine-mesh strainer — For rinsing the rice. You can also use a bowl and your hands, but a strainer is easier.
If you don’t have an oven-safe skillet, you can sear the chicken in a regular pan, then transfer everything to a baking dish for the oven. Just make sure the baking dish is big enough to hold everything in a single layer. I’ve done it that way too, and it works just fine—just one extra dish to wash.
Preparation Method
Alright, let’s get cooking. This is a straightforward process, but I’ll walk you through each step with my tips to make sure it turns out perfectly.
- Preheat your oven to 375°F (190°C). Get this going first so it’s ready when you are. Position a rack in the middle of the oven.
- Prep your chicken. Pat the chicken thighs dry with paper towels. This is a crucial step—dry chicken sears better and gets that lovely golden crust. Season them generously on both sides with salt, pepper, and half of the Italian seasoning. Let them sit while you get the pan ready.
- Sear the chicken. Heat the olive oil and 1 tablespoon of the butter in your oven-safe skillet over medium-high heat. Once the butter is melted and the oil is shimmering, carefully place the chicken thighs in the pan, skin-side down if they have skin. Don’t crowd the pan; work in batches if needed. Cook for 4-5 minutes per side, until deeply golden brown. The chicken doesn’t need to be cooked through at this point—it will finish in the oven. Transfer the seared chicken to a plate and set aside.
- Sauté the aromatics. Reduce the heat to medium. Add the remaining 3 tablespoons of butter to the pan. Once it’s melted, add the minced garlic. Cook for about 30-60 seconds, stirring constantly, until it’s fragrant. Don’t let it burn, or it will turn bitter. I’ve done that before, and it’s a sad moment.
- Toast the rice. Add the rinsed and drained rice to the pan with the garlic and butter. Stir it around for about 1-2 minutes, until the rice starts to look a little translucent at the edges and smells nutty. This step adds so much flavor and helps keep the rice from getting mushy.
- Add the liquids. Pour in the chicken broth and heavy cream. Use your wooden spoon to scrape up any browned bits from the bottom of the pan—that’s pure flavor. Stir in the remaining Italian seasoning and the onion powder. Bring the mixture to a gentle simmer.
- Return the chicken. Nestle the seared chicken thighs back into the pan, placing them on top of the rice. Any juices that have collected on the plate can go in too. The rice should be mostly submerged in the liquid.
- Bake. Cover the skillet with its lid (or tightly with foil) and transfer it to the preheated oven. Bake for 25 minutes.
- Add the cheese and finish. After 25 minutes, carefully remove the skillet from the oven. Uncover and sprinkle the grated Parmesan cheese evenly over the top. Return the skillet to the oven, uncovered, and bake for another 10-15 minutes. The rice should be tender and have absorbed most of the liquid, and the cheese should be melted and golden in spots.
- Rest and serve. Remove the skillet from the oven and let it rest for 5-10 minutes. This is important—it lets the rice finish absorbing any remaining liquid and makes it easier to serve. Garnish with fresh parsley and fluff the rice gently with a fork before serving.
Sensory Cues: When you pull the lid off after the first 25 minutes, you should see a gently bubbling, creamy-looking rice mixture. The chicken will be cooked through and tender. The final bake with the cheese should smell like a warm, garlicky hug. The top will be slightly golden and bubbly.
Cooking Tips & Techniques
Over the years, I’ve made this recipe more times than I can count, and I’ve learned a few things the hard way. Here are my best tips to help you nail it on the first try.
Don’t skip rinsing the rice. This is a big one. Rinsing white rice removes the excess starch on the surface. If you skip it, your rice can turn out gummy and sticky instead of light and fluffy. Just put the rice in a fine-mesh strainer and run cold water over it until the water runs clear. It takes 30 seconds and makes a huge difference.
Sear the chicken well. I know it’s tempting to rush this step, but don’t. A good, deep golden-brown sear adds so much flavor to the final dish. It’s not just about cooking the chicken—it’s about building those browned bits on the bottom of the pan that will flavor the rice. Patience here pays off.
Use freshly grated Parmesan. I mentioned this before, but it’s worth repeating. The pre-shredded stuff has anti-caking agents that prevent it from melting smoothly. You’ll get a much creamier, more cohesive sauce if you grate it yourself from a block. It takes an extra minute, and it’s totally worth it.
Let it rest. I know you’re hungry, but letting the dish rest for 5-10 minutes after it comes out of the oven is crucial. The rice will continue to absorb the liquid, and the whole thing will set up properly. If you dig in right away, the rice might be a little soupy. Trust me on this one—I’ve learned from experience.
One mistake I made: The first time I made this, I used a really big skillet, and the rice layer was too thin. It cooked unevenly and some of the rice was crunchy while other parts were mushy. Now I always use a 12-inch skillet, which is the perfect size for this amount of ingredients. The rice layer should be about an inch deep for even cooking.
Variations & Adaptations
This recipe is a great base, and it’s easy to switch things up based on what you have or what your family likes. Here are a few ways I’ve adapted it over the years.
- Vegetable Add-In: I often throw in a cup of frozen peas and carrots during the last 10 minutes of baking. It adds a pop of color and a little extra nutrition. Broccoli florets work great too—just blanch them first so they’re not too crunchy.
- Spicy Kick: If you like a little heat, add a pinch of red pepper flakes along with the garlic. You can also use a spicy Italian sausage instead of some of the chicken for a completely different flavor profile. My husband loves this version.
- Herb Swap: Not a fan of Italian seasoning? Try using fresh thyme and rosemary instead. Just sprinkle a few sprigs over the top before baking, and remove them before serving. It gives the dish a more rustic, almost Thanksgiving-like flavor.
- Dairy-Free Adaptation: I’ve made this with a good quality plant-based butter and unsweetened oat milk instead of the heavy cream. It’s not quite as rich, but it’s still really tasty. Use a dairy-free Parmesan alternative, too.
- Different Protein: I’ve used boneless, skinless chicken breasts here, and it works fine—just reduce the initial sear time a bit. You could also use pork chops or even a firm white fish like cod, but you’ll need to adjust the baking time for fish (about 15-20 minutes total).
Serving & Storage Suggestions
This dish is pretty complete on its own, but here are a few ways to round it out and handle leftovers.
Serving Suggestions: I love serving this with a simple side salad dressed with lemon vinaigrette. The brightness of the salad cuts through the richness of the cheesy rice perfectly. Steamed green beans or roasted asparagus also work beautifully alongside it. For a truly no-fuss meal, just serve it straight from the skillet with a sprinkle of extra parsley and some cracked black pepper. It’s also great with a side of crusty bread to soak up any extra sauce.
Storage Instructions: Leftovers keep really well in an airtight container in the refrigerator for up to 4 days. The flavors actually meld together even more overnight, so it might taste even better the next day. I’ve been known to eat it cold straight from the container for lunch, and I have no regrets.
Reheating Methods: The best way to reheat this is in a skillet on the stovetop over medium-low heat. Add a splash of chicken broth or water to loosen up the rice, cover it, and let it steam for 5-7 minutes until heated through. You can also use the microwave, but the rice might get a little drier. If using the microwave, cover the bowl with a damp paper towel to add moisture.
Freezer Tips: This dish freezes surprisingly well. Let it cool completely, then transfer it to a freezer-safe container. It will keep for up to 3 months. Thaw it overnight in the refrigerator before reheating. The texture of the rice will be slightly softer after freezing, but the flavor will still be great.
Nutritional Information & Benefits
Here’s a rough estimate of the nutritional information per serving (based on 6 servings). Please note that these values are approximate and can vary based on specific ingredients and portion sizes.
| Nutrient | Amount Per Serving |
|---|---|
| Calories | 485 |
| Total Fat | 24g |
| Saturated Fat | 12g |
| Cholesterol | 145mg |
| Sodium | 680mg |
| Total Carbohydrates | 35g |
| Dietary Fiber | 1g |
| Sugars | 2g |
| Protein | 32g |
This meal is a great source of protein from the chicken, which helps keep everyone full and satisfied. The Parmesan cheese adds calcium and a bit of protein too. The garlic is not just for flavor—it has some great antioxidant properties and can support immune health. While this isn’t a low-calorie dish, it’s a balanced, satisfying meal that fits into a sensible diet. If you’re watching your sodium, using low-sodium broth and going easy on the added salt can help bring those numbers down.
Dietary Considerations: This recipe is naturally gluten-free (just check your broth). It’s not suitable for a dairy-free or low-fat diet as written, but see the variations section for adaptations.
Conclusion
So there you have it—my late-night kitchen experiment that turned into a family favorite. This one-pan garlic Parmesan chicken and rice is proof that you don’t need a complicated recipe or a pantry full of exotic ingredients to make something truly delicious. It’s the kind of meal that brings everyone to the table, makes the kitchen smell amazing, and leaves you with just one pan to wash. Honestly, that last part might be my favorite feature.
I really hope you give this one a try. Don’t be afraid to make it your own—throw in some veggies, swap the herbs, or add a little heat if that’s your style. Cooking should be fun and flexible, not rigid and stressful. And if your kids love it as much as mine do, you’ll feel like a rockstar.
I’d love to hear how it turns out for you! Drop a comment below and let me know if you made any changes or if it became a regular in your dinner rotation. And if you took a photo, tag me on Pinterest—I love seeing your creations. Happy cooking, friend!
Frequently Asked Questions
Can I use chicken breasts instead of thighs?
Yes, you can! Chicken breasts will work, but they can dry out more easily than thighs. To help prevent that, try to use breasts that are similar in size so they cook evenly. You might also want to check the internal temperature a few minutes early—they’re done at 165°F.
Do I have to use heavy cream?
Not at all. You can substitute with half-and-half, whole milk, or even a can of evaporated milk. The dish will be slightly less rich, but it will still be creamy and delicious. I’ve used whole milk in a pinch, and it worked great.
Can I make this in a slow cooker?
I haven’t tested this exact recipe in a slow cooker, but you could try adapting it. Sear the chicken first, then add everything except the cream and cheese to the slow cooker. Cook on low for 4-5 hours. Stir in the cream and cheese at the end, and let it sit for 10 minutes before serving. The texture might be a bit different, but it should still be tasty.
Why is my rice still crunchy after baking?
This usually happens if the rice didn’t have enough liquid or if the oven temperature was too low. Make sure you’re using the exact amount of broth called for, and check that your oven is properly preheated. Also, letting the dish rest for 5-10 minutes after baking helps the rice finish absorbing the liquid.
Can I add vegetables to this dish?
Absolutely! Frozen peas and carrots are my go-to. Just stir them in during the last 10 minutes of baking. You can also add sautéed mushrooms, spinach, or roasted broccoli. Just keep in mind that watery vegetables like zucchini might release extra liquid, so you may need to adjust the broth slightly.
Pin This Recipe!

Kid-Approved One-Pan Garlic Parmesan Chicken and Rice

A quick and easy one-pan meal featuring tender chicken thighs, creamy Parmesan rice, and plenty of garlic. Perfect for busy weeknights, this comforting dish comes together in about 45 minutes with minimal cleanup.
- Prep Time: 10 minutes
- Cook Time: 35 minutes
- Total Time: 45 minutes
- Yield: 6 servings 1x
- Category: Main Course
- Cuisine: American
Ingredients
- 1 ½ pounds boneless, skinless chicken thighs (or breasts, but thighs stay juicier)
- 1 tablespoon olive oil
- 4 tablespoons unsalted butter, divided
- 4 cloves garlic, minced
- 1 cup long-grain white rice (like jasmine or basmati), rinsed well
- 2 ½ cups low-sodium chicken broth
- ½ cup heavy cream
- 1 cup freshly grated Parmesan cheese
- 1 teaspoon dried Italian seasoning
- ½ teaspoon onion powder
- Salt and freshly ground black pepper, to taste
- 2 tablespoons fresh parsley, chopped (for garnish)
Instructions
- Preheat your oven to 375°F (190°C). Position a rack in the middle of the oven.
- Pat the chicken thighs dry with paper towels. Season generously on both sides with salt, pepper, and half of the Italian seasoning. Let them sit while you get the pan ready.
- Heat the olive oil and 1 tablespoon of the butter in your oven-safe skillet over medium-high heat. Once the butter is melted and the oil is shimmering, carefully place the chicken thighs in the pan. Cook for 4-5 minutes per side, until deeply golden brown. Transfer the seared chicken to a plate and set aside.
- Reduce the heat to medium. Add the remaining 3 tablespoons of butter to the pan. Once melted, add the minced garlic. Cook for about 30-60 seconds, stirring constantly, until fragrant.
- Add the rinsed and drained rice to the pan with the garlic and butter. Stir for about 1-2 minutes, until the rice starts to look translucent at the edges and smells nutty.
- Pour in the chicken broth and heavy cream. Use a wooden spoon to scrape up any browned bits from the bottom of the pan. Stir in the remaining Italian seasoning and the onion powder. Bring the mixture to a gentle simmer.
- Nestle the seared chicken thighs back into the pan, placing them on top of the rice. Pour in any juices from the plate.
- Cover the skillet with its lid (or tightly with foil) and transfer to the preheated oven. Bake for 25 minutes.
- After 25 minutes, carefully remove the skillet from the oven. Uncover and sprinkle the grated Parmesan cheese evenly over the top. Return the skillet to the oven, uncovered, and bake for another 10-15 minutes, until the rice is tender and the cheese is melted and golden.
- Remove the skillet from the oven and let it rest for 5-10 minutes. Garnish with fresh parsley and fluff the rice gently with a fork before serving.
Notes
Don’t skip rinsing the rice to avoid gummy texture. Sear the chicken well for maximum flavor. Use freshly grated Parmesan for smooth melting. Let the dish rest for 5-10 minutes after baking to allow the rice to absorb remaining liquid. For best results, use a 12-inch skillet so the rice layer is about an inch deep for even cooking.
Nutrition
- Serving Size: 1 serving (based on
- Calories: 485
- Sugar: 2
- Sodium: 680
- Fat: 24
- Saturated Fat: 12
- Carbohydrates: 35
- Fiber: 1
- Protein: 32
Keywords: one-pan chicken and rice, garlic parmesan chicken, easy weeknight dinner, family-friendly meal, comfort food, one skillet meal


