I figured an apple crisp for two would be a simple scale-down of the regular recipe. It took about one disastrously soggy, overly-sweet ramekin of mush for that assumption to fall apart completely. Honestly, the first attempt was a sad, syrupy puddle with a topping that sank like a stone. The problem wasn’t the apples—it was the math. A full crisp relies on a big dish and a long bake to cook down the fruit and thicken the juices. Shrink the pan, and everything speeds up. The apples release their liquid faster, the topping browns before the fruit is tender, and you end up with a mess.
I wanted something that felt intentional, not like a leftover thought. Something that gave you that warm, brown-sugar-and-cinnamon hug without committing you to a week of leftovers. So I went back to the drawing board. I fiddled with the apple-to-topping ratio, adjusted the bake time, and finally landed on a version that works. The topping stays crunchy. The apples turn jammy and soft. And the whole thing fits perfectly in a small baking dish—no math required.
This cozy small-batch apple crisp for two is the result of those experiments. It’s the kind of dessert you make on a quiet Tuesday night when you just want something warm and sweet. It feels special, but it’s not fussy. And that first bite—where the crisp topping meets the tender, cinnamon-spiced apples—is exactly what you were hoping for.
Why You’ll Love This Recipe
This isn’t just a smaller version of a bigger recipe. It’s built from the ground up for two people, and it shows in every bite. Here’s why it works so well:
- Perfectly Portioned: No more half-eaten dishes languishing in the fridge. This makes exactly two generous servings, or one very generous one if you’re not sharing.
- Simple Ingredients: You probably have everything in your kitchen right now. Apples, oats, flour, butter, brown sugar, and cinnamon. That’s it.
- Quick & Easy: From start to finish, you’re looking at about 45 minutes. Most of that is hands-off baking time.
- Unbelievably Delicious: The topping stays perfectly crunchy, the apples get soft and jammy, and the whole thing is perfectly balanced—not too sweet, not too tart.
- No Special Equipment: A small baking dish or even a couple of ramekins will do the trick. No stand mixer, no food processor.
I’ve tested this recipe more times than I care to admit, and I can tell you—it’s the one. The topping uses melted butter instead of cold, which means you don’t have to cut it in. It creates a clumpy, craggy texture that bakes up perfectly golden. And the apples? They get a head start in the microwave, which ensures they’re tender by the time the topping is crisp. It’s a small trick, but it makes all the difference.
This is comfort food, pure and simple. It’s the kind of dessert that makes you close your eyes after the first bite. It’s perfect for a date night in, a quiet evening with a good book, or just because you deserve something warm and wonderful.
What Ingredients You Will Need
This recipe uses simple, wholesome ingredients to deliver bold flavor and satisfying texture without any fuss. Most of these are pantry staples, which is exactly what you want on a cozy night in.
- Apples (2 medium, about 300g): The star of the show. I recommend a mix of sweet and tart varieties. Honeycrisp and Granny Smith are my go-to combo. The Honeycrisp provides sweetness and a tender texture, while the Granny Smith holds its shape and adds a nice tang. Peel, core, and slice them into roughly 1/4-inch thick pieces. (If you only have one type, that’s fine too—just adjust the sugar slightly.)
- Granulated Sugar (2 tablespoons, 25g): Helps draw out the apples’ natural juices and creates that lovely syrupy base. You can reduce this slightly if your apples are very sweet.
- Brown Sugar (1/4 cup, 50g, packed): This goes into the topping and adds a deep, molasses-like sweetness and that signature chewy-crunchy texture. I use dark brown sugar for a richer flavor, but light brown works beautifully too.
- All-Purpose Flour (1/4 cup, 30g): The base of the crisp topping. It provides structure and helps create those irresistible clumps.
- Rolled Oats (1/4 cup, 20g): Adds a wonderful chew and nutty flavor to the topping. Use old-fashioned rolled oats, not the quick-cooking kind—they have a better texture.
- Unsalted Butter (3 tablespoons, 42g, melted): This is the key to the easy, no-fuss topping. Melted butter coats the dry ingredients perfectly, creating a cohesive mixture that bakes up golden and crunchy. Salted butter works too—just skip the added salt in the topping.
- Ground Cinnamon (1 teaspoon): The essential warm spice. It flavors both the apples and the topping.
- Salt (1/4 teaspoon): A small amount enhances all the other flavors and balances the sweetness.
- Lemon Juice (1/2 tablespoon): A squeeze of fresh lemon juice prevents the apples from browning and brightens up the overall flavor.
- Vanilla Extract (1/2 teaspoon): Adds warmth and rounds out the flavors. Pure vanilla extract is best, but imitation will work in a pinch.
Ingredient Swap Ideas: For a gluten-free version, use a 1-to-1 gluten-free flour blend and certified gluten-free oats. For a lower-sugar option, you can reduce the brown sugar in the topping by a tablespoon—it will still be delicious.
Equipment Needed
One of the best things about this recipe is how little equipment it requires. You don’t need a fancy kitchen to make a fantastic dessert.
- Small Baking Dish or Ramekins: A 5×7-inch baking dish works perfectly. You can also use two 8-ounce ramekins or a small 1-quart baking dish. The key is that the dish is small enough that the apples pile up a bit.
- Mixing Bowls: You’ll need one medium bowl for the apples and one small bowl for the topping.
- Chef’s Knife and Cutting Board: For peeling and slicing the apples.
- Measuring Cups and Spoons: For accurate measurements. I cannot stress this enough—baking is a science, even for a simple crisp.
- Microwave-Safe Bowl: For giving the apples a quick head start. This is a game-changer for small-batch crisps.
- Fork or Whisk: For mixing the topping ingredients together.
If you don’t have a microwave, don’t worry. You can simply bake the crisp for an extra 5-10 minutes. Just keep an eye on the topping to make sure it doesn’t burn. I’ve made this in a toaster oven before, and it works great—just reduce the temperature by 25°F and watch it closely.
Preparation Method
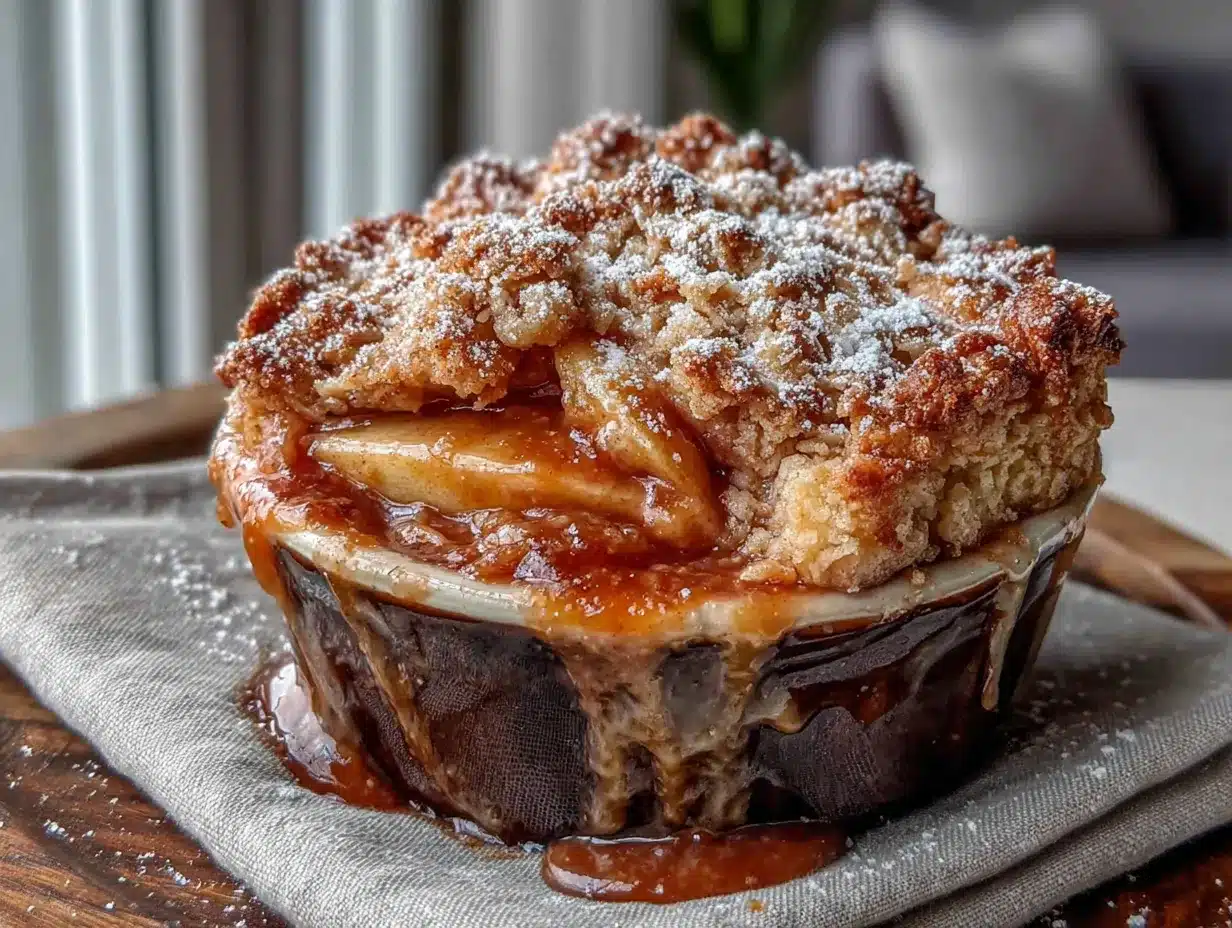
- Preheat and Prep: Preheat your oven to 375°F (190°C). Lightly grease your small baking dish or ramekins with a little butter or non-stick spray. This prevents sticking and makes cleanup a breeze.
- Prepare the Apples: Peel, core, and slice your apples into 1/4-inch thick pieces. You want them uniform so they cook evenly. Place the sliced apples in a medium microwave-safe bowl.
- Season the Apples: Add the granulated sugar, 1/2 teaspoon of the cinnamon, the lemon juice, and a pinch of salt to the apples. Toss everything together until the apples are well coated.
- Microwave the Apples: This is the secret step. Microwave the apple mixture for 2-3 minutes, stirring halfway through. You’re not trying to cook them fully—just soften them slightly and get the juices flowing. The apples should be pliable and starting to release their liquid. (If you don’t have a microwave, you can skip this step and just bake the crisp for an extra 5-10 minutes.)
- Make the Topping: In a separate small bowl, combine the brown sugar, flour, rolled oats, the remaining 1/2 teaspoon of cinnamon, and the 1/4 teaspoon of salt. Stir with a fork to combine.
- Add the Melted Butter: Pour the melted butter and vanilla extract over the dry ingredients. Stir with a fork until the mixture is evenly moistened and forms clumps. It should look like wet sand with some larger, craggy pieces. Don’t overmix—you want those clumps for texture.
- Assemble the Crisp: Transfer the microwaved apples and all their juices into your prepared baking dish. Spread them out in an even layer. Sprinkle the topping evenly over the apples. Don’t press it down—you want it to stay light and clumpy.
- Bake: Place the dish on a baking sheet to catch any potential drips (trust me on this). Bake for 20-25 minutes, or until the topping is golden brown and the apple juices are bubbling up around the edges. The filling should be thick and jammy, not watery.
- Cool Slightly: Let the crisp cool on a wire rack for at least 10 minutes before serving. This allows the filling to set up. If you serve it immediately, it will be runny.
Sensory Cues: When it’s done, your kitchen will smell like a fall candle exploded. The topping should be deep golden brown and feel firm to the touch. You should see thick, syrupy bubbles around the edges of the dish. If the topping is browning too quickly, tent the dish loosely with foil for the last 5 minutes of baking.
Cooking Tips & Techniques
I’ve made this cozy small-batch apple crisp for two more times than I can count, and I’ve learned a few things along the way. Here are my best tips for success.
Don’t Skip the Microwave Step: I know it seems like an extra step, but it’s the secret to a perfect small-batch crisp. Because the dish is small, the apples don’t have as much time to cook through before the topping is done. Microwaving them gives them a head start, ensuring they’re tender and jammy by the time the topping is golden and crunchy. I learned this the hard way after pulling out a crisp with a perfectly browned topping and crunchy, undercooked apples.
Use a Mix of Apples: This isn’t just for flavor—it’s for texture. A soft apple like McIntosh will break down and create a lovely, saucy base, while a firmer apple like Granny Smith will hold its shape and give you nice little pockets of tender fruit. If you only have one type, that’s okay. Just adjust your expectations. All soft apples will give you a more sauce-like filling; all firm apples will give you a more structured one.
Watch the Topping: Oven temperatures can vary wildly. Start checking your crisp at the 20-minute mark. You’re looking for a deep golden brown color. If the topping is getting too dark but the filling isn’t bubbling yet, tent the dish with foil and continue baking. This happened to me once when I was using a new oven, and the foil saved the day.
Let It Rest: I know it’s hard to wait, but letting the crisp rest for 10-15 minutes is crucial. The filling needs time to thicken up. If you scoop into it right away, you’ll end up with a soupy mess. I speak from experience. That first impatient bite is always a letdown. The second one, after a proper rest, is pure magic.
Make It Ahead: You can assemble the entire crisp (without baking) up to a day in advance. Just cover it and store it in the refrigerator. When you’re ready to bake, add about 5-10 minutes to the baking time since you’re starting from cold. This is a great option if you’re having guests over and want to minimize last-minute work.
Variations & Adaptations
This recipe is incredibly flexible. Here are a few of my favorite ways to change it up.
- Add Some Spice: A pinch of nutmeg, allspice, or cardamom in the apple mixture adds a lovely warmth. I sometimes add a tiny pinch of ground cloves for a more complex flavor profile. It’s especially good in the fall.
- Go Nutty: Add 2 tablespoons of chopped pecans or walnuts to the topping mixture. Toast them first for extra flavor. I love the texture contrast that nuts provide.
- Berry-Apple Crisp: Toss a handful of fresh or frozen cranberries, raspberries, or blueberries into the apple mixture. The berries will burst and create beautiful pockets of tartness. This is amazing with a scoop of vanilla ice cream.
- Gluten-Free Version: Use a high-quality 1-to-1 gluten-free flour blend in place of the all-purpose flour, and make sure your oats are certified gluten-free. The texture will be slightly different, but it’s still delicious.
- Vegan Adaptation: Use a plant-based butter stick (like Miyoko’s or Earth Balance) in place of the dairy butter. It works perfectly. I’ve tested this, and you honestly can’t tell the difference.
- Pear Crisp: Swap the apples for ripe but firm pears. Pears are a little more delicate, so reduce the microwave time by a minute. The flavor is subtly different and absolutely lovely.
If you’re a fan of warm, comforting desserts, you might also enjoy this easy spiced vanilla bean pears—another perfect small-batch treat. And for a no-fuss, single-serving cookie fix, these perfect small-batch chocolate chip cookies are my go-to.
Serving & Storage Suggestions
This crisp is best served warm, straight from the oven. The contrast between the warm, jammy apples and the cold, creamy topping is pure perfection.
How to Serve: Scoop the crisp into bowls and top with a generous scoop of vanilla ice cream, a dollop of whipped cream, or a drizzle of heavy cream. For a less decadent option, a spoonful of plain Greek yogurt works beautifully. I personally love it with a scoop of easy no-churn salted caramel ice cream—the salty-sweet combo is incredible.
What to Pair It With: A cup of hot coffee, a mug of spiced chai, or a glass of cold milk are all excellent choices. If you’re feeling fancy, a small glass of bourbon or a dark rum pairs beautifully with the warm apple and cinnamon flavors.
Storage Instructions: If you have any leftovers (unlikely, but possible!), cover the dish tightly with plastic wrap or foil and store it in the refrigerator for up to 3 days. The topping will soften over time, but it will still be delicious.
Reheating Tips: The best way to reheat this crisp is in the oven. Place it in a 350°F (175°C) oven for 10-15 minutes, or until warmed through. This will help re-crisp the topping. You can also use the microwave, but the topping will be soft. If you’re in a hurry, the microwave works—just know what you’re getting.
Flavor Development: Honestly, the flavors actually get better after a day in the fridge. The apple mixture becomes even more deeply spiced and syrupy. If you can resist eating it all, try it cold the next day—it’s like a different dessert entirely, and it’s wonderful.
Nutritional Information & Benefits
This recipe makes two generous servings. Nutritional values are approximate and will vary based on the specific ingredients you use.
- Calories per serving: Approximately 350-400 calories
- Fat: 15-18g
- Carbohydrates: 55-60g
- Fiber: 5-7g
- Sugar: 35-40g
- Protein: 3-4g
Health Benefits: Apples are a great source of fiber and vitamin C. Oats provide soluble fiber, which is good for heart health. While this is definitely a treat, it’s made with whole-food ingredients and is free from artificial flavors and preservatives. It’s a dessert you can feel good about enjoying.
Dietary Considerations: This recipe can easily be made gluten-free and vegan with simple substitutions. It is naturally egg-free and nut-free (unless you add nuts). It contains dairy and gluten in its standard form.
My Perspective: I believe in enjoying dessert without guilt. This crisp is a reasonable portion, made with real ingredients. It’s the kind of dessert that satisfies a craving without sending you into a sugar coma. That’s a win in my book.
Conclusion
This cozy small-batch apple crisp for two is more than just a dessert—it’s a moment. It’s the warm, comforting hug you need after a long day. It’s the simple, impressive treat you can make for someone you love. It’s proof that you don’t need a crowd or a complicated recipe to create something truly wonderful.
I hope you give this recipe a try. Don’t be afraid to make it your own—swap the apples, add some nuts, or pile on the ice cream. The best recipes are the ones that become yours. And honestly, the hardest part of this whole process is waiting for it to cool enough to eat.
If you make this crisp, I’d love to hear about it. Leave a comment below, tag me in your photos, or tell me about your favorite variation. Happy baking, friend. You deserve this.
Frequently Asked Questions
Can I use pre-sliced apples from the store?
You can, but I don’t recommend it. Pre-sliced apples are often treated with preservatives to prevent browning, which can affect the texture and flavor. They also tend to be drier. For the best results, peel and slice your own apples fresh.
Can I double this recipe?
Absolutely. If you want to serve four people, simply double all the ingredients and bake the crisp in an 8×8-inch baking dish. You’ll need to increase the baking time by about 5-10 minutes. Keep an eye on the topping and the bubbling juices to determine doneness.
Why is my topping not crunchy?
There are a few common culprits. The topping might have been over-mixed, which can make it dense. Or, the crisp might not have baked long enough. Make sure your topping is clumpy before baking, and bake until it’s deep golden brown. Also, storing leftovers in the fridge will soften the topping—reheat in the oven to re-crisp it.
Can I use quick-cooking oats instead of rolled oats?
You can, but the texture will be different. Quick-cooking oats are more finely chopped, so they will create a softer, less chewy topping. Rolled oats provide a much better texture and are worth seeking out. If you only have quick oats, reduce the butter by about half a tablespoon to prevent the topping from becoming too dense.
How do I know when the crisp is done?
Look for two key signs. First, the topping should be a deep golden brown color. Second, you should see thick, syrupy bubbles around the edges of the dish. If the juices are thin and watery, it needs more time. If the topping is browning too quickly, tent it with foil. The filling should be thick and jammy when it’s done.
Pin This Recipe!
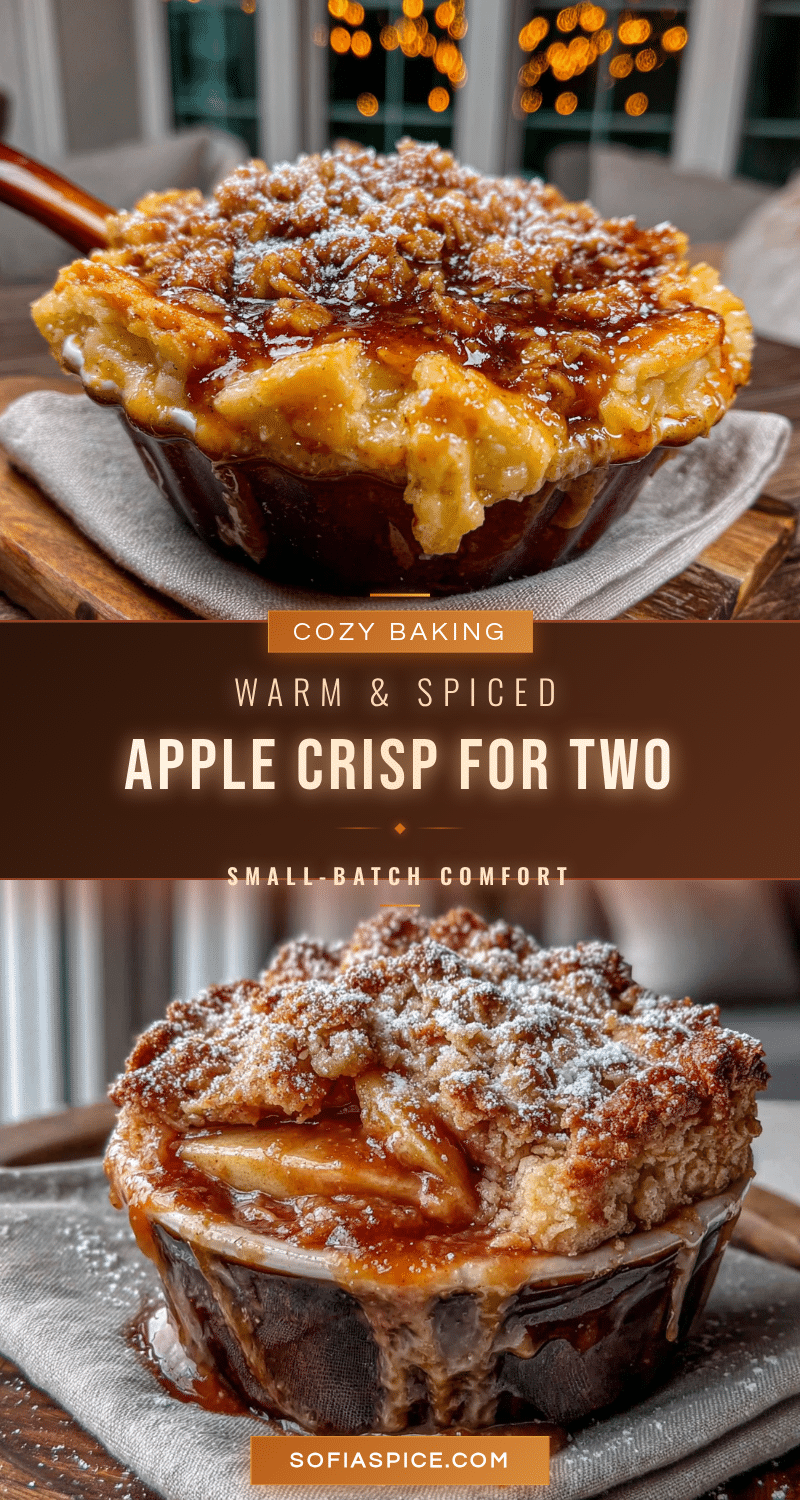
Cozy Small-Batch Apple Crisp for Two

A perfectly portioned apple crisp for two with a crunchy oat topping and tender, cinnamon-spiced apples. Made with simple ingredients and ready in about 45 minutes, it’s the ideal cozy dessert for a quiet night in.
- Prep Time: 15 minutes
- Cook Time: 25 minutes
- Total Time: 40 minutes
- Yield: 2 servings 1x
- Category: Dessert
- Cuisine: American
Ingredients
- 2 medium apples (about 300g), peeled, cored, and sliced into 1/4-inch pieces (recommend a mix of sweet and tart, like Honeycrisp and Granny Smith)
- 2 tablespoons (25g) granulated sugar
- 1/4 cup (50g) packed brown sugar
- 1/4 cup (30g) all-purpose flour
- 1/4 cup (20g) rolled oats (old-fashioned)
- 3 tablespoons (42g) unsalted butter, melted
- 1 teaspoon ground cinnamon
- 1/4 teaspoon salt
- 1/2 tablespoon lemon juice
- 1/2 teaspoon vanilla extract
Instructions
- Preheat your oven to 375°F (190°C). Lightly grease a small baking dish (5×7-inch) or two 8-ounce ramekins with butter or non-stick spray.
- Peel, core, and slice the apples into 1/4-inch thick pieces. Place them in a medium microwave-safe bowl.
- Add the granulated sugar, 1/2 teaspoon of the cinnamon, the lemon juice, and a pinch of salt to the apples. Toss to coat evenly.
- Microwave the apple mixture for 2-3 minutes, stirring halfway through, until the apples are pliable and starting to release their juices. (If you don’t have a microwave, skip this step and bake for an extra 5-10 minutes.)
- In a separate small bowl, combine the brown sugar, flour, rolled oats, remaining 1/2 teaspoon cinnamon, and 1/4 teaspoon salt. Stir with a fork.
- Pour the melted butter and vanilla extract over the dry ingredients. Stir with a fork until the mixture is evenly moistened and forms clumps (like wet sand with some larger pieces). Do not overmix.
- Transfer the microwaved apples and their juices to the prepared baking dish. Spread them in an even layer. Sprinkle the topping evenly over the apples without pressing down.
- Place the dish on a baking sheet to catch drips. Bake for 20-25 minutes, or until the topping is golden brown and the apple juices are bubbling thickly around the edges.
- Let the crisp cool on a wire rack for at least 10 minutes before serving to allow the filling to set.
Notes
Don’t skip the microwave step—it ensures the apples are tender by the time the topping is golden. Use a mix of apple varieties for best texture. Let the crisp rest for 10-15 minutes before serving to allow the filling to thicken. For a gluten-free version, use a 1-to-1 gluten-free flour blend and certified gluten-free oats. For a vegan version, use plant-based butter.
Nutrition
- Serving Size: 1 generous serving
- Calories: 375
- Sugar: 37.5
- Sodium: 150
- Fat: 16.5
- Saturated Fat: 10
- Carbohydrates: 57.5
- Fiber: 6
- Protein: 3.5
Keywords: apple crisp, small batch, for two, easy dessert, fall dessert, apple dessert, crisp topping, comfort food


