The soft, almost pillowy give of the dough under my fingertips, the faint scent of orange blossoms clinging to my hands for hours afterward—that’s the whole point of this bread. I didn’t grow up making Pan de Muerto. Honestly, I first encountered it at a tiny panadería in East L.A., where the woman behind the counter wrapped a still-warm loaf in tissue paper like it was something precious. And it is.
For years, I thought it was beyond me—this bread that only appears for a few weeks each year, decorated with those iconic bone-shaped pieces. But here’s the thing about bread: it’s patient. It waits for you to get your courage up. So last October, I finally decided I was done just buying it. I wanted that smell in my own kitchen.
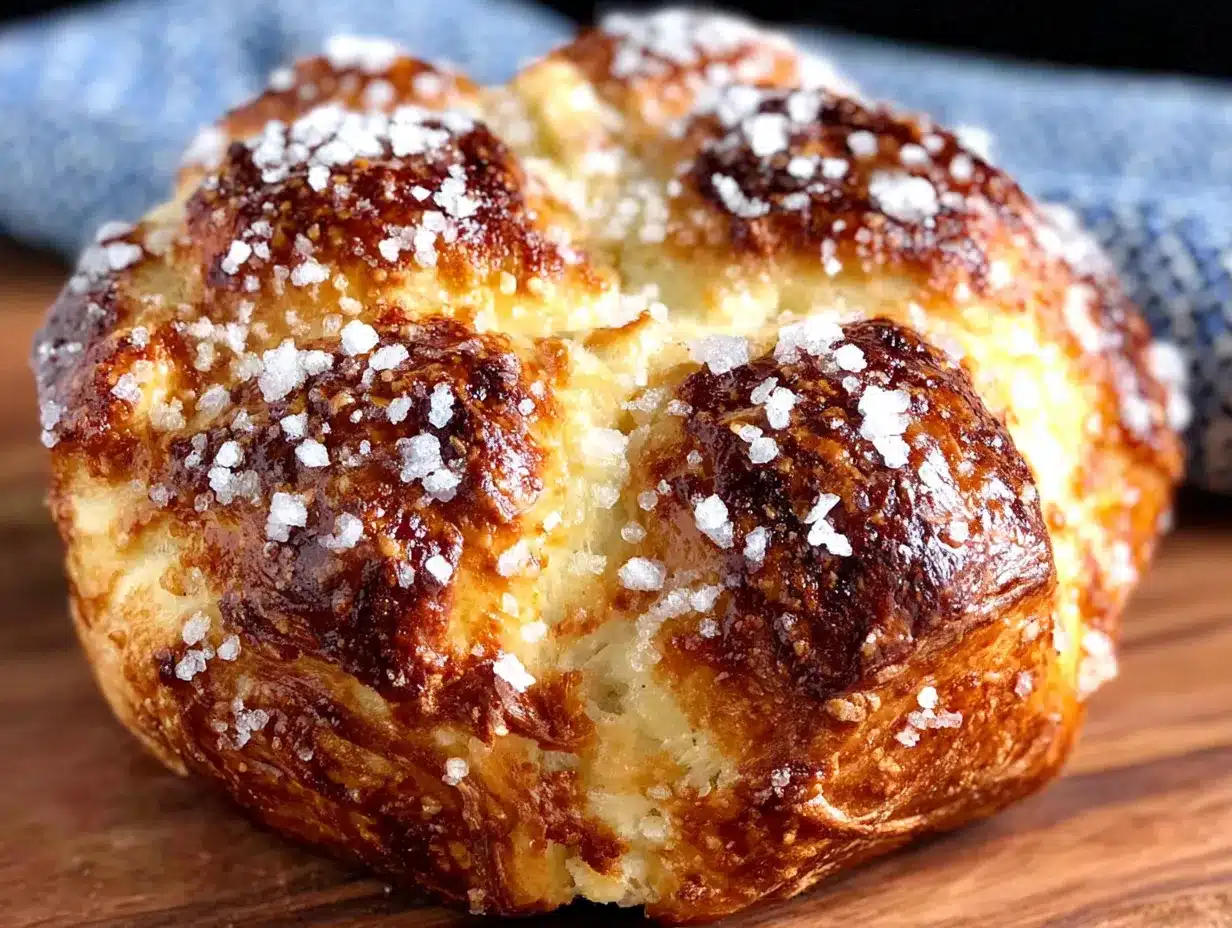
This Classic Pan de Muerto is soft, sweet, and deeply aromatic—exactly what Day of the Dead bread should be. The texture is what keeps me coming back. It’s not quite brioche, not quite challah, but somehow better than both. The crumb is fine and tender, the top glistening with a sugary sheen that catches the light. And that orange-zest-and-anise scent? It fills your whole house with something warm and reverent, like a memory you didn’t know you had.
I’ve tested this recipe six times now to get it just right. The first batch was too dry. The second, too dense. But somewhere around batch four, I found it—that perfect balance of softness and structure. This is the version I’ll be making every year from now on.
Why You’ll Love This Recipe
Let me tell you why this particular Pan de Muerto recipe is different from the others floating around. I spent weeks testing ratios, hydration levels, and proofing times because I wanted a version that actually works for home bakers—not just professional pastry chefs with stand mixers the size of small cars.
- Incredibly Soft Texture: The combination of bread flour, egg yolks, and butter gives this bread a cloud-like crumb that stays fresh for days. No dry, crumbly nonsense here.
- Authentic Flavor Profile: We’re using orange zest, orange blossom water, and a touch of anise seed—the classic trio that makes Pan de Muerto taste like the real thing from a Mexican panadería.
- Surprisingly Manageable Dough: Yes, it’s a yeasted dough. But the process is forgiving. I’ve made this on a rainy day when my kitchen was cold, and it still turned out beautifully.
- Perfect for Day of the Dead or Any Fall Gathering: While this bread is traditional for Día de los Muertos, it’s also wonderful with coffee on a crisp autumn morning. No one’s going to complain about orange-scented bread.
- Freezes Like a Dream: Make two loaves. Eat one, freeze the other. The frozen loaf tastes just as fresh after a quick reheat in the oven.
What really sets this recipe apart is the technique. Instead of just dumping everything in a bowl, we’re blooming the yeast in warm milk with a pinch of sugar, letting the dough rest in stages, and brushing the shaped loaves with melted butter before baking. These small steps make a huge difference. This isn’t just another bread recipe—it’s the one that’ll make you feel like you actually know what you’re doing.
I’ll be honest with you: the first time I made Pan de Muerto, I cried a little. Not because it failed—it actually came out pretty good—but because the smell of orange and anise brought me back to that tiny panadería so vividly. Food does that, you know. It carries us places. And this bread, with its soft, sweet crumb and golden crust, is worth every minute of kneading and waiting.
What Ingredients You Will Need
This recipe uses simple, mostly pantry-friendly ingredients to create something truly special. The magic is in how they work together—the fat from the butter and eggs tenderizes the dough, while the orange and anise provide that unmistakable aromatic lift.
For the Dough
- 4 cups (500g) bread flour – Bread flour gives this loaf the structure it needs while still staying soft. All-purpose works in a pinch, but the texture won’t be quite as pillowy.
- 1/2 cup (100g) granulated sugar – Just enough sweetness to make this bread feel like a treat without being cloying.
- 2 1/4 teaspoons (7g) active dry yeast – One standard packet. Make sure your yeast is fresh—check the expiration date before you start.
- 1/2 cup (120ml) whole milk, warmed – Warm to about 110°F. Not hot, not cold. If you can’t use whole milk, 2% works but the bread will be slightly less rich.
- 4 large eggs, room temperature – This is important. Cold eggs will shock your dough and slow down rising. Leave them on the counter for an hour before starting.
- 1/2 cup (113g) unsalted butter, softened – Let it sit out until it’s truly soft, not just cool. You should be able to press it easily with your finger.
- 1 tablespoon orange zest – From about 2 large oranges. Use a microplane or fine grater. Avoid the white pith—it’s bitter.
- 1 teaspoon orange blossom water – This is the secret ingredient. Find it in the international aisle or a Mexican grocery store. A little goes a long way.
- 1/2 teaspoon anise seed – Lightly crushed in a mortar and pestle or between your fingers. This is optional but traditional and adds a subtle licorice note.
- 1 teaspoon salt – Don’t skip this. Salt controls the yeast and strengthens the gluten structure.
For the Topping
- 2 tablespoons unsalted butter, melted – For brushing the shaped loaves before baking.
- 2 tablespoons granulated sugar – For sprinkling on top after baking. Traditional Pan de Muerto uses white sugar, but you can use coarse sanding sugar for extra sparkle.
- Optional: 1 tablespoon orange zest mixed into the sugar – This adds another layer of citrus flavor on top.
A note on the orange blossom water: I know it sounds fancy and optional, but honestly, it’s what makes this bread taste authentic. If you can’t find it, you can substitute with a teaspoon of vanilla extract plus an extra teaspoon of orange zest. It won’t be quite the same, but it’ll still be delicious. I’ve made it both ways, and the orange blossom version is noticeably more fragrant—like flowers and citrus combined.
For the butter, I recommend using a good-quality European-style butter like Kerrygold or Plugrà. The higher fat content makes the dough richer and more tender. I learned this the hard way after using cheap margarine in my first batch. The bread turned out greasy and flat. Never again.
If you’re feeling adventurous, you can add a pinch of cinnamon or a star anise to the dough. I tested a version with cinnamon and it was lovely, but it overpowered the orange a bit. Stick with the anise seed for a more traditional result.
Equipment Needed
- Stand mixer with dough hook – You can knead by hand, but the dough is fairly sticky and the mixer makes it much easier. A KitchenAid or similar works perfectly.
- Large mixing bowl – For proofing the dough. Glass or ceramic works best—metal can sometimes react with the yeast.
- Baking sheet – A half-sheet pan lined with parchment paper or a silicone baking mat.
- Plastic wrap or a clean kitchen towel – For covering the dough during proofing. Plastic wrap is better because it doesn’t dry out the dough.
- Microplane or fine grater – For zesting the oranges. A box grater works too, but a microplane gives you finer zest that incorporates better.
- Pastry brush – For brushing the butter on the shaped loaves. A silicone brush is easier to clean.
- Cooling rack – So the bread doesn’t get soggy on the bottom.
- Sharp knife or bench scraper – For cutting the bone shapes and scoring the dough.
If you don’t have a stand mixer, you can absolutely knead by hand. It’ll take about 12-15 minutes of steady kneading. The dough is sticky at first, so resist the urge to add too much flour—it’ll come together as you work it. I made my first few batches by hand and actually preferred it. There’s something meditative about working dough with your hands, especially for a bread with this much meaning behind it.
Preparation Method
Let’s walk through this step by step. I’ve included my notes and little tricks I learned along the way. Read through the entire method before starting—trust me on this one.
Step 1: Bloom the Yeast
In the bowl of your stand mixer, combine the warm milk (110°F), 1 tablespoon of the sugar, and the active dry yeast. Stir gently and let it sit for 5-10 minutes until it becomes foamy and smells like bread. If it doesn’t foam, your yeast might be dead. Start over with fresh yeast. I’ve had this happen and it’s frustrating, but better to catch it now than after adding all your flour.
Step 2: Mix the Dough
Add the remaining sugar, eggs, orange zest, orange blossom water, crushed anise seed, and salt to the yeast mixture. Stir to combine. Add the bread flour, one cup at a time, mixing on low speed with the dough hook. The dough will look shaggy and dry at first—that’s normal. Keep mixing.
Once all the flour is incorporated, add the softened butter a tablespoon at a time, letting each piece get fully worked in before adding the next. This takes about 3-4 minutes. The dough will look greasy and loose, then suddenly come together into a smooth, elastic ball. That’s your cue.
Step 3: Knead
Knead on medium speed for 8-10 minutes. The dough should be smooth, supple, and slightly tacky to the touch. It should pass the windowpane test: stretch a small piece of dough between your fingers—if it forms a thin, translucent membrane without tearing, you’re done. If it tears, knead for another 2 minutes and test again.
Step 4: First Rise
Shape the dough into a ball and place it in a lightly greased bowl. Cover tightly with plastic wrap and let it rise in a warm, draft-free spot for 1.5 to 2 hours, or until doubled in size. My favorite spot is inside my oven with the light on (but the oven off). It stays around 80°F in there, which is perfect.
Step 5: Shape the Loaf
Punch down the dough gently to release the gas. Turn it out onto a lightly floured surface. Divide the dough into two pieces: one large piece (about two-thirds of the dough) for the main loaf, and one smaller piece (about one-third) for the decorative bone shapes.
Shape the large piece into a smooth, round ball by tucking the edges under and rotating it on the counter. Place it on your prepared baking sheet. Now, divide the smaller piece into four equal parts. Roll each part into a long rope, about 6 inches long. Gently flatten each rope slightly with your fingers.
To create the traditional bone shapes: cut small slits along the edges of each rope to resemble knobby bones. Place two ropes across the top of the loaf in a cross pattern, and two ropes along the sides. Don’t press them in too hard—they’ll adhere as the dough rises.
Form a small round ball from any remaining dough and place it in the center of the cross. This represents the skull. It sounds a little morbid, but it’s a beautiful tradition that honors the cycle of life and death.
Step 6: Second Rise
Cover the shaped loaf loosely with plastic wrap and let it rise for another 45 minutes to 1 hour. It should look puffy and almost doubled. Don’t rush this step. A good second rise gives you that soft, airy crumb.
Step 7: Bake
Preheat your oven to 350°F (175°C). Brush the risen loaf gently with the melted butter—this gives it that gorgeous golden crust. Bake for 25-30 minutes, rotating the pan halfway through. The bread is done when it’s deep golden brown and sounds hollow when tapped on the bottom. An instant-read thermometer inserted into the center should read 190°F.
Step 8: Finish
Remove the bread from the oven and let it cool on the pan for 5 minutes, then transfer to a cooling rack. While it’s still warm, brush it with a little more melted butter and sprinkle generously with the sugar. The sugar will stick to the warm butter and create that signature sweet, sparkly crust.
Let the bread cool completely before slicing—about 2 hours. I know it’s hard to wait, but slicing warm bread will crush the delicate crumb. Trust me, I’ve done it and regretted it every time.
Cooking Tips & Techniques
I’ve made this bread six times now, and I’ve learned a few things that I wish someone had told me before I started. Here are my best tips:
Temperature matters more than you think. Cold ingredients will make your dough take forever to rise. Warm milk (around 110°F), room-temperature eggs, and softened butter are non-negotiable. I learned this the hard way when I used cold eggs straight from the fridge—the dough took over three hours to double and the texture was dense.
Don’t over-flour your work surface. This dough is sticky, and your instinct will be to dump flour on it. Resist. A light dusting is fine, but too much flour will make your bread dry and tough. Instead, use a bench scraper to lift and fold the dough if it sticks.
Watch the anise seed. A little goes a long way. I once added a full teaspoon instead of half, and the bread tasted like black licorice. If you’re not sure you like anise, start with 1/4 teaspoon. You can always add more next time.
Use the oven light for proofing. If your kitchen is cold (mine is in October), turn your oven on to the lowest setting for 2 minutes, then turn it off and place your covered dough inside with the light on. The residual warmth creates the perfect environment for rising.
Brush with butter twice. The first brushing before baking gives you a golden crust. The second brushing right after baking, followed by the sugar, gives you that signature sweet top. Don’t skip either step.
Make the bone shapes thicker than you think. They’ll puff up and spread during baking, so if you make them too thin, they’ll disappear into the loaf. Aim for ropes about 3/4 inch thick.
One of my biggest failures was batch three, where I forgot the salt. The bread rose beautifully but tasted flat and bland. Salt isn’t just for flavor—it strengthens the gluten and controls yeast activity. Never skip it.
Variations & Adaptations
This recipe is wonderful as-is, but I’ve tested a few variations that are worth sharing:
Chocolate Pan de Muerto
Replace 1/4 cup of the bread flour with 1/4 cup of unsweetened cocoa powder. Add 1 teaspoon of vanilla extract along with the eggs. The chocolate version is rich and almost brownie-like in flavor. I made this for a friend who doesn’t like orange, and she devoured half the loaf in one sitting.
Gluten-Free Version
Use a good-quality gluten-free bread flour blend (I like Cup4Cup or King Arthur’s measure-for-measure blend). Add 1 teaspoon of xanthan gum if your blend doesn’t already include it. The texture will be slightly denser and less airy, but still delicious. I tested this for a gluten-intolerant friend, and it worked surprisingly well.
Vegan Adaptation
Substitute the butter with vegan butter (I recommend Miyoko’s or Earth Balance). Replace the eggs with a flax egg mixture: 4 tablespoons ground flaxseed mixed with 12 tablespoons water, let sit for 5 minutes until gelatinous. Use plant-based milk like oat or almond milk. The bread won’t be as rich, but it’s still soft and flavorful.
Spiced Version
Add 1/2 teaspoon of ground cinnamon, 1/4 teaspoon of ground nutmeg, and a pinch of ground cloves along with the dry ingredients. This gives the bread a warm, holiday-spiced flavor that’s perfect for fall. I made this version for Thanksgiving and it was a hit.
Orange-Glazed Pan de Muerto
Instead of the sugar topping, make a simple glaze: whisk together 1 cup of powdered sugar, 2 tablespoons of fresh orange juice, and 1/2 teaspoon of orange zest. Drizzle over the cooled loaf. This version is sweeter and more like a pastry. My kids prefer this one.
Serving & Storage Suggestions
Pan de Muerto is traditionally served alongside hot chocolate or coffee. The slight bitterness of the drink balances the sweetness of the bread perfectly. I love serving it with a mug of Mexican hot chocolate (the kind with cinnamon and a touch of chili) or a simple café de olla.
For presentation, place the whole loaf on a wooden board or a colorful platter. The bone shapes make it visually striking, so don’t slice it until you’re ready to serve. Let guests tear off pieces with their hands—that’s how it’s traditionally eaten.
Storage: Store the bread in an airtight container or wrapped tightly in plastic wrap at room temperature for up to 3 days. Do not refrigerate—it will dry out the bread. The texture actually improves on day two as the flavors meld together.
Freezing: This bread freezes beautifully. Wrap the completely cooled loaf tightly in plastic wrap, then in aluminum foil. Freeze for up to 3 months. To serve, thaw at room temperature for 2 hours, then warm in a 300°F oven for 10 minutes. The crust will crisp up and the interior will be soft again.
Reheating: For a single slice, pop it in the toaster or microwave for 10-15 seconds. For a whole loaf, wrap in foil and warm in a 300°F oven for 10-15 minutes. The butter and sugar topping will get slightly melty and irresistible.
I’ve noticed that the bread develops a more pronounced orange flavor after a day. The anise also mellows out and becomes more subtle. So if you can, make this bread a day before you plan to serve it. It’s even better.
Nutritional Information & Benefits
Per slice (1/12 of the loaf): approximately 280 calories, 10g fat, 42g carbohydrates, 7g protein, 2g fiber, 18g sugar. This is a treat bread, not a health food, but it does have some redeeming qualities.
The eggs provide high-quality protein and choline, which supports brain health. The butter contains vitamin A and healthy saturated fats. Orange zest is packed with antioxidants and vitamin C. And bread flour provides complex carbohydrates for sustained energy.
If you’re watching your sugar intake, you can reduce the sugar in the dough to 1/3 cup without affecting the texture too much. The topping sugar can also be reduced or replaced with a sugar substitute like monk fruit sweetener.
This bread is not gluten-free in its traditional form, but the gluten-free variation I mentioned earlier works well. It’s also not vegan, but the vegan adaptation is a solid alternative.
From a wellness perspective, I think of this bread as a celebration food. It’s meant to be shared with loved ones during a meaningful holiday. The joy it brings is part of its nutritional value, honestly. Sometimes food is about more than just macros.
Conclusion
This Classic Pan de Muerto is more than just a recipe—it’s a way to connect with tradition, with family, and with the cycle of life that this beautiful holiday celebrates. The soft, sweet crumb, the fragrant orange and anise, the satisfyingly crusty top—every bite carries meaning.
I hope you’ll try making this bread at home. It takes a few hours, yes, but most of that time is waiting for the dough to rise. The actual hands-on work is maybe 30 minutes total. And the result? A loaf that looks like it came from a professional bakery, smells like heaven, and tastes like love.
Don’t be intimidated by the bone shapes. They’re actually fun to make, and even if they’re not perfect, the bread will still be delicious. My first loaf looked a little lopsided, but it disappeared in minutes at our Día de los Muertos gathering.
If you make this recipe, I’d love to hear about it. Leave a comment below and tell me how it turned out, or share your own variations. Did you add cinnamon? Make it gluten-free? Serve it with hot chocolate? I read every comment, and your feedback helps me create better recipes for you.
And if you’re looking for other comforting, shareable recipes, you might enjoy my perfect one-bowl walnut banana bread or these small-batch chocolate chip cookies. Both are made with the same love and attention to detail.
Gracias for reading, and happy baking. May your kitchen be filled with the scent of orange blossoms and warmth.
Frequently Asked Questions
Can I make Pan de Muerto without a stand mixer?
Absolutely! You can knead the dough by hand on a lightly floured surface for 12-15 minutes. The dough is sticky, so use a bench scraper to help manage it. The result will be just as good—it just takes a bit more elbow grease.
Why didn’t my dough rise?
Several reasons: your yeast might be expired, your milk was too hot (above 120°F kills yeast), or your kitchen was too cold. Make sure your milk is around 110°F and let the dough rise in a warm spot. If your yeast didn’t foam in step 1, start over with fresh yeast.
Can I freeze Pan de Muerto?
Yes! Wrap the completely cooled loaf tightly in plastic wrap and then foil. Freeze for up to 3 months. Thaw at room temperature for 2 hours, then warm in a 300°F oven for 10 minutes. It tastes almost as fresh as the day you baked it.
What can I use instead of orange blossom water?
If you can’t find orange blossom water, substitute with 1 teaspoon of vanilla extract plus an extra teaspoon of orange zest. The flavor won’t be as floral, but it’ll still be delicious. You can also use 1/2 teaspoon of orange extract.
How do I know when the bread is fully baked?
The bread should be deep golden brown on top and sound hollow when tapped on the bottom. For accuracy, use an instant-read thermometer—the center should read 190°F. If the top is browning too quickly, tent it loosely with foil for the last 10 minutes of baking.
Pin This Recipe!

Classic Pan de Muerto – Soft & Sweet Day of the Dead Bread

This Classic Pan de Muerto is soft, sweet, and deeply aromatic—exactly what Day of the Dead bread should be. The texture is not quite brioche, not quite challah, but somehow better than both, with a fine and tender crumb and a sugary sheen.
- Prep Time: 30 minutes
- Cook Time: 30 minutes
- Total Time: 3 hours 30 minutes (including rising time)
- Yield: 12 servings 1x
- Category: Bread
- Cuisine: Mexican
Ingredients
- 4 cups (500g) bread flour
- 1/2 cup (100g) granulated sugar
- 2 1/4 teaspoons (7g) active dry yeast
- 1/2 cup (120ml) whole milk, warmed to 110°F
- 4 large eggs, room temperature
- 1/2 cup (113g) unsalted butter, softened
- 1 tablespoon orange zest
- 1 teaspoon orange blossom water
- 1/2 teaspoon anise seed, lightly crushed
- 1 teaspoon salt
- 2 tablespoons unsalted butter, melted (for topping)
- 2 tablespoons granulated sugar (for topping)
- Optional: 1 tablespoon orange zest mixed into the sugar (for topping)
Instructions
- Bloom the yeast: In the bowl of a stand mixer, combine the warm milk (110°F), 1 tablespoon of the sugar, and the active dry yeast. Stir gently and let sit for 5-10 minutes until foamy.
- Mix the dough: Add the remaining sugar, eggs, orange zest, orange blossom water, crushed anise seed, and salt to the yeast mixture. Stir to combine. Add the bread flour, one cup at a time, mixing on low speed with the dough hook. Once all flour is incorporated, add the softened butter a tablespoon at a time, letting each piece get fully worked in before adding the next (about 3-4 minutes).
- Knead: Knead on medium speed for 8-10 minutes until the dough is smooth, supple, and slightly tacky. It should pass the windowpane test.
- First rise: Shape the dough into a ball and place in a lightly greased bowl. Cover tightly with plastic wrap and let rise in a warm, draft-free spot for 1.5 to 2 hours, or until doubled in size.
- Shape the loaf: Punch down the dough gently. Turn out onto a lightly floured surface. Divide into two pieces: one large piece (about two-thirds) for the main loaf, and one smaller piece (about one-third) for the decorative bone shapes. Shape the large piece into a smooth, round ball and place on a prepared baking sheet. Divide the smaller piece into four equal parts, roll each into a 6-inch long rope, and flatten slightly. Cut small slits along the edges of each rope to resemble bones. Place two…
- Second rise: Cover the shaped loaf loosely with plastic wrap and let rise for another 45 minutes to 1 hour, until puffy and almost doubled.
- Bake: Preheat oven to 350°F (175°C). Brush the risen loaf gently with melted butter. Bake for 25-30 minutes, rotating the pan halfway through, until deep golden brown and hollow when tapped. An instant-read thermometer should read 190°F in the center.
- Finish: Remove from oven and let cool on the pan for 5 minutes, then transfer to a cooling rack. While still warm, brush with more melted butter and sprinkle generously with sugar. Let cool completely before slicing (about 2 hours).
Notes
Temperature matters: use warm milk (110°F), room-temperature eggs, and softened butter. Don’t over-flour your work surface. Watch the anise seed—a little goes a long way. Use the oven light for proofing if your kitchen is cold. Brush with butter twice: once before baking for a golden crust, and once after baking for the sugar to stick. Make the bone shapes thicker than you think (about 3/4 inch thick) so they don’t disappear during baking. Never skip the salt. The bread develops a more pronounced orange flavor after a day. Store in an airtight container at room temperature for up to 3 days. Freezes well for up to 3 months.
Nutrition
- Serving Size: 1 slice (1/12 of loa
- Calories: 280
- Sugar: 18
- Sodium: 200
- Fat: 10
- Saturated Fat: 6
- Carbohydrates: 42
- Fiber: 2
- Protein: 7
Keywords: Pan de Muerto, Day of the Dead bread, Mexican bread, orange bread, anise bread, holiday bread, traditional Mexican bread


