I want to make something that feels like Halloween but doesn’t taste like candy. That’s the thought running through my head at 4:30 PM on a random Tuesday in October. The kids are going to be starving in an hour, and I know if I don’t feed them something real before the sugar rush begins, we’re all going to regret it. I have tortillas. I have cheese. I have a bell pepper sitting in the crisper drawer. And honestly—that’s enough.
This is how the Easy Jack-o’-Lantern Quesadillas for Kids were born. Not from a fancy test kitchen or a curated holiday menu. Just a mom staring into her fridge, trying to find a way to make dinner fun without making it complicated. The idea hit me when I spotted a pumpkin-shaped cookie cutter buried in the back of my baking drawer. I thought, why can’t a quesadilla wear a costume too?
So I cut a face into one tortilla, sandwiched it with cheese, and toasted it until the edges got crispy and the cheese turned all gooey. When I flipped it over, that little jack-o’-lantern face was staring right back at me—golden brown and grinning. The kids lost their minds. My four-year-old asked if we could have “Halloween quesadillas” every single day from now until November. And honestly? I might just do it.
These quesadillas are the kind of recipe that makes you feel like a hero without breaking a sweat. They take ten minutes, use ingredients you already have, and turn an ordinary weeknight into something that feels like a party. No complicated techniques, no special equipment (unless you count a cookie cutter), and absolutely zero stress. Let me show you how easy this really is.
Why You’ll Love This Recipe
I’ve tested this recipe more times than I care to admit—mostly because my kids kept requesting it for lunch, snack time, and apparently breakfast too. Here’s why it works so well:
- Quick & Easy: From start to finish, these quesadillas are ready in under 10 minutes. That’s faster than ordering takeout and way more fun.
- Simple Ingredients: You probably have everything in your kitchen right now. Tortillas, cheese, and a bell pepper or olive for the face. That’s it.
- Perfect for Halloween: Whether you’re hosting a spooky playdate, need a school lunch surprise, or just want to make October 31st feel special without the sugar crash, these deliver.
- Crowd-Pleaser: I’ve served these to picky eaters, vegetable-haters, and kids who “don’t like cheese” (which still confuses me). Every single one disappeared.
- Unbelievably Delicious: The crispy tortilla, the melty cheese, that slightly charred edge where the face is cut out—it’s simple comfort food at its absolute best.
What makes this recipe different from every other quesadilla out there? It’s the presentation. That silly little pumpkin face turns a regular snack into an experience. Kids don’t just eat these—they smile at them first. And honestly, that’s the whole point. This isn’t about being fancy. It’s about making something that feels special when the season calls for it.
These quesadillas are the kind of thing you’ll make on a whim and then realize you’ve made them four times in one week. They’re comfort food with a costume, and I promise you—the first bite will make you grin right back.
What Ingredients You Will Need
This recipe uses the simplest ingredients to create something that feels magical. No fancy grocery store trips required. Here’s what you’ll need:
For the Quesadillas
- Flour tortillas (8-inch works best; soft taco size gives you plenty of room for the face)
- Shredded cheddar cheese (Mexican blend or Colby Jack also work great)
- Butter or cooking spray (for crisping the outside)
For the Jack-o’-Lantern Faces
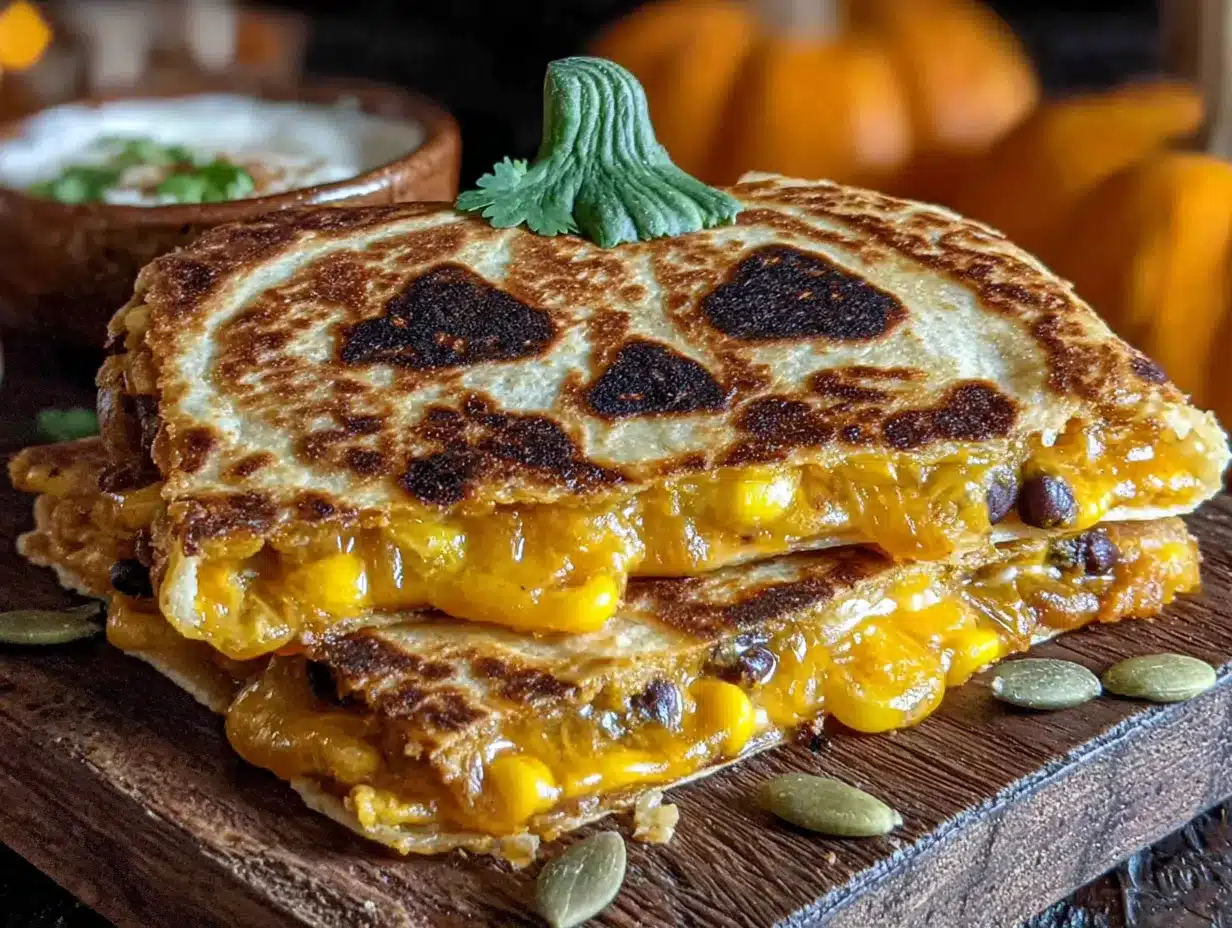
- Black olives (sliced, for eyes and mouth—I prefer canned sliced olives for convenience)
- Red bell pepper (cut into small triangles for the nose; orange pepper works too if you want it to match)
That’s genuinely it. You could also use roasted red pepper strips from a jar if you don’t have fresh bell peppers on hand. For the eyes, black beans make a great substitute if olives aren’t your thing. I’ve even used small pieces of nori (seaweed) in a pinch, and it worked surprisingly well.
Let’s talk cheese for a second. I recommend sharp cheddar because it melts beautifully and has that bold flavor that stands up to the tortilla. But honestly, whatever melting cheese you have in the fridge will work. Mozzarella gives you that incredible stretch. Pepper jack adds a little kick if you’re making these for adults. Pre-shredded cheese is fine—I use it all the time—but freshly shredded melts just a bit smoother if you have the extra minute.
For the tortillas, flour tortillas are my go-to because they get crispy without turning brittle. Corn tortillas work too, but they’re smaller and tend to crack when you try to cut the face. Stick with flour for the best results, especially if you’re making these with little kids who might be a bit rough with the cookie cutter.
Equipment Needed
You don’t need much to make these quesadillas happen. Here’s what I use:
- Large non-stick skillet or griddle (cast iron works beautifully too, just watch the heat)
- Pumpkin-shaped cookie cutter (about 3-4 inches wide; any fall-themed shape works if you don’t have a pumpkin)
- Small paring knife (for cutting the face features if you’re freehanding it)
- Spatula (a thin metal one works best for flipping)
- Cutting board (for assembling)
If you don’t have a pumpkin cookie cutter, don’t worry. I’ve made these with a sharp knife and a steady hand many times. Just trace a simple pumpkin shape freehand—it doesn’t have to be perfect. Imperfect pumpkins have more character anyway. I actually prefer the look of hand-cut pumpkins sometimes. They feel more homemade, you know?
One tip: if you’re using a cast iron skillet, keep the heat on medium-low. Cast iron holds heat really well, and you don’t want the tortilla to burn before the cheese melts. Non-stick skillets are more forgiving for beginners.
Preparation Method
Let me walk you through this step by step. I promise it’s easier than it looks.
- Prep your tortillas. Lay one tortilla flat on your cutting board. Use your pumpkin cookie cutter to press firmly through the center, cutting out a pumpkin shape. Set the pumpkin cutout aside—you’ll toast it separately as a bonus piece. Repeat with as many tortillas as you’re making. For a family of four, I usually make two quesadillas and cut them into quarters.
- Cut the jack-o’-lantern face. Using a small paring knife, cut simple Halloween faces into the tortilla with the pumpkin cutout. Two triangle eyes and a zigzag mouth are the classic look. You can also do round eyes and a big open smile. Let the kids draw the face with a toothpick first if they want to help—it’s a great way to get them involved without sharp knives.
- Assemble the quesadilla. Place the face-cut tortilla on your work surface. Sprinkle a generous layer of shredded cheese evenly across the entire tortilla—about 1/3 cup per quesadilla. Make sure the cheese goes right up to the edges so it melts and seals everything together. Place a second whole tortilla on top, pressing down gently.
- Heat your pan. Place your skillet over medium heat. Add a small pat of butter (about 1 teaspoon) or a quick spray of cooking oil. Let it melt and coat the surface evenly. You want the pan hot but not smoking—medium heat is your friend here.
- Cook the quesadilla. Carefully transfer the assembled quesadilla to the hot skillet. Cook for 2-3 minutes, or until the bottom is golden brown and crispy. You’ll see the cheese starting to melt around the edges. Use your spatula to peek underneath—if it’s golden, it’s ready to flip.
- Flip and finish. Carefully flip the quesadilla using your spatula. Cook for another 2-3 minutes on the second side. The cheese should be fully melted and oozing out the edges just a little. If the tortilla is browning too fast, lower the heat. Patience is key here—you want crispy, not burnt.
- Toast the pumpkin cutout. While the quesadilla is cooking, toss that pumpkin-shaped piece of tortilla into the pan too. It only needs about 30 seconds per side. It’ll be a crispy little bonus piece that the kids will fight over. (Pro tip: make extra cutouts on purpose.)
- Add the face details. Transfer the cooked quesadilla to a cutting board. Let it rest for 30 seconds—this helps the cheese set so it doesn’t all slide out when you cut it. Place sliced black olives on the face openings for eyes and a mouth. Add a small triangle of red bell pepper for the nose. Press them in gently so they stick.
- Cut and serve. Use a sharp knife or pizza cutter to slice the quesadilla into wedges. I usually cut mine into quarters, but you can do smaller pieces for little hands. Serve warm, with the toasted pumpkin cutout on the side for a fun surprise.
One thing I learned the hard way: don’t overstuff the quesadilla with cheese. I know it’s tempting, but too much cheese makes it hard to flip and everything gets messy. A thin, even layer is all you need. The cheese should act like glue, not a filling.
Cooking Tips & Techniques
After making these probably fifty times (not exaggerating), I’ve picked up a few tricks that make the whole process smoother:
Low and slow is your friend. I know you’re hungry, but resist the urge to crank up the heat. Medium heat gives the cheese time to melt completely while the tortilla gets perfectly golden. High heat burns the outside and leaves you with cold cheese in the middle. Trust me on this—I’ve burned more quesadillas than I’d like to admit.
Press down gently while cooking. Use your spatula to press the quesadilla down once or twice during cooking. This helps the cheese spread evenly and ensures the two tortillas stick together. Don’t smash it—just a gentle press.
Let the cheese set before cutting. This was a game-changer for me. If you cut the quesadilla immediately after it comes off the heat, all the cheese oozes out and you’re left with sad, empty tortillas. Give it 30-60 seconds on the cutting board. The cheese will still be warm and gooey, but it won’t run away from you.
Make extra cutouts. I always cut pumpkins out of two or three extra tortillas and toast them alongside the quesadillas. They’re like tortilla chips with personality. My kids call them “pumpkin crackers” and they disappear before the actual quesadillas do.
Prep the faces ahead of time. If you’re making these for a Halloween party or a big group, cut all the faces and prep all the tortillas beforehand. Stack them with parchment paper between each layer. Then all you have to do is assemble and cook. It makes the whole process feel effortless.
Use room temperature tortillas. Cold tortillas straight from the fridge are stiff and crack easily when you try to cut the face. Let them sit on the counter for 10 minutes before you start. If you’re in a hurry, pop them in the microwave for 10 seconds to soften them up.
Variations & Adaptations
One of the best things about this recipe is how easy it is to change up. Here are some of my favorite variations:
Spooky Ghost Quesadillas: Instead of a pumpkin shape, use a ghost cookie cutter. Cut round eyes and an oval mouth. Use cream cheese mixed with a little garlic powder for the filling. It’s a completely different vibe but just as fun.
Monster Face Quesadillas: Skip the cookie cutter altogether and just cut the tortilla into a round shape. Use sliced black olives for eyes, a strip of red pepper for a mouth, and small pieces of fresh cilantro for “monster hair” sticking out the top. My son insists these are “scarier” than the pumpkins.
Bat Wing Quesadillas: Cut the tortilla into a bat shape using a template you draw freehand. Fill with refried beans and pepper jack cheese for a savory twist. Serve with a side of salsa for dipping. These are great for a Halloween movie night.
Gluten-Free Option: Use gluten-free tortillas—they work exactly the same way. Just be gentle when flipping because gluten-free tortillas can be a bit more fragile. I’ve used both corn tortillas and store-bought GF flour tortillas with great results.
Dairy-Free Version: Swap the cheddar for your favorite dairy-free shredded cheese. Most plant-based cheeses melt well these days. Just keep an eye on the heat—dairy-free cheese can burn faster than regular cheese.
Protein-Packed Option: Add a thin layer of refried beans, shredded chicken, or crumbled cooked sausage before adding the cheese. It turns these from a snack into a full meal. I’ve done this for lunch many times and it always hits the spot.
Sweet Version: This is wild but hear me out. Use a flour tortilla, spread a thin layer of Nutella or peanut butter, add sliced bananas, and cook the same way. Cut into pumpkin shapes and dust with powdered sugar. It’s like a Halloween dessert quesadilla, and it’s absolutely ridiculous in the best way.
Serving & Storage Suggestions
These quesadillas are best served warm, right off the skillet. That’s when the cheese is at its stretchiest and the tortilla is perfectly crispy. But let me give you some ideas for serving them up.
For dipping: Serve with a side of warm salsa, sour cream, or guacamole. My kids love dipping them in ranch dressing—don’t judge me, it works. For a slightly healthier option, try plain Greek yogurt mixed with a pinch of salt and garlic powder.
For a complete meal: Pair these with a simple side salad or a bowl of black bean soup. The healthy turkey chili from this site is a perfect match—it’s hearty, warming, and feels very Halloween-appropriate. You could also serve them alongside easy candy corn bark for a full spooky spread.
For a Halloween party: Cut the quesadillas into smaller pieces and arrange them on a platter in the shape of a pumpkin. Add a small bowl of dipping sauce in the center. It looks adorable and kids love grabbing their own pieces.
For lunchboxes: These quesadillas actually hold up pretty well at room temperature. Let them cool completely before packing. Wrap them in foil or parchment paper. They won’t be crispy anymore, but they’ll still taste great. I’ve sent these in school lunches more times than I can count.
Storage: Leftover quesadillas can be stored in an airtight container in the refrigerator for up to 3 days. To reheat, place them back in a dry skillet over medium heat for 2-3 minutes per side. The microwave works in a pinch, but the tortilla will be soft instead of crispy. If you’re reheating multiple quesadillas, pop them in a 350°F oven for 5-7 minutes—they’ll crisp right back up.
Freezer instructions: These freeze surprisingly well. Let the cooked quesadillas cool completely, then wrap each one tightly in plastic wrap and place them in a freezer bag. They’ll keep for up to 2 months. To reheat from frozen, place them directly in a skillet over medium-low heat, cover with a lid, and cook for 4-5 minutes per side. The lid traps steam and helps the cheese melt evenly.
Nutritional Information & Benefits
Let’s be real—these are quesadillas. They’re not health food, but they’re not junk either. Here’s what you’re looking at per serving (one quarter of a quesadilla):
| Nutrient | Amount |
|---|---|
| Calories | 180-200 |
| Total Fat | 10g |
| Saturated Fat | 5g |
| Carbohydrates | 16g |
| Protein | 8g |
| Calcium | 150mg (15% DV) |
| Sodium | 320mg |
The cheese provides a good amount of calcium and protein, which is great for growing kids. The bell pepper adds a small boost of vitamin C. If you use whole wheat tortillas, you’ll get some extra fiber too.
For dietary considerations: these are vegetarian as written. To make them gluten-free, use corn or gluten-free tortillas. To make them dairy-free, use plant-based cheese. They are nut-free as long as you don’t add any nut-based ingredients.
If you’re watching sodium, use low-sodium cheese and skip the salt. The olives already add plenty of flavor. And if you’re looking to boost the nutrition, add some black beans or finely chopped spinach to the cheese layer before cooking. The kids won’t even notice the spinach—it just looks like green flecks in the cheese.
Frequently Asked Questions
Can I make these ahead of time for a party?
Absolutely. Cook them fully, let them cool, and store them in the fridge. Reheat in a 350°F oven for 5-7 minutes right before serving. They’ll crisp right back up.
What if I don’t have a pumpkin cookie cutter?
No problem at all. Use a sharp knife to cut a simple pumpkin shape freehand. You can also use any fall-themed cookie cutter—leaves, acorns, or even a simple circle with a face cut into it works perfectly.
Can I use corn tortillas instead of flour?
Yes, but they’re smaller and more fragile. Corn tortillas tend to crack when you cut the face, so be gentle. I recommend using a very sharp knife and cutting slowly. They also cook faster, so keep an eye on them.
My cheese isn’t melting all the way. What am I doing wrong?
Your heat is probably too high. The outside of the tortilla is cooking too fast, leaving the cheese no time to melt. Lower the heat to medium-low and cover the pan with a lid for the last minute of cooking. The trapped steam will help the cheese melt without burning the tortilla.
Can I add meat to these?
Definitely. Cooked ground beef, shredded chicken, crumbled sausage, or even diced ham work great. Just make sure the meat is fully cooked before you add it to the quesadilla. I like to add a layer of meat, then cheese, then another thin layer of meat. It distributes everything evenly.
Conclusion
These Easy Jack-o’-Lantern Quesadillas for Kids are proof that Halloween doesn’t have to be complicated to be special. They take ten minutes, use ingredients you already have, and turn an ordinary weeknight into something that feels like a celebration. The kids will smile. You’ll feel like a rockstar. And nobody has to eat another piece of candy.
I love this recipe because it’s flexible. You can make it as simple or as fancy as you want. You can involve the kids in cutting the faces or do it yourself while they watch. You can serve it for dinner, lunch, or an after-school snack. It works every single time.
So go ahead—raid your fridge, grab those tortillas, and make some magic happen. And when you do, I’d love to hear about it. Drop a comment below and tell me what faces your kids came up with. Did they go classic triangle eyes? Did they try a scary monster mouth? Did they eat the pumpkin cutout before the quesadilla was even done? (Mine did. Every single time.)
Happy Halloween, friends. May your cheese be melty, your tortillas be crispy, and your jack-o’-lanterns be grinning right back at you.
Pin This Recipe!
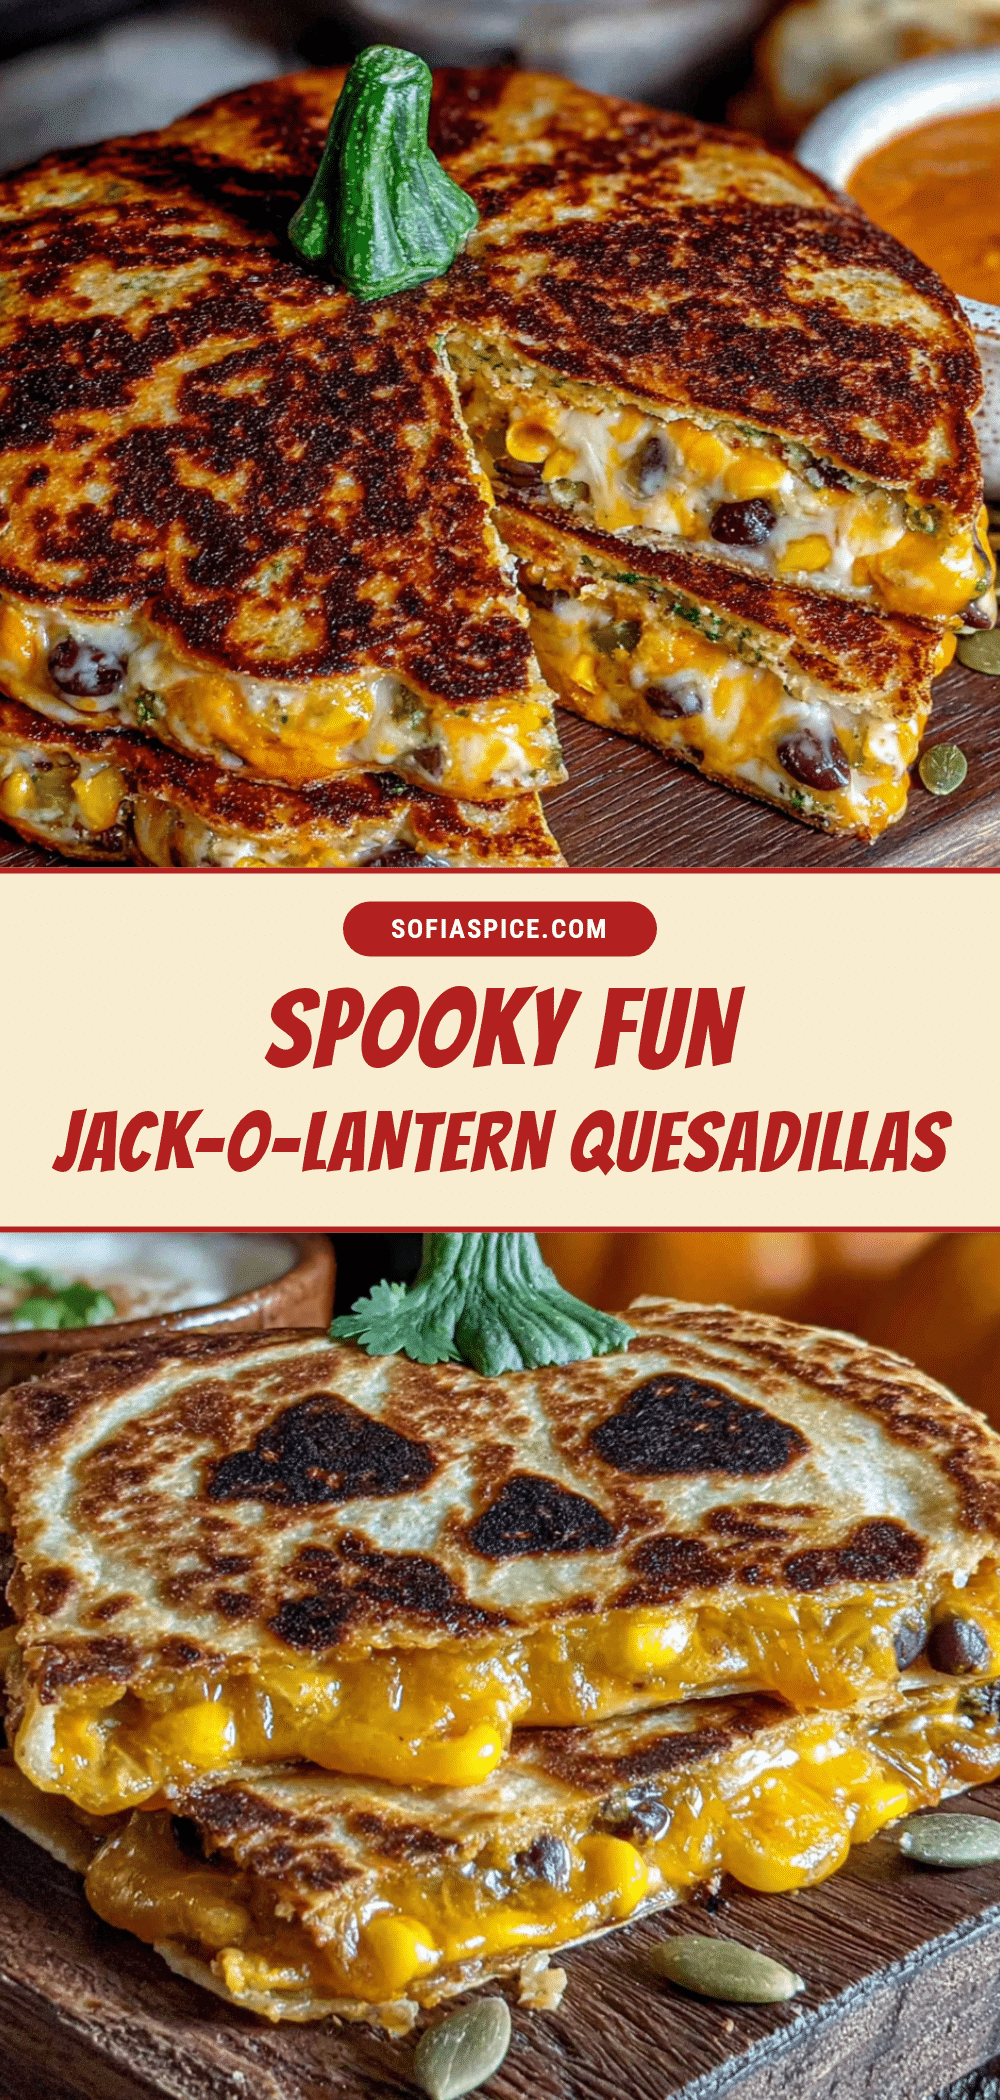
Easy Jack-o-Lantern Quesadillas for Kids – Best Halloween Snack Recipe
These Easy Jack-o’-Lantern Quesadillas for Kids are proof that Halloween doesn’t have to be complicated to be special. They take ten minutes, use ingredients you already have, and turn an ordinary weeknight into something that feels like a celebration.
- Prep Time: 5 minutes
- Cook Time: 6 minutes
- Total Time: 11 minutes
- Yield: 4 servings (2 quesadillas, each cut into quarters)
- Category: Snack
- Cuisine: Mexican-American
Ingredients
- Flour tortillas (8-inch, soft taco size)
- Shredded cheddar cheese (about 1/3 cup per quesadilla; Mexican blend or Colby Jack also work)
- Butter or cooking spray (for crisping the outside)
- Black olives (sliced, for eyes and mouth)
- Red bell pepper (cut into small triangles for the nose; orange pepper works too)
Instructions
- Prep your tortillas. Lay one tortilla flat on your cutting board. Use your pumpkin cookie cutter to press firmly through the center, cutting out a pumpkin shape. Set the pumpkin cutout aside—you’ll toast it separately as a bonus piece. Repeat with as many tortillas as you’re making. For a family of four, I usually make two quesadillas and cut them into quarters.
- Cut the jack-o’-lantern face. Using a small paring knife, cut simple Halloween faces into the tortilla with the pumpkin cutout. Two triangle eyes and a zigzag mouth are the classic look. You can also do round eyes and a big open smile. Let the kids draw the face with a toothpick first if they want to help—it’s a great way to get them involved without sharp knives.
- Assemble the quesadilla. Place the face-cut tortilla on your work surface. Sprinkle a generous layer of shredded cheese evenly across the entire tortilla—about 1/3 cup per quesadilla. Make sure the cheese goes right up to the edges so it melts and seals everything together. Place a second whole tortilla on top, pressing down gently.
- Heat your pan. Place your skillet over medium heat. Add a small pat of butter (about 1 teaspoon) or a quick spray of cooking oil. Let it melt and coat the surface evenly. You want the pan hot but not smoking—medium heat is your friend here.
- Cook the quesadilla. Carefully transfer the assembled quesadilla to the hot skillet. Cook for 2-3 minutes, or until the bottom is golden brown and crispy. You’ll see the cheese starting to melt around the edges. Use your spatula to peek underneath—if it’s golden, it’s ready to flip.
- Flip and finish. Carefully flip the quesadilla using your spatula. Cook for another 2-3 minutes on the second side. The cheese should be fully melted and oozing out the edges just a little. If the tortilla is browning too fast, lower the heat. Patience is key here—you want crispy, not burnt.
- Toast the pumpkin cutout. While the quesadilla is cooking, toss that pumpkin-shaped piece of tortilla into the pan too. It only needs about 30 seconds per side. It’ll be a crispy little bonus piece that the kids will fight over. (Pro tip: make extra cutouts on purpose.)
- Add the face details. Transfer the cooked quesadilla to a cutting board. Let it rest for 30 seconds—this helps the cheese set so it doesn’t all slide out when you cut it. Place sliced black olives on the face openings for eyes and a mouth. Add a small triangle of red bell pepper for the nose. Press them in gently so they stick.
- Cut and serve. Use a sharp knife or pizza cutter to slice the quesadilla into wedges. I usually cut mine into quarters, but you can do smaller pieces for little hands. Serve warm, with the toasted pumpkin cutout on the side for a fun surprise.
Notes
Don’t overstuff the quesadilla with cheese; a thin, even layer is all you need. Let the cheese set for 30-60 seconds before cutting to prevent it from oozing out. Use room temperature tortillas to prevent cracking. For best results, cook on medium heat to ensure cheese melts completely without burning the tortilla. Make extra pumpkin cutouts for bonus crispy pieces.
Nutrition
- Serving Size: 1 quarter of a quesa
- Calories: 190
- Sugar: 1
- Sodium: 320
- Fat: 10
- Saturated Fat: 5
- Carbohydrates: 16
- Fiber: 1
- Protein: 8
Keywords: Halloween quesadillas, jack-o-lantern quesadillas, easy Halloween snack, kid-friendly Halloween recipe, quick Halloween dinner, spooky quesadillas, Halloween lunch ideas


