That faint, sweet whistle of hot sugar hitting cold air — the sound that always meant my grandmother was pulling a tray of meringues from the oven — still stops me mid-step. It’s a sound that cuts through the noise of a busy kitchen, promising something light, airy, and almost impossibly delicate. I can still see her, flour dusted on her apron, pulling apart a meringue shell with her hands, the inside soft and marshmallowy, the outside crisp and ready to shatter. It was never about the recipe with her; it was about the feel. The way the egg whites stiffened under her wrist, the precise moment they held a peak without weeping. I never wrote a single thing down.
So when I started making these Easy Ghost Meringue Cookies with Chocolate Chip Eyes, it wasn’t from a place of wanting to be cute (though, let’s be honest, they are). It was from missing that sound. I wanted a cookie that felt like a ghost — light enough to float, sweet enough to satisfy, and just a little bit spooky without being over the top. The chocolate chip eyes are the punchline, the little detail that makes kids laugh and adults smile. But the cookie itself? That’s pure, unapologetic meringue, done right.
These aren’t your average Halloween treats. They’re not loaded with butter or drowning in dye. They’re ethereal. They’re the kind of cookie you can eat three of without feeling heavy, which is honestly a superpower during a season of candy corn and caramel apples. I’ve tested this batch more times than I can count — too flat, too sticky, not sweet enough, eyes that sank like tiny, sad ships — and this version is the one that finally made me feel like I was back in her kitchen. It’s simple, it’s reliable, and it’s the perfect way to make a little kitchen magic.
Why You’ll Love This Recipe
Let me tell you why this recipe has become my go-to for Halloween gatherings, school parties, and even just a quiet Tuesday night when I need a little whimsy. First off, these ghost meringues are surprisingly sturdy for something that’s mostly air. They hold their shape beautifully, and the chocolate chip eyes stay put — no sliding, no sinking, just perfect little faces staring back at you.
- Quick & Easy: From start to finish, you’re looking at about 2 hours, but most of that is hands-off baking time. The active prep takes maybe 15 minutes. Perfect for when you need a last-minute Halloween treat.
- Simple Ingredients: You probably have everything in your pantry right now. Eggs, sugar, vanilla, cream of tartar, and chocolate chips. No special trips to the store, no obscure extracts.
- Perfect for Halloween: These are the star of any spooky spread. They’re adorable, they’re photogenic, and they’re a welcome break from the usual sugar overload of Halloween candy.
- Crowd-Pleaser: I’ve served these to kids who thought they didn’t like meringue and adults who claimed they were “too fancy.” Everyone loves them. The texture is addictive — crisp on the outside, chewy in the middle.
- Unbelievably Delicious: The flavor is pure vanilla sweetness, light as a cloud, with the rich little pop of dark chocolate from the eyes. It’s a combination that’s simple but absolutely perfect.
What makes this recipe different from the dozens of other ghost meringue recipes out there? It’s the technique. I’ve perfected the method for getting that glossy, stiff peak meringue that doesn’t deflate when you pipe it. The secret is in the slow, steady addition of sugar and the patience to let the egg whites come to room temperature. I’ve also nailed the baking temperature so the ghosts stay ghostly white, not toasted brown. This isn’t just another version — it’s the one that works every single time.
Honestly, this is the kind of recipe that makes you feel like a kitchen wizard. It’s impressive enough to bring to a party, but simple enough to make with your kids on a rainy afternoon. And that first bite — that delicate crunch that melts into nothing — it’s pure joy. It’s comfort food reimagined as a cloud.
What Ingredients You Will Need
This recipe uses simple, pantry-friendly ingredients to create something that feels genuinely magical. The magic is in the technique, not the shopping list, which is exactly what I love about it.
- 4 large egg whites, at room temperature: This is non-negotiable. Room temperature egg whites whip up to a much greater volume than cold ones, giving you a lighter, airier meringue. Separate your eggs when they’re cold (it’s easier), then let the whites sit on the counter for about 30 minutes before you start. I’ve found that using fresh eggs (not the carton kind) gives the best structure.
- 1 cup (200g) granulated sugar: Regular white sugar is perfect here. Don’t use powdered sugar — it contains cornstarch, which will mess with the texture. I actually prefer to use superfine sugar if I can find it, or I’ll pulse my granulated sugar in the food processor for a few seconds to make it finer. It dissolves faster and gives a smoother meringue.
- 1/2 teaspoon cream of tartar: This is the stabilizer that keeps your meringue from weeping or collapsing. If you don’t have it, you can substitute with 1 teaspoon of lemon juice or white vinegar, but I really recommend cream of tartar for the most reliable results.
- 1 teaspoon pure vanilla extract: I use pure vanilla extract, not imitation. The flavor is noticeably richer and more complex. You can also use the seeds from half a vanilla bean for a more speckled, gourmet look.
- 1/4 cup (45g) mini chocolate chips: These are for the eyes. I prefer mini chips because they’re the perfect size for little ghost faces. Dark chocolate chips give a nice contrast against the white meringue, but milk chocolate works too. Make sure they’re not too large or they’ll sink into the meringue as it bakes.
Ingredient Selection Tips: For the best results, use fresh, high-quality eggs. The fresher the eggs, the stiffer the whites will whip. I also recommend using a kitchen scale for the sugar — it’s more accurate than measuring cups and ensures the right sweetness and structure. If you’re in a humid climate, you might need to add an extra minute or two of baking time to ensure the meringues are fully dried out.
Equipment Needed
You don’t need a lot of fancy equipment for this recipe, which is part of its charm. Here’s what you’ll need:
- Electric stand mixer or hand mixer: While you can whip egg whites by hand with a whisk, I don’t recommend it for this recipe. You need to whip them to stiff peaks, and that takes a solid 8-10 minutes of continuous mixing. A stand mixer with the whisk attachment is ideal, but a hand mixer works perfectly too.
- Large mixing bowl: Make sure it’s spotlessly clean and completely dry. Any trace of grease or moisture will prevent your egg whites from whipping up properly. I like to wipe my bowl and whisk attachment with a little lemon juice or vinegar before starting.
- Piping bag with a large round tip: I use a Wilton 1A tip for the ghost shapes. If you don’t have a piping bag, you can use a sturdy zip-top bag with the corner snipped off. It won’t be as precise, but it will still work.
- Baking sheets lined with parchment paper: Parchment is essential — it prevents sticking and makes cleanup a breeze. Don’t use wax paper or greased foil, as the meringues will stick.
- Kitchen scale (optional but recommended): For measuring sugar accurately. It makes a difference in the final texture.
Budget-Friendly Options: If you don’t have a piping bag, a zip-top bag really does work in a pinch. Just be careful not to squeeze too hard, or the bag might burst. I’ve also used a small cookie scoop to drop dollops of meringue onto the baking sheet and then shaped them into ghosts with a spatula. It’s less uniform, but they end up looking charmingly handmade.
Preparation Method
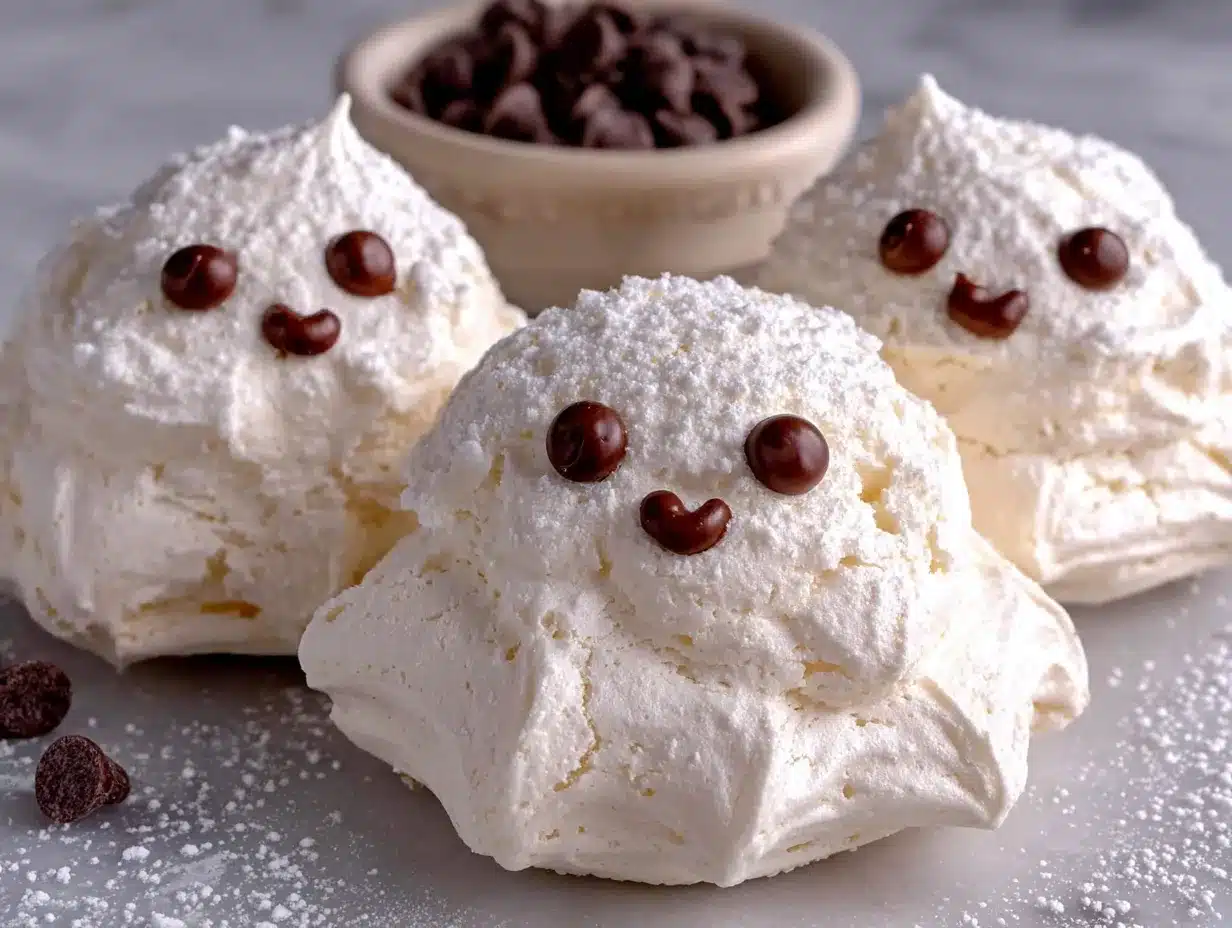
Alright, let’s get to the fun part. I’m going to walk you through every step so you end up with perfect little ghosts that are crisp on the outside and marshmallowy on the inside.
- Preheat your oven to 200°F (93°C). Yes, this is a very low temperature. We’re not so much baking the meringues as we are drying them out. Line two large baking sheets with parchment paper and set them aside.
- Prepare your egg whites. Place your room temperature egg whites and cream of tartar in the clean, dry bowl of your stand mixer. Start mixing on medium speed until the mixture becomes foamy and starts to turn white, about 2 minutes. You’ll see small bubbles forming — that’s the air starting to get incorporated.
- Gradually add the sugar. This is the most important step. With the mixer running on medium-high speed, start adding the sugar one tablespoon at a time. Wait about 15 seconds between each addition. I know it feels tedious, but this slow incorporation is what gives you a stable, glossy meringue. If you dump all the sugar in at once, your meringue will be grainy and might collapse.
- Whip to stiff peaks. Once all the sugar is added, increase the speed to high and whip for another 5-7 minutes. You’re looking for stiff, glossy peaks that hold their shape when you lift the whisk. The mixture should be thick and marshmallowy. A good test: rub a little bit between your fingers — if it feels smooth and not grainy, the sugar is fully dissolved.
- Add the vanilla. With the mixer on low, add the vanilla extract and mix just until combined. Don’t overmix at this stage, or you’ll deflate all that beautiful air you just whipped in.
- Pipe the ghosts. Transfer the meringue to your piping bag fitted with the large round tip. Hold the bag perpendicular to the baking sheet and pipe a tall, rounded dollop of meringue, about 2 inches wide at the base. To create the ghost shape, pipe a slightly smaller dollop on top, then use the tip to pull up a little point at the top. Don’t worry if they’re not perfect — ghosts are supposed to be a little uneven! Leave about 1 inch of space between each ghost.
- Add the eyes. Gently press two mini chocolate chips into each ghost for eyes. Press them in just enough so they stay put — they shouldn’t be completely buried. I like to place them slightly unevenly for a more whimsical, “spooky” look.
- Bake low and slow. Place the baking sheets in the preheated oven and bake for 1 hour and 15 minutes to 1 hour and 30 minutes. The meringues should be dry to the touch and easily lift off the parchment paper. They shouldn’t be browned at all — if they start to take on color, your oven is too hot.
- Cool completely in the oven. This is a pro tip. Turn the oven off and leave the meringues inside with the door slightly ajar (use a wooden spoon to prop it open) for at least 1 hour, or until they’re completely cool. This gradual cooling prevents cracking and ensures they’re perfectly dry all the way through.
Sensory Cues: At the stiff peak stage, the meringue should feel like shaving cream — thick, glossy, and almost silky. When you pipe it, it should hold its shape without spreading. During baking, you’ll notice the meringues puff up slightly and then settle. They’re done when they feel light as air and lift off the parchment without sticking.
Cooking Tips & Techniques
I’ve made a lot of mistakes with meringue over the years, and I’m here to save you from the same fate. Here are my best tips for perfect ghost meringues every time.
The Humidity Factor: Meringue is notoriously finicky in humid weather. If it’s a rainy or overly humid day, your meringues might end up sticky or weepy. To combat this, add an extra 15-20 minutes to the baking time and make sure they cool completely in the oven. I’ve also found that leaving the oven door slightly ajar during cooling helps release excess moisture.
The Sugar Dissolving Test: I cannot stress this enough — make sure your sugar is fully dissolved before you stop whipping. Rub a tiny bit of the meringue between your thumb and forefinger. If it feels gritty, keep whipping. If it feels smooth and silky, you’re good to go. Undissolved sugar will cause your meringues to weep (release moisture) and become sticky.
Don’t Overbake: The goal is to dry the meringues out, not to brown them. If your meringues start to look tan or golden, your oven is too hot. I recommend using an oven thermometer to make sure your oven is actually at 200°F (93°C). Many ovens run hot, and even 25 degrees can make a difference.
My Biggest Failure: The first time I made these, I was in a hurry and added the sugar all at once. The meringue never got stiff, and I ended up with flat, sticky puddles of sugar and egg white. It was a sad, expensive mess. I learned my lesson the hard way — patience is not optional with meringue. Take your time with the sugar, and you’ll be rewarded with perfect little ghosts.
Timing and Multitasking: While the meringues are baking, you can clean up your kitchen, prep other Halloween treats, or just relax. The long, slow bake time is actually a blessing — it gives you a solid hour and a half of hands-off time. I like to use it to make a batch of easy no-churn salted caramel ice cream for a complete dessert spread.
Variations & Adaptations
One of the best things about this recipe is how easily you can adapt it to your tastes or dietary needs.
Dietary Variations:
- Vegan Meringues: You can make these completely vegan by using aquafaba (the liquid from a can of chickpeas) instead of egg whites. Use 1/2 cup of aquafaba (about the liquid from one can) and whip it with the cream of tartar just like you would egg whites. It takes a little longer to reach stiff peaks, but it works beautifully.
- Gluten-Free: These are naturally gluten-free! Meringue contains no flour, so they’re perfect for anyone avoiding gluten. Just double-check that your chocolate chips are certified gluten-free if that’s a concern.
- Low-Sugar Option: You can reduce the sugar to 3/4 cup (150g), but the meringues will be slightly less stable and might not hold their shape as well. I don’t recommend going lower than that.
Flavor Variations:
- Peppermint Ghosts: Replace the vanilla extract with 1/2 teaspoon of peppermint extract for a cool, minty twist. These are amazing for Christmas too!
- Chocolate Ghosts: Sift 2 tablespoons of unsweetened cocoa powder into the sugar before adding it to the egg whites. You’ll get pale brown ghosts that look like they’ve been playing in the mud.
- Fruity Ghosts: Add a few drops of food coloring (gel works best) to create colored ghosts. Pink or purple ghosts are adorable, and you can use flavored extracts like strawberry or raspberry.
Alternative Cooking Methods: If you don’t want to heat up your oven for that long, you can use a dehydrator. Set it to 135°F (57°C) and dry the meringues for 4-6 hours, or until they’re completely dry and crisp. This method is actually more energy-efficient if you have a dehydrator.
My Personal Variation: I once made a batch with a pinch of cinnamon and a tiny drop of orange extract. They tasted like a creamsicle ghost, and they were gone in about 10 minutes. It’s a weird combination that somehow works perfectly.
Serving & Storage Suggestions
These ghost meringues are best served at room temperature, straight from the oven (after they’ve cooled, of course). They’re perfect on a Halloween dessert table, tucked into a lunchbox for a fun surprise, or packed in a cellophane bag as a party favor.
Serving Temperature: Room temperature is ideal. If you’ve stored them in the fridge or freezer, let them sit out for about 10 minutes before serving. The texture is best when they’re not too cold.
Presentation Ideas: Arrange them on a platter with a “graveyard” theme — use crushed chocolate cookies for “dirt” and add some gummy worms for a fun touch. You can also stick them on sticks to make ghost lollipops, which are a huge hit with kids.
Complementary Dishes: These ghosts pair beautifully with a warm drink like a copycat Starbucks pumpkin cream cold brew for a cozy fall treat. They’re also great alongside a rich, decadent game day giant chocolate chip skillet cookie for a dessert spread that has something for everyone.
Storage Instructions: Store your ghost meringues in an airtight container at room temperature for up to 2 weeks. Do not refrigerate them — the moisture in the fridge will make them sticky and soft. If you live in a humid climate, add a silica gel packet to the container to absorb excess moisture.
Freezing: You can freeze these for up to 3 months. Place them in a single layer in a freezer-safe container, with parchment paper between layers to prevent sticking. Thaw at room temperature for about 30 minutes before serving. The texture will be just as good as fresh.
Flavor Development: Interestingly, the flavor of these meringues actually mellows and becomes more rounded after a day or two. The vanilla seems to deepen, and the chocolate chips get a little softer. They’re still delicious fresh, but I honestly think they’re even better on day two.
Nutritional Information & Benefits
While these are a treat, they’re actually one of the lighter Halloween desserts you can make. Here’s the estimated nutritional breakdown per ghost (based on a batch of 24):
- Calories: 45
- Fat: 0.5g
- Carbohydrates: 10g
- Sugar: 9g
- Protein: 1g
Health Benefits: The main ingredient here is egg whites, which are a fantastic source of high-quality protein. They’re also low in calories and contain no fat or cholesterol, making this a guilt-free indulgence compared to butter-laden cookies or candy bars. The chocolate chips add a small amount of antioxidants, especially if you use dark chocolate.
Dietary Considerations: These are naturally gluten-free, nut-free, and dairy-free (as long as your chocolate chips are dairy-free). They’re also relatively low in calories, which makes them a great option for anyone watching their sugar intake but still wanting a Halloween treat.
Allergen Note: They do contain eggs, so they’re not suitable for anyone with an egg allergy. The vegan aquafaba version is a great alternative for those with egg allergies.
My Wellness Perspective: I believe in balance. These meringues are a treat, but they’re a treat I feel good about giving my family. They’re made from real, simple ingredients, and they don’t leave you with that heavy, over-sugared feeling. Plus, the process of making them is almost meditative — whipping egg whites into a cloud is strangely therapeutic.
Conclusion
These Easy Ghost Meringue Cookies with Chocolate Chip Eyes are more than just a Halloween novelty. They’re a testament to the magic that can happen with just a few simple ingredients and a little patience. They’re light, they’re adorable, and they’re genuinely delicious — a combination that’s surprisingly hard to find in the world of holiday treats.
I hope you give them a try, and I hope you make them your own. Add a little cinnamon, swap the chocolate chips for sprinkles, or pipe them into different shapes. The beauty of this recipe is its flexibility. And if you do make them, I’d love to hear about it. Leave a comment below and tell me how they turned out, or tag me in your photos on social media. Seeing your creations honestly makes my day.
Go ahead, whip up a little kitchen magic. Your ghosts are waiting.
Frequently Asked Questions
Can I make these ghost meringues ahead of time?
Absolutely! In fact, they’re perfect for making a day or two in advance. Store them in an airtight container at room temperature, and they’ll stay crisp for up to two weeks. Just keep them away from humidity.
Why did my meringue turn out sticky or chewy?
This usually happens because of humidity or underbaking. Make sure your meringues are completely dry before you take them out of the oven. If they’re still sticky, pop them back in the oven at 200°F (93°C) for another 15-20 minutes.
Can I use a different type of chocolate for the eyes?
Yes! Mini chocolate chips work best because they’re small and don’t sink, but you can also use regular chocolate chips cut in half, or even candy eyes if you can find them. Just make sure whatever you use is small enough to stay put.
How do I know when the egg whites are at stiff peaks?
When you lift the whisk attachment, the meringue should form a peak that stands straight up and doesn’t flop over. The mixture should also be glossy and smooth, not grainy. If the peak droops, keep whipping.
Can I color the meringue for different holidays?
Definitely! Use gel food coloring (liquid coloring can deflate the meringue) to tint the mixture. Pink for Valentine’s Day, green for Christmas, or orange for Halloween — the possibilities are endless. Just fold the color in gently at the end.
Pin This Recipe!
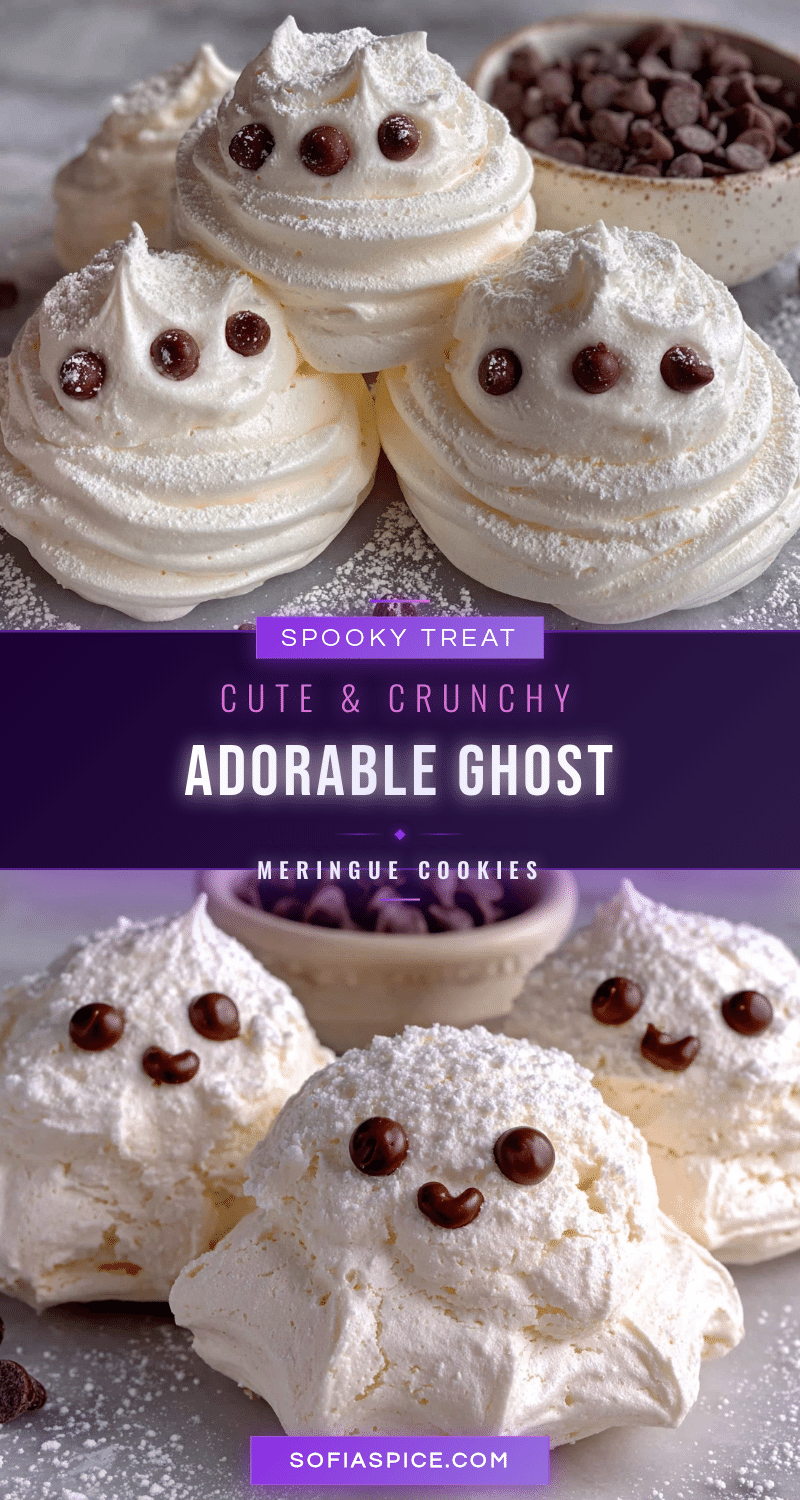
Easy Ghost Meringue Cookies with Chocolate Eyes
Light, airy meringue cookies shaped like ghosts with chocolate chip eyes. A simple, gluten-free Halloween treat that’s crisp on the outside and marshmallowy on the inside.
- Prep Time: 15 minutes
- Cook Time: 1 hour 30 minutes
- Total Time: 2 hours 45 minutes
- Yield: 24 servings 1x
- Category: Dessert
- Cuisine: American
Ingredients
- 4 large egg whites, at room temperature
- 1 cup (200g) granulated sugar
- 1/2 teaspoon cream of tartar
- 1 teaspoon pure vanilla extract
- 1/4 cup (45g) mini chocolate chips
Instructions
- Preheat your oven to 200°F (93°C). Line two large baking sheets with parchment paper.
- Place room temperature egg whites and cream of tartar in the clean, dry bowl of a stand mixer. Mix on medium speed until foamy and starting to turn white, about 2 minutes.
- With the mixer running on medium-high speed, add the sugar one tablespoon at a time, waiting about 15 seconds between each addition.
- Once all sugar is added, increase speed to high and whip for 5-7 minutes until stiff, glossy peaks form. The mixture should be thick and marshmallowy, and feel smooth when rubbed between fingers.
- With the mixer on low, add vanilla extract and mix just until combined.
- Transfer meringue to a piping bag fitted with a large round tip. Pipe tall, rounded dollops about 2 inches wide at the base, then pipe a slightly smaller dollop on top and pull up a little point for the ghost shape. Leave 1 inch of space between ghosts.
- Gently press two mini chocolate chips into each ghost for eyes, pressing just enough so they stay put.
- Bake for 1 hour 15 minutes to 1 hour 30 minutes, until meringues are dry to the touch and easily lift off the parchment. They should not be browned.
- Turn off the oven and leave meringues inside with the door slightly ajar (prop with a wooden spoon) for at least 1 hour, until completely cool.
Notes
For best results, use room temperature egg whites and add sugar slowly. In humid weather, add 15-20 minutes to baking time. Store in an airtight container at room temperature for up to 2 weeks. Do not refrigerate.
Nutrition
- Serving Size: 1 ghost cookie
- Calories: 45
- Sugar: 9
- Sodium: 15
- Fat: 0.5
- Carbohydrates: 10
- Protein: 1
Keywords: ghost meringue cookies, Halloween cookies, meringue cookies, gluten-free Halloween treat, easy meringue recipe


