That first crack of a buttered knife against a cold stick of butter — the kind that gives way with a soft, yielding resistance — still takes me straight to my grandmother’s kitchen on a rainy Sunday afternoon. She wasn’t one for fussy recipes, but she knew butter. She knew that letting it brown, letting it bubble and pop and turn the color of hazelnuts, was the difference between a cookie you eat and a cookie you remember. I was maybe eight, standing on a step stool, watching her scrape those dark flecks into a mixing bowl, and I didn’t know why she was doing it. I just knew the kitchen smelled like something I wanted to keep forever.
Years later, after countless batches of flat, too-sweet, or just-boring cookies, I finally understood what she was doing. She wasn’t just making dessert. She was building flavor from the ground up. And honestly? It took me a few burnt pans and a lot of trial and error to get it right. But once I nailed these Perfect Brown Butter Chocolate Chunk Cookies, I knew I’d never go back to plain butter again.
These cookies are the kind that make you pause mid-bite. The edges are crisp, the centers are soft, and the chocolate — well, we’re not using chips here. We’re using real chunks of dark chocolate that melt into puddles. That nutty, caramel-like flavor from the brown butter wraps around every bite, and the texture is just… right. Not cakey, not greasy, just chewy in that way that feels like a hug. This isn’t a complicated recipe, but it’s one that asks you to pay attention. And I promise, it’s worth every second.
Why You’ll Love This Recipe
I’ve tested this recipe at least a dozen times. I’ve tried it with cold butter, melted butter, browned butter that sat too long, and butter I rushed through. I’ve made it for cookie swaps, for lazy Sundays, and for that one time I needed to impress my in-laws. Every single time, these cookies disappear. There’s something about that brown butter — it’s not just an ingredient, it’s a secret weapon.
- Quick & Easy: From start to finish, you’re looking at about 30 minutes of active work. The dough needs a quick chill, but that’s mostly hands-off time. Perfect for when you need cookies fast but still want them to taste like you spent all day.
- Simple Ingredients: You probably have everything already. Butter, sugar, eggs, flour, vanilla, salt, and a good bar of chocolate. No weird gums, no specialty flours, no trips to three different stores.
- Perfect for Any Occasion: These cookies are just as at home on a holiday cookie platter as they are on a Tuesday night with a glass of milk. They’re sturdy enough to mail to a friend, elegant enough for a party, and comforting enough for a solo binge-watch session.
- Crowd-Pleaser: I’ve yet to meet someone who doesn’t go back for a second one. The combination of nutty butter and melty chocolate is basically universal. Kids love them, adults love them, and people who claim they “don’t have a sweet tooth” somehow find room.
- Unbelievably Delicious: That first bite — the way the edge shatters and the center gives way — it’s next-level. The brown butter adds a depth that regular cookies just can’t touch. It’s the difference between a good cookie and one people ask you to bring to every gathering.
What makes this recipe different? It’s not just another chocolate chip cookie recipe. It’s the technique. We’re browning the butter, which sounds fancy but is actually dead simple. We’re using chopped chocolate instead of chips, which means every bite has a different chocolate-to-dough ratio. And we’re chilling the dough just long enough to develop that perfect texture. This isn’t a cookie you rush through — it’s a cookie you savor making, and then you savor eating.
Honestly, this recipe is comfort food reimagined. It’s familiar but better. It’s the kind of cookie that makes you close your eyes after the first bite, and that’s not an exaggeration. I’ve done it. You’ll do it too.
What Ingredients You Will Need
This recipe uses simple, wholesome ingredients to deliver bold flavor and satisfying texture without the fuss. Most of these are pantry staples, but a few notes will help you get the best results. Trust me, the quality of your butter and chocolate matters here.
- Unsalted butter (1 cup / 226g): This is the star of the show. Use unsalted so you can control the salt level. I prefer Kerrygold or Plugrà for their higher fat content, which browns beautifully. Cut it into pieces before browning for even melting.
- Dark brown sugar (1 cup, packed / 200g): Brown sugar adds moisture and that deep molasses flavor that pairs perfectly with brown butter. Pack it firmly into your measuring cup. Light brown sugar works too, but dark gives a richer result.
- Granulated sugar (1/2 cup / 100g): White sugar helps with spreading and gives the cookies those crispy edges. Don’t skip it — the balance of sugars is key.
- Large eggs (2, room temperature): Room temperature eggs incorporate more easily into the butter mixture, creating a smoother dough. If you forget to take them out, place them in a bowl of warm water for 5 minutes.
- Vanilla extract (2 teaspoons): Use pure vanilla extract, not imitation. The flavor is noticeably better. I love Nielsen-Massey, but any good brand works.
- All-purpose flour (2 1/4 cups / 280g): Spoon and level your flour — don’t scoop directly from the bag. Scooping packs the flour and leads to dry, dense cookies. A kitchen scale is even better.
- Baking soda (1 teaspoon): This helps the cookies spread just enough and gives them a slight lift. Make sure it’s fresh — test it by dropping a bit into vinegar; it should fizz.
- Salt (1 teaspoon): Salt balances the sweetness and enhances the brown butter flavor. I use fine sea salt. If you use kosher salt, you may need a bit more.
- Dark chocolate (8 oz / 225g): Skip the chocolate chips. Buy a good quality dark chocolate bar (60-70% cocoa) and chop it into chunks. The irregular pieces create pools of chocolate and some smaller bits that distribute throughout the dough. I love Ghirardelli or Lindt for this.
- Flaky sea salt (for finishing, optional but highly recommended): A sprinkle of Maldon or similar flaky salt on top right out of the oven takes these cookies from great to unforgettable. It’s that sweet-salty thing that gets everyone.
Equipment Needed
You don’t need a lot of fancy tools for these cookies, but a few key items make the process smoother. Here’s what I use every time.
- Medium saucepan: For browning the butter. A light-colored pan helps you see the color change. I use a stainless steel saucepan — it heats evenly and lets me monitor the browning without guessing.
- Mixing bowls: One large for the dough, one small for the flour mixture. Glass or stainless steel works best.
- Whisk: For combining the sugars and eggs. A silicone whisk is gentle on your bowls.
- Rubber spatula: For folding in the flour and chocolate. A sturdy one makes a difference.
- Baking sheets: Rimmed baking sheets work best. I prefer the ones from Nordic Ware — they don’t warp in the oven.
- Parchment paper: Non-negotiable. It prevents sticking and makes cleanup a breeze. Silicone baking mats work too, but parchment gives slightly crisper bottoms.
- Cookie scoop (about 2 tablespoons): For evenly sized cookies. A #40 scoop is perfect. If you don’t have one, use two spoons to portion the dough.
- Cooling rack: Lets air circulate under the cookies so they stay crisp. If you don’t have one, let them cool on the baking sheet for a few minutes, then transfer to a plate.
Preparation Method
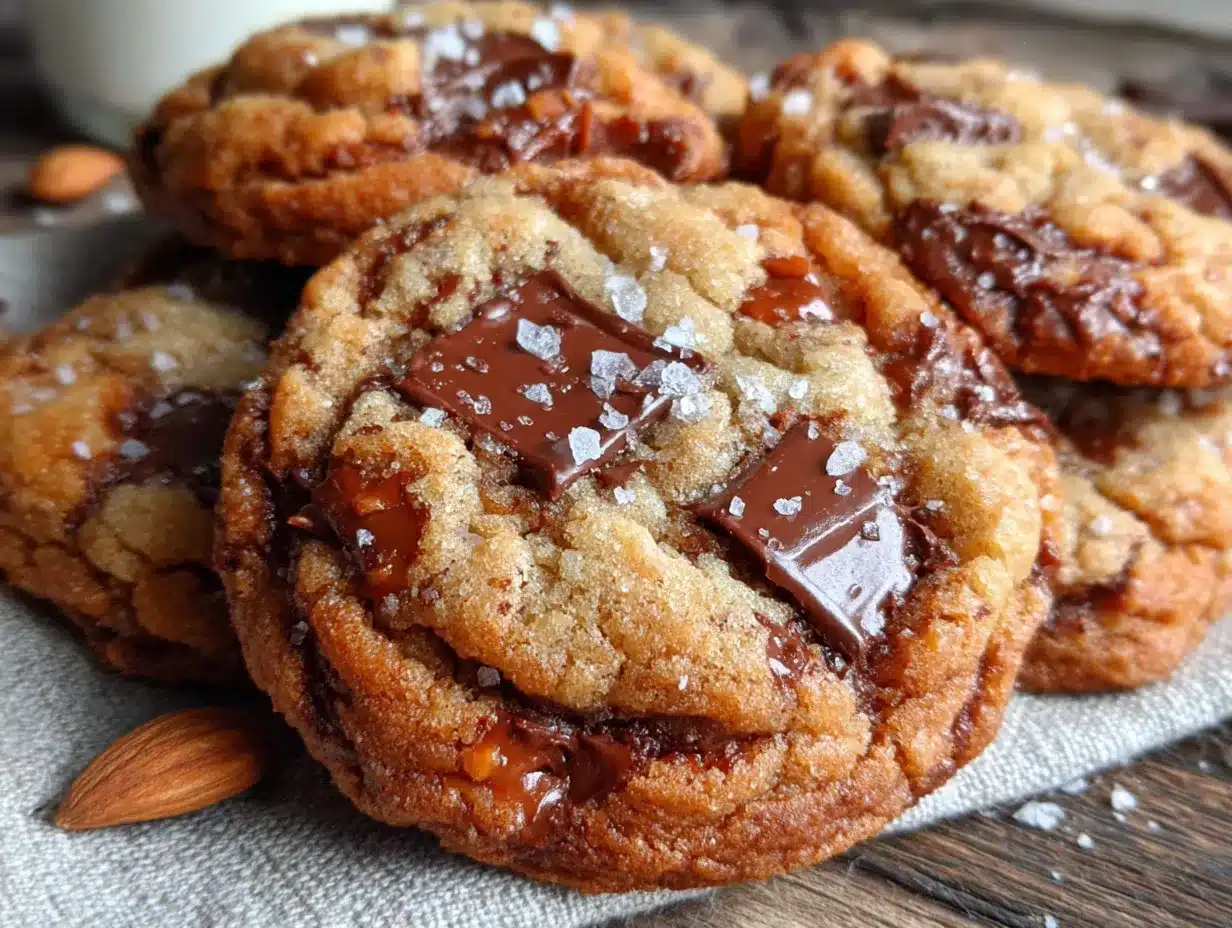
Let’s get to it. This method is straightforward, but I’ll walk you through every step so you get perfect cookies every time.
-
Brown the butter. Place the 1 cup of unsalted butter in a medium saucepan over medium heat. Let it melt completely, then stir occasionally. The butter will start to foam and bubble — that’s normal. After a few minutes, you’ll see brown specks forming at the bottom. Keep stirring and watch closely. When the butter turns a deep amber color and smells nutty (like toasted hazelnuts), remove it from the heat immediately. This usually takes about 5-7 minutes. Pour it into a heatproof bowl, including all those brown bits. Let it cool for 10-15 minutes. Don’t skip this — if you add it to the sugars while it’s too hot, you’ll cook the eggs later.
-
Mix the sugars and butter. In a large mixing bowl, combine the cooled brown butter, 1 cup packed dark brown sugar, and 1/2 cup granulated sugar. Whisk vigorously for about 1 minute until the mixture looks like wet sand and is well combined. It won’t be fluffy like creamed butter, and that’s okay. The texture should be smooth and glossy.
-
Add the eggs and vanilla. Crack the 2 room-temperature eggs into the bowl. Add the 2 teaspoons of vanilla extract. Whisk everything together until the mixture is smooth, thick, and slightly pale. This takes about 30 seconds. The batter should look like a thick caramel sauce. If it looks separated or greasy, your butter was too hot — don’t worry, it’ll still work, just mix a little longer.
-
Combine the dry ingredients. In a separate small bowl, whisk together 2 1/4 cups all-purpose flour, 1 teaspoon baking soda, and 1 teaspoon salt. Make sure there are no lumps. The salt and baking soda should be evenly distributed.
-
Fold in the flour mixture. Add the dry ingredients to the wet ingredients in two additions, folding gently with a rubber spatula after each. Don’t overmix — stop as soon as you no longer see streaks of flour. Overmixing develops gluten and makes cookies tough. The dough will be thick and slightly sticky.
-
Add the chocolate chunks. Roughly chop the 8 oz dark chocolate bar into irregular pieces — some big, some small. Reserve a handful of the largest chunks for pressing onto the tops of the cookies later. Fold the rest into the dough until evenly distributed. The dough should look studded with chocolate.
-
Chill the dough. This is crucial. Cover the bowl with plastic wrap and refrigerate for at least 30 minutes, or up to 72 hours. Chilling solidifies the butter, which prevents the cookies from spreading too much in the oven. It also allows the flavors to meld. If you’re in a rush, 30 minutes works, but 1-2 hours is better. I’ve let it go overnight, and the cookies are even better the next day.
-
Preheat and prepare. When you’re ready to bake, preheat your oven to 350°F (175°C). Line two baking sheets with parchment paper. Remove the dough from the fridge — it should be firm but scoopable.
-
Scoop the cookies. Use a 2-tablespoon cookie scoop to portion the dough. Place the dough balls about 2 inches apart on the prepared baking sheets. For bakery-style cookies, roll each ball between your palms to make it tall rather than round — this helps them bake up thick. Press a few of the reserved chocolate chunks onto the tops of each dough ball. This makes them look gorgeous.
-
Bake. Bake one sheet at a time for 10-12 minutes. The cookies should look golden brown around the edges but still soft and slightly underdone in the center. They will continue to set on the hot baking sheet. If you overbake them, they’ll be crisp all the way through — still good, but not the chewy texture we want.
-
Finish with flaky salt. As soon as the cookies come out of the oven, sprinkle a pinch of flaky sea salt on top of each one. This little step makes a huge difference. Let the cookies cool on the baking sheet for 5 minutes, then transfer them to a cooling rack.
Cooking Tips & Techniques
I’ve made every mistake in the book with these cookies, so you don’t have to. Here are the things I’ve learned the hard way.
Don’t rush the browning. The first time I tried this, I got impatient and cranked the heat too high. The butter went from melted to burnt in seconds. Low and slow is the way to go. Medium heat, constant attention. When you see those brown specks form, you’re almost there. The butter will smell nutty and look like liquid gold. Pull it off the heat immediately — residual heat will continue to cook it.
Use a light-colored pan. I learned this one from a baking blog years ago. Dark pans make it hard to see the color change, and you’re more likely to burn the butter. A stainless steel or light-colored nonstick pan is ideal.
Measure your flour correctly. This is the number one reason cookies turn out dry or flat. Spoon the flour into your measuring cup and level it off with a knife. Don’t scoop. If you have a kitchen scale, use it — 280 grams is perfect.
Don’t skip the chill. I know it’s tempting to skip this step when you want cookies right now. But warm dough spreads into thin, greasy puddles. Chilled dough bakes up thick and chewy. Even 30 minutes makes a difference. If you’re really in a rush, scoop the dough into balls first, then chill them on a plate for 20 minutes.
Bake one sheet at a time. I used to try to bake two sheets at once to save time, but the cookies always came out uneven. The top sheet would brown too fast, the bottom sheet would be pale. Bake one sheet at a time in the center rack for the best results.
Let them cool on the sheet. Those 5 minutes on the hot baking sheet are important. The cookies continue to bake and set up. If you move them too soon, they’ll fall apart. If you leave them too long, they’ll overcook. Five minutes is the sweet spot.
Variations & Adaptations
One of the best things about this recipe is how adaptable it is. Here are a few ways I’ve played with it over the years.
- Brown Butter Bourbon Pecan Bars: If you love the nutty flavor of brown butter, you’ll love my Brown Butter Bourbon Pecan Bars. It’s the same brown butter magic, but in bar form with a boozy twist.
- Gluten-Free Version: Swap the all-purpose flour for a 1:1 gluten-free baking flour blend. I’ve used King Arthur’s Measure for Measure with great results. The texture is slightly more tender, but still delicious. Add an extra tablespoon of flour if the dough seems too sticky.
- White Chocolate & Macadamia Nut: Replace the dark chocolate with white chocolate chunks and add 1/2 cup of roughly chopped macadamia nuts. Toast the nuts first for extra flavor. This version is dangerously good.
- Double Chocolate: Reduce the flour to 2 cups and add 1/3 cup of unsweetened cocoa powder. Use milk or semi-sweet chocolate chunks instead of dark. These are rich, fudgy, and perfect for chocolate lovers.
- Vegan Option: Use vegan butter (like Miyoko’s) and a flax egg (1 tablespoon ground flaxseed mixed with 3 tablespoons water, let sit for 5 minutes). The flavor is slightly different, but the texture is surprisingly close. The brown butter effect is less pronounced, but still good.
- Add Some Spice: Add 1/2 teaspoon of cinnamon and a pinch of nutmeg to the flour mixture. It gives the cookies a warm, cozy flavor that’s perfect for fall. It pairs beautifully with the brown butter.
Serving & Storage Suggestions
These cookies are best served warm, when the chocolate is still melty and the edges are crisp. But they’re pretty amazing at room temperature too.
Serving temperature: If you’ve baked them fresh, let them cool for 5-10 minutes on the baking sheet, then serve. If they’ve cooled completely, pop them in a 300°F oven for 3-4 minutes to re-warm them. It brings back that just-baked magic.
Presentation: Stack them on a pretty plate or arrange them in a cookie jar. A sprinkle of flaky salt right before serving makes them look professional. I like to serve them with a cold glass of milk or a hot cup of coffee. For a dessert spread, pair them with Soft Pumpkin Spice Snickerdoodles for a fall-themed cookie platter that’s impossible to resist.
Storage: Store baked cookies in an airtight container at room temperature for up to 5 days. Place a slice of bread in the container to keep them soft — the cookies will absorb the moisture from the bread. Change the bread every day or two.
Freezing: These cookies freeze beautifully. You can freeze the baked cookies for up to 3 months. Wrap them individually in plastic wrap, then place them in a freezer bag. Thaw at room temperature for 30 minutes. You can also freeze the raw dough balls. Scoop them onto a baking sheet, freeze until solid, then transfer to a freezer bag. Bake from frozen, adding 2-3 extra minutes to the baking time.
Flavor development: These cookies actually taste better the next day. The brown butter flavor deepens and the chocolate melds with the dough. If you can resist eating them all on day one, you’re in for a treat on day two.
Nutritional Information & Benefits
Let’s be honest — these are indulgent cookies. But they’re made with real ingredients, and that counts for something. Here’s the approximate nutritional breakdown per cookie (based on 24 cookies).
- Calories: 210
- Fat: 12g
- Saturated Fat: 7g
- Carbohydrates: 26g
- Sugar: 18g
- Fiber: 1g
- Protein: 3g
- Sodium: 150mg
Health benefits of key ingredients: Dark chocolate (60% or higher) is rich in antioxidants and flavonoids, which can support heart health. The brown butter, while not exactly a health food, contains butyrate, a fatty acid that may support gut health in small amounts. The eggs provide protein and essential vitamins like B12 and D.
Dietary considerations: This recipe contains dairy, eggs, and gluten. For a dairy-free option, use vegan butter and dairy-free chocolate. For a gluten-free option, use a 1:1 gluten-free flour blend. For a lower-sugar version, reduce the granulated sugar to 1/4 cup and use a sugar substitute like monk fruit sweetener, though the texture will be slightly different.
Potential allergens: Dairy, eggs, gluten, and soy (in some chocolate brands). Always check your chocolate label if you’re cooking for someone with allergies.
My perspective: I believe in balance. These cookies are a treat, not an everyday food. But when you do indulge, make it count. Use good ingredients, take your time, and enjoy every bite. Life’s too short for mediocre cookies.
Conclusion
These Perfect Brown Butter Chocolate Chunk Cookies are more than just a recipe — they’re a little piece of my kitchen, and now they can be a piece of yours. That nutty, caramel-like flavor from the brown butter, the pools of melted dark chocolate, the crisp edges and soft centers — it’s everything a cookie should be. And honestly? It’s not that hard to get there.
I love this recipe because it’s forgiving. It’s adaptable. It’s the kind of cookie you can make on a whim and still feel proud of. Whether you’re baking for a holiday party, a school bake sale, or just because it’s Tuesday, these cookies deliver. They’ve become my go-to for every occasion, and I have a feeling they’ll become yours too.
So grab your butter, your chocolate, and your favorite mixing bowl. Take your time with that browning process — let it fill your kitchen with that incredible smell. And when you pull those cookies out of the oven, golden and perfect, don’t forget that sprinkle of flaky salt. Trust me on that one.
I’d love to hear how they turn out for you! Drop a comment below and let me know if you tried any variations, or tag me in your photos. Happy baking, friend!
Frequently Asked Questions
Can I use salted butter instead of unsalted?
Yes, you can. Just reduce the added salt in the recipe to 1/2 teaspoon. The brown butter flavor will still shine through, but the cookies might be slightly saltier. If you’re using salted butter, taste the dough before adding the full amount of salt — you can always add more later.
Why did my cookies spread too much?
This usually happens for one of three reasons: the dough wasn’t chilled long enough, the butter was too warm when you mixed it, or you used too little flour. Make sure to chill the dough for at least 30 minutes, let the brown butter cool before mixing, and measure your flour correctly by spooning and leveling.
Can I use chocolate chips instead of chunks?
Absolutely. Chocolate chips work fine, but they won’t create those beautiful pools of melted chocolate that chunks do. If you only have chips, go ahead and use them. The cookies will still be delicious. Just know that chips are designed to hold their shape, so you won’t get that same gooey effect.
How do I know when the butter is properly browned?
Look for three signs: the color turns a deep amber, you see brown specks forming at the bottom of the pan, and the butter smells nutty and toasty. It happens quickly, so keep an eye on it. If you see smoke or smell a burnt odor, you’ve gone too far. Start over if that happens — burnt butter is bitter and will ruin the cookies.
Can I make the dough ahead of time and bake later?
Yes! The dough can be refrigerated for up to 72 hours. In fact, the cookies often taste better after a day or two in the fridge because the flavors have time to meld. You can also freeze the dough balls for up to 3 months. Just bake from frozen, adding 2-3 minutes to the baking time. It’s the perfect make-ahead option for holiday baking.
Pin This Recipe!
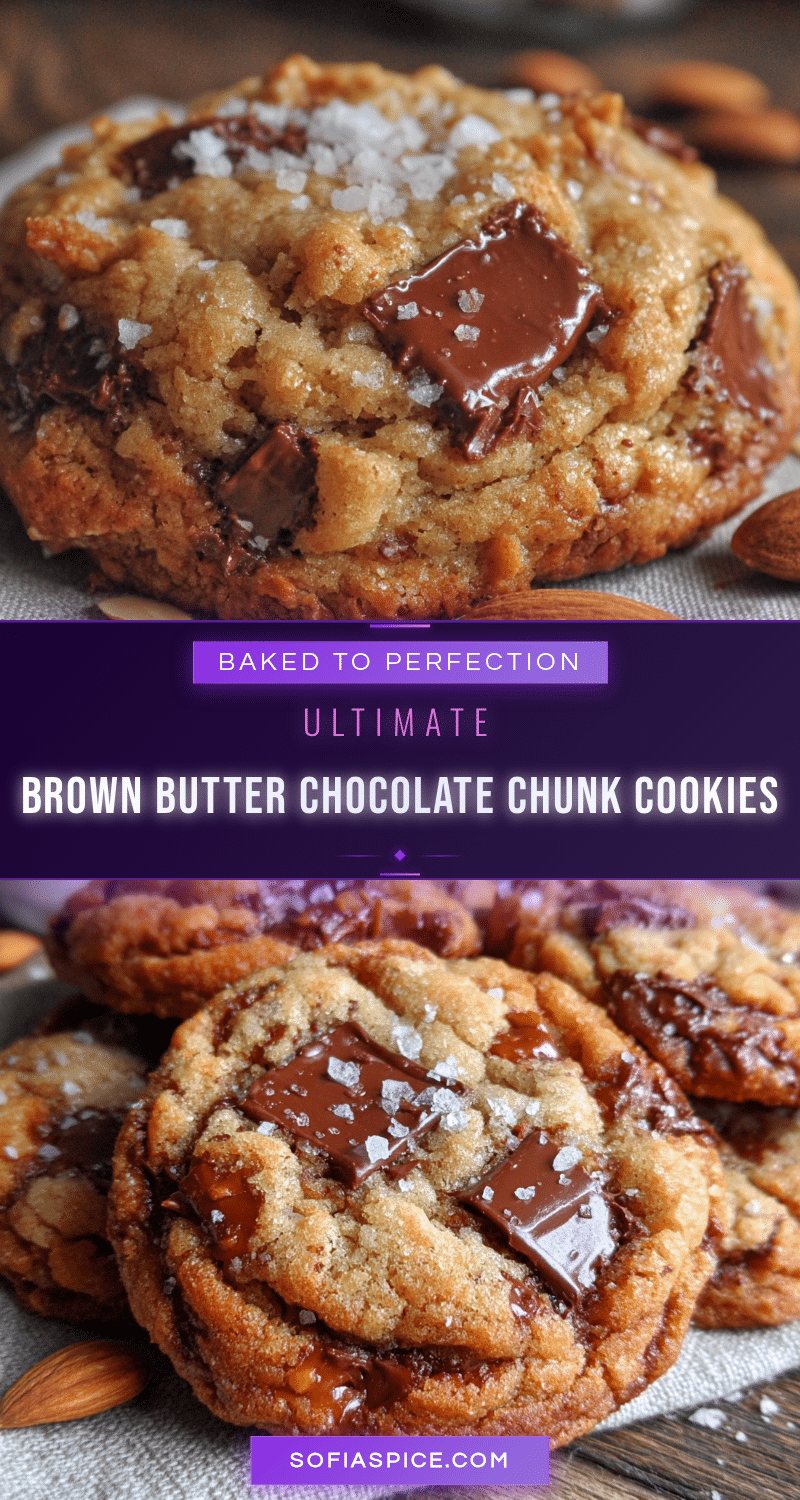
Perfect Brown Butter Chocolate Chunk Cookies
These cookies have crisp edges, soft centers, and real dark chocolate chunks that melt into puddles. The nutty, caramel-like flavor from brown butter wraps around every bite for a chewy, unforgettable treat.
- Prep Time: 30 minutes
- Cook Time: 12 minutes
- Total Time: 1 hour 12 minutes (including chilling)
- Yield: 24 cookies 1x
- Category: Dessert
- Cuisine: American
Ingredients
- 1 cup (226g) unsalted butter
- 1 cup (200g) packed dark brown sugar
- 1/2 cup (100g) granulated sugar
- 2 large eggs, room temperature
- 2 teaspoons vanilla extract
- 2 1/4 cups (280g) all-purpose flour
- 1 teaspoon baking soda
- 1 teaspoon salt
- 8 oz (225g) dark chocolate (60-70% cocoa), chopped into chunks
- Flaky sea salt for finishing (optional)
Instructions
- Brown the butter: Place 1 cup unsalted butter in a medium saucepan over medium heat. Melt completely, then stir occasionally. When butter turns deep amber and smells nutty (about 5-7 minutes), remove from heat. Pour into a heatproof bowl, including brown bits. Cool for 10-15 minutes.
- Mix sugars and butter: In a large bowl, combine cooled brown butter, 1 cup packed dark brown sugar, and 1/2 cup granulated sugar. Whisk vigorously for about 1 minute until mixture looks like wet sand and is smooth and glossy.
- Add eggs and vanilla: Add 2 room-temperature eggs and 2 teaspoons vanilla extract. Whisk until smooth, thick, and slightly pale (about 30 seconds).
- Combine dry ingredients: In a separate bowl, whisk together 2 1/4 cups all-purpose flour, 1 teaspoon baking soda, and 1 teaspoon salt.
- Fold in flour mixture: Add dry ingredients to wet in two additions, folding gently with a rubber spatula after each. Stop when no streaks of flour remain.
- Add chocolate chunks: Reserve a handful of largest chocolate chunks for topping. Fold remaining chocolate into dough until evenly distributed.
- Chill dough: Cover bowl with plastic wrap and refrigerate for at least 30 minutes, up to 72 hours.
- Preheat and prepare: Preheat oven to 350°F (175°C). Line two baking sheets with parchment paper.
- Scoop cookies: Use a 2-tablespoon cookie scoop to portion dough. Place dough balls 2 inches apart on prepared sheets. Roll each ball tall rather than round. Press reserved chocolate chunks onto tops.
- Bake: Bake one sheet at a time for 10-12 minutes, until edges are golden brown and centers are soft.
- Finish with flaky salt: Sprinkle flaky sea salt on each cookie immediately out of oven. Cool on baking sheet for 5 minutes, then transfer to cooling rack.
Notes
Don’t skip chilling the dough—it prevents spreading and develops flavor. Use a light-colored pan for browning butter to see color change. Measure flour by spooning and leveling. Bake one sheet at a time for even results. Cookies taste even better the next day.
Nutrition
- Serving Size: 1 cookie
- Calories: 210
- Sugar: 18
- Sodium: 150
- Fat: 12
- Saturated Fat: 7
- Carbohydrates: 26
- Fiber: 1
- Protein: 3
Keywords: brown butter cookies, chocolate chunk cookies, easy cookie recipe, chewy cookies, homemade cookies


