That first crack of a fresh Biscoff cookie — the one that shatters into a million buttery, spiced crumbs before you even get it to your mouth — still takes me straight to my aunt’s tiny kitchen in Antwerp. I was maybe twelve, sitting on a wobbly stool, watching her stir something thick and caramel-colored on the stove. She handed me a cookie without a word, and I swear, the world got a little quieter. It wasn’t just the crunch; it was the way that warm, cinnamon-ginger-cardamom thing lingered, like a hug you could taste.
Fast forward a couple decades, and I’m in my own kitchen, staring at a package of Biscoff spread (the creamy stuff, obviously) and wondering how to bottle that exact feeling. I wanted something that had the same soul-soothing satisfaction as those cookies but felt like a proper dessert — not just a snack. Something you could make without turning on the oven, because let’s be honest, summer in a non-air-conditioned apartment is a real thing. And something that wouldn’t demand a culinary degree. These No-Bake Biscoff Cheesecake Bars are the delicious result of that craving. They’re the kind of dessert that feels fancy enough for company but comes together with the kind of ease that makes you feel like you’re cheating.
The first time I made them, I ate three bars standing over the counter. No plate. No shame. And honestly? That’s the highest compliment I can give a recipe.
Why You’ll Love This Recipe
These aren’t just another cheesecake bar. After testing this recipe about six times (someone had to do it), I can tell you exactly why this version sticks.
- No Oven Required: Seriously. Zero heat. Perfect for hot days, busy schedules, or when you just don’t want to deal with preheating. This recipe lives in the fridge, not the oven.
- Simple Ingredients: You won’t need to hunt down weird specialty items. Cream cheese, heavy cream, Biscoff spread, butter, and cookies. That’s basically it. Most of it is probably in your pantry right now.
- Incredible Texture Contrast: The buttery, spiced cookie crust gives way to a cloud-like, creamy filling, all topped with a silky Biscoff ganache and more crunchy cookie bits. Every single bite has that perfect snap-and-cream moment.
- Make-Ahead Dream: These bars actually get better after a night in the fridge. The flavors meld together, the texture sets perfectly, and you get to be the person who shows up to a party with a fully prepped, stunning dessert.
- Crowd-Pleaser: I’ve brought these to potlucks, family dinners, and casual get-togethers. They disappear fast. Kids love the cookie crunch, and adults appreciate the sophisticated spice profile. It’s a win-win.
What makes these bars different from every other no-bake cheesecake out there is the technique. Instead of a wobbly, gelatin-heavy filling, we’re using a stabilized cream cheese mixture that stays firm and sliceable without being dense. The secret is a little trick I learned from making too many wobbly cheesecakes: whip the cream separately before folding it in. It creates an airy, mousse-like texture that feels impossibly light against the crunchy crust. This isn’t just another dessert — it’s the one that makes you close your eyes after the first bite.
What Ingredients You Will Need
This recipe relies on a handful of key players, each doing important work. No complicated science here, just smart choices.
- For the Crust:
- Biscoff Cookies (300g / about 30 cookies): The heart of the crust. You’ll crush these into fine crumbs. I’ve tried this with other speculoos cookies, and honestly, nothing beats the original Lotus Biscoff for that signature caramelized flavor. The texture is key — you want a fine, sandy crumb, not chunky bits.
- Unsalted Butter (85g / 6 tablespoons), melted: This binds the crumbs together. Use unsalted so you control the salt level. If you only have salted butter, just skip adding any extra salt to the crust.
- Light Brown Sugar (2 tablespoons): A little extra sweetness and moisture for the crust. It also helps the crust hold together better than white sugar would.
- For the Cheesecake Filling:
- Full-Fat Cream Cheese (450g / two 8-oz blocks), softened: This is non-negotiable. Low-fat cream cheese has too much water and won’t set properly. Leave it on the counter for at least an hour before you start. Cold cream cheese = lumpy filling.
- Powdered Sugar (100g / 1 cup): Dissolves seamlessly into the cream cheese, giving sweetness without any grittiness. No granulated sugar here.
- Biscoff Spread (150g / ½ cup), smooth: The creamy, spreadable version of the cookies. This is what gives the filling that deep, spiced Biscoff flavor. I use the smooth kind, but the crunchy version would add nice little bits if that’s your thing.
- Heavy Cream (240ml / 1 cup), cold: Whipped to stiff peaks, this is what makes the filling light and airy. Don’t substitute with milk or half-and-half — you need the fat content for stability.
- Vanilla Extract (1 teaspoon): Rounds out the flavors and adds warmth.
- Pinch of Salt: Just a tiny one. It balances the sweetness and makes the spice notes pop.
- For the Topping:
- Biscoff Spread (100g / ⅓ cup): Warmed slightly to create a pourable ganache-like layer.
- Heavy Cream (60ml / ¼ cup): Thins out the spread so it pours smoothly over the bars.
- Crushed Biscoff Cookies (a handful): For that final, glorious crunch on top. Don’t skip it — it’s the textural exclamation point.
I personally recommend using the Lotus brand for both the cookies and the spread. I’ve tried store-brand versions, and the spice blend just isn’t as complex. The real deal has that slightly burnt-caramel, almost molasses-like depth that makes this dessert sing.
Equipment Needed
You don’t need a fancy kitchen for this one. Here’s what you’ll actually use:
- 8×8-inch Square Baking Pan: The perfect size for thick, generous bars. If you only have a 9×9, the bars will be slightly thinner and may set faster.
- Parchment Paper: Absolutely essential for easy removal. Leave a little overhang on two sides to create “handles.”
- Food Processor or Zip-Top Bag + Rolling Pin: For crushing the cookies. A food processor is faster and gives a more even crumb. A bag and rolling pin works fine — it’s just a mini arm workout.
- Electric Hand Mixer or Stand Mixer: You need this to whip the cream and beat the cream cheese. A whisk and some serious elbow grease could work for the cream cheese, but you really need the mixer for the whipped cream.
- Mixing Bowls (at least 2): One for the crust, one for the filling.
- Spatula: For folding the whipped cream into the cream cheese mixture gently.
- Measuring Cups and Spoons: Standard stuff.
If you don’t have a food processor, don’t sweat it. Place the cookies in a sturdy zip-top bag, squeeze out the air, and go to town with a rolling pin. It’s a great way to release some stress, honestly.
Preparation Method
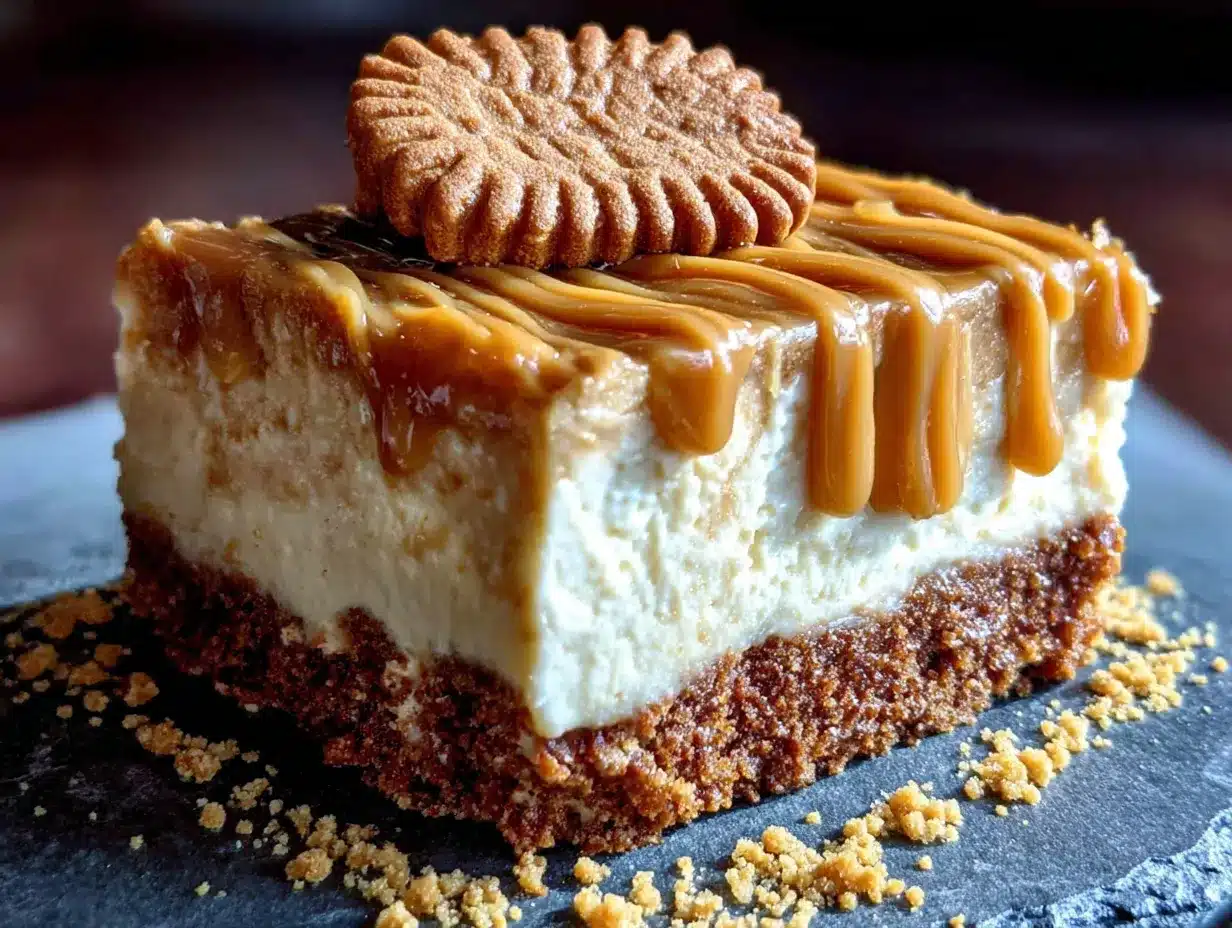
This is the fun part. Take your time, and don’t rush the chilling steps — they’re what make these bars perfect.
- Prepare the Pan. Line your 8×8-inch pan with parchment paper, leaving about 2 inches of overhang on two opposite sides. This will be your sling to lift the bars out later. Set it aside.
- Make the Crust. In your food processor, pulse the 300g of Biscoff cookies until they turn into fine crumbs. You should have about 2 cups of crumbs. Pour them into a medium bowl. Add the 2 tablespoons of light brown sugar and the 85g of melted butter. Stir with a fork until every crumb is moistened and the mixture looks like wet sand. It should clump together when you squeeze a handful.
- Press the Crust. Dump the crumb mixture into your prepared pan. Use the bottom of a flat measuring cup or a glass to press it down firmly and evenly. I mean really press it — a tight, compact crust is the foundation of a bar that doesn’t fall apart. Pop the pan in the fridge while you make the filling.
- Whip the Cream. In a large, clean bowl (or the bowl of your stand mixer), pour in the 240ml of cold heavy cream. Using the whisk attachment, whip on medium-high speed until stiff peaks form. This takes about 3-4 minutes. You’re looking for peaks that stand straight up when you lift the whisk. Don’t over-whip, or you’ll end up with butter. Set this bowl aside in the fridge.
- Beat the Cream Cheese. In another large bowl, beat the softened 450g of cream cheese with an electric mixer on medium speed until it’s completely smooth and fluffy — about 2 minutes. Scrape down the sides and the bottom of the bowl with a spatula. Add the 100g of powdered sugar, 150g of Biscoff spread, 1 teaspoon of vanilla, and a pinch of salt. Beat again until everything is combined, smooth, and uniform. It should look like a thick, pale caramel-colored mousse.
- Fold Everything Together. Take the whipped cream out of the fridge. Add about one-third of it to the cream cheese mixture. Gently fold it in with your spatula using a sweeping motion — cut down through the center, scrape along the bottom, and fold up and over. Rotate the bowl as you go. Once it’s mostly combined, add the rest of the whipped cream and fold until no white streaks remain. The mixture should be light, airy, and hold its shape.
- Assemble the Bars. Take the crust out of the fridge. Spoon the cheesecake filling on top of the crust. Spread it evenly with your spatula, making sure it reaches all the corners. Give the pan a gentle tap on the counter to release any air bubbles. Smooth the top as best you can.
- Make the Topping. In a small microwave-safe bowl, combine the 100g of Biscoff spread and 60ml of heavy cream. Microwave in 15-second bursts, stirring between each, until the mixture is smooth, glossy, and pourable. Don’t overheat it — you just want it warm enough to drizzle.
- Finish the Bars. Pour the warm Biscoff mixture over the cheesecake filling. Tilt the pan gently to let it spread evenly, or use the back of a spoon. Sprinkle the crushed Biscoff cookies generously over the top.
- Chill, Patience, Chill Again. Cover the pan tightly with plastic wrap and place it in the refrigerator for at least 6 hours, but overnight is truly best. The filling needs this time to set completely. Do not rush this step. If you try to cut them too early, you’ll have a delicious but messy puddle.
- Slice and Serve. Once fully chilled and firm, use the parchment overhang to lift the entire block out of the pan. Place it on a cutting board. Use a sharp, large knife to slice into 16 neat bars. Wipe the knife clean between cuts for the cleanest edges. Serve cold.
Cooking Tips & Techniques
I’ve made every mistake in the book so you don’t have to. Here are the things I wish someone had told me.
Room Temperature Cream Cheese is King. I cannot stress this enough. Cold cream cheese will give you a lumpy filling no matter how long you beat it. Let it sit out for at least an hour. If you’re in a rush, cut it into small cubes and let it sit for 20 minutes. It helps.
Don’t Over-Whip the Cream. Stiff peaks are the goal, but if you keep going, you’ll get grainy, buttery cream. Stop the mixer the moment the peaks stand up straight. If you’re unsure, stop earlier rather than later. You can always whip a little more.
Fold, Don’t Stir. When combining the whipped cream and cream cheese, use a gentle folding motion. Stirring vigorously will deflate all that lovely air you just whipped in, and your bars will be dense instead of cloud-like. Be gentle. It’s worth it.
The Patience Payoff. I know it’s tempting to sneak a slice after three hours. I’ve done it. It’s a sad, soft mess. The 6-hour minimum is non-negotiable for clean slices. Overnight is where the magic really happens. The flavors deepen, the texture sets perfectly, and the crust stays wonderfully crunchy.
Clean Knife, Clean Cuts. For those Instagram-worthy slices, dip your knife in hot water, wipe it dry, and then cut. Repeat between each cut. It makes a world of difference.
Variations & Adaptations
Once you’ve mastered the base recipe, feel free to play around. Here are some of my favorite twists.
- Chocolate Biscoff Dream: Melt 60g of dark chocolate with the Biscoff spread for the topping. It creates a rich, fudge-like layer that pairs beautifully with the spiced cookie flavor. I tried this last Christmas, and it was a hit.
- Pumpkin Spice Version: Add 100g of pumpkin puree and 1 teaspoon of pumpkin pie spice to the cream cheese mixture. Reduce the Biscoff spread to 100g. This is a fantastic fall twist, and it pairs perfectly with our pumpkin pie cheesecake bars with pecan crust for a full autumn dessert spread.
- Vegan & Dairy-Free Option: Use a vegan cream cheese block (like Tofutti or Violife), a dairy-free heavy cream alternative (like Country Crock Plant Cream), and a vegan butter stick. The texture will be slightly softer, but the flavor is still incredible. The Biscoff cookies and spread are naturally vegan, which is a great bonus.
- Nutty Crunch: Add a layer of toasted, chopped pecans or walnuts on top of the crust before adding the filling. It adds an extra layer of crunch and a warm, toasty flavor. This is a great way to use up leftover nuts from the holidays.
- Individual Mini Bars: Press the crust into a 12-cup muffin tin lined with paper liners. Divide the filling among the cups and chill. These are perfect for parties or portion control. You’ll need to reduce the chilling time to about 3-4 hours.
Serving & Storage Suggestions
These bars are best served cold, straight from the fridge. The texture is firm, creamy, and utterly satisfying. For the prettiest presentation, arrange the bars on a platter and sprinkle a tiny pinch of flaky sea salt on top right before serving. It sounds fancy, but it just makes the caramelized Biscoff flavor pop even more.
They pair beautifully with a strong cup of black coffee, a hot espresso, or even a cold glass of milk. If you’re feeling extra, a dollop of lightly sweetened whipped cream on the side is never a bad idea.
Storage: Store any leftover bars in an airtight container in the refrigerator. They will keep well for up to 5 days. In fact, they might even be better on day two or three, as the flavors continue to meld. Just make sure they’re tightly covered so they don’t pick up any fridge odors.
Freezing: These bars freeze beautifully. Place the fully set, uncut block (or individual slices) on a parchment-lined baking sheet and freeze until solid, about 2 hours. Then wrap each piece tightly in plastic wrap and place them in a freezer-safe bag. They’ll keep for up to 3 months. To serve, thaw in the refrigerator overnight. The texture will be just as good as fresh.
Reheating: No reheating needed here. These are a cold dessert through and through. If you want a slightly softer, almost mousse-like texture, let them sit at room temperature for about 10 minutes before serving.
Nutritional Information & Benefits
Let’s be real — this is a treat. But knowing what’s in it helps you enjoy it mindfully. Per bar (based on 16 servings), here’s an estimated breakdown:
- Calories: ~320
- Fat: 22g
- Carbohydrates: 28g
- Protein: 4g
- Sugar: 18g
While these are not a health food, they do offer some surprising benefits. The cream cheese provides a good amount of calcium and protein. The Biscoff cookies, while sweet, contain a blend of warm spices like cinnamon, nutmeg, and cardamom — all of which have anti-inflammatory properties. Plus, the portion size is naturally controlled (if you can stop at one!).
This recipe is naturally egg-free and gelatin-free, making it a great option for those with specific dietary needs. It can easily be made gluten-free by using gluten-free speculoos cookies (like the Schär brand). Always check your labels.
For a slightly lighter version, you can use Neufchâtel cheese (which has a third less fat than regular cream cheese) and a light whipped topping, but the texture will be noticeably less rich and stable.
Conclusion
These No-Bake Biscoff Cheesecake Bars are more than just a dessert — they’re a moment of pure, uncomplicated joy. They’re the kind of thing you make when you want to impress without the stress, when you need a little sweetness in your week, or when you just want to eat three bars standing over the counter (no judgment here). The combination of that buttery, spiced crust, the impossibly creamy filling, and the glossy, crunchy topping is honestly addictive. It’s comfort food at its finest, made simple.
I’d love to hear how yours turn out! Did you add a twist? Did you manage to share them, or did they disappear like mine always do? Leave a comment below and let me know. And if you loved this recipe, please share it with a friend who needs a little Biscoff magic in their life. Happy no-baking!
Frequently Asked Questions
Can I use a different type of cookie for the crust?
Absolutely! Graham crackers, vanilla wafers, or even shortbread cookies would work. Just keep in mind that the flavor will change. The Biscoff cookies give a unique spiced, caramelized taste that’s hard to replicate, but a buttery shortbread crust is also delicious.
Why did my cheesecake filling not set?
This usually happens for one of three reasons: the cream cheese wasn’t fully softened, the heavy cream wasn’t whipped to stiff peaks, or the bars weren’t chilled long enough. Make sure your cream cheese is at room temperature, your cream is cold and properly whipped, and you give the bars a full 6 hours (or overnight) to set.
Can I make these bars in a different size pan?
Yes, but the thickness will change. A 9×9-inch pan will give you thinner bars that may set a little faster. A 9×13-inch pan will yield very thin bars. If using a different size, keep an eye on the chilling time. The 8×8 is the sweet spot for thick, satisfying bars.
How do I get clean, sharp slices?
Use a long, sharp knife and wipe it clean with a damp paper towel between each cut. For the absolute cleanest edges, dip the knife in hot water, dry it off, and then slice. Repeat this between every single cut. It takes a little extra time, but the results are gorgeous.
Can I use the crunchy Biscoff spread instead of smooth?
You can! The crunchy spread has small cookie pieces in it, which will add a lovely texture to the creamy filling. Just keep in mind that the topping layer might not be as smooth and glossy. It will still taste amazing, just with a bit more crunch.
Pin This Recipe!
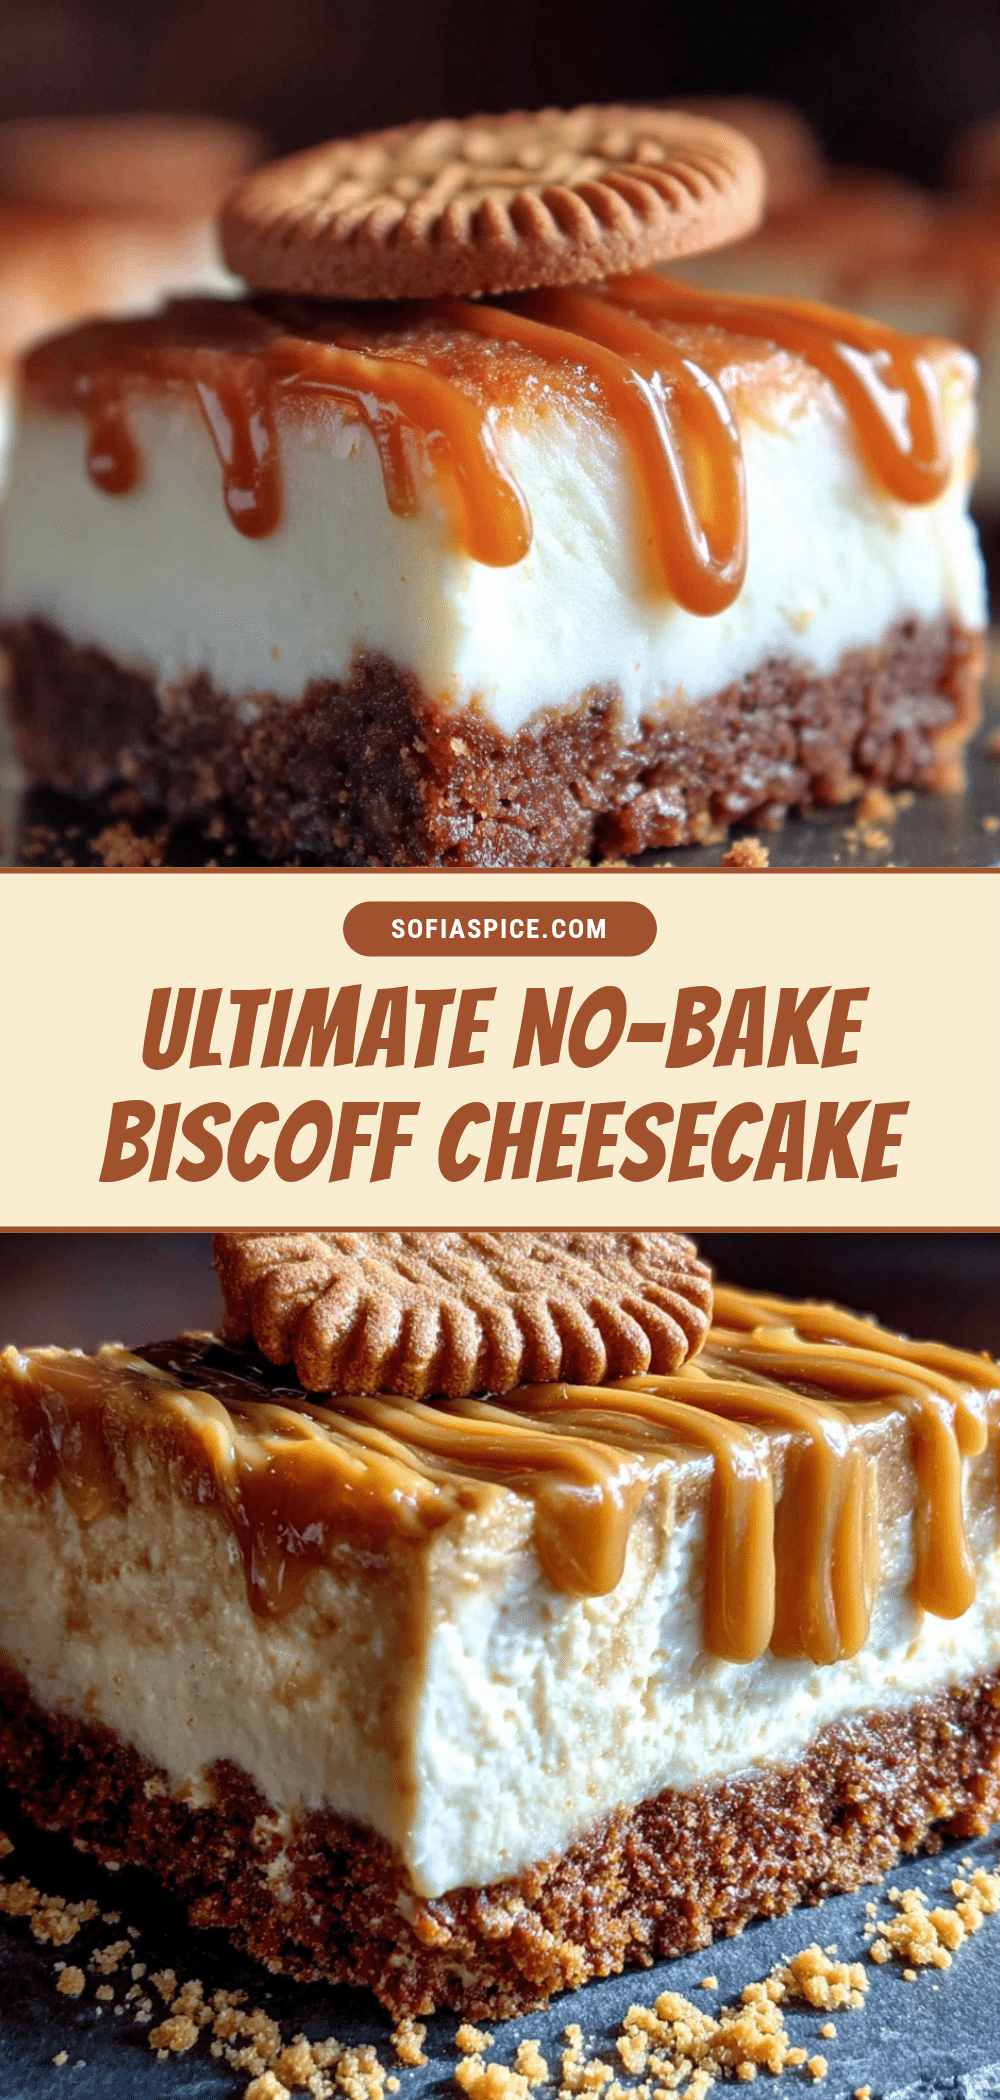
Easy No-Bake Biscoff Cheesecake Bars: Creamy & Crunchy
These no-bake Biscoff cheesecake bars feature a buttery spiced cookie crust, a light and airy cream cheese filling, and a silky Biscoff ganache topping. They’re the perfect make-ahead dessert for any occasion.
- Prep Time: 20 minutes
- Cook Time: 0 minutes
- Total Time: 6 hours 20 minutes (includes chilling)
- Yield: 16 bars 1x
- Category: Dessert
- Cuisine: American
Ingredients
- 300g Biscoff cookies (about 30 cookies)
- 85g unsalted butter, melted (6 tablespoons)
- 2 tablespoons light brown sugar
- 450g full-fat cream cheese, softened (two 8-oz blocks)
- 100g powdered sugar (1 cup)
- 150g smooth Biscoff spread (½ cup)
- 240ml heavy cream, cold (1 cup)
- 1 teaspoon vanilla extract
- Pinch of salt
- 100g Biscoff spread (⅓ cup, for topping)
- 60ml heavy cream (¼ cup, for topping)
- Handful of crushed Biscoff cookies (for topping)
Instructions
- Line an 8×8-inch baking pan with parchment paper, leaving overhang on two sides.
- Pulse 300g Biscoff cookies in a food processor until fine crumbs form. Transfer to a bowl, add 2 tablespoons light brown sugar and 85g melted butter, and stir until moistened.
- Press the crumb mixture firmly into the prepared pan. Refrigerate while making the filling.
- In a large bowl, whip 240ml cold heavy cream to stiff peaks. Set aside in the fridge.
- In another large bowl, beat 450g softened cream cheese until smooth. Add 100g powdered sugar, 150g Biscoff spread, 1 teaspoon vanilla, and a pinch of salt; beat until combined.
- Gently fold the whipped cream into the cream cheese mixture until no streaks remain.
- Spread the filling evenly over the chilled crust. Tap the pan gently to release air bubbles.
- In a microwave-safe bowl, combine 100g Biscoff spread and 60ml heavy cream. Microwave in 15-second bursts, stirring until smooth and pourable.
- Pour the warm Biscoff mixture over the filling, tilting to spread evenly. Sprinkle with crushed Biscoff cookies.
- Cover and refrigerate for at least 6 hours, preferably overnight, until firm.
- Use the parchment overhang to lift the bars out. Slice into 16 squares with a sharp knife, wiping clean between cuts. Serve cold.
Notes
For clean slices, dip your knife in hot water and wipe dry between cuts. The bars can be frozen for up to 3 months. For a vegan version, use vegan cream cheese, dairy-free heavy cream, and vegan butter.
Nutrition
- Serving Size: 1 bar
- Calories: 320
- Sugar: 18
- Sodium: 180
- Fat: 22
- Saturated Fat: 12
- Carbohydrates: 28
- Fiber: 1
- Protein: 4
Keywords: no-bake cheesecake, Biscoff cheesecake bars, easy dessert, no-bake dessert, Biscoff recipe, cheesecake bars


