“Wait—these are pumpkin snickerdoodles? They’re not cakey at all.” My sister-in-law said it with a cookie halfway to her mouth, eyebrows raised like she’d just caught me in a lie. And honestly, she had a point. Most pumpkin cookies I’d tried before were basically muffin tops pretending to be cookies—puffy, dome-shaped things that collapsed the second you looked at them. Not these.
I’d been chasing a different texture for weeks. Something with that signature snickerdoodle chew, the kind that gives you just a little resistance before it practically melts. But with pumpkin puree in the mix? That’s a lot of moisture to work around. The first batch spread into thin, sad little discs. The second one tasted more like pumpkin bread in cookie form—good, sure, but not what I was after. It was batch number four when everything finally clicked. My kitchen smelled like a cinnamon-sugar bomb went off, and the cookies came out soft, slightly puffed, with that perfect crinkled top and a tender center that stayed chewy for days.
These soft baked pumpkin snickerdoodle cookies with cinnamon sugar are the result of all that testing. They taste like fall in a way that doesn’t try too hard—warm, spiced, with just enough pumpkin to remind you it’s October without making you feel like you’re eating a vegetable masquerading as dessert. And the best part? You don’t need a mixer, you don’t need chilled dough, and you definitely don’t need an hour to make them happen.
Sometimes the best recipes come from stubbornly refusing to accept a bad batch. This one sure did.
Why You’ll Love These Soft Baked Pumpkin Snickerdoodle Cookies
I’ve tested this recipe more times than I care to admit, and each round taught me something new about how pumpkin behaves in cookie dough. Here’s why I keep coming back to this version.
- 30 Minutes Start to Finish – No chilling required. No complicated steps. From mixing bowl to cookie plate in half an hour flat. That’s faster than ordering delivery.
- Simple Pantry Ingredients – You likely have everything you need already. Butter, sugar, flour, eggs, pumpkin puree, and a few spices. No weird specialty ingredients hiding in the back of your pantry.
- Perfect for Fall Gatherings – These cookies show up at every pumpkin patch trip, Friendsgiving, and cozy movie night I host. They’re the kind of treat that disappears before the coffee even finishes brewing.
- Crowd-Pleaser Texture – They’re soft without being cakey, chewy without being tough, and coated in that classic cinnamon sugar that snickerdoodle lovers crave. Kids and adults both go for seconds.
- Next-Level Flavor – The pumpkin adds a subtle earthiness that balances the sweet cinnamon sugar coating. It’s not pumpkin-spice-overload—it’s a gentle warmth that makes you want another bite.
What makes these different from every other pumpkin cookie recipe out there? It’s the technique. Instead of fighting the moisture from the pumpkin, I lean into it by adjusting the fat ratio and using a specific mixing method that keeps the cookies tender without turning them into pucks. These aren’t your average pumpkin cookies—they’re the ones you’ll actually want to bake again.
Honestly, the first time I bit into one of these, I closed my eyes for a second. That’s the kind of cookie this is. The kind that makes you pause.
What Ingredients You Will Need
This recipe uses simple, wholesome ingredients to create cookies that taste anything but basic. Let’s talk about what each one brings to the table.
For the Cookie Dough
- 1/2 cup unsalted butter, softened to room temperature – I prefer using unsalted so I can control the salt level. If you only have salted butter on hand, just reduce the added salt to 1/4 teaspoon.
- 3/4 cup granulated sugar – White sugar gives these cookies that slight crispness on the edges while keeping the centers soft. Don’t swap in brown sugar here—it changes the texture too much.
- 1/4 cup packed light brown sugar – This adds a touch of molasses flavor and helps with moisture retention. Dark brown sugar works too if that’s what you have.
- 1/2 cup pumpkin puree – Make sure you’re using 100% pumpkin puree, not pumpkin pie filling. The canned stuff with spices already added will throw off the sugar and spice balance. I usually go with Libby’s—it’s consistent and never watery.
- 1 large egg yolk – Just the yolk. The white gets discarded (or saved for another recipe). This gives you tenderness without extra moisture that would make the cookies spread too much.
- 1 teaspoon vanilla extract – Pure vanilla extract makes a difference here. The imitation stuff has a chemical aftertaste that doesn’t play well with pumpkin.
- 1 3/4 cups all-purpose flour – Spoon and level your flour. Scooping directly from the bag packs it down and you’ll end up with dry cookies. Use a spoon to fluff it up, then spoon it into your measuring cup and level it off with a knife.
- 1/2 teaspoon baking soda – This helps the cookies spread just enough and gives them a little lift.
- 1/2 teaspoon cream of tartar – The secret to that classic snickerdoodle tang. It also helps stabilize the cookies so they don’t flatten into pancakes.
- 1/2 teaspoon salt – Don’t skip it. Salt balances the sweetness and makes the pumpkin flavor pop.
- 1 teaspoon ground cinnamon – The backbone of the spice blend. Use a fresh jar if yours has been sitting around for more than six months.
- 1/2 teaspoon ground nutmeg – Freshly grated if you have it, but pre-ground works perfectly fine.
- 1/4 teaspoon ground ginger – Adds a little warmth without being spicy.
- 1/8 teaspoon ground cloves – Just a whisper. Cloves are strong, so go easy.
For the Cinnamon Sugar Coating
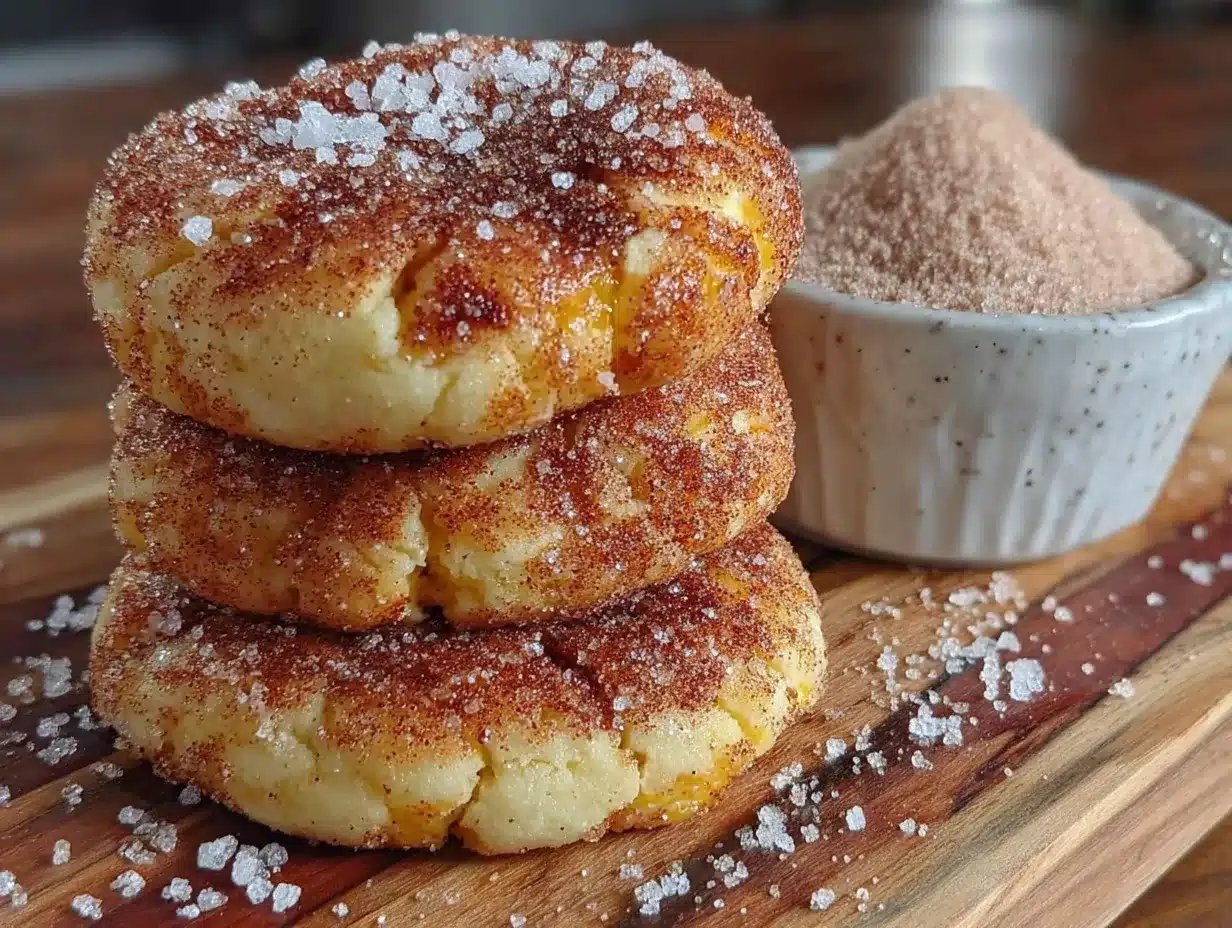
- 1/4 cup granulated sugar – Fine sugar sticks best to the dough. Avoid using superfine or powdered sugar here.
- 1 tablespoon ground cinnamon – Adjust this to your taste. I like a heavy coating, so I sometimes bump it up to 1 1/2 tablespoons.
A quick note on ingredient sourcing—I’ve found that using a good quality cinnamon makes a noticeable difference. I personally love Saigon cinnamon for its bold, slightly sweet flavor. It’s worth the extra dollar or two if you can find it.
Equipment Needed
You don’t need a fancy kitchen to make these cookies, but having the right tools makes the process smoother.
- Large mixing bowl and medium mixing bowl – One for the wet ingredients, one for the dry. Any bowls you have will work.
- Hand mixer or stand mixer – A hand mixer is totally fine here. You could even mix by hand with a wooden spoon if you’re patient enough, but the butter and sugar need to be properly creamed together for the right texture.
- Measuring cups and spoons – Accurate measurements matter in baking more than cooking. A kitchen scale is even better if you have one.
- Baking sheet – A light-colored aluminum sheet works best. Dark sheets absorb more heat and can cause the bottoms to brown too quickly.
- Parchment paper or silicone baking mat – Parchment paper is my go-to. It prevents sticking and makes cleanup a breeze.
- Cookie scoop (1.5 tablespoon size) – I use a #40 scoop for consistent cookies. If you don’t have one, just use two spoons to portion out the dough.
- Cooling rack – Letting cookies cool on the sheet for a few minutes before transferring to a rack prevents them from over-baking on the hot pan.
- Small shallow bowl – For the cinnamon sugar coating. A cereal bowl works perfectly.
If you don’t have a hand mixer, you can beat the butter and sugars together with a sturdy spatula—it just takes a bit more elbow grease. And if you’re like me and hate washing extra dishes, line your baking sheets with parchment paper and skip the silicone mats. They work fine, but parchment is easier to deal with.
Preparation Method
Let’s make these cookies. I’ll walk you through every step so you know exactly what to look for.
- Preheat your oven to 350°F (175°C). Line two baking sheets with parchment paper. Getting the oven hot before you start mixing ensures even baking from the moment the cookies go in.
- In a medium bowl, whisk together the dry ingredients. Combine 1 3/4 cups all-purpose flour, 1/2 teaspoon baking soda, 1/2 teaspoon cream of tartar, 1/2 teaspoon salt, 1 teaspoon cinnamon, 1/2 teaspoon nutmeg, 1/4 teaspoon ginger, and 1/8 teaspoon cloves. Whisk until everything is evenly distributed—about 15 seconds. Set this aside.
- In a large bowl, cream the butter and sugars. Beat 1/2 cup softened unsalted butter with 3/4 cup granulated sugar and 1/4 cup packed brown sugar on medium speed for 2-3 minutes. You’re looking for a light, fluffy texture. The mixture should look paler in color and feel smooth when you rub a bit between your fingers. Scrape down the sides of the bowl halfway through.
- Add the pumpkin, egg yolk, and vanilla. Beat in 1/2 cup pumpkin puree, 1 large egg yolk, and 1 teaspoon vanilla extract on low speed until just combined. The mixture might look slightly curdled at this point—that’s totally normal. Don’t overmix here. You just want everything incorporated.
- Gradually add the dry ingredients to the wet ingredients. Add the flour mixture in two additions, mixing on low speed after each until just combined. Stop as soon as you don’t see any more streaks of flour. Overmixing at this stage develops gluten and makes the cookies tough. The dough will be soft and slightly sticky—that’s exactly what you want.
- Prepare the cinnamon sugar coating. In a small shallow bowl, whisk together 1/4 cup granulated sugar and 1 tablespoon cinnamon. Set this near your baking sheets.
- Scoop and roll the dough balls. Using a 1.5-tablespoon cookie scoop, portion out the dough. Roll each portion between your palms into a smooth ball—about 1.5 inches in diameter. If the dough feels too sticky to roll, lightly dampen your hands with water. Drop each ball into the cinnamon sugar mixture and roll it around until completely coated. Place the coated dough balls on the prepared baking sheets, spacing them about 2 inches apart. You should get about 18-20 cookies total.
- Bake for 10-12 minutes. Bake one sheet at a time in the center of the oven. At 10 minutes, the cookies will look puffed, slightly cracked on top, and the edges will be set but the centers will still look soft and slightly underdone. That’s your cue to pull them out. If you prefer a firmer cookie, go the full 12 minutes—but honestly, the 10-minute mark gives you that perfect soft-baked texture.
- Cool on the baking sheet for 5 minutes. This step is crucial. The cookies need this time to set up properly. If you try to move them too soon, they’ll fall apart. After 5 minutes, transfer them to a wire cooling rack to cool completely.
- Repeat with the remaining dough. If you’re reusing the same baking sheet, let it cool completely before placing new dough on it. A hot sheet will cause the cookies to spread too much.
A quick note on timing—the first batch usually takes me about 10 minutes to scoop and roll, then 10 minutes to bake. By the time the first batch is cooling, the second is ready to go in. You can have all 20 cookies done in under 30 minutes easily.
Cooking Tips & Techniques
I’ve made plenty of mistakes with pumpkin cookies over the years, so let me save you the trouble.
Don’t skip blotting your pumpkin puree. This is the number one tip I give everyone. Pumpkin puree holds a surprising amount of water, and that extra moisture can make your cookies spread into thin, flat discs. Before adding the pumpkin to your dough, spread it out on a paper towel-lined plate and gently press another paper towel on top to absorb excess liquid. You’ll be shocked at how much water comes out. This simple step changed my cookie game completely.
Room temperature ingredients matter. Cold butter doesn’t cream properly with sugar, and cold egg yolk can cause the mixture to seize up. Let your butter sit out for about 30 minutes before starting, and let your egg come to room temperature by placing it in a bowl of warm water for 5 minutes if you’re in a hurry.
Watch your bake time like a hawk. Ovens vary wildly. My friend’s oven runs 25 degrees hot, and she has to pull her cookies at 8 minutes. The first time you make these, check them at 9 minutes and go from there. The cookies are done when the edges are set and the centers look slightly underbaked. They’ll continue cooking on the hot sheet after you pull them out.
Multitask strategically. While your first batch bakes, roll the second batch of dough balls. While the second batch bakes, the first batch is cooling. This keeps the assembly line moving and you’re never standing around waiting.
One mistake I learned the hard way— I once tried doubling the recipe and baked both sheets at the same time on different racks. The top cookies browned too fast while the bottom ones stayed pale. Always bake one sheet at a time in the center of the oven for the most consistent results.
Variations & Adaptations
These cookies are forgiving enough to play around with. Here are some variations I’ve tested and loved.
Gluten-Free Version – Swap the all-purpose flour with a 1:1 gluten-free baking flour blend. I’ve had great results with Bob’s Red Mill 1:1 Baking Flour. The cookies will be slightly more delicate, so handle them gently when transferring to the cooling rack.
Dairy-Free Option – Use vegan butter sticks instead of regular butter. I recommend Country Crock Plant Butter or Miyoko’s. Avoid margarine spreads, which have too much water and will ruin the texture.
Spice It Up – Add 1/4 teaspoon of cardamom to the spice blend for a more complex, aromatic flavor. Cardamom and pumpkin are a match made in heaven.
Chocolate Lover’s Twist – Fold in 1/2 cup of semi-sweet chocolate chips or white chocolate chips after mixing the dough. The chocolate adds a nice richness that balances the spices.
Maple Glaze Drizzle – Mix 1/2 cup powdered sugar with 1 tablespoon maple syrup and 1 teaspoon milk. Drizzle over cooled cookies for an extra layer of fall flavor. I did this once for a brunch party and they disappeared in minutes.
Pumpkin Seed Crunch – Before baking, press a few pumpkin seeds (pepitas) into the top of each dough ball. They toast up in the oven and add a lovely crunch.
My personal favorite variation is the cardamom version. There’s something about that floral, slightly citrusy note that makes the cookies feel extra special. I make a batch every Thanksgiving and they’re always the first thing gone from the dessert table.
Serving & Storage Suggestions
These cookies are best served slightly warm, when the cinnamon sugar coating is still a little melty and the centers are ultra-soft. Let them cool for about 5 minutes after baking, then grab one while it’s still warm—trust me on this.
They pair beautifully with a hot cup of coffee, a glass of cold milk, or even a scoop of vanilla ice cream for an indulgent dessert. If you’re hosting a fall gathering, arrange them on a platter alongside some soft pumpkin spice snickerdoodles for a cookie spread that’ll have everyone asking for the recipe.
For storage, keep the cookies in an airtight container at room temperature. They’ll stay soft and fresh for up to 4 days. Layer them with parchment paper between stacks to prevent them from sticking together. After day 2, I like to pop one in the microwave for 8 seconds to bring back that just-baked softness.
To freeze: Place the baked and cooled cookies in a single layer on a baking sheet and freeze for 1 hour. Transfer to a freezer-safe bag or container. They’ll keep for up to 3 months. Thaw at room temperature for about 30 minutes before serving. You can also freeze the unbaked dough balls—just roll them in the cinnamon sugar, place them on a parchment-lined baking sheet, freeze until solid, then transfer to a bag. Bake from frozen, adding 2-3 minutes to the bake time.
If you’re planning ahead for the holidays, these cookies actually develop deeper flavor after a day or two in the fridge. The spices have time to meld together, and the texture stays remarkably soft. Just bring them to room temperature before serving.
Nutritional Information & Benefits
Here’s the estimated nutritional breakdown for one cookie (based on 20 cookies per batch):
- Calories: 135
- Total Fat: 5g
- Saturated Fat: 3g
- Cholesterol: 25mg
- Sodium: 85mg
- Total Carbohydrates: 21g
- Dietary Fiber: 1g
- Sugars: 13g
- Protein: 2g
These numbers are estimates and will vary based on the specific brands and ingredients you use.
One of the things I love about this recipe is that it includes real pumpkin puree, which is packed with vitamin A and fiber. It’s not a health food by any stretch, but it’s nice knowing there’s a vegetable hiding in there somewhere. The pumpkin also adds moisture naturally, which means you can use less butter than you would in a traditional cookie recipe.
If you’re watching your sugar intake, you can reduce the sugar in the dough to 1/2 cup granulated and 2 tablespoons brown sugar. The cookies will be less sweet but still delicious, especially with that cinnamon sugar coating on the outside.
Conclusion
These soft baked pumpkin snickerdoodle cookies with cinnamon sugar are everything I want in a fall cookie—warm, spiced, perfectly soft, and ridiculously easy to make. They’ve become my go-to for pumpkin patch trips, cozy weekends, and any time I need a quick dessert that feels special without requiring hours in the kitchen.
I love that this recipe is flexible enough to adapt to whatever you have on hand, reliable enough to bake perfectly every time, and delicious enough to earn a permanent spot in your fall baking rotation. Whether you stick with the classic version or try one of the variations, these cookies are guaranteed to bring a little warmth to your kitchen.
If you give them a try, I’d love to hear how they turn out. Leave a comment below and let me know if you made any fun adaptations—I’m always looking for new ideas to test in my kitchen. And if you’re looking for more fall baking inspiration, don’t miss my pumpkin pie cheesecake bars with pecan crust or these soft baked pumpkin chocolate chip cookies for even more seasonal sweetness.
Happy baking, friends. May your cookies be soft, your cinnamon sugar generous, and your kitchen smell like October.
Frequently Asked Questions
Can I use pumpkin pie filling instead of pumpkin puree?
No, I wouldn’t recommend it. Pumpkin pie filling already has sugar and spices added, which will throw off the balance of this recipe. Stick with 100% pure pumpkin puree for the best results. If you accidentally bought pie filling, you can still use it—just reduce the sugar in the dough by half and skip the added spices. The texture will be slightly different, but it’ll still work in a pinch.
Why did my cookies turn out flat and thin?
This usually happens for one of three reasons: the butter was too soft or melted, the pumpkin puree wasn’t blotted dry enough, or the dough was overmixed. Make sure your butter is softened but not greasy, blot your pumpkin puree with paper towels, and mix just until the flour disappears. Also, check that your baking soda is fresh—old baking soda loses its lifting power.
Can I make the dough ahead of time and bake later?
Absolutely. You can refrigerate the dough balls (coated in cinnamon sugar) for up to 24 hours before baking. Place them on a parchment-lined baking sheet, cover with plastic wrap, and pop them in the fridge. When you’re ready to bake, add 1-2 minutes to the bake time since the dough will be cold. The cookies actually come out even softer this way because the chilling time allows the flavors to meld.
How do I make these cookies vegan?
To make these vegan, substitute the butter with vegan butter sticks and replace the egg yolk with 1 tablespoon of aquafaba (the liquid from a can of chickpeas) mixed with 1 teaspoon of cornstarch. The texture will be slightly different—a bit more tender and less chewy—but they’ll still be delicious. Make sure your sugar is vegan-friendly too, as some granulated sugars are processed with bone char.
Can I double this recipe?
Yes, this recipe doubles beautifully. Just make sure you have enough baking sheets to work with, and always bake one sheet at a time in the center of the oven. Doubling the recipe will give you about 36-40 cookies, which is perfect for holiday cookie exchanges or big gatherings. If you’re baking for a crowd, these cookies also freeze wonderfully, so you can make a double batch and save half for later.
Pin This Recipe!
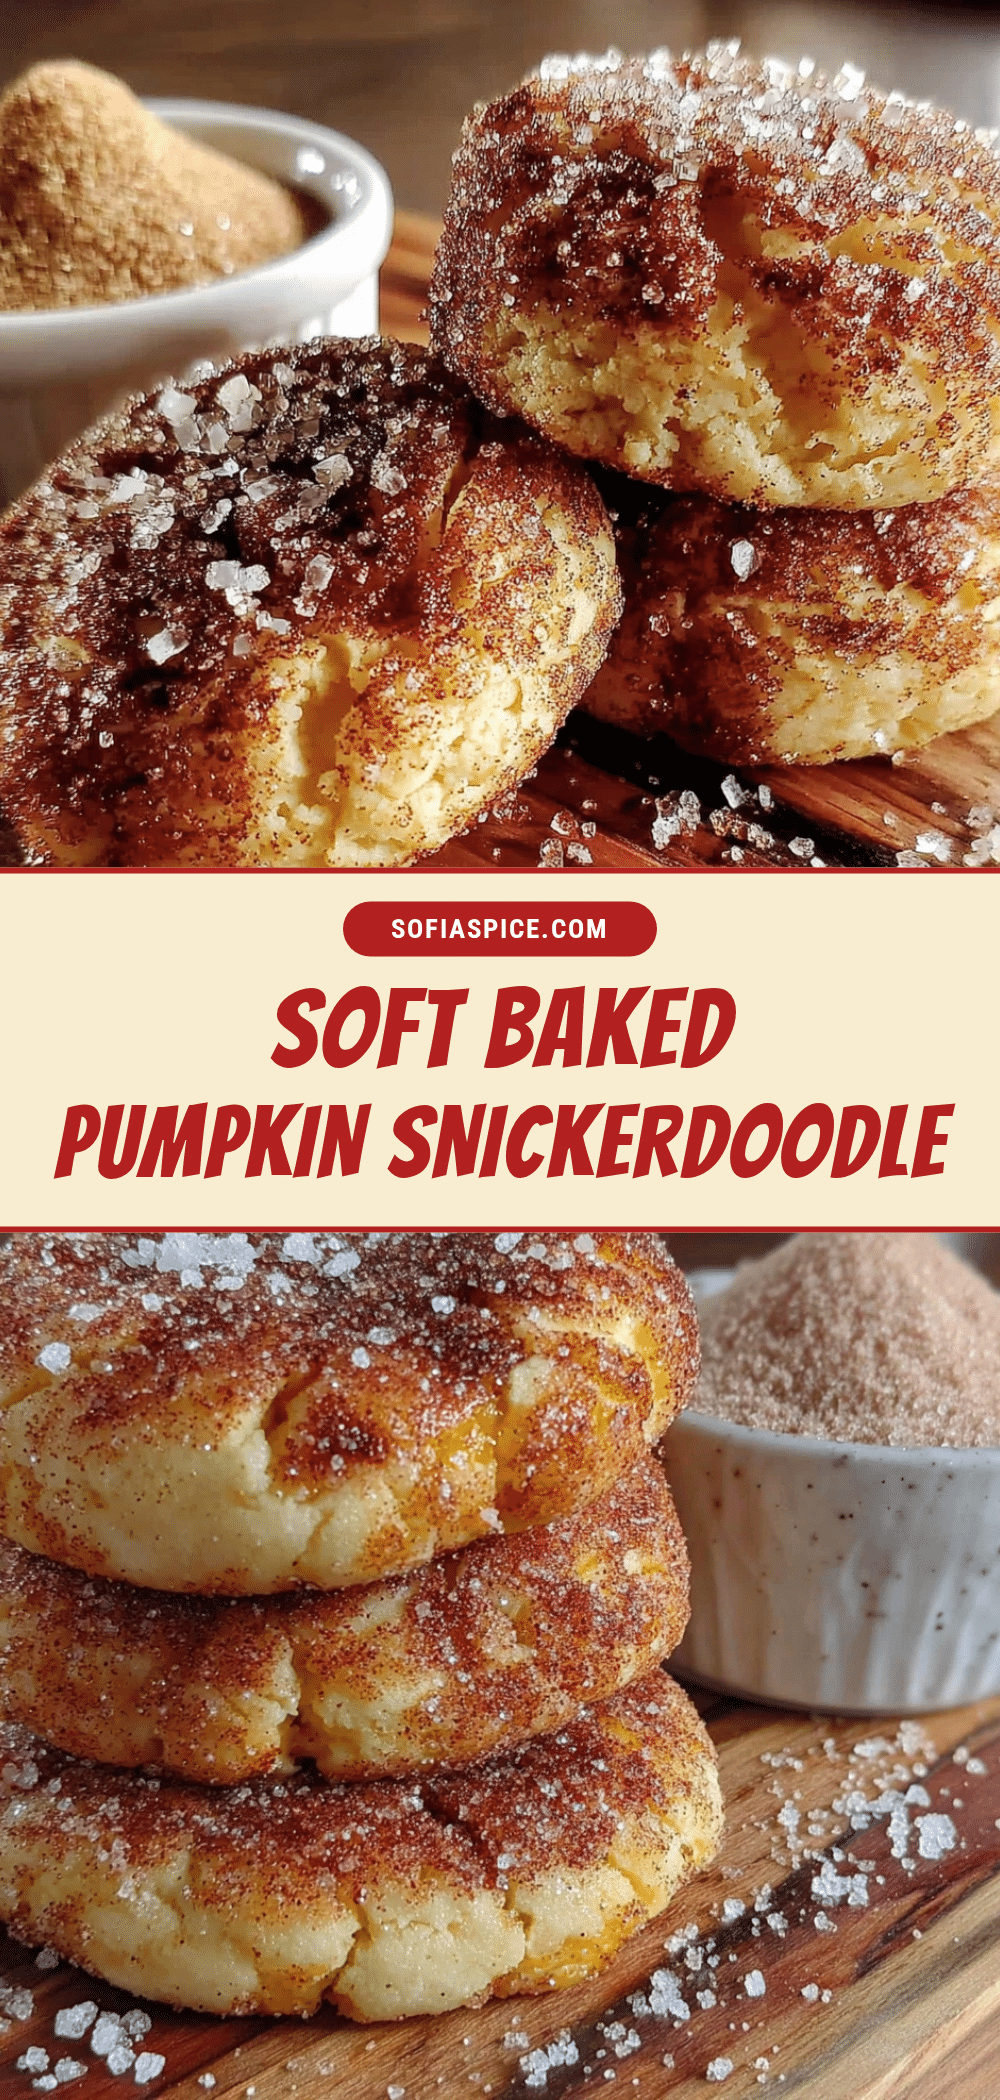
Soft Baked Pumpkin Snickerdoodle Cookies – Easy 30-Minute Recipe

These soft baked pumpkin snickerdoodle cookies with cinnamon sugar are warm, spiced, perfectly soft, and ridiculously easy to make. They taste like fall without trying too hard, with a tender center that stays chewy for days.
- Prep Time: 15 minutes
- Cook Time: 10 minutes
- Total Time: 25 minutes
- Yield: 18-20 cookies 1x
- Category: Dessert
- Cuisine: American
Ingredients
- 1/2 cup unsalted butter, softened to room temperature
- 3/4 cup granulated sugar
- 1/4 cup packed light brown sugar
- 1/2 cup pumpkin puree (100% pure, not pie filling)
- 1 large egg yolk
- 1 teaspoon vanilla extract
- 1 3/4 cups all-purpose flour
- 1/2 teaspoon baking soda
- 1/2 teaspoon cream of tartar
- 1/2 teaspoon salt
- 1 teaspoon ground cinnamon
- 1/2 teaspoon ground nutmeg
- 1/4 teaspoon ground ginger
- 1/8 teaspoon ground cloves
- 1/4 cup granulated sugar (for coating)
- 1 tablespoon ground cinnamon (for coating)
Instructions
- Preheat your oven to 350°F (175°C). Line two baking sheets with parchment paper.
- In a medium bowl, whisk together the dry ingredients: 1 3/4 cups all-purpose flour, 1/2 teaspoon baking soda, 1/2 teaspoon cream of tartar, 1/2 teaspoon salt, 1 teaspoon cinnamon, 1/2 teaspoon nutmeg, 1/4 teaspoon ginger, and 1/8 teaspoon cloves. Set aside.
- In a large bowl, cream the butter and sugars: beat 1/2 cup softened unsalted butter with 3/4 cup granulated sugar and 1/4 cup packed brown sugar on medium speed for 2-3 minutes until light and fluffy. Scrape down the sides halfway through.
- Add the pumpkin, egg yolk, and vanilla: beat in 1/2 cup pumpkin puree, 1 large egg yolk, and 1 teaspoon vanilla extract on low speed until just combined. The mixture may look slightly curdled—that’s normal.
- Gradually add the dry ingredients to the wet ingredients in two additions, mixing on low speed after each until just combined. Stop as soon as no streaks of flour remain. The dough will be soft and slightly sticky.
- Prepare the cinnamon sugar coating: in a small shallow bowl, whisk together 1/4 cup granulated sugar and 1 tablespoon cinnamon.
- Using a 1.5-tablespoon cookie scoop, portion out the dough. Roll each portion into a smooth ball about 1.5 inches in diameter. Drop each ball into the cinnamon sugar mixture and roll until completely coated. Place on prepared baking sheets, spacing 2 inches apart. You should get about 18-20 cookies.
- Bake for 10-12 minutes, one sheet at a time in the center of the oven. At 10 minutes, the cookies will look puffed, slightly cracked on top, with set edges and soft centers. That’s your cue to pull them out for a soft-baked texture.
- Cool on the baking sheet for 5 minutes. This step is crucial for the cookies to set properly. Then transfer to a wire cooling rack to cool completely.
- Repeat with remaining dough. If reusing the same baking sheet, let it cool completely before placing new dough on it.
Notes
Blot pumpkin puree with paper towels to remove excess moisture for best texture. Use room temperature ingredients. Check cookies at 9 minutes for first batch as ovens vary. For gluten-free, use a 1:1 gluten-free baking flour blend. For dairy-free, use vegan butter sticks. Store in an airtight container at room temperature for up to 4 days. Freeze baked cookies for up to 3 months or unbaked dough balls for later use.
Nutrition
- Serving Size: 1 cookie
- Calories: 135
- Sugar: 13
- Sodium: 85
- Fat: 5
- Saturated Fat: 3
- Carbohydrates: 21
- Fiber: 1
- Protein: 2
Keywords: pumpkin snickerdoodle cookies, soft baked pumpkin cookies, easy pumpkin cookies, fall cookies, snickerdoodle recipe, pumpkin dessert, 30-minute cookies


