I want chicken thighs for dinner tonight and I have everything except patience. That’s the honest truth most weeknights—I stand in front of the fridge, mentally calculating how many steps a recipe requires before I commit. And this one-pan garlic butter situation? It passes the test every single time. No marinating, no chopping a mountain of vegetables, no complicated sauces that separate on you. Just chicken, a skillet, butter, garlic, and about thirty minutes of my life.
I stumbled into this recipe on a Tuesday when my grocery budget was shot and my energy levels were lower. I had chicken thighs thawing on the counter (because I forgot to take them out earlier, let’s be real) and I needed something that felt like comfort food but didn’t require a trip to the store. The garlic butter route seemed obvious—butter makes everything better, garlic makes everything aromatic, and one pan means I’m not staring at a mountain of dishes afterward.
The first time I made these, I was skeptical. Chicken thighs in thirty minutes? Without breading or complicated steps? But the smell that filled my kitchen changed my mind before I even took a bite. The garlic sizzling in butter, the chicken skin crisping up golden brown—it smelled like Sunday dinner on a random Tuesday. And when I finally sat down with that plate of juicy chicken with its buttery pan sauce, I knew I’d found my weeknight hero. This is the kind of recipe that makes you feel like you actually have your life together, even when you definitely don’t.
Why You’ll Love This Recipe
I’ve made this recipe more times than I can count, and every time it delivers exactly what I need—dinner on the table fast, with minimal cleanup and maximum flavor. Here’s why this one has become my go-to:
- Ready in 30 Minutes : From fridge to table in under half an hour. No marinating overnight, no complicated prep work. This is real weeknight cooking that works with your schedule, not against it.
- Simple Pantry Ingredients : Chicken thighs, butter, garlic, salt, pepper, and maybe some herbs if you’re feeling fancy. That’s it. You probably have most of this stuff right now.
- One Pan, Minimal Cleanup : Everything happens in one skillet. No need to juggle multiple pots and pans or scrub burnt-on messes. The pan sauce does the work for you.
- Juicy, Never Dry : Chicken thighs are naturally more forgiving than breasts—they stay tender and moist even if you walk away for an extra minute or two. The butter bath keeps everything succulent.
- Family-Approved : I’ve served these to picky kids, skeptical in-laws, and friends who claim they don’t like dark meat. Every single plate came back clean. It’s that good.
What makes this recipe different from other chicken dinners is the technique—you’re not just cooking chicken in butter, you’re building a flavorful pan sauce right in the same skillet. The fond (those browned bits stuck to the pan) gets deglazed with a splash of chicken broth or white wine, creating a rich, garlicky sauce that coats every bite. It’s restaurant-quality cooking without the restaurant-level effort. And honestly? That’s exactly what I need on a busy night.
What Ingredients You Will Need
This recipe keeps things simple, using everyday ingredients that come together to create something genuinely special. Here’s what you’ll need to grab:
- Chicken Thighs (4-6 pieces, bone-in skin-on preferred): The bone keeps the meat juicy during cooking, and the skin crisps up beautifully in the butter. You can use boneless thighs if that’s what you have, just reduce cooking time by about 5-7 minutes. I prefer organic or air-chilled chicken for better texture and flavor.
- Unsalted Butter (4 tablespoons): Butter is the star here—it adds richness, helps brown the chicken, and forms the base of your pan sauce. I use unsalted so I can control the salt level. Kerrygold or any European-style butter gives an extra creamy finish.
- Fresh Garlic (6-8 cloves, minced): Don’t skimp on the garlic—it mellows as it cooks and becomes sweet and aromatic. Pre-minced garlic from a jar works in a pinch, but fresh garlic really makes a difference here. I recommend smashing each clove with the side of your knife before mincing for maximum flavor release.
- Chicken Broth (1/2 cup): This deglazes the pan and creates the sauce. Low-sodium broth is best so you can adjust seasoning later. Bone broth adds even more richness if you have it on hand.
- Olive Oil (1 tablespoon): A little oil helps the butter from burning while you sear the chicken. It raises the smoke point so you get a good golden crust without acrid flavors.
- Salt and Black Pepper (to taste): Simple but essential. I use kosher salt for even seasoning and freshly cracked black pepper for that little kick.
- Fresh Thyme or Rosemary (4-5 sprigs, optional but recommended): Herbs add an aromatic layer that complements the garlic butter beautifully. Dried herbs work too—use about 1 teaspoon.
- Lemon Juice (1 tablespoon, optional): A squeeze of lemon at the end brightens everything up and cuts through the richness of the butter. Don’t skip this if you have a lemon handy.
- Red Pepper Flakes (1/4 teaspoon, optional): For a tiny bit of heat. Completely optional, but I love the little warmth it adds.
Equipment Needed
You don’t need a fancy kitchen for this recipe—just a few basic tools that most home cooks already have:
- Large Oven-Safe Skillet (12-inch cast iron or stainless steel): Cast iron gives the best sear and heat retention, but any heavy-bottomed oven-safe pan works. I’ve made this in my trusty Lodge cast iron for years. If you don’t have oven-safe, you can finish the chicken on the stovetop covered.
- Tongs : For flipping the chicken without piercing the skin. Piercing releases juices and you lose that beautiful golden crust.
- Sharp Knife and Cutting Board : For mincing garlic and any herbs. A microplane also works great for garlic if you want it extra fine.
- Measuring Spoons and Liquid Measuring Cup : For accurate measurements, though honestly I eyeball the broth most nights.
- Meat Thermometer (optional but recommended): Takes the guesswork out of doneness. Chicken thighs are done at 165°F, but I pull them at 160°F and let carryover cooking finish the job.
- Aluminum Foil : For tenting the chicken while it rests. This keeps it warm and juicy while you finish the sauce.
If you don’t have an oven-safe skillet, no worries—just cook the chicken entirely on the stovetop over medium heat, covered for the last 5-7 minutes. The skin won’t be quite as crispy, but it’ll still taste amazing.
Preparation Method
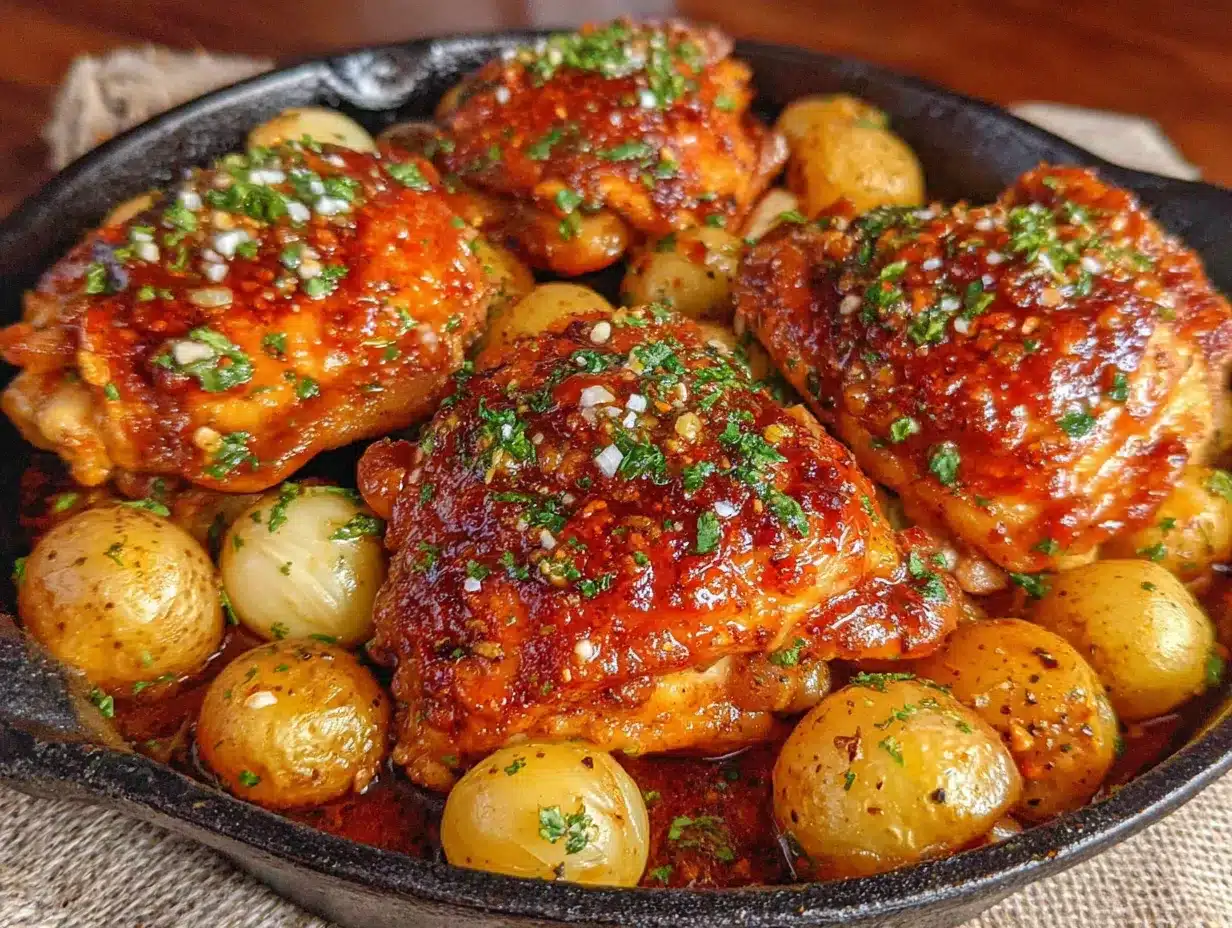
Let me walk you through this step by step. I’ve made this so many times I could do it in my sleep, but I’ll share all the little tricks I’ve picked up along the way.
- Prep Your Chicken : Pat the chicken thighs dry with paper towels. This is crucial—wet chicken won’t brown properly. Season generously on both sides with salt and pepper. Don’t be shy with the salt; it helps the skin crisp up and seasons the meat all the way through. Let them sit at room temperature for 10-15 minutes while you get everything else ready.
- Heat Your Pan : Place your skillet over medium-high heat and add the olive oil and 1 tablespoon of the butter. Swirl to combine. Wait until the butter stops foaming and just starts to brown—that’s your signal that the pan is hot enough. You want a good sizzle when the chicken hits the pan.
- Sear the Chicken : Place the chicken thighs skin-side down in the hot skillet. Don’t crowd the pan—if your skillet is smaller, cook in batches. Let them cook undisturbed for 5-6 minutes. I know it’s tempting to peek, but leave them alone! The skin needs that uninterrupted contact to get golden and crispy. You’ll know it’s ready when the skin releases easily from the pan.
- Flip and Continue Cooking : Using your tongs, flip the chicken over. Cook for another 4-5 minutes on the second side. The chicken should be deeply golden on both sides. If you’re using a meat thermometer, it should read about 150°F at this point.
- Add Garlic and Butter : Reduce the heat to medium-low. Push the chicken to one side of the pan and add the remaining 3 tablespoons of butter and the minced garlic to the empty space. Stir the garlic in the melting butter for about 30-45 seconds until fragrant—don’t let it burn or it’ll turn bitter.
- Create the Sauce : Pour in the chicken broth and add your herb sprigs if using. Use a wooden spoon or spatula to scrape up all those browned bits from the bottom of the pan—that’s pure flavor right there. Let the sauce simmer for 2-3 minutes, spooning it over the chicken as it cooks.
- Finish in the Oven (Optional but Recommended) : If you want extra crispy skin and perfectly cooked meat, transfer the skillet to a preheated 400°F oven for 5-7 minutes. This step is optional but worth it—the oven heat surrounds the chicken and finishes cooking it evenly while keeping the skin crisp.
- Rest and Serve : Remove the skillet from the oven (use oven mitts—that handle is hot!). Transfer the chicken to a plate and tent loosely with foil for 5 minutes. While it rests, add the lemon juice and red pepper flakes to the pan sauce, stirring to combine. Taste and adjust seasoning with more salt or pepper if needed.
- Spoon the Sauce Over the Chicken : Place the chicken on a serving platter or individual plates. Spoon that gorgeous garlic butter sauce over the top. Garnish with fresh herbs if you have them.
One thing I learned the hard way—don’t skip the resting step. I know you’re hungry and it smells amazing, but those 5 minutes let the juices redistribute throughout the meat. Cut into it too soon and all that goodness ends up on your cutting board instead of in your mouth.
Cooking Tips & Techniques
After making this recipe dozens of times, I’ve collected a few tips that make the difference between good chicken and unforgettable chicken. Here’s what I’ve learned:
Patience with the sear is everything. The biggest mistake I see home cooks make is moving the chicken too soon. That golden crust doesn’t form until the moisture on the surface evaporates and the proteins start browning. If you try to flip the chicken and it sticks, it’s not ready yet. Give it another minute and try again. I ruined my first few attempts by being impatient—the skin tore and I ended up with pale, sad chicken.
Don’t crowd the pan. If you’re cooking for a crowd and need more than 6 thighs, do it in batches. When the pan is overcrowded, the temperature drops and the chicken steams instead of searing. You’ll end up with gray, rubbery skin instead of that gorgeous golden crust. I learned this when I tried to cram 8 thighs into a 10-inch skillet—never again.
Control your heat. Medium-high for the sear, then medium-low for the garlic and sauce. Garlic burns quickly at high heat and turns bitter. If you see the garlic starting to brown too fast, add a splash more broth or butter to cool things down. I keep a small bowl of broth nearby just in case.
Use a meat thermometer for consistency. I know, I sound like a broken record, but it really takes the guesswork out. Chicken thighs are done at 165°F, but I pull them at 160°F because they continue cooking while resting. The carryover heat brings them up to perfect doneness without overcooking.
Deglaze properly. When you add the broth, really work that wooden spoon across the bottom of the pan. Those browned bits (the fond) are concentrated chicken flavor mixed with caramelized garlic and butter. If you leave them stuck to the pan, you’re missing out on half the flavor of this dish.
Season in layers. Salt the chicken before cooking, season the sauce at the end, and taste before serving. Building flavor in stages creates a more complex final dish than just dumping all the seasoning in at once.
Variations & Adaptations
One of the best things about this recipe is how flexible it is. Here are some ways I’ve adapted it depending on what I have on hand or who I’m cooking for:
Lemon Herb Version : Add the zest of one lemon along with the garlic, and use fresh rosemary and thyme instead of just one herb. Finish with a generous squeeze of lemon juice and some lemon slices in the pan while it bakes. The brightness cuts through the butter beautifully—perfect for spring or summer dinners.
Creamy Garlic Butter Chicken : After deglazing with broth, stir in 1/4 cup of heavy cream or half-and-half. Let it simmer for 2-3 minutes until thickened slightly. The cream mellows the garlic and creates a luscious sauce that’s incredible over mashed potatoes or rice. This is my go-to when I want something extra indulgent.
Spicy Honey Garlic Version : Add 2 tablespoons of honey and 1 teaspoon of sriracha (or more if you like heat) to the pan sauce. The sweet-spicy combination is addictive, and the honey helps create a gorgeous glaze on the chicken. My husband requests this version every time he’s had a rough week.
Keto/Low-Carb Adaptation : This recipe is naturally low-carb as written! Just skip any honey or sugar additions and serve with roasted vegetables or cauliflower rice instead of potatoes or pasta. The butter and chicken thighs are perfect for keto diets.
Dairy-Free Version : Substitute the butter with a high-quality vegan butter or ghee (if you can tolerate clarified butter). The flavor changes slightly but it’s still delicious. I’ve used Miyoko’s European-style cultured vegan butter with great results—it browns similarly to dairy butter.
Sheet Pan Variation : If you love the idea of even less cleanup, try my sticky honey garlic chicken thighs sheet pan recipe for a similar flavor profile with a different cooking method. Both are weeknight winners in my book.
Serving & Storage Suggestions
These garlic butter chicken thighs are incredibly versatile when it comes to serving. Here’s how I like to enjoy them:
Serving Temperature : Serve hot, straight from the skillet. The butter sauce will start to solidify as it cools, so eat up while it’s warm and luscious. If you’re serving a crowd, keep the skillet on a trivet at the table so everyone can help themselves.
What to Serve With It : The buttery garlic sauce begs for something to soak it up. Mashed potatoes are my top choice—the creamy potatoes catch every drop of that sauce. Crusty bread for dipping runs a close second. For a lighter option, try roasted asparagus, steamed green beans, or a simple arugula salad with lemon vinaigrette. The creamy make-ahead mashed potato casserole is a fantastic holiday-worthy side that pairs beautifully with this chicken.
Wine Pairing : A crisp white wine like Sauvignon Blanc or a light Pinot Noir works beautifully. The acidity cuts through the butter while complementing the garlic. If you’re not drinking wine, sparkling water with lemon is perfect.
Storage : Store leftover chicken in an airtight container in the refrigerator for up to 4 days. Keep the sauce separate if possible, or pour it over the chicken before storing. The flavors actually deepen overnight—I’ve been known to make extra just for next day’s lunch.
Reheating : The best way to reheat is in a skillet over medium-low heat with a splash of broth or water to loosen the sauce. Cover and heat for 5-7 minutes until warmed through. The microwave works in a pinch but will dry out the chicken and make the skin soggy. If you’re in a hurry, microwave on 50% power in 30-second intervals.
Freezing : These freeze beautifully for up to 3 months. Let the chicken cool completely, then place in a freezer-safe container with the sauce. Thaw overnight in the refrigerator and reheat as directed above. I often double the recipe and freeze half for those nights when I just can’t cook.
Nutritional Information & Benefits
Here’s a rough estimate of what you’re looking at per serving (based on one chicken thigh with sauce):
- Calories : Approximately 380-420
- Protein : 28-32 grams
- Fat : 28-32 grams
- Carbohydrates : 2-4 grams
- Fiber : 0 grams
- Sugar : 0-1 grams
These values are estimates and will vary based on the size of your chicken thighs and exact ingredients used.
Health Benefits : Chicken thighs are an excellent source of high-quality protein, which supports muscle maintenance and keeps you feeling full. They also provide essential B vitamins, particularly B6 and B12, which support energy metabolism and brain function. The garlic in this recipe contains allicin, a compound known for its anti-inflammatory and immune-supporting properties. Butter, when used in moderation, provides fat-soluble vitamins A, D, E, and K.
Dietary Considerations : This recipe is naturally gluten-free, low-carb, and keto-friendly. It’s also nut-free and egg-free. If you’re watching sodium, use low-sodium broth and go easy on the added salt. For dairy-free needs, substitute with vegan butter or ghee as mentioned above.
Potential Allergens : Dairy (butter). If you’re serving someone with a dairy allergy, make sure to use a certified dairy-free butter alternative.
Conclusion
This one-pan garlic butter chicken thighs recipe has honestly become my weeknight security blanket. It’s the meal I turn to when I’m tired, when I’m busy, when I need something reliable that I know will turn out perfectly. There’s something deeply satisfying about watching those chicken thighs transform from pale and raw to golden and sizzling in a pool of garlic butter—it feels like a small victory every time.
What I love most about this recipe is that it doesn’t ask much of you. It meets you where you are—tired, rushed, maybe a little overwhelmed—and still delivers a dinner that feels special. The kind of meal that makes everyone at the table pause and say, “Wow, this is really good.” And you get to smile and say, “It was nothing,” because honestly, it kind of was.
I’d love to hear how this turns out for you! Did you add your own twist? Serve it with something unexpected? Burn the garlic and start over? (Been there.) Drop a comment below and let me know—your kitchen victories (and failures) make this community what it is.
Now go make some garlic butter magic. You’ve got this.
Frequently Asked Questions
Can I use chicken breasts instead of thighs?
Absolutely! Boneless skinless chicken breasts work, but they cook faster and can dry out more easily. Reduce the cooking time by about 5 minutes and use a meat thermometer to ensure they reach 165°F. I recommend pounding thicker breasts to an even thickness for consistent cooking. The butter sauce will help keep them moist, just don’t overcook them.
Do I have to use bone-in skin-on chicken thighs?
Nope, but I really recommend it for the best results. The bone adds flavor and moisture, while the skin crisps up into something magical. If you use boneless skinless thighs, reduce cooking time by 5-7 minutes and expect less crispy skin (obviously) and a slightly less rich sauce. Still delicious, just different.
Can I make this recipe dairy-free?
Yes! Substitute the butter with a good quality vegan butter or ghee if you tolerate clarified dairy. I’ve had great results with Miyoko’s European-style cultured vegan butter. The flavor profile changes slightly but it’s still absolutely delicious. Just make sure your vegan butter has a high enough fat content to brown properly.
How do I keep the garlic from burning?
This is the number one question I get! The trick is to reduce the heat before adding the garlic. After searing the chicken, turn the heat down to medium-low, then add the butter and garlic. Stir constantly for 30-45 seconds—you want it fragrant but not brown. If it starts browning too fast, add a splash of broth to cool things down immediately.
Can I prep this recipe ahead of time?
You can season the chicken up to 24 hours in advance and keep it covered in the fridge. Let it sit at room temperature for 15 minutes before cooking. You can also mince the garlic and measure out your other ingredients ahead of time. The actual cooking is best done fresh, but the leftovers reheat beautifully for lunch the next day.
Pin This Recipe!

Easy One-Pan Garlic Butter Chicken Thighs: Best 30-Minute Dinner

Juicy, golden chicken thighs cooked in a rich garlic butter sauce, all in one pan and ready in 30 minutes. Perfect for busy weeknights when you need a comforting, flavorful dinner with minimal cleanup.
- Prep Time: 10 minutes
- Cook Time: 20 minutes
- Total Time: 30 minutes
- Yield: 4 servings 1x
- Category: Main Course
- Cuisine: American
Ingredients
- 4–6 bone-in skin-on chicken thighs
- 4 tablespoons unsalted butter
- 6–8 cloves fresh garlic, minced
- 1/2 cup low-sodium chicken broth
- 1 tablespoon olive oil
- Kosher salt and freshly cracked black pepper, to taste
- 4–5 sprigs fresh thyme or rosemary (optional, or 1 teaspoon dried)
- 1 tablespoon lemon juice (optional)
- 1/4 teaspoon red pepper flakes (optional)
Instructions
- Pat the chicken thighs dry with paper towels. Season generously on both sides with salt and pepper. Let sit at room temperature for 10-15 minutes.
- Place a large oven-safe skillet (12-inch cast iron or stainless steel) over medium-high heat. Add olive oil and 1 tablespoon of butter. Swirl to combine. Wait until the butter stops foaming and just starts to brown.
- Place the chicken thighs skin-side down in the hot skillet. Do not crowd the pan; cook in batches if needed. Cook undisturbed for 5-6 minutes until the skin is golden and releases easily from the pan.
- Flip the chicken using tongs. Cook for another 4-5 minutes on the second side until deeply golden. If using a meat thermometer, it should read about 150°F.
- Reduce heat to medium-low. Push chicken to one side of the pan. Add remaining 3 tablespoons of butter and minced garlic to the empty space. Stir garlic in the melting butter for 30-45 seconds until fragrant, being careful not to burn it.
- Pour in chicken broth and add herb sprigs if using. Use a wooden spoon to scrape up browned bits from the bottom of the pan. Let sauce simmer for 2-3 minutes, spooning it over the chicken.
- Optional: Transfer skillet to a preheated 400°F oven for 5-7 minutes for extra crispy skin and even cooking.
- Remove skillet from oven. Transfer chicken to a plate and tent loosely with foil for 5 minutes. While chicken rests, stir lemon juice and red pepper flakes into the pan sauce. Taste and adjust seasoning.
- Place chicken on a serving platter or individual plates. Spoon garlic butter sauce over the top. Garnish with fresh herbs if desired.
Notes
Don’t skip the resting step—it allows juices to redistribute. For dairy-free, substitute with vegan butter or ghee. If you don’t have an oven-safe skillet, cook entirely on stovetop over medium heat, covered for the last 5-7 minutes. Pat chicken dry for best browning. Reduce heat before adding garlic to prevent burning.
Nutrition
- Serving Size: 1 chicken thigh with
- Calories: 400
- Sugar: 0.5
- Sodium: 450
- Fat: 30
- Saturated Fat: 12
- Carbohydrates: 3
- Protein: 30
Keywords: one-pan chicken, garlic butter chicken, 30-minute dinner, chicken thighs, easy weeknight dinner, skillet chicken


