The way the marshmallow stretches before it snaps—that’s the moment I wait for. Not the eating, not the decorating, though those are fine. That elastic, glossy pull between the spatula and the pot, clinging like it knows something you don’t. That’s the whole reason I make these Easy Candy Corn Rice Krispie Treats for Halloween every single year. Everything else is just the payoff.
I wasn’t planning on inventing a new tradition, honestly. It was three Octobers ago, and I had a bag of candy corn I bought because it was staring at me from the checkout aisle. You know how that goes. I also had a box of Rice Krispies, a bag of marshmallows, and a vague sense that I should probably make something festive for the neighborhood kids who’d be ringing my doorbell in a week. I didn’t want to bake a cake—too much fuss. Cookies felt too ordinary. But layered Rice Krispie treats? That felt like something worth figuring out.
The first batch was ugly. Let’s be real. The layers bled into each other like a bad tie-dye project, and the candy corn sank to the bottom like it was trying to hide. But the taste—oh, the taste was exactly right. Salty, sweet, buttery, with that signature crunch that makes you close your eyes for half a second. So I tried again. And again. And somewhere around batch four, I figured out the trick to keeping those layers clean and those candy corn pieces suspended like little orange-and-white gems. Now I can’t imagine Halloween without them. They’re not perfect-looking, but they’re ours.
Why You’ll Love This Recipe
These Easy Candy Corn Rice Krispie Treats for Halloween aren’t just another dessert you’ll forget about by November. They’re the kind of thing people remember. Here’s why they work so well:
- No oven required. Seriously. You don’t even need to turn on the oven for these. Everything happens on the stovetop or in the microwave, which means your kitchen stays cool and you spend less time cleaning up.
- Only 4 main ingredients. Butter, marshmallows, Rice Krispies cereal, and candy corn. That’s it. You probably already have three of them in your pantry right now.
- Perfect for Halloween parties. The three-layer design looks like a giant piece of candy corn, which makes it an instant hit at classroom parties, trunk-or-treat events, or just your own living room on October 31st.
- Kid-friendly from start to finish. Little hands can help press the mixture into the pan, sprinkle the candy corn on top, or cut the bars into triangles. Just keep them away from the hot marshmallow mixture, obviously.
- They travel well. These treats hold their shape beautifully, so you can stack them in a container, toss them in a bag, and bring them anywhere without worrying about crumbs everywhere.
What makes this version different from the other recipes floating around the internet? It’s the technique. I’ve tested this enough times to know exactly how to keep the layers from mixing together into a muddy mess. The trick is letting each layer set just long enough before adding the next one—not too long that they won’t stick, but long enough that they hold their own shape. It’s a fine line, and I’ll walk you through every step of it.
This recipe is the one that makes people say, “Wait, you made these?” with that impressed little pause. It’s Halloween comfort food at its most honest—no fancy equipment, no weird ingredients, just good old-fashioned butter and marshmallows doing what they do best.
What Ingredients You Will Need
This recipe uses simple, everyday ingredients to create something that looks way more complicated than it actually is. Most of these are pantry staples, but I’ll walk you through a few specifics to make sure your treats turn out perfect every time.
- Unsalted butter (6 tablespoons, divided). I use unsalted because it lets me control the salt level. If you only have salted butter on hand, just skip the extra pinch of salt I mention later. I prefer Land O’Lakes for consistent quality, but any brand works fine.
- Mini marshmallows (10 ounces per layer, 30 ounces total). Mini marshmallows melt faster and more evenly than the big ones. Don’t try to substitute with jumbo marshmallows unless you want to stand there stirring forever. Jet-Puffed is my go-to brand because they melt into the smoothest consistency.
- Rice Krispies cereal (5 cups per layer, 15 cups total). Generic brands work in a pinch, but the real Rice Krispies hold up better and give you that signature snap-crackle-pop texture. If you use a store brand, just know the pieces tend to be smaller and the final texture might be slightly denser.
- Candy corn (about 1 cup for topping and mixing). This is the star of the show, so don’t skimp here. Brach’s is the classic choice, but I’ve also used the seasonal autumn mix that has the little pumpkins in it. Just avoid the stale bags—fresh candy corn is softer and mixes into the marshmallow better.
- Vanilla extract (1 teaspoon, optional). This isn’t strictly necessary, but it rounds out the sweetness and adds a little warmth. I add it to the marshmallow mixture right after it melts. If you’re using imitation vanilla, that’s fine too.
- Salt (a pinch, optional). A tiny sprinkle of flaky sea salt on top right before the treats set balances all that sugar. It’s a small detail, but it makes a difference.
Ingredient swap ideas: If you want to try something different, you can swap out the candy corn for candy pumpkins or even chopped-up caramel candies. For a chocolate twist, drizzle melted dark chocolate over the top after the treats have set. If you’re gluten-free, double-check your marshmallow brand—most are gluten-free, but some contain wheat starch. Rice Krispies are made with malt flavoring, which contains gluten, so look for a gluten-free crispy rice cereal if that’s a concern.
Equipment Needed
You don’t need a professional kitchen to make these Easy Candy Corn Rice Krispie Treats for Halloween. Here’s what you’ll need:
- Large pot (at least 4-quart). You need room to stir the marshmallows and cereal without spilling over the sides. A heavy-bottomed pot works best because it distributes heat evenly and prevents scorching.
- 9×13-inch baking pan. This is the standard size for a full batch. If you only have an 8×8 pan, you can still make this recipe—your treats will just be thicker and you’ll have a little extra mixture left over.
- Parchment paper. This is non-negotiable. Line your pan with parchment paper, leaving some overhang on two sides. It makes lifting the whole block of treats out so much easier than trying to scoop them out with a spatula.
- Silicone spatula or wooden spoon. A silicone spatula is ideal because it won’t scratch your pot and it scrapes the sides clean. If you’re using a wooden spoon, just make sure it’s sturdy enough to handle the thick marshmallow mixture.
- Sharp knife or bench scraper. A clean, sharp knife makes cutting the treats into triangles much neater. A bench scraper works even better because it cuts straight down without dragging the marshmallow.
- Measuring cups and spoons. Accurate measurements matter here, especially for the cereal. Too much cereal and the treats will be dry; too little and they’ll be gooey.
If you don’t have a 9×13 pan, you can use a rimmed baking sheet instead. Just note that the treats will be thinner and you might need to adjust the pressing time. I’ve also used a glass baking dish before—it works fine, just be careful not to scratch it when cutting.
Preparation Method
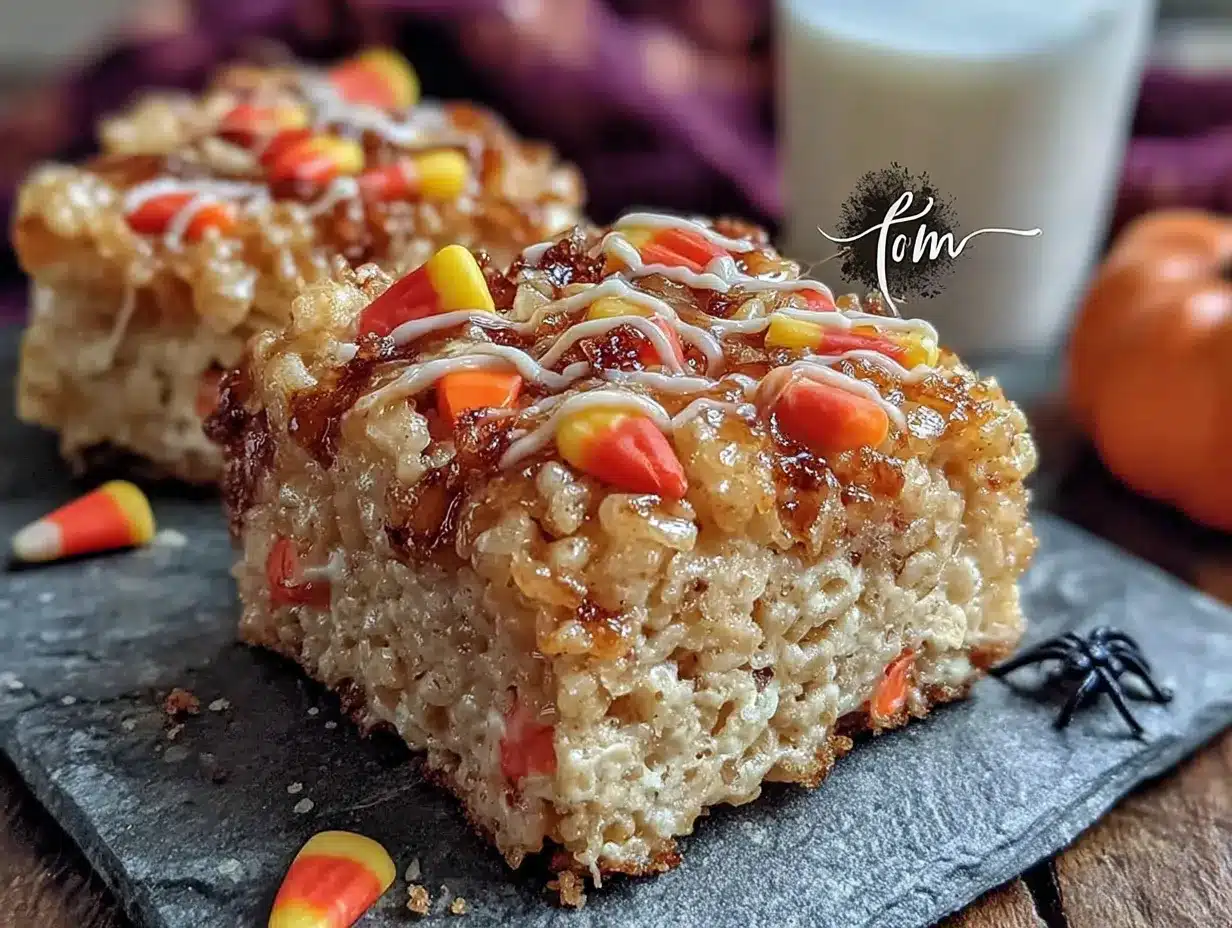
Let’s get into the actual process. These Easy Candy Corn Rice Krispie Treats for Halloween come together in three separate layers, and the key is patience between each one. Here’s exactly how to do it:
- Prep your pan. Line a 9×13-inch baking dish with parchment paper, leaving about 2 inches of overhang on the long sides. Lightly grease the parchment with butter or nonstick spray. This is your insurance policy against sticking.
- Make the orange layer first. In a large pot over medium-low heat, melt 2 tablespoons of butter. Add 10 ounces of mini marshmallows and stir constantly until they’re completely smooth and glossy. This takes about 3-4 minutes. Don’t walk away—marshmallows burn fast. Remove from heat and stir in 5 cups of Rice Krispies cereal until evenly coated. Also mix in about 1/3 cup of candy corn at this point if you want some inside the layer. Press this mixture firmly and evenly into the bottom of your prepared pan. Use a greased spatula or your hands (buttered first) to press it down flat. Let this layer cool for about 10 minutes at room temperature.
- Make the yellow layer. While the orange layer is cooling, wipe out your pot (or grab a clean one). Repeat the same process: melt 2 tablespoons of butter, add 10 ounces of mini marshmallows, stir until smooth. Remove from heat and stir in 5 cups of Rice Krispies. This layer doesn’t get any candy corn mixed in—just the cereal. Gently spread this yellow layer over the orange layer. Press it down carefully so you don’t push the orange layer up. Let it cool for another 10 minutes.
- Make the white layer. For the final layer, melt the remaining 2 tablespoons of butter with the last 10 ounces of marshmallows. Stir in 1 teaspoon of vanilla extract and a pinch of salt if you’re using them. Add 5 cups of Rice Krispies and stir to combine. Press this white layer over the yellow layer. Before it sets completely, sprinkle the remaining candy corn on top, pressing them in gently so they stick.
- Let the whole thing set. Allow the treats to cool completely at room temperature—about 1 hour. Don’t rush this by putting them in the fridge, or the layers might separate. Once set, use the parchment paper to lift the entire block out of the pan.
- Cut into triangles. Use a sharp knife to cut the block in half lengthwise, then cut each half into triangles by making diagonal cuts. You should get about 12-16 triangles depending on how big you want them.
Sensory cues to watch for: The marshmallow mixture should look like thick, shiny glue when it’s ready. When you press the cereal mixture into the pan, it should feel firm but not hard. If it’s too sticky to handle, butter your hands or the spatula. The layers should be distinct when you cut into them—if they’re bleeding into each other, you didn’t let the previous layer set long enough.
Cooking Tips & Techniques
I’ve made this recipe enough times to know exactly where things can go wrong. Here are the lessons I learned the hard way so you don’t have to:
- Low heat is your friend. I cannot stress this enough. Medium-low heat for melting marshmallows. If you crank the heat to speed things up, you’ll end up with brown, burnt marshmallow that tastes like regret. Low and slow, people.
- Don’t over-stir the cereal. Once you add the Rice Krispies, fold them in gently until just combined. Over-stirring crushes the cereal and gives you dense, hockey-puck-style treats. You want some air in there.
- The warm towel trick. If the marshmallow mixture starts sticking to your spatula or hands, dip them in warm water and dry them off. The warmth prevents sticking without adding moisture to the treats. Works every time.
- Layer patience is real. I know it’s tempting to rush through the layers, but those 10-minute cooling breaks are non-negotiable. If you add the next layer too soon, the colors will blend together and you’ll end up with a muddy orange-brown mess instead of clean stripes.
- Cutting cleanly. For the cleanest cuts, spray your knife with nonstick spray between each slice. Wipe the blade clean after every few cuts. This prevents the marshmallow from dragging and tearing the edges.
- My biggest failure. The first time I made these, I tried to double the recipe in a single pan. Don’t do that. The layers were so thick they never set properly, and I ended up with a sticky, delicious disaster that I ate with a spoon while standing over the sink. Stick to one batch in a 9×13 pan.
Variations & Adaptations
Once you’ve mastered the basic Easy Candy Corn Rice Krispie Treats for Halloween, feel free to play around. Here are some variations I’ve tried and loved:
- Chocolate drizzle version. After the treats have set, melt about 1/2 cup of dark chocolate chips with a teaspoon of coconut oil and drizzle it over the top. The chocolate adds a nice bitterness that balances the sweetness. I did this for a Halloween party last year and the bars disappeared in ten minutes flat.
- Peanut butter twist. Add 1/4 cup of creamy peanut butter to the marshmallow mixture in the orange layer. It gives the treats a subtle nutty flavor that pairs surprisingly well with the candy corn. Just make sure your peanut butter is well-stirred before adding it.
- Vegan option. Use vegan marshmallows (Dandies brand works great), vegan butter, and a gluten-free crispy rice cereal. The texture will be slightly different—vegan marshmallows don’t get quite as stretchy—but the taste is still fantastic.
- Spooky spiderweb design. Instead of the three-layer candy corn look, make the whole batch one color (orange or yellow) and pipe a spiderweb design on top using melted white chocolate. Add a plastic spider on each bar for maximum Halloween effect.
- Mini treat cups. Press the mixture into a greased mini muffin tin instead of a baking pan. You’ll get bite-sized treats that are perfect for snack bags or party platters. Just reduce the pressing time since they’re smaller.
My personal favorite variation? The chocolate drizzle version. I made it for a monster sugar cookies themed party I threw last year, and everyone kept asking for the recipe. It’s just enough of a twist to feel special without losing the original charm.
Serving & Storage Suggestions
These Easy Candy Corn Rice Krispie Treats for Halloween are best served at room temperature. The texture is perfectly chewy with just the right amount of crunch. Here’s how to serve and store them:
- Serving temperature. Let the treats sit out for about 10 minutes after cutting before serving. This takes the chill off if they’ve been in the fridge and lets the marshmallow soften slightly.
- Presentation ideas. Arrange the triangles on a platter in a circular pattern, points facing outward, like a sunburst. Or stack them in a jar for a cute gifting option. I’ve also wrapped individual bars in clear cellophane bags tied with orange ribbon for Halloween party favors.
- What to serve with them. These treats pair beautifully with a cold glass of milk, a warm mug of apple cider, or a pumpkin spice cold foam iced coffee for the grown-ups. If you’re serving them at a party, add some spooky mummy hot dogs for a savory-sweet balance.
- Storing at room temperature. Keep the treats in an airtight container at room temperature for up to 3 days. Layer them with parchment paper between each row to prevent sticking. Don’t refrigerate them—the cold makes the marshmallow hard and the cereal loses its crunch.
- Freezing instructions. You can freeze these treats for up to 2 months. Wrap each bar individually in plastic wrap, then place them in a freezer-safe bag. To thaw, let them sit at room temperature for about 30 minutes. They won’t be quite as fresh as the day you made them, but they’re still delicious.
- Flavor development note. These treats actually taste better the day after you make them. The flavors meld together overnight, and the texture settles into that perfect chewy-crunchy balance. So don’t stress if you’re making them a day ahead—it’s actually ideal.
Nutritional Information & Benefits
Let’s be honest—these are a treat, not a health food. But here’s what you should know:
- Estimated per serving (1 triangle): Calories: 220, Fat: 6g, Carbohydrates: 42g, Sugar: 28g, Protein: 2g, Fiber: 0g. These numbers will vary depending on your specific ingredients and how big you cut the bars.
- What’s in it for you? The butter provides a small amount of vitamin A, and the cereal is fortified with iron and B vitamins. But honestly, the real benefit here is the joy factor—sometimes you just need a treat that makes you smile.
- Dietary considerations: This recipe contains dairy (butter) and gluten (Rice Krispies contain malt flavoring). For a dairy-free version, use vegan butter. For gluten-free, use a certified gluten-free crispy rice cereal. The candy corn is typically gluten-free, but check the label to be sure.
- Allergen note: Candy corn is usually made in facilities that process peanuts and tree nuts, so if you have severe allergies, check the packaging carefully. Some brands also use corn syrup, which is an issue for anyone with corn sensitivities.
I’m not a nutritionist, and I don’t pretend to be one. These treats are for Halloween fun, not daily fuel. But I do believe in balance—enjoy one (or two) on October 31st, and pair them with some rainbow veggie lunch boxes the next day to reset. That’s how I handle it, anyway.
Conclusion
These Easy Candy Corn Rice Krispie Treats for Halloween are exactly what a holiday dessert should be—fun, simple, and completely satisfying. They don’t require any fancy techniques or hard-to-find ingredients. Just butter, marshmallows, cereal, and candy corn, layered with a little patience and a lot of love.
What I love most about this recipe is how it brings people together. Every time I make them, someone asks for the recipe. Kids get excited about the colors. Adults get nostalgic about Rice Krispie treats from their own childhood. It’s one of those rare recipes that works for everyone, no matter their age or baking skill level.
I’d love to hear how yours turn out. Did you try a variation? Did your kids help press the layers? Did you add a chocolate drizzle or keep it classic? Drop a comment below and let me know—I read every single one, and I genuinely love seeing your photos. Share them on social media and tag me so I can cheer you on. Happy Halloween, and happy snacking!
Frequently Asked Questions
Can I use regular marshmallows instead of mini marshmallows?
You can, but they take longer to melt and don’t always get as smooth. If you only have regular marshmallows, chop them into smaller pieces first to help them melt faster. You’ll also need to stir them a bit longer to get that silky consistency.
Why did my layers blend together?
This usually happens when you add the next layer too soon. Each layer needs about 10 minutes to set at room temperature before you add the next one. If the bottom layer is still warm and soft, the new layer will sink into it and create a muddy color. Patience is the secret here.
How do I keep the treats from sticking to the pan?
Parchment paper is your best friend here. Line the pan with parchment, leaving overhang on two sides, and grease the parchment lightly with butter or nonstick spray. When the treats are set, just lift the whole block out using the parchment handles. No scraping, no sticking.
Can I make these ahead of time for a party?
Absolutely. In fact, they taste better the next day. Make them up to 2 days ahead and store them in an airtight container at room temperature. Just don’t refrigerate them—the cold makes the marshmallow hard and the cereal loses its crunch.
What if I don’t have candy corn?
You can use candy pumpkins, chopped caramel candies, or even M&Ms in Halloween colors. The look will be different, but the taste will still be amazing. If you skip the candy corn entirely, you’ll just have three-layer Rice Krispie treats, which are still pretty great on their own.
Pin This Recipe!
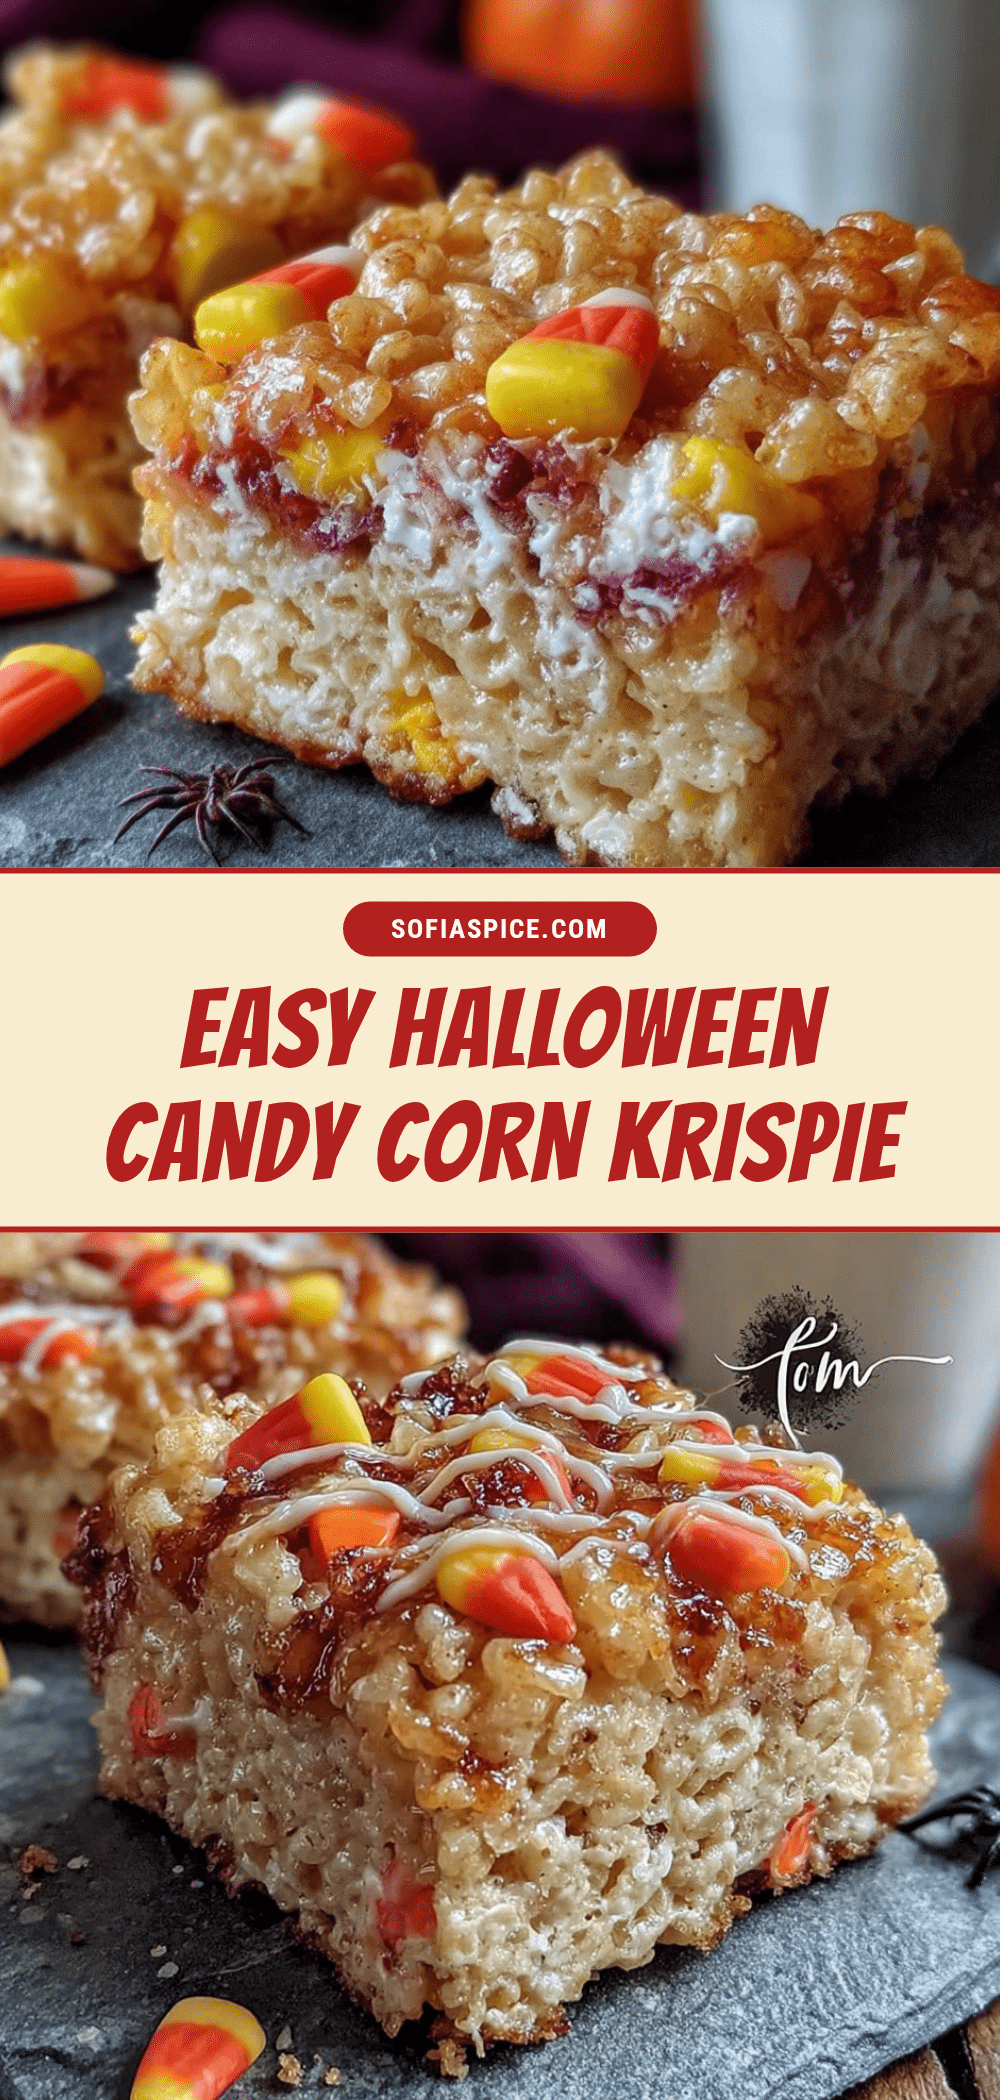
Easy Candy Corn Rice Krispie Treats: Perfect Halloween Dessert
These Easy Candy Corn Rice Krispie Treats are a fun and festive Halloween dessert made with just butter, marshmallows, Rice Krispies cereal, and candy corn. The three-layer design looks like a giant piece of candy corn, and the recipe is simple enough for kids to help with.
- Prep Time: 15 minutes
- Cook Time: 15 minutes
- Total Time: 1 hour 30 minutes
- Yield: 12-16 servings 1x
- Category: Dessert
- Cuisine: American
Ingredients
- 6 tablespoons unsalted butter, divided
- 30 ounces mini marshmallows (10 ounces per layer)
- 15 cups Rice Krispies cereal (5 cups per layer)
- 1 cup candy corn (for topping and mixing)
- 1 teaspoon vanilla extract (optional)
- Pinch of salt (optional)
Instructions
- Line a 9×13-inch baking dish with parchment paper, leaving about 2 inches of overhang on the long sides. Lightly grease the parchment with butter or nonstick spray.
- Make the orange layer: In a large pot over medium-low heat, melt 2 tablespoons of butter. Add 10 ounces of mini marshmallows and stir constantly until completely smooth and glossy (about 3-4 minutes). Remove from heat and stir in 5 cups of Rice Krispies cereal until evenly coated. Mix in about 1/3 cup of candy corn if desired. Press this mixture firmly and evenly into the bottom of the prepared pan. Let cool for 10 minutes at room temperature.
- Make the yellow layer: Wipe out the pot or use a clean one. Melt 2 tablespoons of butter, add 10 ounces of mini marshmallows, and stir until smooth. Remove from heat and stir in 5 cups of Rice Krispies. Gently spread this layer over the orange layer and press down carefully. Let cool for 10 minutes.
- Make the white layer: Melt the remaining 2 tablespoons of butter with the last 10 ounces of marshmallows. Stir in 1 teaspoon of vanilla extract and a pinch of salt if using. Add 5 cups of Rice Krispies and stir to combine. Press this layer over the yellow layer. Before it sets completely, sprinkle the remaining candy corn on top, pressing them in gently.
- Let the treats cool completely at room temperature (about 1 hour). Do not refrigerate. Once set, use the parchment paper to lift the entire block out of the pan.
- Cut into triangles: Cut the block in half lengthwise, then cut each half into triangles by making diagonal cuts. You should get about 12-16 triangles.
Notes
Let each layer set for 10 minutes before adding the next to prevent colors from bleeding. Use low heat when melting marshmallows to avoid burning. For clean cuts, spray knife with nonstick spray between slices. Treats taste better the next day. Store in an airtight container at room temperature for up to 3 days. Can be frozen for up to 2 months.
Nutrition
- Serving Size: 1 triangle
- Calories: 220
- Sugar: 28
- Sodium: 150
- Fat: 6
- Saturated Fat: 3
- Carbohydrates: 42
- Protein: 2
Keywords: candy corn rice krispie treats, halloween dessert, easy rice krispie treats, no bake halloween treats, candy corn dessert


