I figured a dump cake couldn’t possibly be this good. It took about one bite—warm, with melted peanut butter cups pooling into spiced pumpkin—for that assumption to fall apart completely.
Look, I’m not above a boxed cake mix shortcut. But I’ve made enough dry, disappointing dump cakes to know the difference between “easy” and “actually worth eating.” This one? It’s the latter. The first time I made it, I was honestly just trying to use up leftover pumpkin puree and a bag of mini Reese’s cups I’d stashed for Halloween. I wasn’t expecting much. I dumped the pumpkin layer in, sprinkled the dry cake mix on top (feeling skeptical the whole time), and slid it into the oven.
Twenty minutes later, my kitchen smelled like a fall festival had exploded. And when I pulled that pan out? The edges were bubbling, the peanut butter cups had melted into gooey pockets, and there was this golden, slightly crisp top that looked nothing like the sad, dusty cake mix I’d started with. It was, honestly, kind of magical.
That’s the thing about this recipe—it tricks you. It looks like you fussed. It tastes like you fussed. But really, you just stirred, dumped, and baked. And now, it’s the dessert I bring to every fall gathering, the one people ask for by name. Not because it’s fancy. Because it’s that good.
Why You’ll Love This Recipe
Let’s be real—there are a lot of pumpkin desserts out there. But this one? It earns its spot in your rotation. Here’s why:
- Ridiculously Easy: We’re talking 10 minutes of active prep. Stir the pumpkin layer, dump the cake mix, add butter. That’s it. No stand mixer, no sifting, no fuss.
- Unbelievably Decadent: The combo of creamy pumpkin, melted peanut butter cups, and buttery, crisp cake topping is next-level. It’s the kind of dessert that makes you close your eyes after the first bite.
- Perfect for Fall Gatherings: Thanksgiving, potlucks, Friendsgiving, a cozy Sunday night—this cake fits. It serves a crowd, travels well, and everyone goes back for seconds.
- Crowd-Pleaser: Kids love the peanut butter cups. Adults love the sophisticated pumpkin spice. It’s the rare dessert that makes everyone happy.
- Simple Ingredients: You probably already have most of this in your pantry. No weird specialty items, no last-minute grocery store runs.
What makes this recipe different from other dump cakes? It’s the layering. Most dump cakes are just fruit and cake mix. This one has a rich, creamy pumpkin base that bakes up almost like a custard underneath that crunchy, buttery top. And the peanut butter cups? They melt into these perfect pockets of salty-sweet goodness throughout. It’s not just another pumpkin dessert—it’s the pumpkin dessert.
This is the kind of recipe that makes you look like a hero with almost zero effort. It’s comfort food, reimagined. Faster, easier, but with the same soul-soothing satisfaction. Perfect for impressing guests without stress, or turning a simple Tuesday night into something memorable.
What Ingredients You Will Need
This recipe uses simple, mostly pantry-staple ingredients to deliver that big, bold flavor without the fuss. Here’s what you’ll need to grab:
For the Pumpkin Layer
- 1 can (15 oz) pumpkin puree (not pumpkin pie filling—make sure you grab the plain stuff)
- 1 can (12 oz) evaporated milk (adds richness and creaminess to the pumpkin base)
- 3/4 cup granulated sugar
- 2 large eggs, room temperature
- 2 teaspoons pumpkin pie spice (I prefer the McCormick blend for that perfect balance)
- 1/2 teaspoon salt (don’t skip it—it balances the sweetness)
For the Cake Layer
- 1 box (15.25 oz) yellow cake mix (Duncan Hines or Betty Crocker both work great here)
- 1 cup unsalted butter, melted (salted butter works too, just reduce the added salt slightly)
- 1 1/2 cups mini Reese’s peanut butter cups (the unwrapped kind—about one 10 oz bag)
- Optional: 1/2 cup chopped pecans or walnuts (for extra crunch on top)
Ingredient Tips: Look for a can of pumpkin puree that’s 100% pumpkin with no added spices. For the peanut butter cups, the mini unwrapped ones are perfect because they distribute evenly. If you can only find the full-size ones, just chop them into quarters. And for the butter—melt it slowly in the microwave or on the stovetop. You want it fully liquid, not just softened.
Substitution Guidance: Need it gluten-free? Use a gluten-free yellow cake mix—it works perfectly. Want to lighten it up? You can substitute the evaporated milk with a can of coconut milk (full-fat for best texture). And if you’re not a fan of pumpkin pie spice, use 1 teaspoon cinnamon, 1/2 teaspoon ginger, 1/4 teaspoon nutmeg, and a pinch of cloves instead.
Equipment Needed
One of the best things about this recipe? You don’t need much. Here’s what you’ll need to have on hand:
- 9×13-inch baking dish (glass or metal both work; I prefer glass because you can see the bubbly edges)
- Large mixing bowl (for the pumpkin layer)
- Whisk (a fork works in a pinch, but a whisk makes it smoother)
- Measuring cups and spoons
- Spatula (for spreading the pumpkin layer evenly)
- Small bowl (to melt the butter)
Budget-Friendly Tip: Don’t have a 9×13 dish? You can use two 8×8 square pans instead—just check them about 5 minutes early since they’ll bake faster. And if you don’t have a whisk, honestly, a fork does the job. This is a forgiving recipe.
Preparation Method
Alright, let’s get to it. Here’s how to make this decadent Reese’s Peanut Butter Pumpkin Dump Cake, step by step.
- Preheat your oven to 350°F (175°C). While it’s heating, lightly grease your 9×13-inch baking dish with butter or non-stick spray. Don’t skip this step—even with the butter, things can stick a little around the edges.
- Make the pumpkin layer. In your large mixing bowl, whisk together the pumpkin puree, evaporated milk, granulated sugar, eggs, pumpkin pie spice, and salt. Whisk until smooth and fully combined. It should be a beautiful, rich orange color and smell amazing already. (It will!)
- Pour the pumpkin mixture into your prepared baking dish. Use your spatula to spread it evenly across the bottom. Don’t worry if it seems thin—it will thicken as it bakes and create that creamy, custard-like layer.
- Sprinkle the mini peanut butter cups evenly over the pumpkin layer. Try to distribute them so every bite gets at least one or two. I like to press them down gently into the pumpkin mixture so they sink slightly as they bake. This creates those melty, gooey pockets of peanut butter goodness.
- Now for the cake layer. Sprinkle the dry yellow cake mix evenly over the top of the pumpkin and peanut butter cups. Don’t stir it in—just dump it and spread it gently with your fingers or a fork to make sure it covers the surface evenly. I know it looks weird at this point. Trust the process.
- Pour the melted butter evenly over the top of the dry cake mix. Try to cover as much of the cake mix as possible. You’ll see the butter start to soak in and create little crumbly pockets. If you’re using nuts, sprinkle them on top now.
- Bake for 45-50 minutes. The top should be golden brown and slightly crisp. You’ll see the edges bubbling and the center should be set—not jiggly. If you insert a toothpick into the cake layer, it should come out clean. The pumpkin layer underneath will still be soft, so don’t worry if that part seems a little loose.
- Let it cool for at least 15-20 minutes before serving. I know, I know—the waiting is the hardest part. But this step is crucial. The pumpkin layer needs time to set up so you get clean slices. If you cut into it too soon, it will be a soupy mess. (Ask me how I know.)
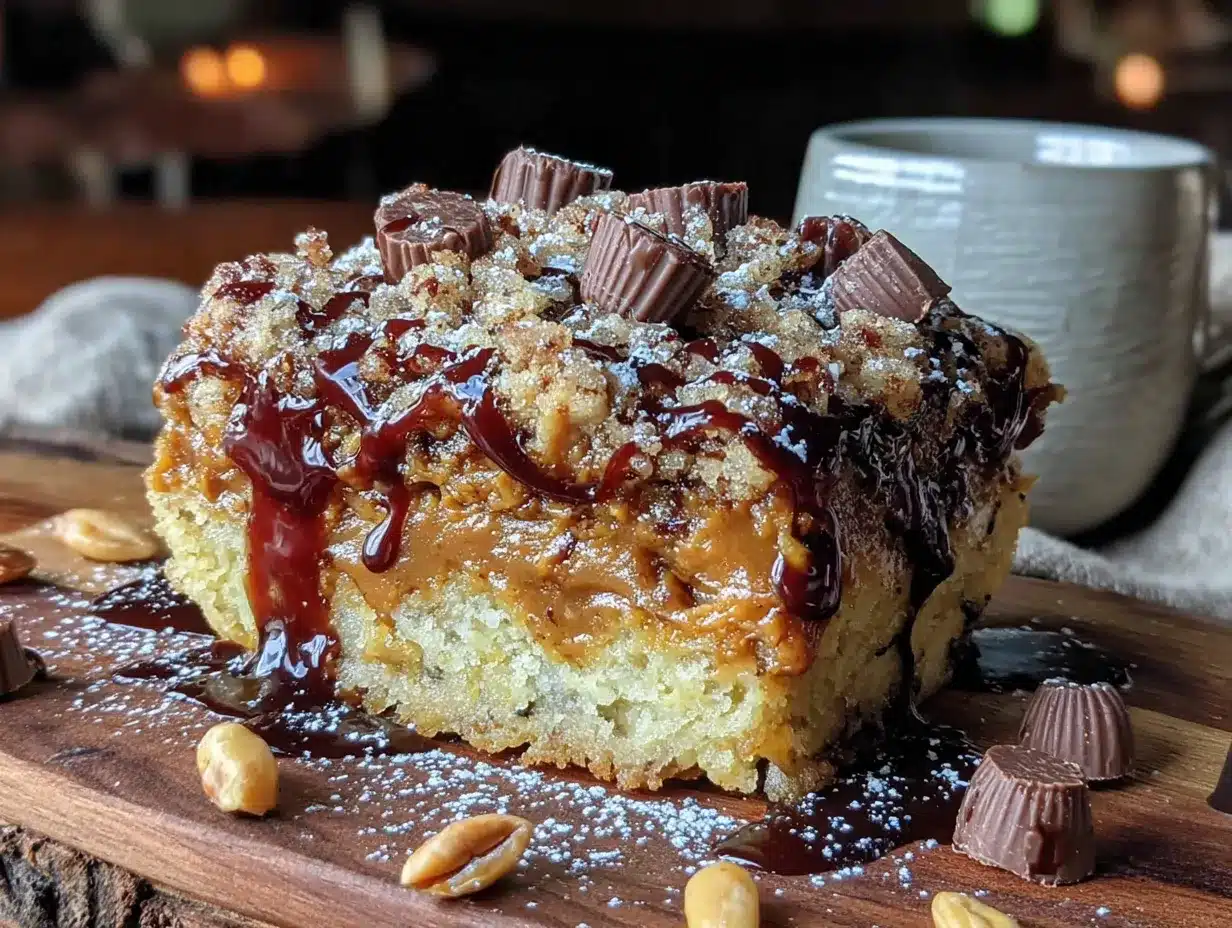
Sensory Cue: When it’s done, your kitchen will smell like a combination of a pumpkin patch and a peanut butter cup factory. The top should be golden and crackly, and you’ll see little bits of melted peanut butter cup peeking through.
Cooking Tips & Techniques
I’ve made this recipe more times than I can count, and I’ve learned a few things along the way. Here are my best tips for getting it right every time:
Don’t overmix the pumpkin layer. Just whisk until it’s smooth. Overmixing can incorporate too much air, which can make the pumpkin layer puff up and then collapse. You want it dense and creamy.
Room temperature eggs matter. Cold eggs can seize up the pumpkin mixture and make it lumpy. Just set your eggs on the counter for 15 minutes before you start. If you forget, place them in a bowl of warm water for 5 minutes.
The butter distribution is key. Pour it slowly and evenly. If you dump it all in one spot, you’ll end up with a soggy, uneven top. I like to pour it in a zigzag pattern across the whole dish.
My biggest failure? The first time I made this, I used pumpkin pie filling instead of puree. The result was a cloyingly sweet, overly spiced mess. Learn from my mistake—always check the label. Pumpkin puree is the only ingredient. Pumpkin pie filling has sugar and spices already added.
Timing tip: While the pumpkin layer bakes, clean up your dishes. There’s almost nothing to wash—just a bowl, a whisk, and a measuring cup. You’ll be done before the cake is.
Variations & Adaptations
This recipe is incredibly versatile. Here are a few ways to make it your own:
Chocolate Lover’s Version: Use a chocolate cake mix instead of yellow. The chocolate-pumpkin-peanut butter combo is absolutely killer. I tried this on a whim one rainy Sunday, and it’s now my second-favorite way to make it.
Nut-Free Option: Simply skip the pecans or walnuts on top. The cake is still amazing without them. Or substitute with toasted pumpkin seeds (pepitas) for a little crunch without the nuts.
Dairy-Free Adaptation: Use a dairy-free butter substitute (like Earth Balance) and a can of full-fat coconut milk instead of evaporated milk. The texture will be slightly different, but it’s still delicious.
Spice It Up: Add a pinch of cayenne pepper or a teaspoon of vanilla extract to the pumpkin layer for an unexpected depth of flavor. The cayenne gives it a subtle warmth that pairs beautifully with the chocolate and peanut butter.
Make It a Sundae: Serve warm slices with a scoop of vanilla ice cream and a drizzle of caramel sauce. It’s over-the-top in the best way possible.
Serving & Storage Suggestions
This cake is best served warm, about 15-20 minutes after it comes out of the oven. The pumpkin layer is still soft and creamy, the peanut butter cups are melty, and the top is perfectly crisp. A scoop of vanilla ice cream or a dollop of whipped cream takes it to another level.
If you’re serving it at a gathering, let it cool completely in the pan, then cut it into squares. It holds its shape much better at room temperature. I like to garnish each square with a mini peanut butter cup on top—it makes them look extra special.
Storage: Cover the baking dish tightly with foil or plastic wrap and store in the refrigerator for up to 5 days. The flavors actually meld and deepen overnight, so leftovers are just as good—if not better—the next day.
Reheating: Pop individual squares in the microwave for 20-30 seconds. Or, for a crispier top, reheat in a 350°F oven for about 10 minutes.
Freezer-Friendly: This cake freezes beautifully. Let it cool completely, then wrap the entire pan (or individual squares) tightly in plastic wrap, then foil. Freeze for up to 3 months. Thaw in the refrigerator overnight and reheat as directed.
Nutritional Information & Benefits
Let’s be honest—this is a dessert, and it’s meant to be indulgent. But here’s a rough estimate per serving (based on 12 servings):
- Calories: Approximately 450-500
- Fat: 25g
- Carbohydrates: 55g
- Protein: 8g
- Fiber: 3g
- Sugar: 38g
Health Highlights: Pumpkin is packed with vitamin A, fiber, and antioxidants. It’s actually a nutrient-dense ingredient—it just happens to taste amazing with butter and sugar. And peanut butter cups? Well, they have protein. (I’m reaching, I know.)
Dietary Considerations: This recipe contains dairy, eggs, gluten, and peanuts. For gluten-free, use a gluten-free cake mix. For dairy-free, use the substitutions listed above. For peanut-free, swap the Reese’s cups for chopped dark chocolate or butterscotch chips.
My personal take? This is a treat. It’s not an everyday dessert. But when you’re craving something decadent and satisfying, this cake delivers. And honestly? A little indulgence now and then is good for the soul.
Conclusion
This Decadent Reese’s Peanut Butter Pumpkin Dump Cake is everything I want in a fall dessert—easy, indulgent, and absolutely crowd-pleasing. It’s the kind of recipe that makes you look like a baking pro with almost zero effort. The creamy pumpkin layer, the melty peanut butter cups, the buttery, crisp top—it’s a combination that just works.
I love this recipe because it’s forgiving. You can tweak it, swap ingredients, make it your own. And it always, always turns out delicious. Whether you’re bringing it to a Thanksgiving dinner, a potluck, or just making it for a cozy night in, it never disappoints.
So go ahead—give it a try. And when you do, I’d love to hear about it. Leave a comment below and tell me how it turned out. Did you add nuts? Swap the cake mix? Make it a sundae? Share your version—I’m always looking for new ideas!
Happy baking, friends. And remember—sometimes the best desserts are the ones that look like you fussed, but really, you just dumped and baked.
Frequently Asked Questions
Can I use pumpkin pie filling instead of pumpkin puree?
I don’t recommend it. Pumpkin pie filling already has sugar and spices added, which will make this cake overly sweet and throw off the flavor balance. Stick with 100% pumpkin puree for the best results.
Can I make this ahead of time?
Absolutely! This cake actually tastes even better the next day as the flavors meld together. Bake it, let it cool completely, cover it tightly, and refrigerate. Reheat individual squares in the microwave for 20-30 seconds before serving.
Can I use a different type of cake mix?
Yes! Yellow cake mix is classic, but chocolate, spice, or even butter pecan cake mix all work beautifully. Each one gives the cake a slightly different flavor profile, so feel free to experiment.
How do I know when the dump cake is done?
The top should be golden brown and slightly crisp to the touch. The edges will be bubbly, and the center should be set—not jiggly. A toothpick inserted into the cake layer (not the pumpkin layer) should come out clean.
Can I freeze this dump cake?
Yes, it freezes beautifully. Let the cake cool completely, then wrap the entire pan (or individual squares) tightly in plastic wrap and then foil. Freeze for up to 3 months. Thaw in the refrigerator overnight and reheat before serving.
For another easy fall dessert, try our double layer pumpkin spice dump cake with a caramel drizzle. And if you’re looking for a smaller treat, these pumpkin chocolate chip cookies are a perfect quick fix. For a fun Halloween twist, these graveyard dirt pudding cups are a hit with kids. And don’t miss our pumpkin pie cheesecake bars for another show-stopping dessert.
Pin This Recipe!
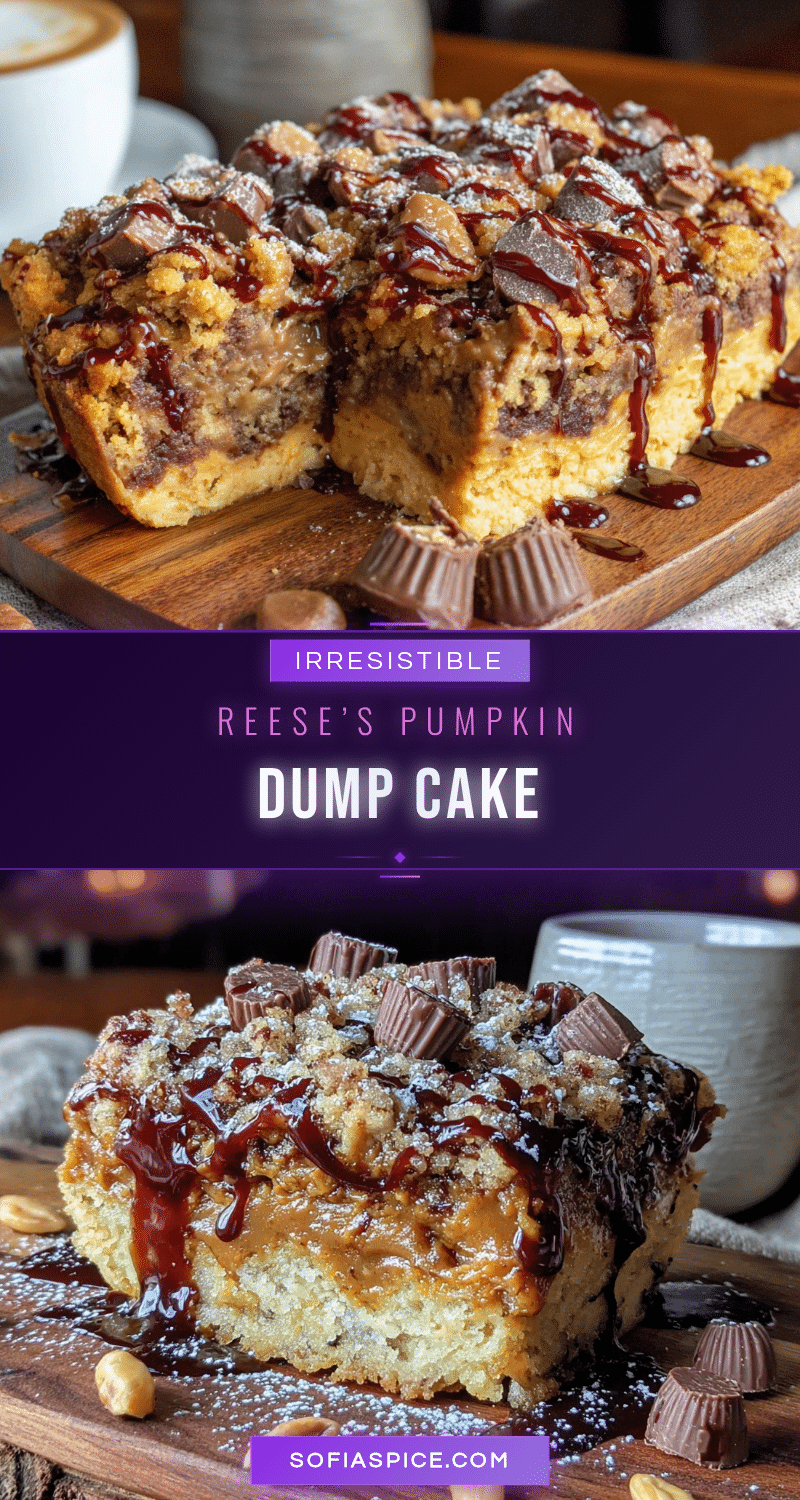
Decadent Reeses Peanut Butter Pumpkin Dump Cake – Best Easy Dessert
A ridiculously easy dump cake with a creamy pumpkin base, melted peanut butter cups, and a buttery, crisp cake topping. Perfect for fall gatherings, this dessert tastes like you fussed but requires just 10 minutes of prep.
- Prep Time: 10 minutes
- Cook Time: 45-50 minutes
- Total Time: 55-60 minutes
- Yield: 12 servings 1x
- Category: Dessert
- Cuisine: American
Ingredients
- 1 can (15 oz) pumpkin puree (not pumpkin pie filling)
- 1 can (12 oz) evaporated milk
- 3/4 cup granulated sugar
- 2 large eggs, room temperature
- 2 teaspoons pumpkin pie spice (McCormick blend recommended)
- 1/2 teaspoon salt
- 1 box (15.25 oz) yellow cake mix (Duncan Hines or Betty Crocker)
- 1 cup unsalted butter, melted
- 1 1/2 cups mini Reese’s peanut butter cups (about one 10 oz bag)
- Optional: 1/2 cup chopped pecans or walnuts
Instructions
- Preheat your oven to 350°F (175°C). Lightly grease a 9×13-inch baking dish with butter or non-stick spray.
- In a large mixing bowl, whisk together the pumpkin puree, evaporated milk, granulated sugar, eggs, pumpkin pie spice, and salt until smooth and fully combined.
- Pour the pumpkin mixture into the prepared baking dish and spread it evenly with a spatula.
- Sprinkle the mini peanut butter cups evenly over the pumpkin layer. Gently press them down into the mixture so they sink slightly as they bake.
- Sprinkle the dry yellow cake mix evenly over the top of the pumpkin and peanut butter cups. Do not stir—just spread it gently with your fingers or a fork to cover the surface evenly.
- Pour the melted butter evenly over the top of the dry cake mix in a zigzag pattern to cover as much as possible. If using nuts, sprinkle them on top now.
- Bake for 45-50 minutes, until the top is golden brown and slightly crisp, the edges are bubbling, and the center is set (not jiggly). A toothpick inserted into the cake layer should come out clean.
- Let the cake cool for at least 15-20 minutes before serving to allow the pumpkin layer to set. Serve warm.
Notes
Don’t overmix the pumpkin layer—just whisk until smooth. Room temperature eggs are important to prevent lumpiness. Pour melted butter slowly and evenly to avoid a soggy top. Always use 100% pumpkin puree, not pumpkin pie filling. Let the cake cool for 15-20 minutes before serving to allow the pumpkin layer to set. For gluten-free, use a gluten-free yellow cake mix. For dairy-free, use dairy-free butter substitute and full-fat coconut milk instead of evaporated milk. For peanut-free, swap Reese’s cups for chopped dark chocolate or butterscotch chips.
Nutrition
- Serving Size: 1 square (1/12 of ca
- Calories: 450500
- Sugar: 38
- Fat: 25
- Carbohydrates: 55
- Fiber: 3
- Protein: 8
Keywords: pumpkin dump cake, Reese's peanut butter pumpkin cake, easy fall dessert, pumpkin dessert, dump cake recipe, peanut butter cups, Thanksgiving dessert


