My husband did not trust homemade ice cream. Full stop. He’d gesture at the ice cream maker collecting dust in the back of our pantry and remind me about the time I tried to make strawberry sorbet and ended up with a solid block of fruity ice that chipped our good spoons. So when I told him I was attempting a no-churn salted caramel ice cream, he just raised an eyebrow and said, “Good luck with that.” Fair enough. I had my own doubts, honestly. No machine, no churning, no eggs—just a can of sweetened condensed milk and some heavy cream? It sounded like the kind of Pinterest promise that looks glossy in photos but melts into a puddle of sadness inside ten minutes.
But here is the thing—the first batch came together on a sticky Tuesday afternoon in July. The air conditioner was struggling, the kids were restless, and I needed something that felt like a win without a trip to the store. I whisked the caramel on the stove until it turned the color of an old penny, let it cool, then folded it into the whipped cream with a little sea salt. I poured it into a loaf pan, crossed my fingers, and stuck it in the freezer. Eight hours later, I scooped out a perfect golden spoonful. No ice crystals. No weird texture. Just creamy, salty-sweet ice cream that tasted like something from a fancy parlor.
He ate three bowls that night without saying a word. The next morning, he asked if there was any left. That was the moment I knew this recipe was different. It is the kind of simple that makes you wonder why you ever bothered with the complicated stuff. And honestly, it changed how I think about dessert entirely.
Why You’ll Love This Recipe
This no-churn salted caramel ice cream is the kind of recipe that feels like cheating until you taste it. Then you realize it is just smart cooking. Here is why it works so well:
- No Ice Cream Maker Needed: You do not need any fancy equipment. Just a mixer, a bowl, and a freezer. That is it.
- Rich, Creamy Texture: The sweetened condensed milk does the heavy lifting here. It keeps the ice cream scoopable straight from the freezer—no rock-hard bricks to wrestle with.
- Real Caramel Flavor: We are not using store-bought sauce. Homemade caramel is surprisingly simple and tastes infinitely better. The salt balances the sweetness perfectly.
- Quick Prep Time: From start to freezer in about 20 minutes. The hardest part is waiting for it to freeze.
- Crowd-Pleaser: I have brought this to summer barbecues, holiday dinners, and casual weeknight hangs. It disappears every single time. Kids love it. Adults fight over the last scoop.
What makes this recipe different from other no-churn versions is the caramel itself. I cook it until it is just shy of deep amber—dark enough to have complexity but light enough to stay silky when folded into the cream. The salt flakes on top are not just garnish; they cut through the richness and make every bite crave-worthy. This is not just another ice cream recipe. It is the one you will make over and over until you have it memorized.
What Ingredients You Will Need
This recipe uses simple, everyday ingredients to build something that tastes anything but ordinary. Most of these are probably in your kitchen right now, which is exactly the point.
- Heavy Cream (2 cups / 480 ml): Cold heavy cream is non-negotiable here. It whips up into stiff peaks and gives the ice cream its airy, luscious texture. I prefer organic cream from a local dairy when I can find it, but any heavy cream with at least 36% milkfat works beautifully.
- Sweetened Condensed Milk (1 can / 14 oz / 397 g): This is the secret weapon of no-churn ice cream. It adds sweetness, creaminess, and stability without any extra work. I use Eagle Brand or Borden—both reliable. Do not swap this for evaporated milk; they are not the same.
- Granulated Sugar (1 cup / 200 g): For the caramel sauce. White sugar works best because it melts cleanly and caramelizes evenly. You can use organic cane sugar if you prefer.
- Unsalted Butter (6 tablespoons / 85 g): Cut into small cubes. Butter enriches the caramel and gives it that velvety mouthfeel. Use unsalted so you control the salt level.
- Sea Salt (1 teaspoon + extra for topping): I use flaky Maldon sea salt for finishing and fine sea salt for the caramel itself. The flaky salt on top adds little bursts of salinity that make each bite pop. If you only have table salt, use half the amount—it is much stronger.
- Vanilla Extract (2 teaspoons): Pure vanilla extract rounds out the caramel flavor. Avoid imitation vanilla here; it has a chemical aftertaste that stands out in a simple recipe like this.
That is it. Six ingredients. No eggs, no stabilizers, no weird additives. The beauty of this recipe is that it lets each ingredient shine without overcomplicating things. If you want to get fancy, you can add a splash of bourbon or a pinch of cinnamon to the caramel, but the base version is already perfect.
Equipment Needed
You do not need much for this recipe, which is honestly my favorite part. Here is what you will need:
- Electric Mixer (Stand or Handheld): Whipping cream by hand is possible but miserable. A mixer saves time and gives you better volume. I use my KitchenAid stand mixer, but a hand mixer works just as well.
- Large Mixing Bowls (2): One for whipping the cream, one for combining everything. Glass or stainless steel works best because they stay cold longer.
- Saucepan (Medium): For making the caramel. A heavy-bottomed saucepan distributes heat evenly and prevents scorching. I use a stainless steel All-Clad pan.
- Loaf Pan (9×5-inch / 23×13 cm): For freezing the ice cream. A metal pan freezes faster than glass, but either works. Line it with parchment paper for easy removal.
- Rubber Spatula: For folding the caramel into the whipped cream. A flexible spatula helps you incorporate everything without deflating the mixture.
- Plastic Wrap or Wax Paper: To cover the surface of the ice cream directly. This prevents ice crystals from forming on top.
If you do not have a loaf pan, you can use any freezer-safe container. A wide, shallow dish freezes faster, which means less waiting time. I have even used a metal cake pan in a pinch—it works fine.
Preparation Method
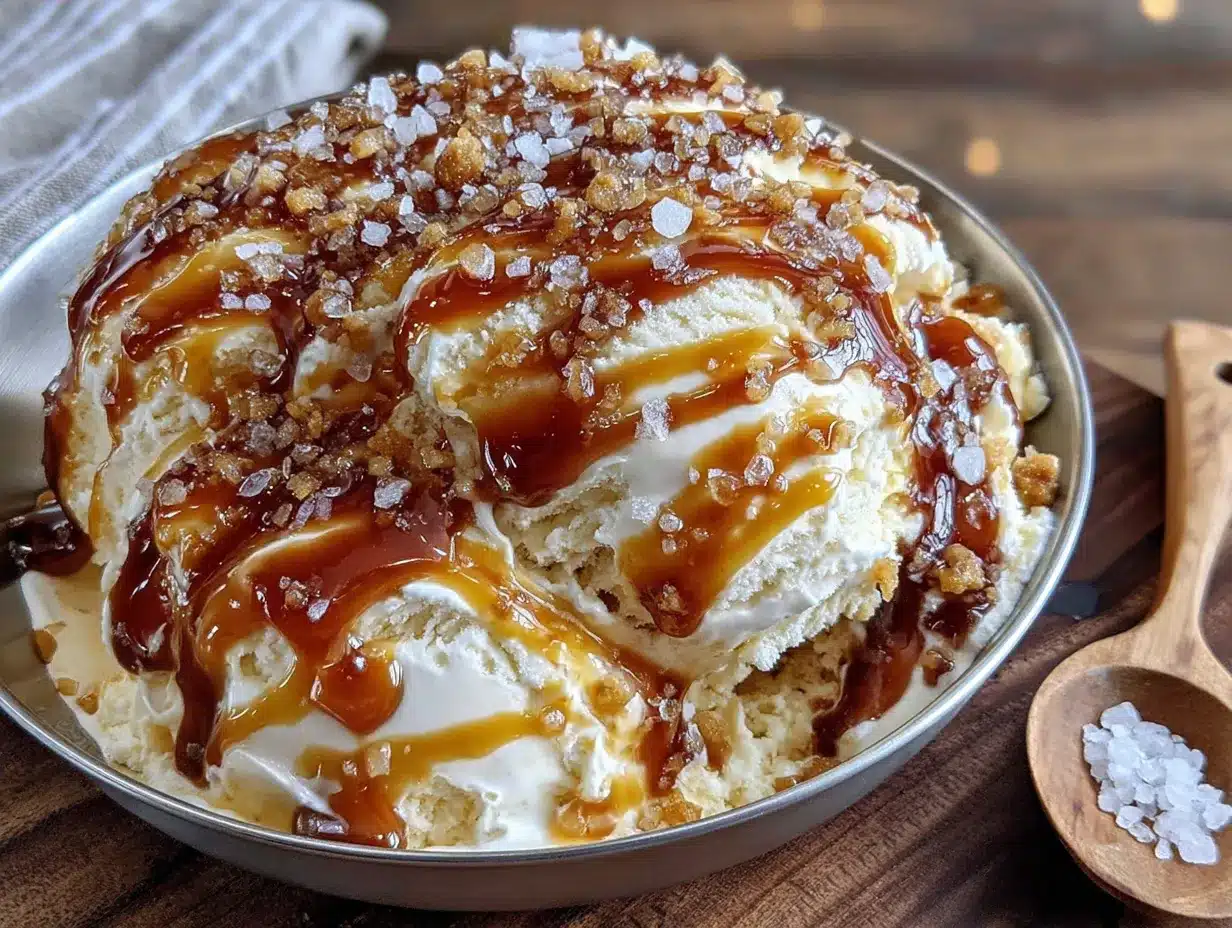
Let me walk you through this step by step. It is simpler than you think, but a few details make all the difference.
- Make the Caramel Sauce: Place a medium saucepan over medium heat and add the granulated sugar in an even layer. Let it sit without stirring for about 2-3 minutes, until the edges start to turn golden. Gently swirl the pan—do not stir—until the sugar is fully melted and deep amber in color. This takes about 5-7 minutes total. Watch it carefully; caramel can go from perfect to burnt in seconds. Once it reaches a rich copper color, remove it from the heat immediately. Add the butter cubes and whisk until melted and smooth. The mixture will bubble up—that is normal. Slowly drizzle in the heavy cream while whisking constantly. It will steam and bubble again, so be careful. Whisk until smooth, then stir in 1 teaspoon of fine sea salt and the vanilla extract. Let the caramel cool to room temperature, about 20 minutes. It will thicken as it cools.
- Whip the Cream: Pour the remaining heavy cream (you should have about 1 ¾ cups left) into a large chilled bowl. Using an electric mixer, beat on medium-high speed until stiff peaks form. This takes about 3-4 minutes. You want the cream to hold its shape when you lift the beaters, but stop before it turns grainy or buttery. Over-whipping is a real thing—I have done it, and it is not pretty.
- Combine the Base: In a separate large bowl, whisk the sweetened condensed milk until smooth. Gently fold in about one-third of the whipped cream to lighten the mixture. Then fold in the remaining whipped cream until just combined. Do not overmix; you want a light, airy texture.
- Add the Caramel: Pour the cooled caramel sauce over the cream mixture. Use a rubber spatula to fold it in with 4-5 broad strokes. You want streaks of caramel running through the ice cream, not a uniform color. Those ribbons of caramel are what make every scoop exciting.
- Freeze: Pour the mixture into a parchment-lined loaf pan. Smooth the top with a spatula. Sprinkle a pinch of flaky sea salt over the surface. Press a piece of plastic wrap directly onto the surface of the ice cream—this prevents ice crystals. Freeze for at least 8 hours, but overnight is better. The wait is brutal, I know, but it is worth it.
- Serve: Let the ice cream sit at room temperature for 5-10 minutes before scooping. This softens it just enough to make scooping easy without melting the texture. Use a warm ice cream scoop for clean, perfect spheres.
Sensory cues to look for: The caramel should smell nutty and sweet, not burnt. The whipped cream should be billowy and hold a peak without collapsing. When you fold in the caramel, you should see distinct ribbons of golden brown against the white cream. The final texture after freezing should be creamy, not icy—if it is icy, your cream was over-whipped or your caramel was too hot when you added it.
Cooking Tips & Techniques
I have made this recipe more times than I can count, and I have definitely made every mistake along the way. Here is what I learned so you do not have to repeat my failures.
Do Not Rush the Caramel: Patience is everything here. If you stir the sugar too early, it will clump and crystallize. Let it melt on its own, swirling the pan gently. If crystals do form, do not panic—just keep heating and they will usually dissolve. If they do not, start over. Burnt caramel cannot be saved, but crystallized caramel can with a little more heat.
Temperature Matters: When you add the butter and cream to the hot caramel, make sure both are at room temperature. Cold ingredients can cause the caramel to seize up and become grainy. I learned this the hard way when my first batch turned into a lumpy mess. Let your butter sit out for 15 minutes before starting.
Whip Cream to Stiff Peaks: Under-whipped cream will make your ice cream dense and icy. Over-whipped cream will turn into butter. Aim for stiff peaks that hold their shape but still look glossy. If you see the cream starting to separate, you have gone too far.
Fold, Do Not Stir: When combining the caramel with the whipped cream, use a gentle folding motion. Stirring vigorously will deflate all that air you worked so hard to whip in. Think of it like folding egg whites into a cake batter—gentle, confident strokes.
Freeze Flat for Faster Results: If you are impatient (like me), pour the mixture into a wide, shallow dish instead of a deep loaf pan. It freezes in about 4-5 hours instead of 8. The texture is slightly less creamy, but it is still delicious.
Flavor Development: The ice cream tastes even better after 24 hours in the freezer. The flavors meld together, and the caramel becomes more pronounced. If you can wait, do it. Your taste buds will thank you.
Variations & Adaptations
This recipe is a fantastic base for experimentation. Here are a few variations I have tried and loved:
- Chocolate Salted Caramel: Add ¼ cup of cocoa powder to the sweetened condensed milk before folding in the cream. The chocolate and caramel combination is dangerously good. I made this for a friend’s birthday, and she asked for the recipe three times.
- Bourbon Salted Caramel: Stir 2 tablespoons of bourbon into the caramel after it cools. The alcohol keeps the ice cream slightly softer and adds a warm, smoky note. Use a good bourbon—something you would actually drink. I like Buffalo Trace for this.
- Vegan Version: Swap the heavy cream for full-fat coconut cream (chilled overnight) and use a vegan sweetened condensed milk. The coconut flavor pairs surprisingly well with caramel. It is not identical to the original, but it is creamy and satisfying in its own right.
- Nutty Salted Caramel: Fold in ½ cup of toasted pecans or walnuts before freezing. The crunch adds texture and contrasts beautifully with the smooth ice cream. Toast the nuts first for maximum flavor.
- Spiced Caramel: Add ½ teaspoon of cinnamon and a pinch of cayenne to the caramel while it cooks. The warmth of the spices complements the saltiness and makes it perfect for fall. I served this after a big bowl of creamy roasted butternut squash soup, and it was a hit.
Feel free to mix and match these ideas. The base recipe is forgiving, so do not be afraid to experiment. Just keep the ratio of fat to sugar roughly the same, and you will be fine.
Serving & Storage Suggestions
This ice cream is best served slightly softened, about 5-10 minutes out of the freezer. Scoop it into bowls or cones and finish with an extra pinch of flaky sea salt for that professional touch. It pairs beautifully with warm desserts like brown butter pumpkin snickerdoodle cookies or a slice of warm apple pie. The contrast between hot and cold is magic.
For storage, keep the ice cream in an airtight container with plastic wrap pressed directly onto the surface. This prevents freezer burn and ice crystals. It will keep for up to 2 weeks, though I doubt it will last that long. The texture is best within the first week. After that, it may become slightly icy, but it is still perfectly edible.
To re-soften hard ice cream, microwave the container on low power for 10-15 seconds, or let it sit on the counter for 15 minutes. Do not refreeze melted ice cream—it will turn into a slushy mess. If you have leftovers that have melted slightly, just eat them straight away. Consider it a milkshake.
I love serving this after a rich meal like creamy one-pan tuscan chicken thighs. The cold, salty-sweet ice cream cuts through the richness perfectly and leaves you feeling satisfied without being heavy.
Nutritional Information & Benefits
Let me be honest—this is a treat. It is not health food, and it does not pretend to be. But understanding what is in it helps you enjoy it mindfully. Per serving (about ½ cup / 120 ml), here is the estimated breakdown:
- Calories: 320
- Fat: 22g (14g saturated)
- Carbohydrates: 30g (28g sugar)
- Protein: 3g
- Sodium: 180mg
The heavy cream provides a good source of vitamin A and healthy fats, which help with nutrient absorption. The caramel, while indulgent, is made from real sugar and butter—no high-fructose corn syrup or artificial preservatives. The sea salt adds trace minerals like magnesium and potassium. If you are watching your sugar intake, you can reduce the caramel by half or use a sugar substitute, though the texture will change slightly.
This recipe is gluten-free and contains no eggs, making it suitable for many dietary restrictions. It does contain dairy, so it is not vegan or lactose-free unless you use the substitutions mentioned above. As with any indulgence, moderation is key. A small scoop after dinner is a lovely way to end the day without overdoing it.
Conclusion
This easy no-churn salted caramel ice cream has become a staple in my freezer for good reason. It is simple enough to make on a whim but impressive enough to serve at a dinner party. The homemade caramel is the star here—rich, buttery, perfectly salted—and the no-churn method makes it accessible to anyone, regardless of kitchen equipment.
I love that this recipe lets me control the ingredients. No stabilizers, no artificial flavors, just real food that tastes incredible. It has saved me on hot summer days, lazy weekends, and even a few stressful evenings when I needed something sweet to reset my mood. It is that kind of recipe—the one you turn to again and again.
If you make this, I would love to hear how it turns out. Did you add any variations? Did it disappear faster than expected? Leave a comment below or tag me in your photos. And if you are looking for another simple, satisfying dessert, try my cozy monster cookie bars—they are just as easy and just as addictive. Happy scooping!
Frequently Asked Questions
Can I use store-bought caramel sauce instead of making my own?
You can, but the texture and flavor will not be the same. Homemade caramel is thicker and has a deeper, more complex flavor. Store-bought sauces often contain corn syrup and preservatives that can make the ice cream grainy. If you are in a pinch, use a high-quality jarred caramel and reduce the sugar slightly.
Why did my ice cream turn out icy?
Ice crystals usually mean the cream was over-whipped or the caramel was too hot when you added it. Make sure your caramel is completely cool before folding it in. Also, pressing plastic wrap directly onto the surface of the ice cream before freezing helps prevent ice crystals from forming.
Can I make this without an electric mixer?
Yes, but it will take some elbow grease. Whisk the heavy cream by hand with a balloon whisk until stiff peaks form. This takes about 8-10 minutes of vigorous whisking. It is a good arm workout, but a mixer is much easier if you have one.
How long does this ice cream keep in the freezer?
It stays creamy and scoopable for up to 2 weeks if stored properly. After that, it may develop ice crystals and lose some of its smooth texture. For best results, eat it within the first week. I doubt it will last that long anyway.
Can I double this recipe?
Absolutely. Double all the ingredients and use a larger container for freezing. A 9×13-inch baking dish works well. The freezing time will be slightly longer, about 10-12 hours, because the mixture is thicker. Just make sure your caramel cools completely before folding it into the cream.
Pin This Recipe!
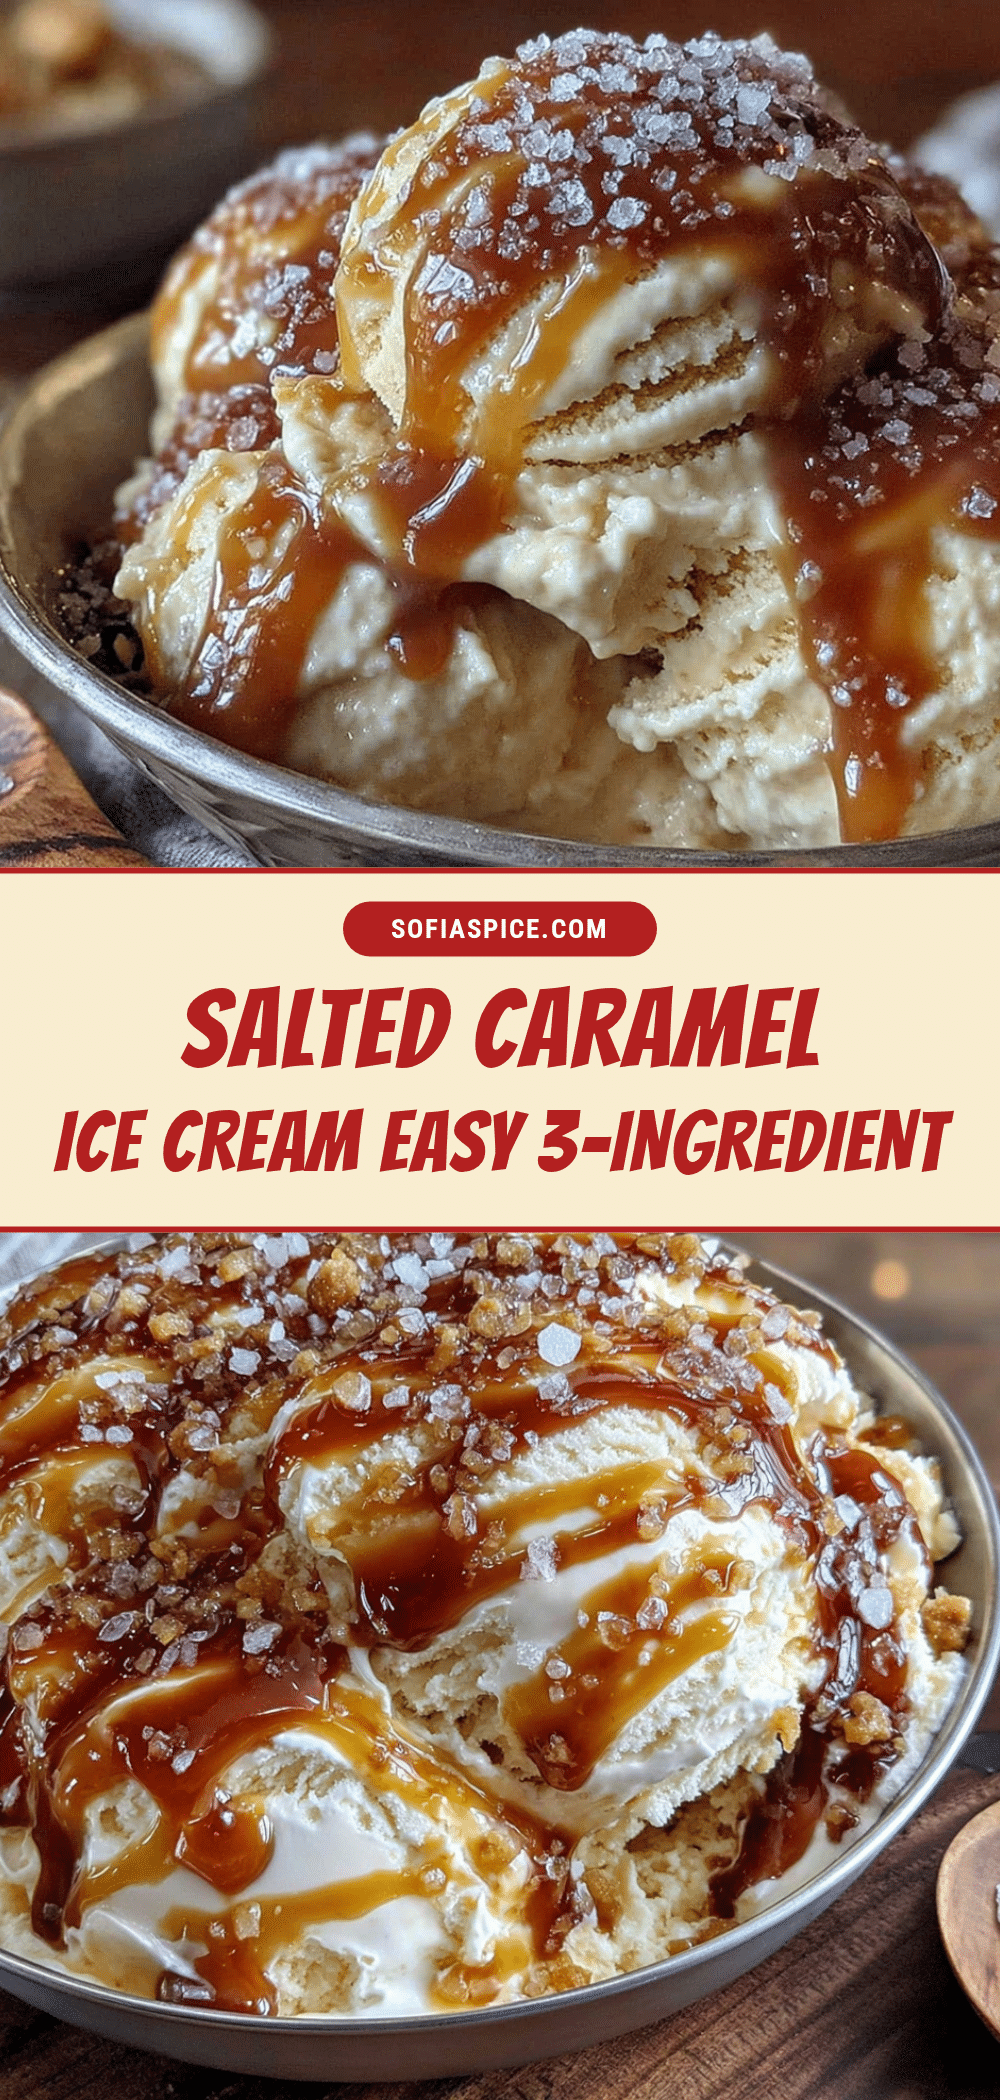
Easy No-Churn Salted Caramel Ice Cream Recipe
This no-churn salted caramel ice cream is rich, creamy, and made without an ice cream maker. Homemade caramel and a few simple ingredients create a decadent dessert that’s perfect for any occasion.
- Prep Time: 20 minutes
- Cook Time: 10 minutes
- Total Time: 8 hours 30 minutes (includes freezing)
- Yield: 8 servings 1x
- Category: Dessert
- Cuisine: American
Ingredients
- 2 cups (480 ml) heavy cream, divided
- 1 can (14 oz / 397 g) sweetened condensed milk
- 1 cup (200 g) granulated sugar
- 6 tablespoons (85 g) unsalted butter, cut into small cubes
- 1 teaspoon fine sea salt, plus flaky sea salt for topping
- 2 teaspoons pure vanilla extract
Instructions
- Make the Caramel Sauce: Place a medium saucepan over medium heat and add the granulated sugar in an even layer. Let it sit without stirring for about 2-3 minutes, until the edges start to turn golden. Gently swirl the pan—do not stir—until the sugar is fully melted and deep amber in color, about 5-7 minutes total. Remove from heat immediately. Add the butter cubes and whisk until melted and smooth. Slowly drizzle in 1/4 cup of the heavy cream while whisking constantly. Whisk until smooth, then s…
- Whip the Cream: Pour the remaining heavy cream (about 1 ¾ cups) into a large chilled bowl. Using an electric mixer, beat on medium-high speed until stiff peaks form, about 3-4 minutes.
- Combine the Base: In a separate large bowl, whisk the sweetened condensed milk until smooth. Gently fold in about one-third of the whipped cream to lighten the mixture. Then fold in the remaining whipped cream until just combined.
- Add the Caramel: Pour the cooled caramel sauce over the cream mixture. Use a rubber spatula to fold it in with 4-5 broad strokes, leaving streaks of caramel.
- Freeze: Pour the mixture into a parchment-lined 9×5-inch loaf pan. Smooth the top with a spatula. Sprinkle a pinch of flaky sea salt over the surface. Press a piece of plastic wrap directly onto the surface of the ice cream. Freeze for at least 8 hours, preferably overnight.
- Serve: Let the ice cream sit at room temperature for 5-10 minutes before scooping. Use a warm ice cream scoop for clean spheres.
Notes
Do not rush the caramel; let the sugar melt undisturbed. Ensure butter and cream are at room temperature before adding to hot caramel to prevent seizing. Whip cream to stiff peaks but stop before it turns grainy. Fold caramel gently to keep airy texture. For faster freezing, use a wide, shallow dish. Ice cream tastes even better after 24 hours.
Nutrition
- Serving Size: 1/2 cup (120 ml)
- Calories: 320
- Sugar: 28
- Sodium: 180
- Fat: 22
- Saturated Fat: 14
- Carbohydrates: 30
- Protein: 3
Keywords: no-churn ice cream, salted caramel, homemade ice cream, easy dessert, no ice cream maker


