My daughter didn’t say a word. She just stood there, still in her school uniform, staring at the tray of Halloween sugar cookies cooling on the counter. I was mid-pipe, holding a bag of black royal icing, and I honestly thought she’d grab one and run. But she just watched. After a solid thirty seconds, she pointed at the ghost I’d just finished and said, “His mouth is too small. He looks surprised, not spooky.” And you know what? She was right. That tiny critique changed everything about how I approach these cookies now.
I had spent the whole afternoon testing different royal icing consistencies, fighting with piping tips, and cursing under my breath every time a spider leg drooped. But seeing her study that ghost like it was art — not just a snack — made me realize these cookies are about more than just sugar and food coloring. They’re about the little moments of precision that turn a simple sugar cookie into something that makes a six-year-old stop and really look. And honestly, that’s the whole point of making Halloween sugar cookies that are perfectly piped.
This recipe isn’t complicated, but it asks for a little patience. The cookie base is soft but sturdy enough to hold royal icing without crumbling. The icing itself dries to a beautiful matte finish that won’t smudge when you stack them in a treat bag. And the decorating? That’s where the magic happens. I’ve tested every tip, every consistency, and every trick so you don’t have to learn the hard way that your icing is too thin for spiderwebs. So grab your piping bags, put on something you don’t mind getting speckled with food coloring, and let’s make some Halloween cookies that actually look like what they’re supposed to be.
Why You’ll Love This Recipe
I’ve baked a lot of cookies in my time — from pastel Halloween funfetti shortbread ghost cookies to classic chocolate chip — but these Halloween sugar cookies hit different. Here’s why:
- Sturdy But Soft Base : The cookie dough is rolled thick enough to hold its shape during baking, but stays tender on the inside. No spreading, no cracking, no drama.
- Royal Icing That Actually Works : I’ve tested three different royal icing recipes to find the one that dries hard, pipes cleanly, and doesn’t taste like powdered sugar and regret. This is the one.
- Perfect for Beginners and Pros : Whether you’re piping your first ghost or your hundredth pumpkin, the consistency tips in this guide will save you time and frustration.
- No Special Equipment Required : You don’t need a fancy piping kit. A few zip-top bags with snipped corners will work beautifully. I promise.
- Make-Ahead Friendly : The dough freezes beautifully, the icing keeps for days, and the decorated cookies stay fresh for up to two weeks. Perfect for Halloween parties or classroom treats.
- Endlessly Customizable : Change the colors, switch up the cutters, add sprinkles or edible glitter — these cookies are a blank canvas for your spooky creativity.
Honestly, what makes these cookies special is how they make you feel when you finish one. That little rush of pride when you lift the piping bag and the line comes out exactly right. That moment when someone says, “Wait, you made these?” Yeah. That’s the good stuff.
What Ingredients You Will Need
This recipe uses simple, pantry-friendly ingredients to create a sugar cookie that’s both sturdy and tender. The royal icing relies on just a few key components, but getting them right makes all the difference.
For the Sugar Cookie Dough
- Unsalted butter, softened — 1 cup (226g). I prefer using European-style butter like Plugrà for richer flavor and better texture.
- Granulated sugar — 1 cup (200g). Standard white sugar works perfectly here.
- Large egg — 1, room temperature. Cold eggs can make the dough seize up, so let it sit out for 30 minutes first.
- Vanilla extract — 2 teaspoons. Pure vanilla extract gives the best flavor, but imitation works in a pinch.
- All-purpose flour — 3 cups (360g). Spoon and level your flour — scooping directly from the bag packs it down and makes cookies dense.
- Baking powder — 1 teaspoon. Helps the cookies puff slightly without spreading.
- Salt — ½ teaspoon. Balances the sweetness and enhances the vanilla.
For the Royal Icing
- Powdered sugar — 4 cups (480g), sifted. Sifting is non-negotiable here — lumps will clog your piping tip and ruin a perfectly good ghost.
- Meringue powder — 3 tablespoons. I use Wilton brand because it dissolves cleanly and gives consistent results. (If you can’t find meringue powder, you can use 3 pasteurized egg whites, but the texture is trickier to control.)
- Warm water — 5 to 6 tablespoons. Start with 5 and add more as needed. The consistency should be thick enough to hold a ribbon when you lift the spoon.
- Vanilla extract — 1 teaspoon. Optional, but it rounds out the sweetness nicely.
- Gel food coloring — in black, orange, purple, green, and white. Gel colors are concentrated and won’t thin out your icing like liquid drops will.
For Decorating
- Piping bags or zip-top bags. Disposable piping bags are easier to clean, but sandwich bags with a snipped corner work just as well.
- Piping tips — #2 or #3 round tips for outlining and flooding. A #1 tip is great for fine details like spider legs or jack-o’-lantern faces.
- Toothpicks — for spreading icing into tight corners and popping air bubbles.
- Edible glitter or sprinkles — optional, but adds a fun sparkle to pumpkins and ghosts.
I always recommend using gel food coloring over liquid. I learned that the hard way when my orange icing turned into soup because I added too many drops of liquid color. Gel gives you vibrant shades without messing with the consistency.
Equipment Needed
You don’t need a professional bakery setup to make beautifully piped Halloween cookies. Here’s what I actually use in my own kitchen:
- Stand mixer or hand mixer — A stand mixer makes creaming butter and sugar effortless, but a hand mixer works just as well. You can even mix the dough by hand if you’re feeling strong.
- Rolling pin — I prefer a French-style tapered rolling pin for better control, but any rolling pin will do. If you don’t have one, a clean wine bottle works in a pinch (I’ve done it).
- Halloween cookie cutters — Ghost, pumpkin, bat, spider, and cat shapes are my go-to. Look for metal cutters with sharp edges — they cut cleaner than plastic ones.
- Parchment paper — Line your baking sheets to prevent sticking and make cleanup a breeze.
- Baking sheets — Heavy-duty aluminum sheets distribute heat evenly. Avoid dark nonstick pans — they can over-brown the bottoms of your cookies.
- Piping bags and tips — As mentioned above, disposable bags with #2 or #3 tips are ideal for outlining and flooding. Keep a few extra bags on hand for different colors.
- Cooling rack — Essential for letting cookies cool completely before icing. Warm cookies will melt royal icing into a puddle.
- Small bowls or cups — For separating and mixing your icing colors. I use small ramekins or even shot glasses for tiny amounts.
One tip: invest in a good set of piping tips. I bought a cheap set once and the metal was so thin it bent after one use. A quality #2 tip will last for years if you clean it properly.
Preparation Method
Let’s get into the nitty-gritty. I’ll walk you through every step so you can make these Halloween sugar cookies with confidence.
Step 1: Make the Cookie Dough
In a stand mixer fitted with the paddle attachment, cream the softened butter and granulated sugar together on medium speed until light and fluffy, about 3 minutes. Scrape down the sides of the bowl halfway through. Add the egg and vanilla extract, then beat until fully combined, about 1 minute. The mixture should look pale and smooth.
In a separate bowl, whisk together the flour, baking powder, and salt. Gradually add the dry ingredients to the wet mixture, mixing on low speed until just combined. Don’t overmix — the dough should come together in a soft, cohesive ball. If it feels sticky, add an extra tablespoon of flour.
Step 2: Chill the Dough
Divide the dough in half, flatten each half into a disc about 1 inch thick, and wrap tightly in plastic wrap. Refrigerate for at least 2 hours, or up to 3 days. Chilling is crucial — it prevents the cookies from spreading and helps them hold their shape during baking. I once skipped this step and ended up with ghost cookies that looked like melted snowmen. Not cute.
Step 3: Roll and Cut
Preheat your oven to 350°F (175°C). Line two baking sheets with parchment paper. Lightly flour your work surface and rolling pin. Roll one disc of dough to about ¼-inch thickness. If the dough cracks at the edges, let it sit at room temperature for 5 minutes to warm slightly.
Dip your cookie cutters in flour before each cut to prevent sticking. Place the cut cookies about 1 inch apart on the prepared baking sheets. Gather the scraps, re-roll, and cut again. Repeat with the second disc of dough.
Step 4: Bake
Bake for 8 to 10 minutes, or until the edges are just barely golden. The centers should look set but not browned. Let the cookies cool on the baking sheet for 5 minutes, then transfer to a cooling rack to cool completely. Do not ice warm cookies — the royal icing will slide right off.
Step 5: Prepare the Royal Icing
In a stand mixer fitted with the whisk attachment, combine the sifted powdered sugar and meringue powder. Add 5 tablespoons of warm water and the vanilla extract. Mix on low speed until combined, then increase to medium-high and beat for 5 to 7 minutes. The icing should be thick, glossy, and hold a stiff peak when you lift the whisk.
For outlining consistency, the icing should hold its shape when piped. For flooding consistency, it should slowly settle into a smooth surface within 10 seconds. To thin icing for flooding, add water one teaspoon at a time, stirring gently. To thicken it, add more sifted powdered sugar.
Step 6: Color and Bag the Icing
Divide the icing into separate bowls for each color. Add gel food coloring one drop at a time until you reach your desired shade. For black, use a generous amount of black gel — it takes more than you think. Transfer each color to a piping bag fitted with a #2 tip for outlining or a #3 tip for flooding. Seal the bags tightly to prevent the icing from drying out.
Step 7: Decorate the Cookies
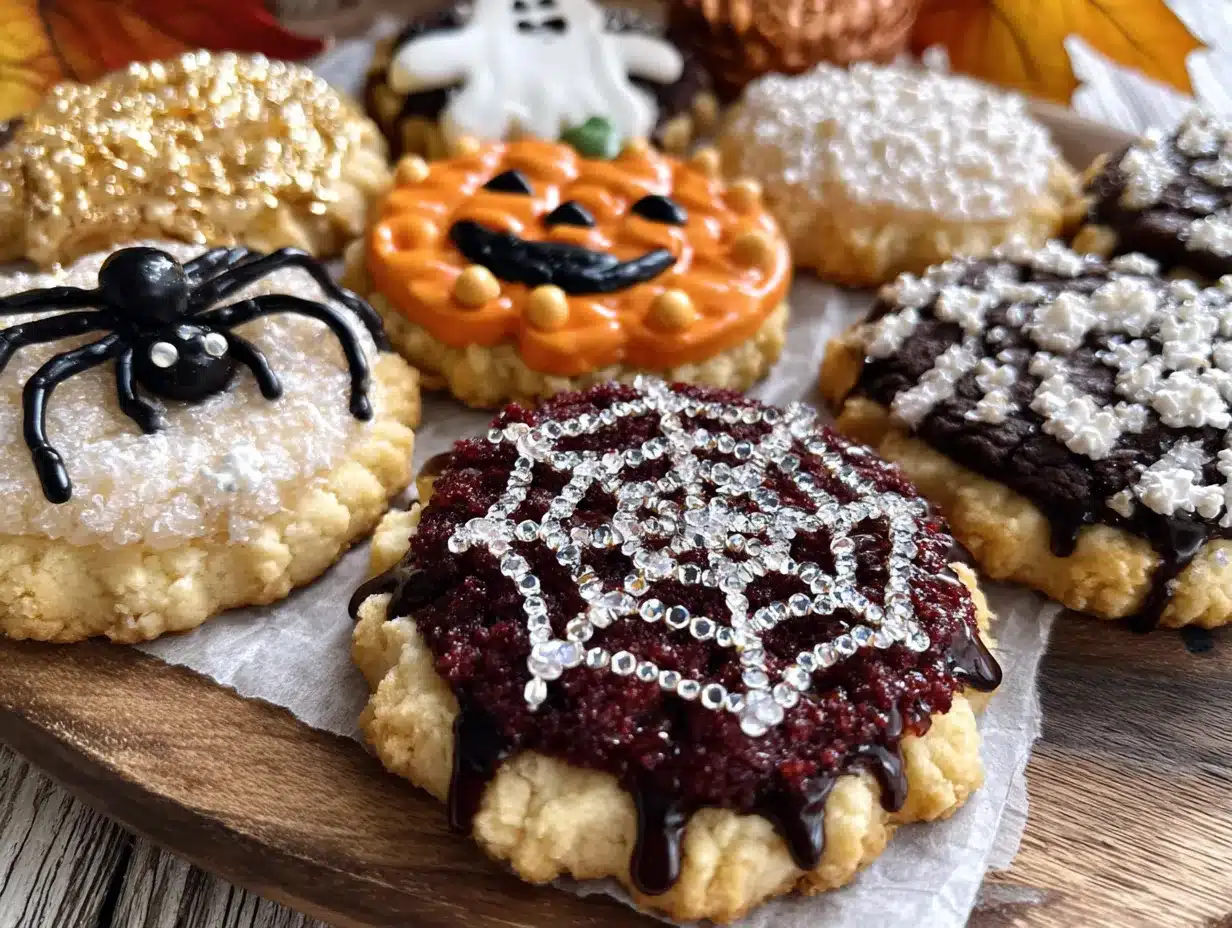
Start by outlining each cookie with the appropriate color. For a ghost, outline the entire shape with white icing. For a pumpkin, outline the ridges with orange. Let the outlines dry for 10 to 15 minutes before flooding.
To flood, pipe the same color inside the outline, filling in the space. Use a toothpick to gently spread the icing into corners and pop any air bubbles. Let the flooded cookies dry completely — at least 4 hours, but overnight is better.
Once the base layer is dry, add details like faces, spider legs, or pumpkin stems using a #1 tip. For a spooky effect, pipe a thin line of black icing for the mouth and eyes. Let the details dry for another hour before stacking or packaging.
Cooking Tips & Techniques
I’ve made every mistake in the book so you don’t have to. Here are the tips that actually make a difference:
Get the Icing Consistency Right — This is the most important part. If your outlining icing is too thin, it will run off the cookie. If it’s too thick, it will be lumpy and hard to pipe. Test it on a plate first. The ribbon test works: lift the whisk and let the icing fall back into the bowl — it should form a ribbon that holds its shape for a few seconds before sinking in.
Work in Batches — Don’t try to decorate all 48 cookies at once. Outline a few, flood them, let them dry, then move on. Trying to do everything at once leads to rushed work and smudged details. I learned this the hard way when I tried to pipe 30 ghosts in one sitting and ended up with a tray of lopsided spirits.
Use a Damp Paper Towel — Keep a damp paper towel over the opening of your piping bags when you’re not using them. Royal icing dries fast, and a crusty tip will ruin your piping. If the tip does clog, wipe it with a damp cloth and try again.
Chill the Dough Twice — If your kitchen is warm, chill the cut cookies on the baking sheet for 10 minutes before baking. This extra chill time prevents spreading and keeps the edges sharp.
Don’t Overbake — Sugar cookies continue to bake on the hot sheet after you pull them from the oven. Take them out when the edges are just barely golden, even if the centers look slightly underdone. They’ll firm up as they cool.
Variations & Adaptations
One of the best things about this recipe is how easy it is to adapt. Here are some of my favorite variations:
Gluten-Free Version — Substitute the all-purpose flour with a 1:1 gluten-free baking flour blend. I’ve used Bob’s Red Mill with great results. Add an extra tablespoon of milk to the dough if it feels dry.
Vegan Royal Icing — Replace the meringue powder with 3 tablespoons of aquafaba (the liquid from a can of chickpeas). Whip it with the powdered sugar until stiff peaks form. The texture is slightly different, but it dries beautifully.
Flavor Twists — Add ½ teaspoon of almond extract to the cookie dough for a subtle nutty flavor. Or swap the vanilla in the royal icing for peppermint extract for a holiday twist. A friend of mine adds a pinch of cinnamon to her pumpkin cookies and it’s surprisingly good.
Different Shapes — Don’t limit yourself to Halloween shapes. Use these same techniques for Christmas trees, Valentine’s hearts, or Easter eggs. The cookie and icing recipe works year-round.
Quick Shortcut — If you’re short on time, skip the royal icing and use store-bought cookie icing in tubes. The cookies will still taste great, and you can still have fun decorating with the kids. No judgment here.
Serving & Storage Suggestions
These Halloween sugar cookies are best served at room temperature. The royal icing should be fully dry and firm to the touch before serving — usually after 6 to 8 hours of drying time. If you’re serving them at a party, arrange them on a platter with a mix of shapes and colors for maximum visual impact.
For storage, place the fully decorated cookies in a single layer in an airtight container, separated by sheets of parchment paper. They will stay fresh for up to 2 weeks at room temperature. Do not refrigerate them — the moisture in the fridge can make the icing sticky and cause the colors to bleed.
These cookies also freeze beautifully. Layer them in a freezer-safe container with parchment paper between each layer, and freeze for up to 3 months. Thaw at room temperature for about 30 minutes before serving. The icing stays perfectly intact.
If you’re making these for a Halloween party, I recommend baking the cookies and making the icing a day ahead. Decorate them the morning of the party so the icing has plenty of time to dry before guests arrive.
Nutritional Information & Benefits
Let’s be real — these are sugar cookies with royal icing. They’re a treat, not a health food. But here’s the estimated nutritional breakdown per cookie (based on a 3-inch ghost shape):
- Calories: 180
- Total Fat: 7g
- Saturated Fat: 4g
- Carbohydrates: 28g
- Sugar: 18g
- Protein: 2g
On the bright side, these cookies are free of common allergens like nuts and soy (depending on your food coloring). The meringue powder is pasteurized, so the icing is safe for children and pregnant women. If you’re watching your sugar intake, you can reduce the icing amount or skip the sprinkles.
I personally think a treat like this is fine in moderation. Halloween comes once a year, and these cookies are meant to be enjoyed — not analyzed. Make them, share them, and don’t stress about the numbers.
Conclusion
There’s something deeply satisfying about pulling a tray of perfectly piped Halloween sugar cookies out of the oven and watching people’s faces light up. Whether you’re making them for a classroom party, a Halloween gathering, or just because you want to practice your piping skills, this recipe delivers every time.
The cookie base is soft and buttery, the royal icing dries to a beautiful matte finish, and the decorating possibilities are endless. You can keep it simple with ghosts and pumpkins, or go all out with detailed spiderwebs and jack-o’-lantern faces. The choice is yours.
I’d love to see what you create. Leave a comment below and tell me which Halloween shape was your favorite to decorate, or share a photo of your finished cookies. Don’t forget to tag me on social media — I’m always inspired by your creativity. Happy Halloween, and happy baking!
Frequently Asked Questions
Why did my royal icing turn out runny?
Runny icing usually means you added too much water. To fix it, whisk in more sifted powdered sugar, one tablespoon at a time, until the consistency thickens. If you’ve already colored the icing and it’s too thin, add powdered sugar and a tiny drop more food coloring to maintain the shade.
Can I use store-bought cookie dough for this recipe?
You can, but the texture won’t be as sturdy. Store-bought dough often contains more fat, which causes cookies to spread more during baking. If you’re short on time, look for a refrigerated sugar cookie dough that’s labeled “cut-out” style — it holds its shape better.
How far in advance can I make these cookies?
The dough can be made up to 3 days ahead and kept in the fridge. Baked, undecorated cookies can be stored in an airtight container for up to a week. Fully decorated cookies last up to 2 weeks at room temperature. You can also freeze the decorated cookies for up to 3 months.
My icing keeps crusting over in the piping bag. What am I doing wrong?
Royal icing dries quickly when exposed to air. Keep a damp paper towel or cloth over the tip of your piping bag when you’re not using it. If the tip does clog, wipe it clean with a damp cloth and squeeze out a small amount of icing to clear the blockage.
Can I use liquid food coloring instead of gel?
You can, but I don’t recommend it. Liquid food coloring adds extra moisture to the icing, which can thin it out and make it harder to control. Gel colors are concentrated and won’t affect the consistency. If you only have liquid coloring, add a tablespoon of extra powdered sugar to compensate for the added liquid.
Pin This Recipe!

Perfectly Piped Halloween Sugar Cookies Easy Royal Icing Recipe

These Halloween sugar cookies feature a soft, sturdy base and a royal icing that dries to a beautiful matte finish. Perfect for beginners and pros, this recipe includes tips for perfect piping and endless decorating possibilities.
- Prep Time: 30 minutes
- Cook Time: 10 minutes
- Total Time: 2 hours 40 minutes (includes chilling and decorating time)
- Yield: 48 cookies 1x
- Category: Dessert
- Cuisine: American
Ingredients
- 1 cup (226g) unsalted butter, softened
- 1 cup (200g) granulated sugar
- 1 large egg, room temperature
- 2 teaspoons vanilla extract
- 3 cups (360g) all-purpose flour, spooned and leveled
- 1 teaspoon baking powder
- ½ teaspoon salt
- 4 cups (480g) powdered sugar, sifted
- 3 tablespoons meringue powder
- 5 to 6 tablespoons warm water
- 1 teaspoon vanilla extract (optional, for icing)
- Gel food coloring (black, orange, purple, green, white)
- Piping bags or zip-top bags
- Piping tips (#2 or #3 round, #1 for details)
- Toothpicks
- Edible glitter or sprinkles (optional)
Instructions
- Make the cookie dough: In a stand mixer with paddle attachment, cream softened butter and granulated sugar on medium speed until light and fluffy, about 3 minutes. Scrape down sides halfway through. Add egg and vanilla extract, beat until combined, about 1 minute.
- In a separate bowl, whisk together flour, baking powder, and salt. Gradually add dry ingredients to wet mixture on low speed until just combined. Do not overmix.
- Divide dough in half, flatten into 1-inch thick discs, wrap in plastic wrap, and refrigerate for at least 2 hours or up to 3 days.
- Preheat oven to 350°F (175°C). Line baking sheets with parchment paper. Lightly flour work surface and rolling pin. Roll one disc to ¼-inch thickness.
- Dip cookie cutters in flour before each cut. Place cut cookies 1 inch apart on prepared sheets. Gather scraps, re-roll, and cut again. Repeat with second disc.
- Bake for 8 to 10 minutes, until edges are just barely golden. Cool on baking sheet for 5 minutes, then transfer to cooling rack to cool completely.
- Prepare royal icing: In stand mixer with whisk attachment, combine sifted powdered sugar and meringue powder. Add 5 tablespoons warm water and vanilla extract. Mix on low, then increase to medium-high and beat for 5 to 7 minutes until thick, glossy, and holds a stiff peak.
- For outlining consistency, icing should hold its shape when piped. For flooding consistency, it should slowly settle into a smooth surface within 10 seconds. Adjust with water or powdered sugar as needed.
- Divide icing into bowls for each color. Add gel food coloring one drop at a time. Transfer each color to piping bag fitted with #2 tip for outlining or #3 tip for flooding.
- Decorate cookies: Outline each cookie with appropriate color. Let outlines dry 10-15 minutes. Flood with same color inside outline, using toothpick to spread into corners and pop air bubbles. Let dry completely, at least 4 hours or overnight.
- Add details with #1 tip once base layer is dry. Let details dry for another hour before stacking or packaging.
Notes
Chilling dough is crucial to prevent spreading. Royal icing dries quickly; keep a damp paper towel over piping bag openings when not in use. For best results, let flooded cookies dry overnight before adding details. Cookies stay fresh up to 2 weeks in airtight container at room temperature.
Nutrition
- Serving Size: 1 cookie
- Calories: 180
- Sugar: 18
- Sodium: 50
- Fat: 7
- Saturated Fat: 4
- Carbohydrates: 28
- Protein: 2
Keywords: Halloween sugar cookies, royal icing, decorated cookies, ghost cookies, pumpkin cookies, spooky cookies, easy royal icing recipe


