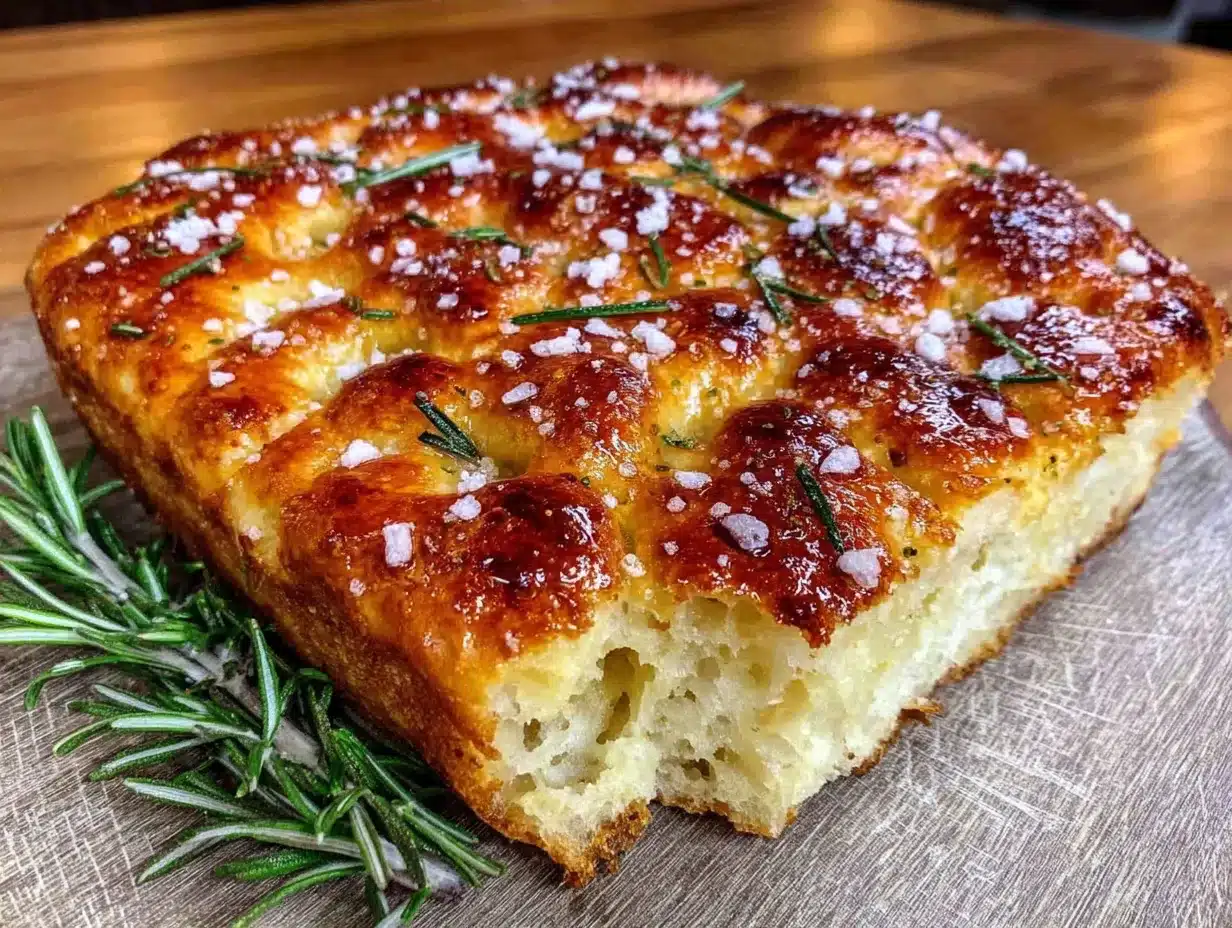
The timer on the oven beeped, and I pulled out a tray of what looked like a golden, dimpled landscape—the edges were caramelized and crispy, the top studded with rosemary and flaky salt. It was a Thursday afternoon, the kind of quiet, gray hour where the only thing I wanted was to use up the sourdough discard sitting in my fridge for the third day in a row. I wasn’t trying to impress anyone. I was just tired of seeing that jar stare at me every time I opened the door.
This focaccia wasn’t planned. It came together because I had run out of patience for complicated bread recipes. No stretch-and-folds. No stand mixer. No fancy proving baskets. Just a bowl, a spatula, and a lot of olive oil. I dumped in the discard, added some flour and water, and walked away. Honestly, I didn’t expect much. But when I cut into that first slice—the crackle of the crust, the soft, airy crumb inside—I knew I had stumbled onto something worth keeping.
That first bite was quiet. Not dramatic. Just the kind of moment where you stop, chew slowly, and think, why don’t I make this more often? The tang from the discard gives it a gentle sourness that plays off the olive oil and salt perfectly. It’s not a show-off bread. It’s the bread you make when you want something good without the fuss. And that, I think, is why it stuck with me.
Why You’ll Love This Recipe
This isn’t just another focaccia recipe. It’s the one that actually works with your lazy Sunday energy. Here’s why I keep coming back to it:
- No kneading required. You don’t need to work out your arms for this one. Just mix, wait, and bake. That’s it.
- Uses up sourdough discard. If you keep a starter, you know the struggle. This recipe turns that leftover tang into something beautiful.
- Simple ingredients. Flour, water, olive oil, salt, and your discard. You probably have all of it right now.
- Perfect for beginners. I’ve taught friends who never baked bread before, and they nailed it on the first try. The dough is forgiving.
- Great for any meal. Serve it alongside soup, use it for sandwiches, or just eat it warm with butter. It fits everywhere.
What makes this different from other focaccia recipes is the fermentation from the discard. It gives the bread a deeper flavor without needing a long, complicated process. The crumb stays soft and airy, while the crust gets that satisfying crackle. I tested this version three times to get the hydration just right—wet enough for big bubbles, but not so sticky that you can’t handle it. It’s my best version, and I’m pretty proud of it.
There’s something about pulling a tray of focaccia out of the oven that feels like a small victory. The smell fills your kitchen, the top is golden and blistered, and you know you made it with stuff you already had. That feeling never gets old.
What Ingredients You Will Need
This recipe keeps things simple. You don’t need a trip to a specialty store. Most of these are pantry staples, especially if you already maintain a sourdough starter. Here’s what you’ll need:
- All-purpose flour – 3 cups (360g). I prefer unbleached all-purpose for a consistent crumb. King Arthur Flour is my go-to, but any brand works. Bread flour will give you a chewier texture if that’s your preference.
- Sourdough discard – 1 cup (240g), unfed and straight from the fridge. This is the star of the show. It adds tang and helps with fermentation without needing to be active.
- Warm water – 1 cup (240ml), around 90°F. Not too hot—you don’t want to kill the natural yeast in the discard. Just warm to the touch.
- Olive oil – ¼ cup (60ml) plus extra for drizzling. Use a good-quality extra virgin olive oil here. It’s not just for the pan; it’s part of the flavor. I like California Olive Ranch for a balanced taste.
- Salt – 1½ teaspoons (9g). Fine sea salt works best for the dough. Save the flaky salt for topping.
- Instant yeast – 1 teaspoon (3g). This gives the dough a reliable rise, even with discard. You can skip it if your discard is very active, but I recommend it for consistency.
- Flaky sea salt – for topping. Maldon is my favorite. It adds that perfect crunch on top.
- Fresh rosemary – 2 sprigs, leaves stripped and chopped. Optional but highly recommended. The aroma is incredible.
If you want to mix it up, you can swap the rosemary for thyme, oregano, or even za’atar. I’ve also used dried herbs in a pinch—just use half the amount since dried herbs are more concentrated.
A note on the discard: it doesn’t need to be bubbly or active. In fact, discard that has been sitting in the fridge for a few days works perfectly. The tang develops more over time, which gives the focaccia a lovely sour note.
Equipment Needed
You don’t need a lot of fancy gear for this recipe. That’s the beauty of it. Here’s what I use:
- Large mixing bowl – Any bowl works, but I prefer a wide ceramic one. It makes mixing easier.
- Measuring cups and spoons – A kitchen scale is more accurate, but cups work fine. I use both depending on my mood.
- Spatula or wooden spoon – For mixing the dough. Nothing fancy needed.
- 9×13-inch baking pan – A metal or glass pan works. I like a light-colored metal pan for even browning. If you only have a dark pan, reduce the oven temperature by 25°F.
- Plastic wrap or a clean kitchen towel – For covering the dough while it rises.
- Parchment paper – Optional but helpful for easy removal. I use it sometimes when I want to avoid sticking.
- Cooling rack – For cooling the focaccia after baking. It keeps the bottom from getting soggy.
If you don’t have a 9×13 pan, you can use a cast iron skillet or a round cake pan. Just adjust the baking time slightly—smaller pans will give you a thicker focaccia that needs a few extra minutes. I’ve made this in a 10-inch cast iron skillet before, and the crispy edges were incredible.
Preparation Method
This is the part where the magic happens. Take your time, but don’t stress. The dough is forgiving.
- Mix the dough. In a large bowl, combine the flour, instant yeast, and salt. Stir with a spatula to distribute. Add the sourdough discard, warm water, and 2 tablespoons of olive oil. Mix until a shaggy dough forms. It will look sticky and rough—that’s exactly what you want. Cover the bowl with plastic wrap and let it rest for 30 minutes. This autolyse step helps the flour absorb the liquid and makes the dough easier to handle.
- First rise. After the rest, uncover the bowl and give the dough a few folds. Just grab an edge, stretch it up, and fold it over the center. Do this 4-5 times around the bowl. It helps build structure without kneading. Cover again and let it rise at room temperature for 8-12 hours. Overnight is perfect. The dough should double in size and look bubbly on top.
- Prepare the pan. Pour 2 tablespoons of olive oil into your 9×13 pan. Use your fingers to spread it all over the bottom and sides. This is crucial—the oil creates that crispy, golden crust. Don’t skimp here.
- Transfer the dough. Gently scrape the dough into the oiled pan. It will be sticky and soft. Don’t try to shape it too much. Just let it fall into the pan. Cover with plastic wrap and let it rest for 30-45 minutes. This relaxes the gluten and makes it easier to stretch.
- Stretch the dough. After the rest, use your fingertips to gently press and stretch the dough to fill the pan. If it resists, let it rest another 10 minutes and try again. You want it evenly spread, but don’t worry about perfection. The dimples from your fingers are part of the look.
- Second rise. Cover the pan again and let the dough rise for 1-2 hours. It should puff up and look airy. The time depends on your room temperature. On a warm day, it might be ready in 45 minutes. On a cooler day, closer to 2 hours.
- Preheat the oven. About 20 minutes before baking, preheat your oven to 425°F (220°C). Place a rack in the middle position. If you have a baking stone or steel, put it in the oven now. It helps create a crispy bottom.
- Add toppings. Just before baking, drizzle another tablespoon of olive oil over the top. Use your fingers to press deep dimples all over the dough—this is where the oil pools and creates those crispy spots. Sprinkle with flaky sea salt and chopped rosemary. Get creative if you want: add sliced olives, cherry tomatoes, or a sprinkle of Parmesan.
- Bake. Place the pan in the preheated oven and bake for 25-30 minutes. The focaccia should be deep golden brown on top and sound hollow when tapped on the bottom. If it’s browning too quickly, tent loosely with foil for the last 5 minutes.
- Cool. Remove from the oven and let it cool in the pan for 5 minutes. Then transfer to a cooling rack. Don’t skip this step—if you leave it in the pan, the bottom will get soggy. Let it cool for at least 15 minutes before cutting. I know it’s hard to wait, but it’s worth it.
The first time I made this, I was convinced I had messed up the hydration. The dough felt too sticky. But I trusted the process, and when I pulled it out of the oven, I was shocked at how beautiful it looked. The bubbles, the golden color, the crispy edges—it was better than anything I could buy at a bakery.
Cooking Tips & Techniques
I’ve made this focaccia more times than I can count, and I’ve learned a few things along the way. Here are my best tips:
- Don’t skip the autolyse. That 30-minute rest after mixing the dough makes a huge difference. It gives the flour time to hydrate, which means less sticky dough and a better texture. I learned this the hard way after rushing through a batch that turned out dense.
- Use enough olive oil. I know it feels like a lot, but the oil is what gives focaccia its signature crispy crust and rich flavor. Don’t be shy with it. One batch I made with less oil came out dry and pale. Never again.
- Wet your fingers for dimpling. If the dough sticks to your fingers when you’re making dimples, just dip your fingertips in a little water or oil. It makes the process so much easier and prevents tearing the dough.
- Watch the oven temperature. Every oven runs differently. If your focaccia is browning too fast on top but still pale on the bottom, move it to a lower rack. If the bottom is burning, use a lighter-colored pan or place a baking sheet on the rack below.
- Let it cool properly. I know the smell is intoxicating, but cutting into hot focaccia will crush the airy crumb. Give it at least 15 minutes. I once cut into it after 5 minutes out of impatience, and it was gummy inside. Patience pays off.
One of my biggest failures was forgetting to add salt to the dough. I was in a rush, and I just mixed everything together without thinking. The focaccia came out flat and bland. It was a sad, flavorless disk. Now I always double-check my salt before I start mixing.
Variations & Adaptations
This recipe is a blank canvas. Here are some ways I’ve adapted it over the years:
- Herb and garlic focaccia. Add 3 cloves of minced garlic and 1 tablespoon of mixed dried herbs (oregano, thyme, basil) to the dough during mixing. The garlic infuses the whole bread with a savory punch.
- Cheesy focaccia. Sprinkle ½ cup of shredded Parmesan or Pecorino over the top before baking. For an extra indulgent version, add dollops of ricotta or cubes of mozzarella. The cheese gets golden and crispy in the olive oil.
- Everything bagel focaccia. Instead of rosemary, top with everything bagel seasoning. The sesame seeds, poppy seeds, garlic, and onion flakes create a crunchy, flavorful crust. This is my go-to for breakfast sandwiches.
- Gluten-free option. Substitute the all-purpose flour with a 1:1 gluten-free baking flour blend. The texture will be a bit denser, but it still works. Add an extra tablespoon of olive oil to keep it moist.
- Sweet focaccia. Skip the salt and rosemary. Instead, top with a mixture of cinnamon and sugar, and drizzle with honey before baking. It’s like a giant, pillowy cinnamon roll. I’ve served this for brunch, and it disappeared in minutes.
I once tried a version with sun-dried tomatoes and Kalamata olives. I pressed them into the dough before the second rise, and they caramelized beautifully in the oven. It was perfect with a bowl of tomato soup. Honestly, the possibilities are endless.
Serving & Storage Suggestions
Focaccia is one of those breads that works for almost any occasion. Here’s how I like to serve and store it:
- Serving temperature. Focaccia is best served warm or at room temperature. If you’ve made it ahead, reheat it in a 350°F oven for 5-7 minutes. It brings back the crispiness. Microwaving will make it soft and chewy—not ideal.
- Presentation. Cut it into squares or strips and arrange on a wooden board. Drizzle with a little extra olive oil and sprinkle with fresh herbs just before serving. It looks beautiful and tastes even better.
- Pairings. This focaccia is amazing with creamy slow cooker potato leek soup with smoked cheddar for a cozy dinner. It’s also perfect for making sandwiches—try it with easy healthy turkey taco lettuce wraps for a fun twist. For breakfast, I love it alongside cozy pumpkin cream cheese swirl muffins.
- Storage. Store leftover focaccia in an airtight container at room temperature for up to 2 days. Do not refrigerate—it will dry out the bread. If you need to keep it longer, wrap it tightly in plastic wrap and freeze for up to 3 months.
- Reheating from frozen. Thaw at room temperature, then reheat in a 350°F oven for 10 minutes. It comes back to life almost perfectly. I often make a double batch and freeze one for later.
The flavors actually develop a bit after the first day. The tang from the sourdough discard becomes more pronounced, and the olive oil seeps deeper into the crumb. I’ve been known to save a piece just to eat cold the next day with a smear of butter.
Nutritional Information & Benefits
Here’s an approximate breakdown per serving (based on 12 servings):
- Calories: 180
- Total fat: 8g
- Saturated fat: 1g
- Carbohydrates: 24g
- Fiber: 1g
- Protein: 4g
- Sodium: 320mg
The sourdough discard in this recipe offers some digestive benefits. The fermentation process breaks down phytic acid, which can make the nutrients in the flour more bioavailable. That means your body can absorb more of the good stuff. Plus, the olive oil provides healthy monounsaturated fats that are great for heart health.
This focaccia is vegetarian-friendly and can be made dairy-free by skipping any cheese toppings. It’s also a great option for those who are looking for a more digestible bread alternative. The longer fermentation time helps some people who struggle with traditional yeast breads.
I like to think of this as a treat that also has some redeeming qualities. It’s not health food, but it’s made with real ingredients and a lot of love. And that counts for something.
Conclusion
This easy no-knead sourdough discard focaccia bread has become a staple in my kitchen for a reason. It’s forgiving, it’s delicious, and it turns something you might throw away into something you’ll want to make again and again. The tangy crumb, the crispy edges, the golden top studded with salt and herbs—it’s everything I want in a bread without any of the fuss.
I love that this recipe works with whatever discard you have. It doesn’t need to be perfectly fed or bubbly. It just needs to exist in your fridge, waiting for its moment to shine. And when it does, you’ll wonder why you ever bought bread from the store.
I’d love to hear how yours turns out. Did you try a different topping? Did you serve it with something amazing? Leave a comment below and share your version. And if you’re looking for more ways to use up your discard, check out this cozy apple cider glazed sourdough cinnamon roll wreath for a sweet treat. Happy baking, friend. You’ve got this.
Frequently Asked Questions
Can I use active sourdough starter instead of discard?
Yes, you can. If you use active starter, you might want to reduce the instant yeast slightly since the starter will contribute more leavening power. The texture will be a bit airier, but it works beautifully.
Why is my focaccia dense and not airy?
This usually happens if the dough didn’t rise enough. Make sure your water is warm (around 90°F) and give it enough time to double. A cold kitchen can slow down the rise significantly. Try placing the bowl in a warm spot, like near a sunny window or on top of the fridge.
Can I make this recipe vegan?
Absolutely. This recipe is already vegan as written, as long as you skip any cheese toppings. The olive oil provides plenty of richness, and the sourdough discard adds depth of flavor without any animal products.
How do I get bigger bubbles in my focaccia?
Higher hydration is the key. Make sure your dough is wet and sticky. Also, be gentle when transferring it to the pan—don’t deflate the dough too much. The dimpling step also helps create those signature bubbles by trapping air pockets.
Can I freeze the baked focaccia?
Yes, it freezes beautifully. Wrap it tightly in plastic wrap, then in foil, and freeze for up to 3 months. To serve, thaw at room temperature and reheat in a 350°F oven for 10 minutes. It will taste almost as good as fresh.
Pin This Recipe!
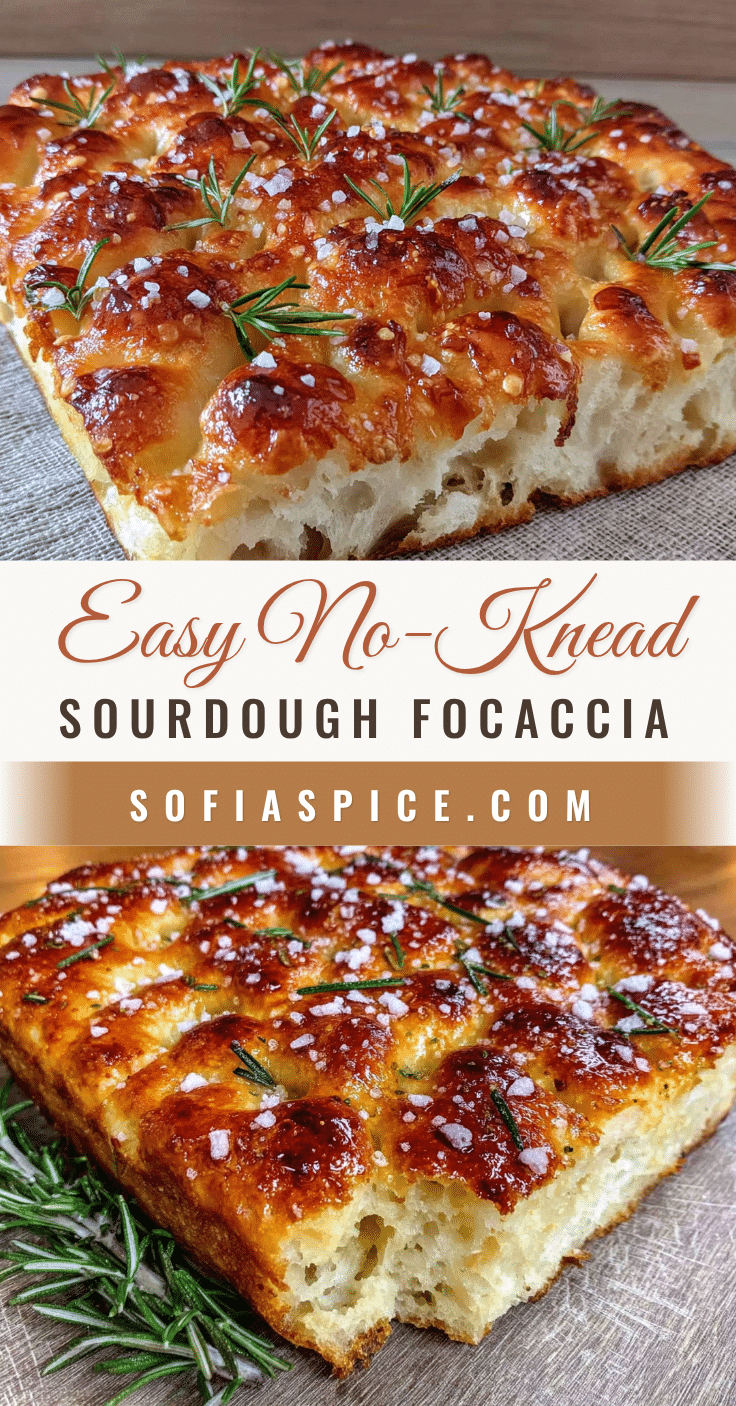
Easy No-Knead Sourdough Discard Focaccia Bread
This easy no-knead sourdough discard focaccia bread is forgiving, delicious, and turns leftover discard into a beautiful, tangy bread with a crispy crust and soft, airy crumb. Perfect for beginners and any meal.
- Prep Time: 15 minutes
- Cook Time: 30 minutes
- Total Time: 9 hours 45 minutes (includes rising time)
- Yield: 12 servings 1x
- Category: Bread
- Cuisine: Italian
Ingredients
- 3 cups (360g) all-purpose flour
- 1 cup (240g) sourdough discard, unfed
- 1 cup (240ml) warm water (about 90°F)
- 1/4 cup (60ml) olive oil, plus extra for drizzling
- 1 1/2 teaspoons (9g) fine sea salt
- 1 teaspoon (3g) instant yeast
- Flaky sea salt for topping
- 2 sprigs fresh rosemary, leaves stripped and chopped (optional)
Instructions
- Mix the dough: In a large bowl, combine flour, instant yeast, and salt. Stir with a spatula. Add sourdough discard, warm water, and 2 tablespoons olive oil. Mix until a shaggy dough forms. Cover with plastic wrap and let rest for 30 minutes.
- First rise: Uncover and fold the dough 4-5 times. Cover again and let rise at room temperature for 8-12 hours (overnight) until doubled and bubbly.
- Prepare the pan: Pour 2 tablespoons olive oil into a 9×13-inch baking pan and spread evenly.
- Transfer the dough: Gently scrape dough into the oiled pan. Cover with plastic wrap and let rest for 30-45 minutes.
- Stretch the dough: Use fingertips to gently press and stretch dough to fill the pan. If it resists, rest another 10 minutes.
- Second rise: Cover and let rise for 1-2 hours until puffed and airy.
- Preheat oven: 20 minutes before baking, preheat to 425°F (220°C).
- Add toppings: Drizzle with 1 tablespoon olive oil, press deep dimples with fingers, sprinkle with flaky sea salt and chopped rosemary.
- Bake: Place pan in oven and bake for 25-30 minutes until deep golden brown and hollow-sounding when tapped.
- Cool: Let cool in pan for 5 minutes, then transfer to a cooling rack. Cool at least 15 minutes before cutting.
Notes
Don’t skip the autolyse (30-minute rest). Use enough olive oil for crispy crust. Wet fingers for dimpling if dough sticks. Let cool properly to avoid gummy texture. Can be frozen for up to 3 months.
Nutrition
- Serving Size: 1 slice (1/12 of rec
- Calories: 180
- Sodium: 320
- Fat: 8
- Saturated Fat: 1
- Carbohydrates: 24
- Fiber: 1
- Protein: 4
Keywords: sourdough discard, focaccia, no-knead bread, easy bread recipe, sourdough bread, discard recipe, Italian bread


