“You won’t believe this bread came out of my oven,” I found myself telling a friend over the phone, still holding the warm loaf just pulled from the pan. Honestly, I wasn’t expecting much when I started mixing a few pantry staples late one Sunday afternoon. It was one of those moments where I needed something comforting but quick—something to quiet the buzz in my head and bring a little calm to the chaos of the day. The honey and butter in this soft and fluffy sandwich bread recipe worked like a charm, wrapping everything up in a tender, slightly sweet hug.
At first, I was skeptical—homemade bread? Me? But the recipe’s simplicity surprised me. There was no need for fancy ingredients or complicated steps. Just a few simple staples sitting quietly in my kitchen, ready to transform. The smell of freshly baked bread with a hint of honey filled the air, and though I’d been tired and distracted, that moment made me pause. It reminded me of why I love baking—not for perfection, but for those small wins that feel like a quiet victory.
What stuck with me was the texture: airy, soft, and just the right amount of chew. It wasn’t dense or heavy like some homemade breads can be. Instead, it was light enough for sandwiches yet sturdy enough to hold its own with a slather of butter. It’s the kind of bread that invites you to pull out your favorite spreads and savor something simple but deeply satisfying. That day, this soft and fluffy sandwich bread with honey and butter became my go-to, a little comfort in a loaf, ready anytime I needed a break from the noise.
Why You’ll Love This Soft and Fluffy Sandwich Bread with Honey and Butter
Having baked this bread countless times (seriously, I lost count after the fifth loaf in one week), I can confidently say it’s a recipe that fits perfectly into busy lives without sacrificing flavor or texture. It’s been tested in my kitchen and approved by my picky eaters—always a good sign.
- Quick & Easy: This bread comes together in under 3 hours, including rising time, making it perfect for weekend baking or weeknight prep.
- Simple Ingredients: No specialty flours or mysterious additives—just basic pantry staples that you probably already have on hand.
- Perfect for Sandwiches: Its soft crumb and slight sweetness make it ideal for everything from classic PB&J to hearty deli meat stacks.
- Crowd-Pleaser: Whether it’s family breakfast toast or a casual get-together, this bread gets compliments every time.
- Unbelievably Delicious: The honey adds a delicate sweetness while the butter lends a tender crumb that’s just irresistible.
This isn’t just any sandwich bread. The trick is in the gentle mixing and a touch of honey that feeds the yeast, creating that soft, fluffy texture. Plus, I love that you can tweak it easily: swap honey for maple syrup, use milk instead of water, or add a sprinkle of oats on top for rustic charm. It’s a recipe that welcomes your creativity but delivers reliable comfort every single time.
For me, it’s the kind of bread that makes mornings better and snacks more special. If you’ve ever been hesitant about baking bread from scratch, this recipe is a friendly nudge toward homemade goodness without fuss.
What Ingredients You Will Need
This recipe uses simple, wholesome ingredients to deliver bold flavor and a perfectly soft texture without any fuss. Most of these are pantry staples, and substitutions are easy if you’re catering to specific dietary needs.
- All-purpose flour (3 ½ cups / 420 g) – The backbone of the bread; choose a trusted brand like King Arthur Flour for consistent texture.
- Warm water (1 ¼ cups / 300 ml) – Activates the yeast; water should be about 110°F (43°C) for best results.
- Active dry yeast (2 ¼ tsp / 7 g) – The magic that makes the dough rise; fresh yeast works too if you have it.
- Honey (3 tbsp / 60 ml) – Adds delicate sweetness and feeds the yeast; you can substitute with maple syrup if preferred.
- Unsalted butter (3 tbsp / 43 g), softened – Adds richness and tenderness to the crumb; feel free to use a plant-based butter alternative.
- Salt (1 ½ tsp / 9 g) – Balances flavor and enhances the dough’s structure.
- Milk (½ cup / 120 ml), warm – Optional but recommended for extra softness; dairy-free milk like oat or almond works well too.
- Egg (1 large), room temperature – Helps with structure and gives a lovely golden crust; omit or replace with flax egg for vegan variation.
Feel free to experiment a bit. When I’m in a hurry, I’ve swapped whole milk for water and it still turns out wonderfully soft, just a touch less rich. And if you want a bit of texture, sprinkling oats or seeds on top before baking adds a nice rustic touch.
Equipment Needed
- Mixing bowls: One large and one medium for proofing yeast and mixing dough.
- Measuring cups and spoons: Accurate measurements make a big difference in bread baking.
- Wooden spoon or dough whisk: Handy for mixing sticky dough before kneading.
- Stand mixer with dough hook (optional): Makes kneading easier, but you can knead by hand with a bit of elbow grease.
- Loaf pan: Standard 9×5 inch (23×13 cm) pan is perfect for shaping the bread.
- Kitchen towel or plastic wrap: To cover dough while it rises, keeping it from drying out.
- Oven thermometer (optional): Useful to ensure your oven is at the right temperature, especially if your oven runs hot or cold.
Personally, I’ve gotten great results kneading by hand and using a simple loaf pan. If you’re on a budget, a wooden spoon and a clean kitchen towel are all you really need. Just make sure to keep your dough warm during rising—something as simple as a sunny windowsill or top of the fridge works wonders.
Preparation Method
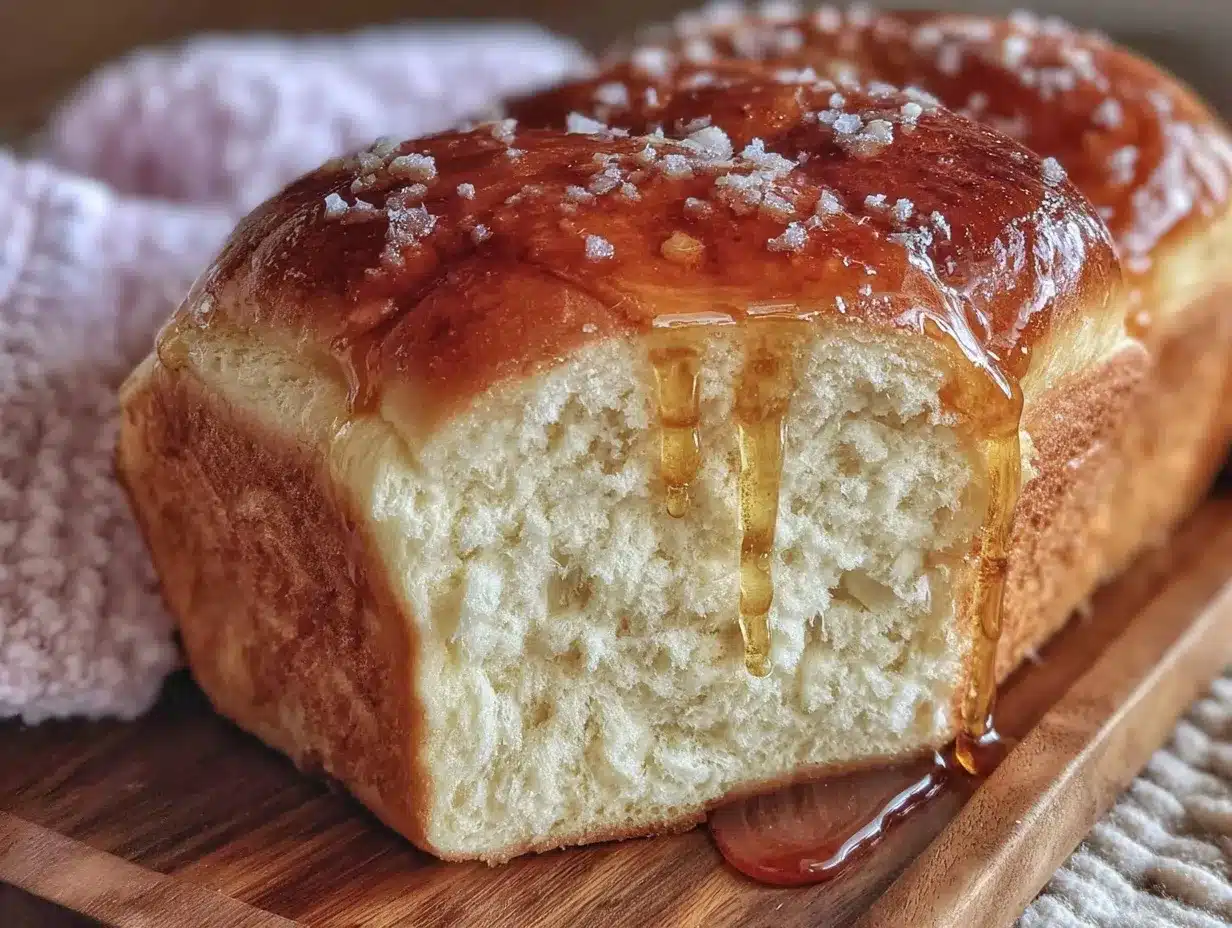
- Activate the yeast: In a medium bowl, combine the warm water (110°F / 43°C), honey, and yeast. Stir gently and let it sit for about 5-10 minutes until foamy. If it doesn’t foam, your yeast might be old or the water too hot/cold—try again with fresh yeast.
- Mix dry ingredients: In a large bowl, whisk together the all-purpose flour and salt until evenly combined.
- Combine wet and dry: Add the yeast mixture, softened butter, warm milk, and egg to the flour. Mix with a wooden spoon or dough whisk until the dough starts to come together. It will be sticky—that’s okay.
- Knead the dough: Turn the dough onto a lightly floured surface and knead for about 8-10 minutes until smooth and elastic. Alternatively, use a stand mixer with a dough hook on medium speed for 6-7 minutes. The dough should be soft, slightly tacky, but not overly sticky.
- First rise: Lightly oil a large bowl and place the dough inside, turning it once to coat in oil. Cover with a kitchen towel or plastic wrap and let it rise in a warm, draft-free spot for 1 to 1 ½ hours, or until doubled in size.
- Shape the loaf: Gently punch down the dough to release gas. Turn it onto a floured surface and shape into a rectangle roughly 9×12 inches. Roll it tightly from the short end, pinch the seams closed, and tuck the ends under. Place the loaf seam-side down into a greased 9×5 inch loaf pan.
- Second rise: Cover the pan loosely and let the dough rise again for about 45 minutes to 1 hour, until it’s puffed just above the pan’s rim.
- Bake: Preheat your oven to 350°F (175°C). Bake the bread for 30-35 minutes until the crust is golden brown and the loaf sounds hollow when tapped. If it browns too quickly, tent with foil after 20 minutes.
- Cool: Remove the bread from the oven and let it cool in the pan for 10 minutes. Then transfer to a wire rack to cool completely before slicing.
Tip: If you slice the bread too soon, it might be gummy inside. Patience pays off here. Also, I find brushing a little melted butter on the warm loaf right out of the oven makes the crust extra soft and shiny.
Cooking Tips & Techniques
Getting soft and fluffy bread is all about the right balance of ingredients and technique. One mistake I made early on was rushing the rising times—honestly, you can’t fake the yeast’s work. Let the dough double properly for that light crumb.
Another tip: use warm, not hot, liquids. Too hot and you kill the yeast; too cold and it won’t activate. I keep a little kitchen thermometer nearby to be sure.
Kneading feels intimidating, but it’s just about developing the gluten. When the dough bounces back to your finger’s poke, that’s a good sign it’s ready. If it tears easily, keep kneading a bit longer.
During baking, tenting the loaf with foil prevents over-browning and keeps moisture in. Also, brushing on butter right after baking helps keep the crust soft and inviting.
Multitasking tip: While the dough is rising, it’s a great time to prep a quick meal like the one-pan garlic butter salmon with asparagus I often make. The timing works out perfectly!
Variations & Adaptations
- Gluten-Free: Substitute all-purpose flour with a gluten-free blend designed for bread baking. Add 1 tsp xanthan gum if your blend doesn’t contain it.
- Vegan: Use dairy-free milk (almond, oat) and replace the egg with a flax egg (1 tbsp ground flaxseed + 3 tbsp water, set 5 minutes).
- Whole Wheat Twist: Swap half the all-purpose flour for whole wheat flour for a nuttier flavor and heartier texture.
- Seeded Loaf: Add 2 tbsp of your favorite seeds (sunflower, sesame, flax) into the dough and sprinkle some on top before baking for added crunch and nutrition.
- Herb-Infused: Mix in 1 tbsp fresh chopped rosemary or thyme for a fragrant, savory touch that pairs beautifully with buttered toast.
Once, I tried adding a swirl of cinnamon and a little extra honey for a sweet breakfast bread that was a hit with the family. The beauty of this recipe is its flexibility—you can make it your own easily.
Serving & Storage Suggestions
This bread is best served warm, fresh from the oven with a generous spread of butter and maybe a drizzle of honey. It’s perfect for breakfast toast, sandwiches, or simply alongside a bowl of soup. I love pairing it with creamy dishes like Greek lemon chicken soup for a cozy meal.
To store, wrap the cooled loaf tightly in plastic wrap or a reusable bread bag. It keeps well at room temperature for 3 days. For longer storage, slice and freeze in an airtight container, then toast slices straight from the freezer whenever you want.
Reheating in a toaster or oven restores the soft texture nicely. I also find that the flavors mellow and become even more pleasant after a day or two—making it great for prepping ahead.
Nutritional Information & Benefits
Each slice (approximately 1/12th of the loaf) contains roughly 120 calories, with 2 grams of protein, 20 grams of carbohydrates, and 3 grams of fat. The honey adds natural sweetness, avoiding refined sugars.
Using real butter contributes healthy fats and a rich flavor, and the milk adds calcium and protein to support bone health. This bread offers a wholesome alternative to store-bought sandwich loaves, free from preservatives and artificial ingredients.
For those avoiding gluten or dairy, the adaptations mentioned make this bread accessible to various dietary needs without losing its signature softness.
Conclusion
This soft and fluffy sandwich bread with honey and butter has become one of those recipes I reach for again and again. It’s forgiving, straightforward, and delivers that tender crumb and lightly sweet flavor that makes everyday meals feel a little more special. Whether you’re making sandwiches, toasting for breakfast, or just craving some buttery bread, this recipe is a reliable friend in the kitchen.
Don’t hesitate to tweak it to suit your mood or pantry. I love how it welcomes creativity while staying simple at heart. I hope it brings a little comfort and joy to your table, just like it did mine.
Give it a try, and let me know how you make it your own!
FAQs About Soft and Fluffy Sandwich Bread with Honey and Butter
Can I use instant yeast instead of active dry yeast?
Yes! Instant yeast can be used in the same amount. Mix it directly with the dry ingredients without proofing in water first.
What if my bread turns out dense instead of fluffy?
Make sure you’re using fresh yeast and giving the dough enough time to rise. Also, knead long enough to develop gluten for a soft texture.
Can I make this bread without an egg?
Absolutely. For egg-free baking, use a flax egg or simply omit it; the bread will still be soft but might be slightly less rich.
How long does the bread keep fresh?
At room temperature, it stays fresh for about 3 days when wrapped well. For longer storage, slice and freeze it.
Is this bread suitable for sandwiches with moist fillings?
Yes, the bread holds up well and won’t get soggy too quickly, making it perfect for sandwiches with spreads or juicy ingredients.
Pin This Recipe!
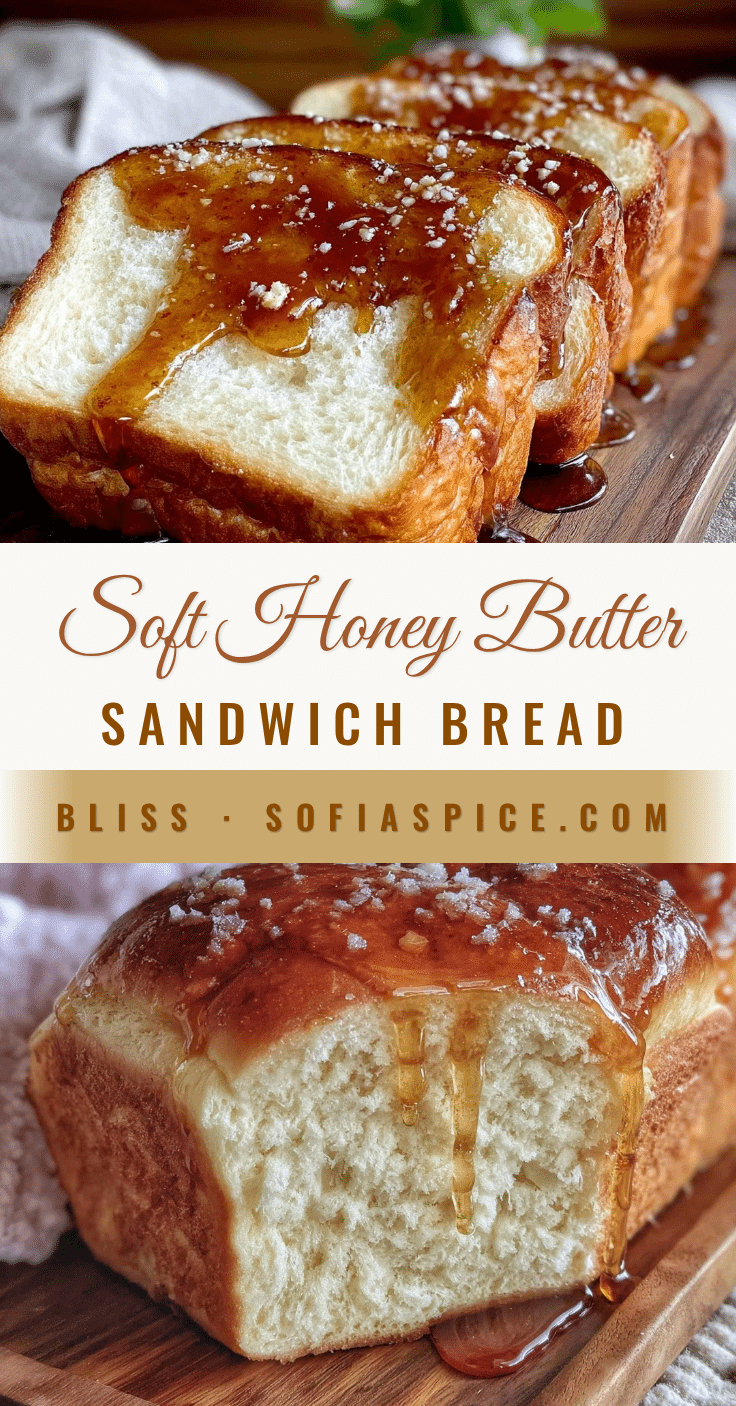
Soft and Fluffy Sandwich Bread Recipe with Honey and Butter Made Easy

A comforting and easy homemade sandwich bread recipe featuring honey and butter for a soft, fluffy texture and a slightly sweet flavor. Perfect for sandwiches, toast, and everyday meals.
- Prep Time: 20 minutes
- Cook Time: 30-35 minutes
- Total Time: 2 hours 45 minutes
- Yield: 12 servings (slices) 1x
- Category: Bread
- Cuisine: American
Ingredients
- 3 ½ cups (420 g) all-purpose flour
- 1 ¼ cups (300 ml) warm water (about 110°F / 43°C)
- 2 ¼ tsp (7 g) active dry yeast
- 3 tbsp (60 ml) honey
- 3 tbsp (43 g) unsalted butter, softened
- 1 ½ tsp (9 g) salt
- ½ cup (120 ml) warm milk (optional)
- 1 large egg, room temperature
Instructions
- Activate the yeast: In a medium bowl, combine the warm water (110°F / 43°C), honey, and yeast. Stir gently and let it sit for about 5-10 minutes until foamy.
- Mix dry ingredients: In a large bowl, whisk together the all-purpose flour and salt until evenly combined.
- Combine wet and dry: Add the yeast mixture, softened butter, warm milk, and egg to the flour. Mix with a wooden spoon or dough whisk until the dough starts to come together. It will be sticky.
- Knead the dough: Turn the dough onto a lightly floured surface and knead for about 8-10 minutes until smooth and elastic. Alternatively, use a stand mixer with a dough hook on medium speed for 6-7 minutes.
- First rise: Lightly oil a large bowl and place the dough inside, turning it once to coat in oil. Cover with a kitchen towel or plastic wrap and let it rise in a warm, draft-free spot for 1 to 1 ½ hours, or until doubled in size.
- Shape the loaf: Gently punch down the dough to release gas. Turn it onto a floured surface and shape into a rectangle roughly 9×12 inches. Roll it tightly from the short end, pinch the seams closed, and tuck the ends under. Place the loaf seam-side down into a greased 9×5 inch loaf pan.
- Second rise: Cover the pan loosely and let the dough rise again for about 45 minutes to 1 hour, until it’s puffed just above the pan’s rim.
- Bake: Preheat your oven to 350°F (175°C). Bake the bread for 30-35 minutes until the crust is golden brown and the loaf sounds hollow when tapped. If it browns too quickly, tent with foil after 20 minutes.
- Cool: Remove the bread from the oven and let it cool in the pan for 10 minutes. Then transfer to a wire rack to cool completely before slicing.
Notes
Use warm, not hot, liquids to activate yeast properly. Let dough rise fully for a light crumb. Brushing melted butter on the warm loaf after baking keeps the crust soft and shiny. Tent with foil if crust browns too quickly. For vegan variation, replace egg with flax egg and use dairy-free milk. For gluten-free, substitute flour with gluten-free blend and add xanthan gum if needed.
Nutrition
- Serving Size: 1 slice (1/12th of l
- Calories: 120
- Fat: 3
- Carbohydrates: 20
- Protein: 2
Keywords: sandwich bread, homemade bread, soft bread, fluffy bread, honey bread, easy bread recipe, butter bread, quick bread, baking bread


