Introduction
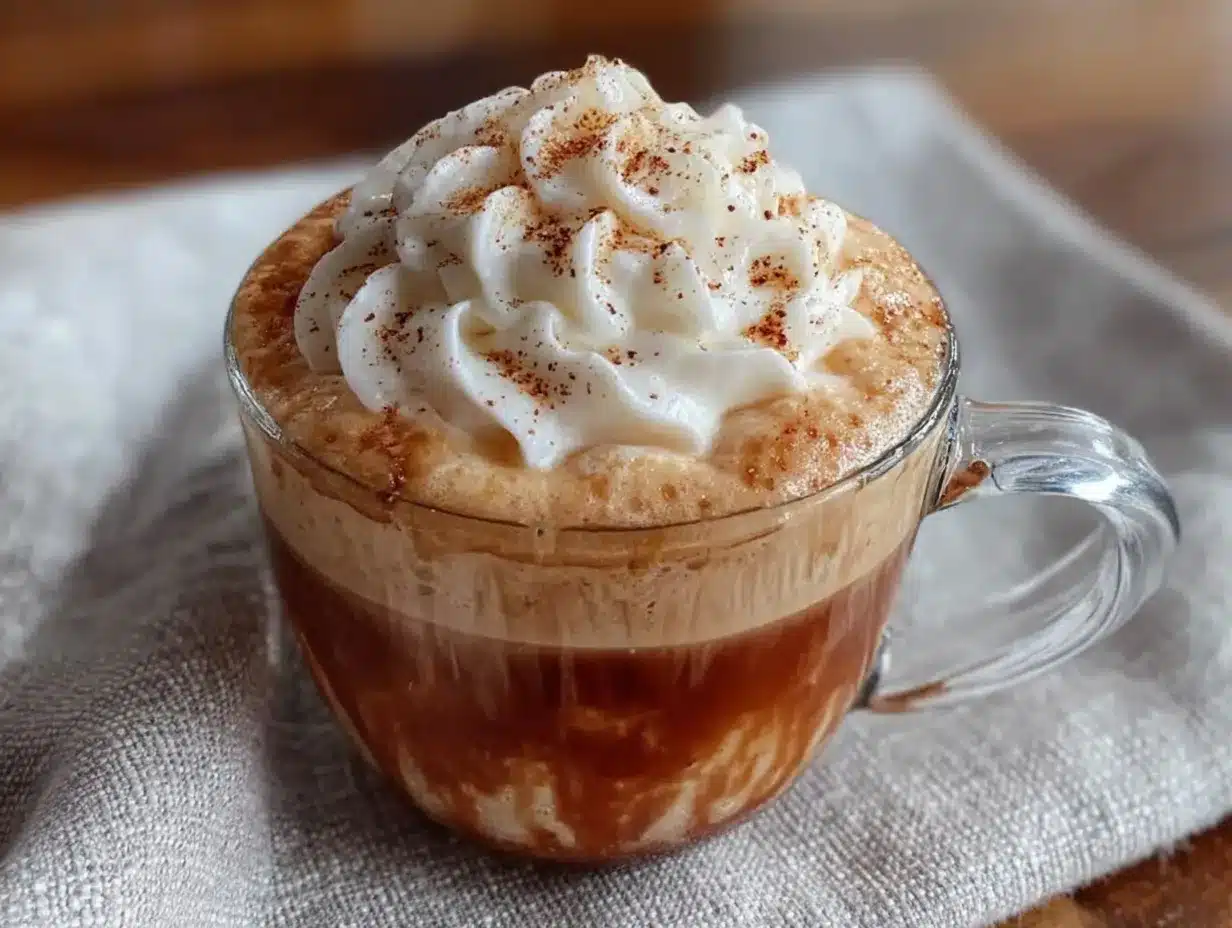
Let me tell you, the moment you pour that steaming espresso into your cup and watch the creamy froth swirl into a delicate ballerina silhouette, your kitchen instantly feels like a cozy little café. The scent of rich coffee mingling with sweet vanilla foam is enough to make anyone’s mouth water, and honestly, it’s a bit magical. The first time I crafted this Creamy Ballerina Cappuccino with Vanilla Foam Art, I was instantly hooked—the kind of moment where you pause, take a deep breath, and just smile because you know you’re onto something truly special.
Years ago, when I was knee-high to a grasshopper, my grandma taught me that the little details make a big difference. However, I never imagined I’d be able to recreate artful foam at home without a fancy barista machine. This recipe stumbled into my life on a rainy weekend, when I wanted to brighten up my morning and impress my friends with something a little extra. My family couldn’t stop sneaking sips off the counter (and I can’t really blame them). This cappuccino feels like a warm hug wrapped in a dance of creamy vanilla and bold espresso—a dangerously easy way to add a bit of whimsy to your day.
Whether you’re looking to brighten your Pinterest coffee board, impress guests, or simply treat yourself to a sweet moment, this Creamy Ballerina Cappuccino recipe fits the bill perfectly. I’ve tested it multiple times in the name of research, of course, and it’s become a staple for weekend mornings and cozy afternoons alike. Trust me, you’re going to want to bookmark this one!
Why You’ll Love This Recipe
Honestly, this Creamy Ballerina Cappuccino isn’t just another coffee recipe—it’s a little showstopper that brings café charm right into your kitchen. With a few simple ingredients and a touch of flair, you get a coffee experience that’s both satisfying and visually stunning. Here’s why this recipe has earned a special spot in my heart:
- Quick & Easy: Comes together in under 10 minutes, perfect for busy mornings or last-minute coffee cravings.
- Simple Ingredients: No fancy trips to specialty stores—just staples you likely have on hand like espresso, milk, and vanilla.
- Perfect for Any Occasion: Whether it’s a weekend brunch, a cozy night in, or a fun treat for friends, it fits right in.
- Crowd-Pleaser: Always gets rave reviews, especially from those who appreciate a little artistry with their caffeine fix.
- Unbelievably Delicious: The creamy texture paired with the subtle sweetness of vanilla foam is pure, nostalgic comfort.
What really sets this recipe apart is the easy vanilla foam art technique—no barista training required! The vanilla adds a gentle sweetness that balances the espresso’s punch, and the foam art? Well, it’s a neat twist that makes your cappuccino feel special without extra fuss. Close your eyes after the first sip, and you’ll get why this recipe feels like comfort food reimagined—simple, fast, and soul-soothing.
What Ingredients You Will Need
This recipe uses simple, wholesome ingredients to deliver bold flavor and a satisfying texture without fuss. Most are pantry staples, and if you’re missing something, I’ve got easy swaps to keep you going.
- Espresso: 2 shots (about 2 oz / 60 ml) of freshly brewed espresso or strong coffee (I recommend using freshly ground beans from Lavazza or Illy for best flavor)
- Milk: 1 cup (240 ml) whole milk, cold (for best frothing; use oat or almond milk for a dairy-free option, but results may vary)
- Vanilla Extract: 1 tsp pure vanilla extract (adds warmth and sweetness to the foam)
- Sugar: 1 tsp granulated sugar or to taste (optional, but balances the espresso’s bitterness)
- Water: Fresh, filtered water for brewing espresso
Optional ingredients for the foam art:
- Cinnamon or cocoa powder: For dusting on top to add a little extra flair and flavor
Remember, fresh ingredients make a difference—freshly brewed espresso and cold milk will give you the best foam texture. And hey, if you want to get creative, swapping vanilla extract for a splash of almond or hazelnut syrup can change things up nicely.
Equipment Needed
- Espresso machine or stovetop espresso maker: Essential for brewing that rich espresso shot. A Moka pot works great if you don’t have an espresso machine.
- Milk frother: Electric frother or handheld wand to create that creamy vanilla foam. If you don’t have one, a French press or a jar with a tight lid can do the trick (shake vigorously!).
- Small saucepan: For warming milk gently if you prefer to heat before frothing.
- Measuring spoons and cups: To get those ingredient amounts just right.
- Spoon or latte art tool: For shaping the ballerina foam art—sometimes even a toothpick works wonders.
I’ve tried this recipe with everything from high-end frothers to the humble jar method—and honestly, it’s all about the technique more than the gadget. For budget-friendly options, a simple handheld frother is under $20 and works like a charm. Just keep your tools clean and ready, especially the frother wand, to avoid any funky flavors.
Preparation Method
- Brew your espresso: Prepare 2 shots (about 2 oz / 60 ml) of espresso using your espresso machine or stovetop maker. Pour into your favorite cappuccino cup. (Tip: Freshly brewed espresso should smell rich and slightly caramelized—if it smells burnt, adjust your grind size or brewing time.)
Estimated time: 3-5 minutes. - Prepare the vanilla milk mixture: In a small bowl or cup, combine 1 cup (240 ml) cold whole milk, 1 tsp pure vanilla extract, and 1 tsp sugar (optional). Stir gently until sugar dissolves. (Don’t skip this step—it’s the secret to that lovely vanilla foam flavor.)
- Froth the vanilla milk: Using your milk frother or steam wand, froth the vanilla milk until it doubles in volume and forms a smooth, velvety foam. If using a French press or jar, pump or shake vigorously until thick foam forms. You’re aiming for microfoam—that soft, cloud-like texture.
Estimated time: 1-2 minutes. - Pour the frothed milk: Slowly pour the frothy vanilla milk over your espresso, holding back the foam with a spoon. Then, gently spoon the foam on top to create a thick, creamy cap.
- Create the ballerina foam art: Using a small spoon or latte art tool (or a toothpick), gently drag small amounts of foam to form the ballerina’s tutu and arms. The trick is to work slowly and let the foam’s softness shape the design. (Practice makes perfect—don’t fret if your first tries aren’t gallery-worthy!)
- Optional finishing touch: Lightly dust the top with a pinch of cinnamon or cocoa powder for extra aroma and a pop of color.
And voilà! Your creamy ballerina cappuccino is ready to enjoy. The whole process takes about 10 minutes, but the memory of that first sip will linger way longer.
Cooking Tips & Techniques
Getting that perfect creamy ballerina cappuccino with vanilla foam art takes a bit of practice, but here are some tips that made all the difference for me:
- Milk temperature matters: Cold milk froths better, but don’t heat it above 150°F (65°C), or it can scorch and lose sweetness.
- Use fresh espresso: Stale or pre-ground coffee won’t give you the rich aroma and flavor you want.
- Froth with purpose: When frothing, tilt your frother slightly and keep it just below the milk surface to create microfoam instead of giant bubbles.
- Foam art patience: Foam art isn’t about speed, but gentle, steady movements. Try making simple shapes like hearts before tackling the ballerina.
- Practice makes perfect: I’ve spilled plenty of milk and created some lopsided ballerinas, but each attempt taught me how the foam behaves. Don’t get discouraged!
One time, I overheated the milk and ended up with flat foam that just wouldn’t hold shape—that’s when I learned to use a thermometer and keep careful watch. Also, multitasking helps: brew espresso while warming milk to save time.
Variations & Adaptations
This recipe is flexible and can be adjusted to suit your taste or dietary needs. Here are some ideas I’ve tried or recommend:
- Flavored foam: Swap vanilla extract for hazelnut or caramel syrup for a fun twist.
- Non-dairy milk: Oat milk froths beautifully and adds a natural sweetness; almond or soy milk also work but may need extra frothing time.
- Decaf option: Use decaffeinated espresso for an evening treat without the jitters.
- Sweetener swap: Try honey or maple syrup instead of sugar for a natural flavor boost.
- Seasonal spins: Add a pinch of pumpkin spice or cinnamon to the milk for autumn vibes.
Personally, I once tried a lavender vanilla foam for a spring brunch, which was a delightful surprise and perfect for impressing guests with something a little different.
Serving & Storage Suggestions
Serve your creamy ballerina cappuccino immediately for that fresh, frothy experience. It’s best enjoyed warm, ideally in a pre-warmed cup to keep the heat longer. Pair it with a buttery croissant or a small biscotti for a classic café feel.
If you have leftovers (which is rare!), store the milk foam separately in an airtight container in the fridge for up to 24 hours. Reheat gently and re-froth before serving. Avoid microwaving espresso as it can become bitter.
Flavors actually develop subtly if you prepare the vanilla milk ahead and let it chill overnight—the vanilla becomes more pronounced. Just remember to froth fresh before pouring.
Nutritional Information & Benefits
This cappuccino packs a cozy punch with roughly 120 calories per serving (depends on milk choice and sugar). Whole milk offers protein and calcium, while the espresso provides a natural caffeine boost and antioxidants. Vanilla extract adds flavor without extra calories.
For those watching carbs, using unsweetened almond or oat milk cuts calories and sugar. Just be mindful of added syrups if you want to keep it lighter. The recipe is naturally gluten-free and can be made vegan with plant-based milk and sugar substitutes.
I love this recipe not only because it tastes great but also because it turns a simple coffee break into a mindful, uplifting moment that feels nurturing and indulgent without guilt.
Conclusion
To sum it up, this Creamy Ballerina Cappuccino with Vanilla Foam Art is a charming, easy way to bring a bit of café magic into your everyday routine. Whether you’re a coffee newbie or a latte art enthusiast, this recipe invites you to slow down, enjoy the process, and sip on something truly special. I adore how it combines simple ingredients with a touch of creativity, making mornings (or any time!) feel a little more joyful.
Give it a try, customize the flavors to your liking, and don’t hesitate to share your foam art attempts—I’d love to hear how your ballerina turns out! Go ahead, make your coffee moment memorable and share the love with friends or family. You deserve that warm, creamy hug in a cup.
FAQs
How do I get the milk foam to be thick and creamy?
Start with cold whole milk and froth just below the surface to create tiny bubbles (microfoam). Avoid overheating the milk—aim for around 150°F (65°C). Using a good frother helps, but shaking milk vigorously in a jar can also work.
Can I use regular brewed coffee instead of espresso?
You can, but espresso’s concentrated flavor makes this cappuccino special. If using brewed coffee, make it strong (like a double-strength brew) to avoid a weak taste.
What’s the easiest way to create vanilla foam art?
After frothing vanilla milk, use a small spoon to gently shape the foam on top of your coffee. For the ballerina, drag the foam slowly with a toothpick or latte art tool to form tutu shapes and arms. Practice simple shapes first to get comfortable.
Can I make this recipe dairy-free?
Absolutely! Use oat or almond milk for frothing—oat milk tends to froth best. Swap sugar for a plant-based sweetener if desired. The vanilla foam art might be a bit trickier but definitely doable.
How do I store leftover cappuccino?
It’s best enjoyed fresh, but if you must, separate the milk foam and espresso. Store milk foam in the fridge in an airtight container for up to 24 hours and re-froth before serving. Espresso can be refrigerated but avoid microwaving to keep flavor intact.
Pin This Recipe!
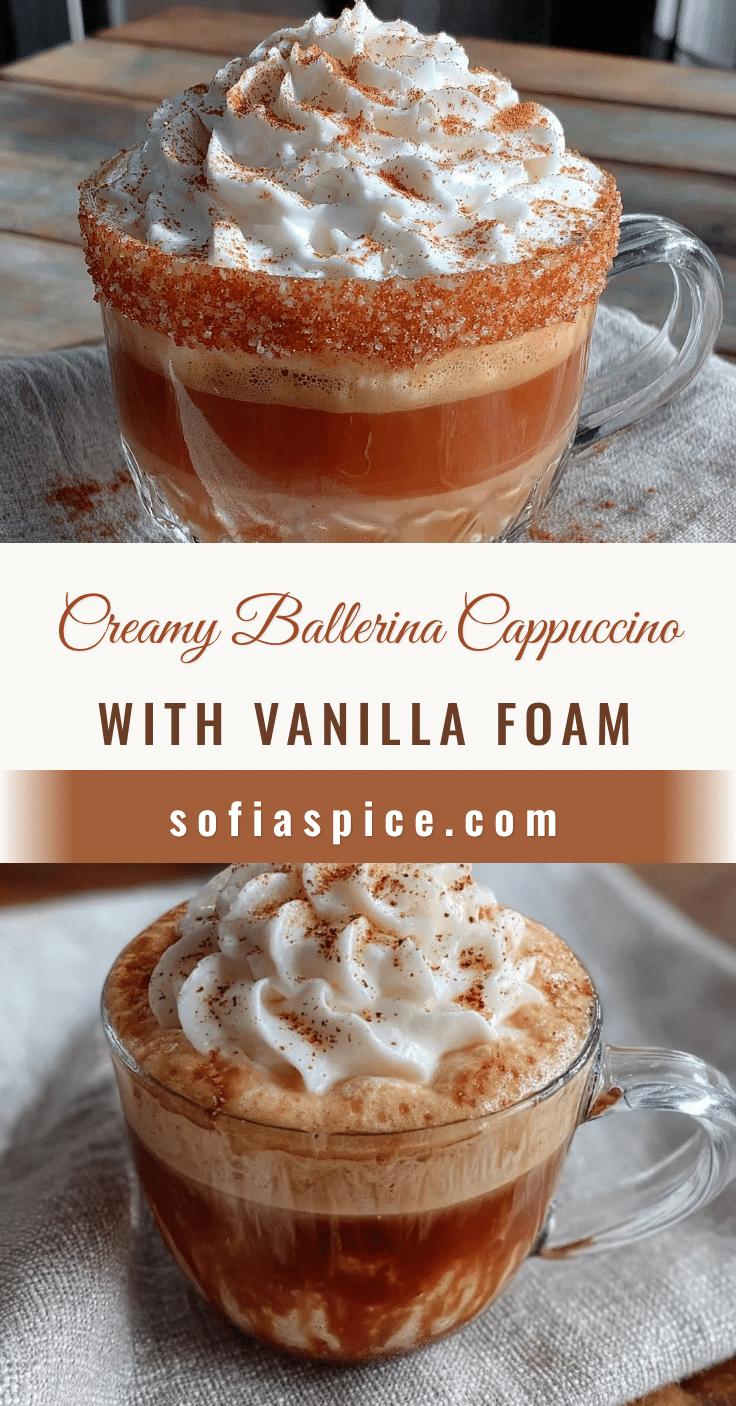
Creamy Ballerina Cappuccino Recipe with Easy Vanilla Foam Art Tutorial
A charming and easy cappuccino recipe featuring creamy vanilla foam art that brings café magic into your kitchen. Perfect for cozy mornings or impressing guests with a visually stunning coffee treat.
- Prep Time: 5 minutes
- Cook Time: 5 minutes
- Total Time: 10 minutes
- Yield: 1 serving 1x
- Category: Beverage
- Cuisine: Cafe Style
Ingredients
- 2 shots (about 2 oz / 60 ml) freshly brewed espresso or strong coffee
- 1 cup (240 ml) whole milk, cold (or oat/almond milk for dairy-free option)
- 1 tsp pure vanilla extract
- 1 tsp granulated sugar (optional)
- Fresh, filtered water for brewing espresso
- Optional: cinnamon or cocoa powder for dusting
Instructions
- Brew 2 shots (about 2 oz / 60 ml) of espresso using an espresso machine or stovetop maker. Pour into a cappuccino cup.
- In a small bowl or cup, combine 1 cup cold whole milk, 1 tsp vanilla extract, and 1 tsp sugar (optional). Stir gently until sugar dissolves.
- Froth the vanilla milk using a milk frother or steam wand until it doubles in volume and forms smooth, velvety microfoam. If using a French press or jar, pump or shake vigorously until thick foam forms.
- Slowly pour the frothed vanilla milk over the espresso, holding back the foam with a spoon. Then spoon the foam on top to create a thick, creamy cap.
- Using a small spoon or latte art tool (or toothpick), gently drag small amounts of foam to form the ballerina’s tutu and arms.
- Optionally, lightly dust the top with cinnamon or cocoa powder for extra aroma and color.
Notes
[‘Use cold milk for best frothing results and avoid heating milk above 150°F (65°C) to prevent scorching.’, ‘Freshly brewed espresso should smell rich and slightly caramelized; adjust grind size or brewing time if burnt.’, ‘Practice foam art gently and patiently; simple shapes like hearts can help before attempting the ballerina.’, ‘For dairy-free, oat milk froths best; almond or soy milk may require extra frothing time.’, ‘Store leftover milk foam separately in an airtight container in the fridge for up to 24 hours; re-froth before serving.’, ‘Avoid microwaving espresso to prevent bitterness.’]
Nutrition
- Serving Size: 1 cup (about 8 oz)
- Calories: 120
- Sugar: 9
- Sodium: 90
- Fat: 5
- Saturated Fat: 3
- Carbohydrates: 10
- Protein: 6
Keywords: cappuccino, vanilla foam art, espresso, creamy coffee, latte art, easy coffee recipe, homemade cappuccino, ballerina foam