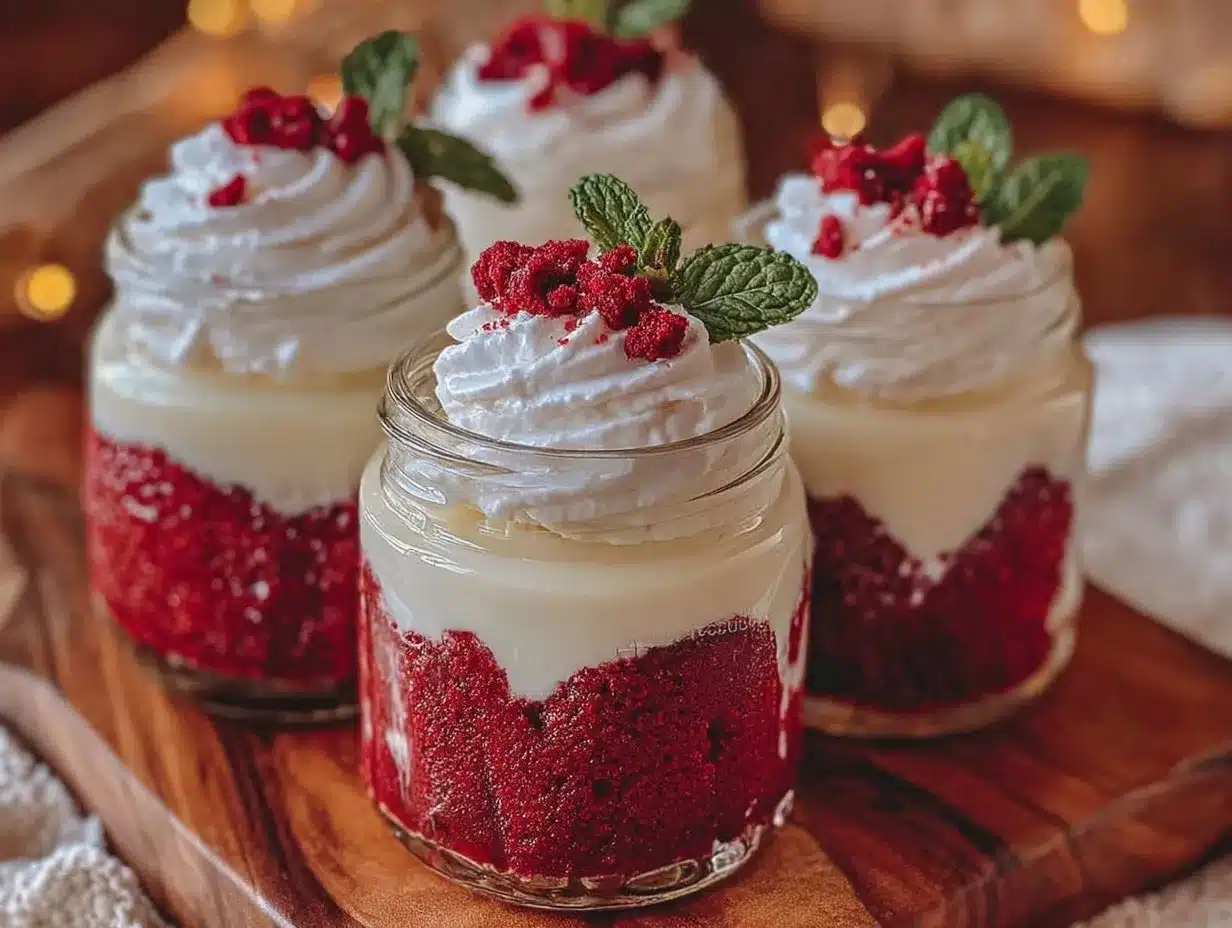
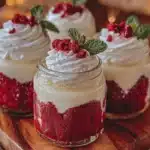
Let me tell you, the sight of those little mason jars filled with velvety red cheesecake, topped with a swirl of cream cheese frosting, is enough to make anyone’s mouth water. The first time I baked these creamy mini red velvet cheesecakes in mason jars, I was instantly hooked. It was one of those rare moments where you pause, take a deep breath, and just smile because you know you’ve stumbled onto something truly special. Years ago, when I was knee-high to a grasshopper, desserts always meant big slices on plates, but these charming jars bring a playful twist that feels both nostalgic and fresh.
I discovered this recipe during a rainy weekend—trying to recreate the perfect red velvet cake experience but in a fun, portable form for a family picnic. Honestly, my family couldn’t stop sneaking them off the cooling rack (and I can’t really blame them). These creamy mini red velvet cheesecakes in mason jars quickly became a staple for family gatherings and gifting, the kind of dessert that feels like a warm hug in every bite. You know what makes them special? They’re dangerously easy, visually stunning, and offer pure, nostalgic comfort all at once.
Perfect for potlucks, sweet treats for your kids’ lunchboxes, or to brighten up your Pinterest cookie board, these mini cheesecakes are a guaranteed crowd-pleaser. I’ve tested this recipe more times than I can count—(in the name of research, of course)—and each batch feels like a little celebration. You’re going to want to bookmark this one, trust me.
Why You’ll Love This Recipe
Honestly, creamy mini red velvet cheesecakes in mason jars are the kind of dessert that makes you close your eyes after the first bite. Here’s why this recipe stands out and will win your heart:
- Quick & Easy: Comes together in under 45 minutes, perfect for busy weeknights or last-minute cravings.
- Simple Ingredients: No fancy grocery trips needed; you likely already have everything in your kitchen.
- Perfect for Any Occasion: Great for holiday mornings, cozy dinners, brunches, or charming gifts.
- Crowd-Pleaser: Always gets rave reviews from kids and adults alike—trust me, it’s a hit every time.
- Unbelievably Delicious: The smooth cream cheese texture paired with that classic red velvet flavor is next-level comfort food.
This isn’t just another cheesecake recipe. What makes it special is the way the cream cheese filling blends with just the right amount of cocoa and vanilla, plus a touch of tanginess from the buttermilk. The mason jars not only add a rustic charm but also keep these cheesecakes perfectly portioned and easy to serve. It’s comfort food reimagined—healthier, faster, but with the same soul-soothing satisfaction. Whether you’re impressing guests or just treating yourself, this recipe hits all the right notes.
What Ingredients You Will Need
This recipe uses simple, wholesome ingredients to deliver bold flavor and satisfying texture without the fuss. Most of these are pantry staples, and where possible, I’ve included easy swaps if you need them.
- For the Crust:
- 1 cup graham cracker crumbs (about 100g) – for that perfect crunchy base
- 3 tablespoons unsalted butter, melted (adds richness and helps bind)
- 2 tablespoons granulated sugar (balances the buttery crust)
- For the Cheesecake Filling:
- 16 oz (450g) cream cheese, softened – I recommend Philadelphia for the best texture
- ½ cup granulated sugar (100g)
- 2 large eggs, room temperature
- ¼ cup buttermilk (60ml) – adds that signature tang
- 2 tablespoons unsweetened cocoa powder (15g) – use Dutch-processed if you can, it deepens the flavor
- 1 teaspoon vanilla extract
- 1 tablespoon red food coloring (or beet juice for a natural option) – for that iconic red velvet hue
- ¼ teaspoon salt (balances sweetness)
- For the Topping:
- ½ cup heavy cream (120ml), chilled
- 2 tablespoons powdered sugar (15g)
- ½ teaspoon vanilla extract
Substitution tips: Use almond flour for a gluten-free crust, swap buttermilk with a mixture of milk and lemon juice, or coconut cream instead of heavy cream if you want a dairy-free topping. I’ve found these swaps work well without sacrificing the creamy texture.
Equipment Needed
- 12 small mason jars (4 oz or 120ml size) – these are perfect for portion control and presentation
- Electric mixer or stand mixer – makes beating the cream cheese silky smooth
- Mixing bowls
- Measuring cups and spoons
- Spatula – ideal for scraping down sides and folding ingredients gently
- Baking sheet or roasting pan – for water bath baking if you want to be fancy (optional)
If you don’t have a stand mixer, a hand mixer works just fine. For the water bath, I usually line the baking pan with a kitchen towel to prevent jars from sliding. Mason jars are great because you can reuse them — I always recommend handwashing and checking the lids for tight seals before baking to avoid leaks.
Preparation Method
- Prepare the crust: Preheat your oven to 325°F (160°C). In a bowl, combine the graham cracker crumbs, melted butter, and sugar. Stir until all crumbs are evenly coated and look like wet sand. Spoon about 1 tablespoon (15g) of the mixture into each mason jar, pressing down firmly to create an even crust layer. Set the jars aside on a baking sheet.
- Make the cheesecake filling: Using an electric mixer, beat the softened cream cheese on medium speed until smooth and creamy, about 2 minutes. Add the sugar and beat until fully incorporated. Scrape down the sides occasionally to avoid lumps.
- Add eggs and flavorings: Beat in the eggs one at a time, mixing well after each addition. Then add the buttermilk, vanilla extract, cocoa powder, red food coloring, and salt. Mix gently on low speed until everything is combined and the batter is smooth with a rich red color. Be careful not to overmix, or you might introduce too much air.
- Fill the jars: Carefully spoon the cheesecake batter over the crust in each jar, filling to about ¾ full. Tap the jars gently on the counter to release any air bubbles and smooth the tops with a spatula.
- Bake: Place the baking sheet with jars in the oven. Bake for 25-30 minutes, or until the edges are set but the centers still have a slight jiggle. If you want extra creamy cheesecakes, consider using a water bath by placing the jars in a roasting pan filled halfway with hot water. This prevents cracking and promotes even baking.
- Cool and chill: Remove the jars from the oven and let them cool to room temperature. Then cover and refrigerate for at least 4 hours, preferably overnight, to let the cheesecakes fully set and flavors meld.
- Prepare the topping: Before serving, whip the chilled heavy cream with powdered sugar and vanilla until soft peaks form. Pipe or spoon a generous dollop on top of each cheesecake jar.
- Serve and enjoy: Garnish with a sprinkle of cocoa powder, chocolate shavings, or even a fresh raspberry for that little extra touch.
Cooking Tips & Techniques
One of the trickiest parts when making cheesecakes is getting that creamy texture without cracks. When mixing the batter, keep your speed moderate and scrape the bowl often to prevent lumps. Overbeating can introduce air bubbles that lead to cracks during baking—so take it easy!
Water baths are a pro tip here—they keep the mason jars from overheating and drying out. If you don’t have a roasting pan, using a deep baking dish works just fine. Just be sure to wrap the jar lids in foil to prevent water from leaking in.
Letting the cheesecakes chill overnight really makes a difference. I’ve rushed serving them before, only to realize the texture was too soft. Patience pays off—honestly, they taste better the next day.
If your crust starts to burn, try reducing the oven temp by 10-15 degrees next time or cover the jars loosely with foil halfway through baking. Also, using room temperature ingredients helps everything blend seamlessly and bake evenly.
Variations & Adaptations
- Dietary: Use gluten-free graham crackers or almond flour crust for gluten-free options. Swap cream cheese for dairy-free alternatives like cashew-based spreads to make it vegan-friendly.
- Seasonal: Add fresh strawberries or raspberries between the crust and filling for a fruity surprise in spring or summer. In fall, a pinch of cinnamon or pumpkin spice in the batter adds cozy warmth.
- Flavor Twists: Mix in finely chopped white chocolate or swirl in raspberry jam before baking for an extra decadent touch. For a boozy kick, a splash of bourbon or coffee liqueur in the batter works wonders.
I once tried adding crushed peppermint candies on top during the holidays—it was an instant hit with my husband’s family. Feel free to get creative; these mini cheesecakes are forgiving and fun to customize.
Serving & Storage Suggestions
Serve these creamy mini red velvet cheesecakes chilled, straight from the fridge. The cool, rich filling with that tangy topping is pure bliss. They look gorgeous on a dessert table lined with fresh flowers or alongside a pot of coffee or tea.
Store leftovers in the fridge with lids tightly sealed for up to 4 days. If you want to keep them longer, these jars freeze beautifully—just thaw overnight in the fridge before serving. Reheating isn’t recommended, but letting them sit at room temperature for 10 minutes before eating softens the texture nicely.
Flavors develop and deepen after a day or two, so if you can resist, let the cheesecakes rest a bit. Trust me, it’s worth the wait.
Nutritional Information & Benefits
Each mini jar offers approximately 250-300 calories depending on exact portions, with a balance of protein and fat from cream cheese and eggs. Key ingredients like cream cheese provide calcium and vitamin A, while the buttermilk adds probiotics and tang.
This recipe is gluten-friendly when made with gluten-free crust options and can be adapted for low-sugar diets by swapping sweeteners. Just keep in mind the classic indulgence comes from that luscious creaminess and sweet red velvet flavor. It’s a treat, but one that feels a little more thoughtful and homemade than your average dessert.
Conclusion
Creamy mini red velvet cheesecakes in mason jars are an easy, charming dessert that’s sure to impress anyone lucky enough to get a jar. Whether you’re making them for a special occasion or just because, they bring that perfect balance of rich flavor, smooth texture, and nostalgic comfort. Customize with your favorite flavors and toppings to make it truly yours.
I love this recipe because it’s both fuss-free and fancy, and honestly, it makes me feel a little bit like a dessert magician. Give it a try, and don’t forget to share your creations or any fun twists you try out—I’d love to hear about them!
So, what are you waiting for? Grab those mason jars and get baking. Your sweet tooth will thank you!
Frequently Asked Questions
Can I make these mini cheesecakes ahead of time?
Absolutely! These cheesecakes taste even better after chilling overnight. You can prepare them a day or two in advance, just keep them refrigerated until serving.
Do I have to use mason jars?
While mason jars are perfect for portion control and presentation, you can use any small oven-safe ramekins or jars you have on hand.
How do I prevent cracks on the cheesecake surface?
Mix the batter gently without overbeating and consider baking in a water bath to maintain even moisture and temperature.
Can I freeze these cheesecakes?
Yes, they freeze well. Cover tightly and freeze for up to 2 months. Thaw overnight in the fridge before eating.
What’s the best way to get that classic red velvet color naturally?
You can use beet juice or powdered beetroot as a natural coloring alternative to red food dye. Just adjust the amount for desired intensity.
Pin This Recipe!
Creamy Mini Red Velvet Cheesecakes in Mason Jars
These creamy mini red velvet cheesecakes in mason jars are a quick, easy, and visually stunning dessert perfect for any occasion. They combine a smooth cream cheese filling with classic red velvet flavor and a crunchy graham cracker crust.
- Prep Time: 15 minutes
- Cook Time: 30 minutes
- Total Time: 4 hours 45 minutes
- Yield: 12 servings 1x
- Category: Dessert
- Cuisine: American
Ingredients
- 1 cup graham cracker crumbs (about 100g)
- 3 tablespoons unsalted butter, melted
- 2 tablespoons granulated sugar
- 16 oz (450g) cream cheese, softened
- ½ cup granulated sugar (100g)
- 2 large eggs, room temperature
- ¼ cup buttermilk (60ml)
- 2 tablespoons unsweetened cocoa powder (15g)
- 1 teaspoon vanilla extract
- 1 tablespoon red food coloring (or beet juice for a natural option)
- ¼ teaspoon salt
- ½ cup heavy cream (120ml), chilled
- 2 tablespoons powdered sugar (15g)
- ½ teaspoon vanilla extract
Instructions
- Preheat your oven to 325°F (160°C). In a bowl, combine the graham cracker crumbs, melted butter, and sugar. Stir until all crumbs are evenly coated and look like wet sand. Spoon about 1 tablespoon (15g) of the mixture into each mason jar, pressing down firmly to create an even crust layer. Set the jars aside on a baking sheet.
- Using an electric mixer, beat the softened cream cheese on medium speed until smooth and creamy, about 2 minutes. Add the sugar and beat until fully incorporated. Scrape down the sides occasionally to avoid lumps.
- Beat in the eggs one at a time, mixing well after each addition. Then add the buttermilk, vanilla extract, cocoa powder, red food coloring, and salt. Mix gently on low speed until everything is combined and the batter is smooth with a rich red color. Be careful not to overmix.
- Carefully spoon the cheesecake batter over the crust in each jar, filling to about ¾ full. Tap the jars gently on the counter to release any air bubbles and smooth the tops with a spatula.
- Place the baking sheet with jars in the oven. Bake for 25-30 minutes, or until the edges are set but the centers still have a slight jiggle. Optionally, use a water bath by placing the jars in a roasting pan filled halfway with hot water to prevent cracking and promote even baking.
- Remove the jars from the oven and let them cool to room temperature. Then cover and refrigerate for at least 4 hours, preferably overnight, to let the cheesecakes fully set and flavors meld.
- Before serving, whip the chilled heavy cream with powdered sugar and vanilla until soft peaks form. Pipe or spoon a generous dollop on top of each cheesecake jar.
- Garnish with a sprinkle of cocoa powder, chocolate shavings, or fresh raspberries if desired. Serve chilled and enjoy.
Notes
Use a water bath to prevent cracking and promote even baking. Chill cheesecakes overnight for best texture and flavor. Use almond flour for gluten-free crust or dairy-free alternatives for vegan adaptations. Avoid overmixing batter to prevent cracks. Mason jars can be replaced with any small oven-safe ramekins.
Nutrition
- Serving Size: 1 mini cheesecake in
- Calories: 275
- Sugar: 14
- Sodium: 210
- Fat: 20
- Saturated Fat: 12
- Carbohydrates: 18
- Fiber: 1
- Protein: 5
Keywords: red velvet cheesecake, mini cheesecakes, mason jar desserts, creamy cheesecake, easy dessert, portable dessert, crowd-pleaser, holiday dessert