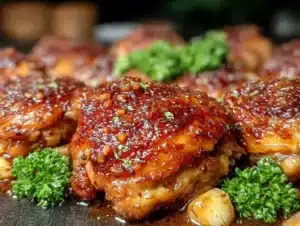
Let me tell you, the sizzle and aroma of this Easy 20-Minute Crispy Italian Chicken wafting from my skillet is enough to make anyone’s mouth water. The first time I cooked this recipe, I was rushing home after a long day, desperate for something quick but satisfying. As the golden crust formed and the garlicky, herb-infused scent filled the kitchen, I was instantly hooked—the kind of moment where you pause, take a deep breath, and just smile because you know you’re onto something truly special.
When I was knee-high to a grasshopper, my grandma used to make her famous Italian chicken, but it always took hours. Years ago, I stumbled upon this quick twist on her classic, and honestly, I wish I’d found it sooner! It’s dangerously easy and offers pure, nostalgic comfort without the wait.
My family couldn’t stop sneaking the crispy pieces off the pan while I was plating (and I can’t really blame them). This recipe has become a staple for busy weeknights, family dinners, and even last-minute guests. Perfect for brightening up your Pinterest dinner board, this crispy Italian chicken delivers flavor and crunch in record time. I’ve tested it more times than I can count—in the name of research, of course—and it’s always a crowd-pleaser.
Why You’ll Love This Recipe
Honestly, this Easy 20-Minute Crispy Italian Chicken isn’t just good—it’s the kind of recipe that makes you close your eyes after the first bite. Here’s why it stands out from the rest:
- Quick & Easy: Ready in under 20 minutes, it’s perfect for those chaotic weeknights or when you just want dinner fast.
- Simple Ingredients: No fancy grocery trips needed; you likely already have everything in your kitchen pantry.
- Perfect for Any Occasion: Whether it’s a cozy family dinner, a casual get-together, or a last-minute meal, this recipe fits the bill.
- Crowd-Pleaser: Kids and adults alike rave about the crispy, flavorful coating paired with juicy chicken inside.
- Unbelievably Delicious: The texture combo—a crispy crust with tender, juicy chicken—is just next-level comfort food.
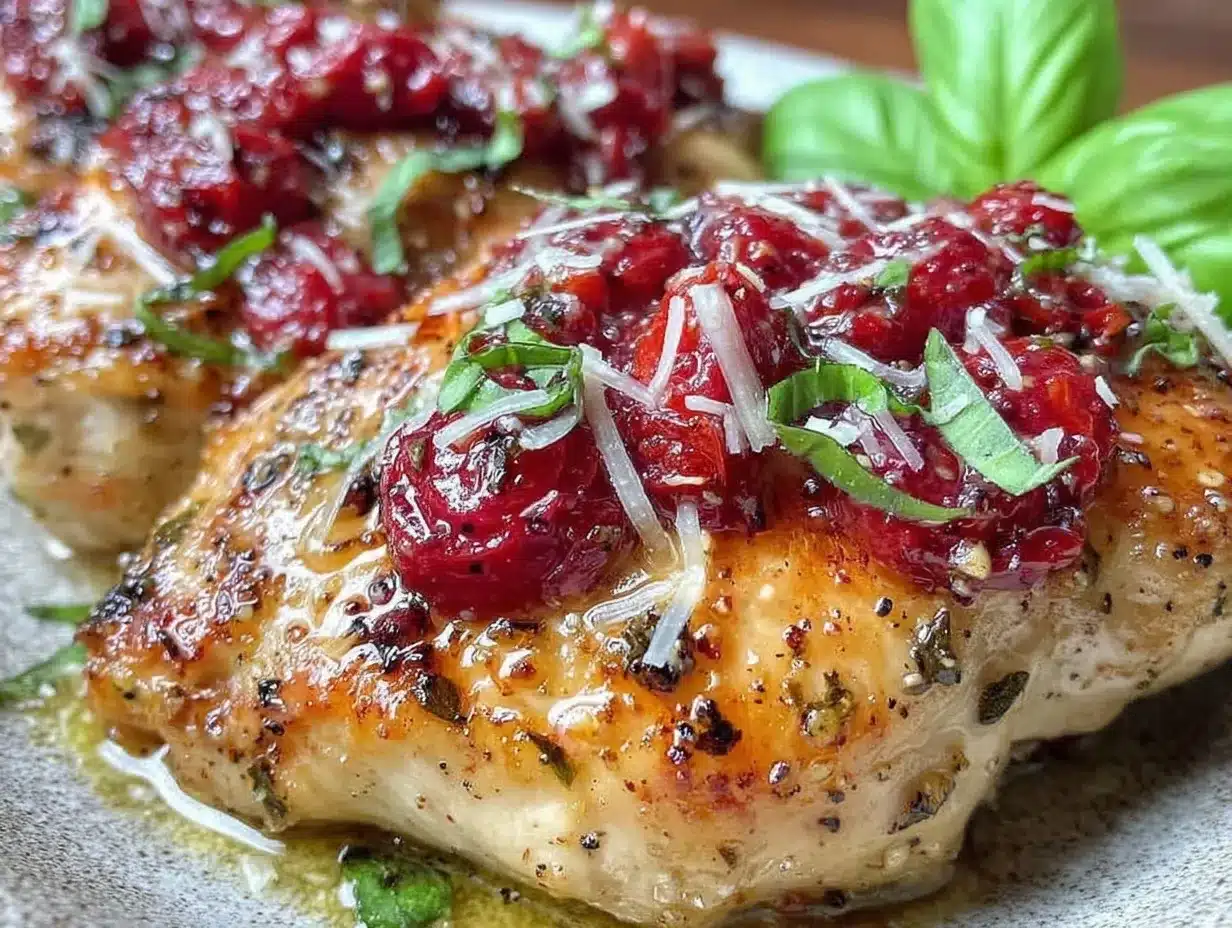
What makes this recipe different? The secret lies in the perfectly balanced Italian seasoning mix, combined with a crisp pan-fried technique that gives you that golden-brown crunch without deep frying. Plus, the garlic and herb flavors come through beautifully, making it feel like you’re dining in a little trattoria in Italy. It’s comfort food reimagined—faster, lighter, but with all the soul-soothing satisfaction.
Perfect for impressing guests without stress or turning a simple meal into something memorable, this recipe is a keeper.
What Ingredients You Will Need
This Easy 20-Minute Crispy Italian Chicken recipe uses simple, wholesome ingredients to deliver bold flavor and satisfying texture without the fuss. Most of these are pantry staples you probably already have, making it a breeze to whip up anytime.
- Chicken breasts: 2 large, boneless and skinless (about 1 lb or 450 g), pounded to even thickness for quick cooking
- All-purpose flour: ½ cup (60 g) for coating, helps the crust stick and crisp up nicely
- Italian seasoning: 1 tablespoon (I recommend McCormick’s blend for best herb balance)
- Garlic powder: 1 teaspoon (adds that subtle, savory depth)
- Parmesan cheese: ¼ cup (25 g), finely grated, for richness and that signature nutty flavor
- Salt and freshly ground black pepper: to taste
- Olive oil: 3 tablespoons (use extra virgin for best flavor, but light olive oil works if you want less intense taste)
- Butter: 1 tablespoon, unsalted and softened (adds richness and helps with browning)
- Fresh parsley: 2 tablespoons, chopped (optional, for garnish and fresh herb punch)
Substitution tips: If you want a gluten-free option, swap all-purpose flour with almond flour or a gluten-free blend. For a dairy-free version, skip the Parmesan or use a vegan cheese alternative. If fresh parsley isn’t on hand, dried Italian herbs sprinkled on top work just fine.
Equipment Needed
- Large skillet or frying pan: A non-stick or well-seasoned cast iron skillet works best for even heat and crispiness.
- Meat mallet or rolling pin: For pounding chicken breasts to an even thickness, ensuring they cook evenly.
- Shallow bowls or plates: For prepping the flour mixture and dredging the chicken.
- Tongs or spatula: To flip the chicken without piercing it, keeping juices locked in.
- Paper towels: For draining excess oil after cooking, so the chicken stays crispy, not greasy.
If you don’t have a meat mallet, no worries—you can use a heavy skillet bottom or even the side of a rolling pin wrapped in plastic wrap. For budget-friendly options, any sturdy stainless steel or cast iron pan will do the trick—no need for fancy gadgets here!
Preparation Method
- Prepare the chicken: Start by trimming any excess fat from the chicken breasts. Place one between two sheets of plastic wrap and gently pound with a meat mallet or rolling pin until about ½ inch (1.3 cm) thick and even. This helps the chicken cook quickly and evenly. Repeat with the other breast. (Approx. 5 minutes)
- Mix the coating: In a shallow bowl or plate, combine the all-purpose flour, Italian seasoning, garlic powder, grated Parmesan, salt (about ½ teaspoon), and freshly ground black pepper (about ¼ teaspoon). Mix well to distribute the seasonings evenly. (Approx. 2 minutes)
- Dredge the chicken: Lightly pat the chicken dry with paper towels. Coat each piece thoroughly in the seasoned flour mixture, pressing gently so the coating sticks well. Shake off any excess flour. Set aside on a clean plate. (Approx. 3 minutes)
- Heat the pan: Place your skillet over medium heat. Add the olive oil and butter, swirling to combine. The butter will melt and foam slightly—that’s your cue that the pan is ready. (Approx. 2 minutes)
- Cook the chicken: Carefully place the coated chicken breasts in the hot pan. Don’t overcrowd—cook in batches if needed. Fry for 4-5 minutes on the first side, until golden brown and crispy. You should hear a satisfying sizzle. Flip carefully with tongs and cook the other side for another 4-5 minutes. (Approx. 10 minutes)
- Check doneness: The chicken should reach an internal temperature of 165°F (74°C). If you don’t have a thermometer, cut into the thickest part—it should be white and juicy, no pink. If needed, reduce heat to low and cover for a minute or two to finish cooking without burning the crust.
- Rest and garnish: Transfer the chicken to a plate lined with paper towels to drain any excess oil. Let it rest for 3-5 minutes to lock in juices. Sprinkle chopped fresh parsley on top for a burst of color and flavor. (Approx. 3 minutes)
Pro tip: If your coating starts browning too quickly and the chicken isn’t cooked through yet, lower the heat—better to cook a bit slower than burn that lovely crust. Also, don’t flip the chicken too often; let it develop a good crust first for that irresistible crunch.
Cooking Tips & Techniques
Getting that perfect crispy crust on your Italian chicken is all about technique and timing. Here’s what I’ve learned over many attempts:
- Even thickness matters: Pounding the chicken ensures it cooks evenly without drying out on the edges or staying raw in the middle.
- Don’t skip the resting: Letting the chicken rest after cooking helps the juices redistribute and keeps the meat tender.
- Oil temperature is key: Too hot, and you’ll burn the coating before the chicken cooks; too cool, and it’ll be greasy and soggy. Medium heat is your sweet spot.
- Use a mix of butter and olive oil: Butter adds flavor and browns beautifully, while olive oil raises the smoke point and prevents burning.
- Avoid overcrowding: Crowding the pan causes steam, which ruins crispiness. Cook in batches if your pan isn’t big enough.
- Season the coating, not just the chicken: Mixing herbs, cheese, and spices into the flour layer boosts flavor in every crispy bite.
- Turn only once: Flipping just once gives the crust time to form and stay intact.
I remember once trying to rush this and flipping the chicken repeatedly—big mistake! The crust fell apart, and the texture was all wrong. Slow and steady wins the crispy race here.
Variations & Adaptations
This recipe is super adaptable, so feel free to make it your own. Here are a few ways I’ve played around with it:
- Spicy Italian Chicken: Add ½ teaspoon red pepper flakes to the flour mixture for a gentle kick that wakes up your taste buds without overwhelming.
- Gluten-Free Version: Swap all-purpose flour with almond flour or a gluten-free blend. The texture is slightly different but still wonderfully crispy.
- Lemon-Herb Twist: Add zest of one lemon and a tablespoon of fresh chopped basil into the coating for a bright, fresh flavor perfect for spring and summer dinners.
- Oven-Baked Option: For a lighter take, bake the coated chicken breasts at 425°F (220°C) for 15-18 minutes, flipping halfway through. You’ll still get a nice crust, just a tad less crunchy than pan-fried.
- Dairy-Free Adaptation: Skip the Parmesan and butter; use olive oil only and add extra Italian herbs to keep flavor vibrant.
The lemon-herb version is one I’ve made on a sunny weekend, and it’s a refreshing change that my whole family enjoyed. Try mixing and matching to find your favorite combo!
Serving & Storage Suggestions
This Easy 20-Minute Crispy Italian Chicken is best served hot and fresh from the pan, but it also holds up nicely if you need to prep ahead. Serve it with a simple side salad, garlic bread, or roasted veggies for a balanced meal that’s both hearty and bright.
Leftovers can be stored in an airtight container in the refrigerator for up to 3 days. To keep that crust crispy when reheating, pop the chicken under a hot broiler or in a preheated skillet for a few minutes instead of microwaving, which tends to soften the coating.
For freezing, wrap each piece tightly in foil and place in a freezer-safe bag for up to 2 months. Thaw overnight in the fridge and re-crisp in a hot pan before serving.
Over time, the flavors meld nicely, especially if you add a squeeze of fresh lemon or sprinkle some extra Parmesan right before serving. It’s a great recipe to prepare in advance for quick weeknight dinners or meal prep lunches.
Nutritional Information & Benefits
Each serving of this Easy 20-Minute Crispy Italian Chicken (about one chicken breast) contains approximately:
| Calories | Protein | Fat | Carbohydrates |
|---|---|---|---|
| 320 kcal | 38 g | 15 g | 8 g |
The chicken breasts provide a lean source of high-quality protein, essential for muscle repair and energy. Olive oil and butter contribute healthy fats that support heart health and enhance flavor. Parmesan cheese adds calcium and a savory depth, while the herbs offer antioxidants and a fresh, natural taste.
This recipe fits well into low-carb and gluten-free diets with simple substitutions, and it’s free from added sugars. Just watch the salt if you’re sodium-conscious.
From a wellness perspective, this recipe feels like a satisfying meal without being heavy or greasy, helping you enjoy comfort food with fewer regrets.
Conclusion
This Easy 20-Minute Crispy Italian Chicken is a winner for anyone who values quick, tasty meals without a long list of ingredients or complicated steps. Its crispy, flavorful crust paired with juicy chicken makes for a dinner that feels special yet is totally doable on busy nights.
Feel free to tweak the herbs, try different variations, or pair it with your favorite sides to make it truly your own. I love this recipe because it brings a little Italian sunshine into my kitchen in no time at all.
If you give this recipe a try, please leave a comment or share how you made it your own—I’d love to hear your twists and tips! Here’s to many more quick, crispy, and absolutely delicious dinners ahead.
FAQs
Can I use chicken thighs instead of breasts?
Yes! Boneless, skinless thighs work well and stay juicy. Just adjust cooking time slightly, as thighs may take a minute or two longer to cook through.
How do I keep the coating from falling off?
Make sure to pat the chicken dry before dredging and press the flour mixture firmly onto the chicken. Avoid flipping too often during cooking to let the crust set.
Is this recipe suitable for air frying?
Absolutely! Coat the chicken as directed and air fry at 400°F (200°C) for about 10-12 minutes, flipping halfway, for a crispy, lower-oil version.
Can I prepare this recipe ahead of time?
You can coat the chicken and store it in the fridge for up to 4 hours before cooking. For best results, cook fresh, but this little prep step saves time on busy days.
What sides pair well with this crispy Italian chicken?
Think simple: a crisp green salad, roasted garlic veggies, creamy mashed potatoes, or even a light pasta tossed in olive oil and herbs. Breadsticks or garlic bread are also fantastic companions!
Pin This Recipe!
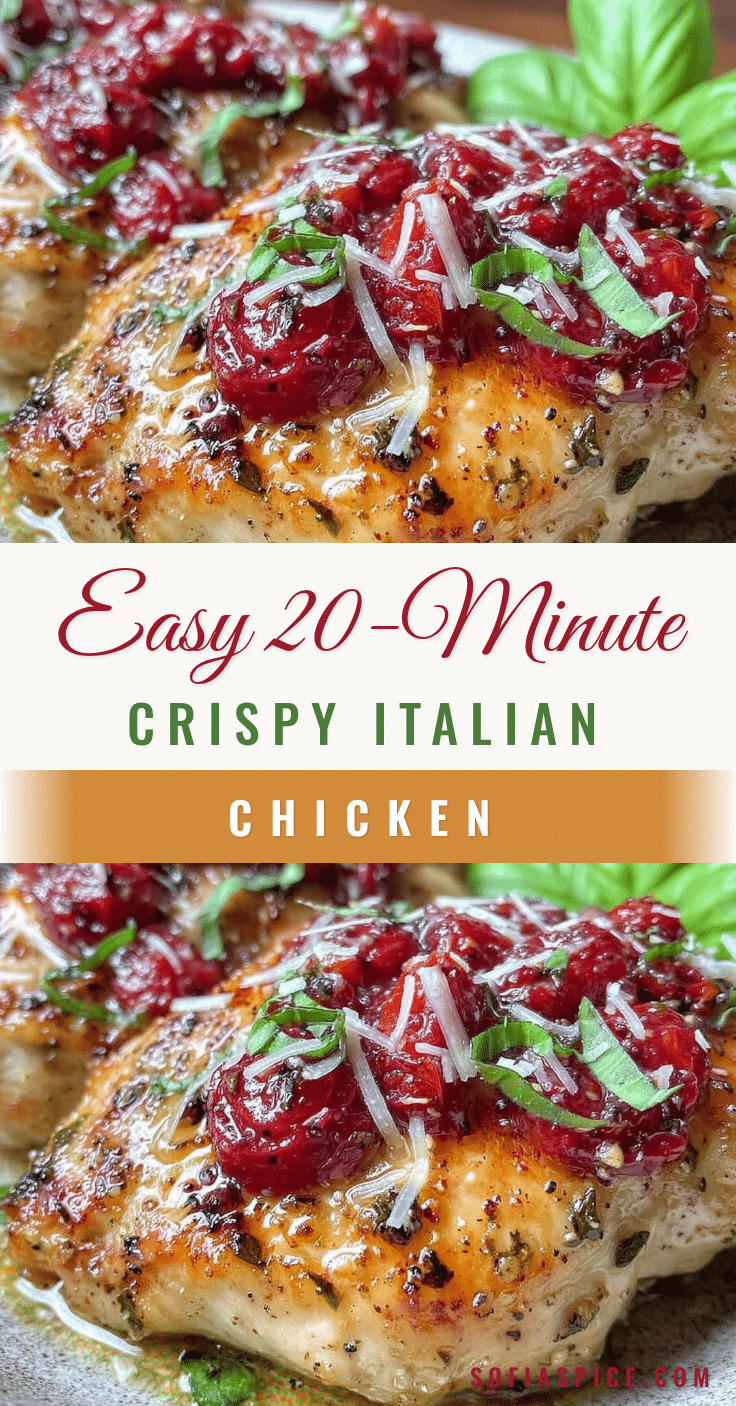
Easy 20-Minute Crispy Italian Chicken

A quick and easy crispy Italian chicken recipe ready in under 20 minutes, featuring a flavorful herb-infused crust and juicy chicken breasts perfect for busy weeknights.
- Prep Time: 10 minutes
- Cook Time: 10 minutes
- Total Time: 20 minutes
- Yield: 2 servings 1x
- Category: Main Course
- Cuisine: Italian
Ingredients
- 2 large boneless, skinless chicken breasts (about 1 lb or 450 g), pounded to even thickness
- ½ cup (60 g) all-purpose flour
- 1 tablespoon Italian seasoning
- 1 teaspoon garlic powder
- ¼ cup (25 g) finely grated Parmesan cheese
- Salt to taste (about ½ teaspoon)
- Freshly ground black pepper to taste (about ¼ teaspoon)
- 3 tablespoons olive oil (extra virgin preferred)
- 1 tablespoon unsalted butter, softened
- 2 tablespoons fresh parsley, chopped (optional, for garnish)
Instructions
- Trim any excess fat from the chicken breasts. Place one breast between two sheets of plastic wrap and gently pound with a meat mallet or rolling pin until about ½ inch (1.3 cm) thick and even. Repeat with the other breast. (Approx. 5 minutes)
- In a shallow bowl or plate, combine the all-purpose flour, Italian seasoning, garlic powder, grated Parmesan, salt, and freshly ground black pepper. Mix well to distribute the seasonings evenly. (Approx. 2 minutes)
- Lightly pat the chicken dry with paper towels. Coat each piece thoroughly in the seasoned flour mixture, pressing gently so the coating sticks well. Shake off any excess flour. Set aside on a clean plate. (Approx. 3 minutes)
- Place your skillet over medium heat. Add the olive oil and butter, swirling to combine. The butter will melt and foam slightly—that’s your cue that the pan is ready. (Approx. 2 minutes)
- Carefully place the coated chicken breasts in the hot pan. Don’t overcrowd—cook in batches if needed. Fry for 4-5 minutes on the first side, until golden brown and crispy. Flip carefully with tongs and cook the other side for another 4-5 minutes. (Approx. 10 minutes)
- Check doneness by ensuring the chicken reaches an internal temperature of 165°F (74°C). If you don’t have a thermometer, cut into the thickest part—it should be white and juicy, no pink. If needed, reduce heat to low and cover for a minute or two to finish cooking without burning the crust.
- Transfer the chicken to a plate lined with paper towels to drain any excess oil. Let it rest for 3-5 minutes to lock in juices. Sprinkle chopped fresh parsley on top for garnish. (Approx. 3 minutes)
Notes
If coating browns too quickly before chicken is cooked through, lower the heat. Avoid flipping chicken too often to maintain crust. For gluten-free, substitute all-purpose flour with almond flour or gluten-free blend. For dairy-free, omit Parmesan and butter or use vegan alternatives. Chicken can be cooked in batches to avoid overcrowding the pan.
Nutrition
- Serving Size: 1 chicken breast
- Calories: 320
- Sodium: 400
- Fat: 15
- Saturated Fat: 4
- Carbohydrates: 8
- Fiber: 1
- Protein: 38
Keywords: crispy Italian chicken, quick chicken recipe, pan-fried chicken, easy dinner, Italian seasoning chicken, weeknight dinner