Let me tell you, the scent of golden, crispy chicken katsu sizzling in the pan is enough to make anyone’s mouth water. The first time I baked these up, I was instantly hooked—the kind of moment where you pause, take a deep breath, and just smile because you know you’re onto something truly special. When I was knee-high to a grasshopper, my grandma used to make all sorts of Japanese comfort foods, but chicken katsu was always the star of the show. I stumbled upon this quick homemade version on a rainy weekend, trying to whip up something tasty without the fuss of a long recipe. Honestly, I wish I’d discovered this recipe years ago—it’s dangerously easy and delivers pure, nostalgic comfort every single time.
My family couldn’t stop sneaking these crispy chicken cutlets off the cooling rack (and I can’t really blame them). Let’s face it, who wouldn’t love a crunchy exterior with juicy, tender chicken inside? This crispy chicken katsu recipe is perfect for busy weeknights, impromptu dinners, or even impressing guests without breaking a sweat. You know what? It’s become a staple for family gatherings, gifting, and those moments when you just want something that feels like a warm hug on a plate. You’re definitely going to want to bookmark this one.
Why You’ll Love This Recipe
Coming from someone who’s tested this recipe multiple times (in the name of research, of course), here’s why this crispy chicken katsu is a keeper:
- Quick & Easy: Comes together in under 30 minutes, making it perfect for those hectic days when you still want something homemade.
- Simple Ingredients: No fancy grocery runs needed; you likely have everything in your pantry and fridge already.
- Perfect for Any Occasion: Whether it’s a cozy dinner, casual potluck, or a quick lunch, this recipe hits the spot every time.
- Crowd-Pleaser: Always gets rave reviews from kids and adults alike, thanks to its crispy texture and juicy interior.
- Unbelievably Delicious: The flavor combo of crunchy panko, juicy chicken, and savory seasoning is next-level comfort food.
What makes this recipe stand apart? It’s all about the technique—using panko breadcrumbs gives that signature crispiness, and a quick but thorough dredging method seals in the juices. Plus, I always recommend using fresh chicken breasts for the best texture. This isn’t just another fried chicken recipe; it’s your best homemade chicken katsu, fast and fuss-free. Honestly, it’s the kind of dish that makes you close your eyes after the first bite and say, “Yep, this is it.”
What Ingredients You Will Need
This recipe uses simple, wholesome ingredients to deliver bold flavor and satisfying texture without the fuss. Most of these are pantry staples, and if you do need to swap anything out, I’ve got you covered with some easy substitutions below.
- Chicken breasts: 2 large, boneless and skinless (about 1 pound / 450 grams), pounded to an even thickness for quick, even cooking.
- Salt and pepper: To season the chicken.
- All-purpose flour: ½ cup (60 grams), for dredging – this helps the egg wash stick better.
- Large eggs: 2, beaten – acts as the glue for the breadcrumbs.
- Panko breadcrumbs: 1 cup (100 grams), Japanese-style for maximum crunch. I prefer Kikkoman or any fresh panko you find at your local Asian market.
- Vegetable oil: For frying – about ¼ inch depth in the pan (use canola or sunflower oil as alternatives).
- Optional: Tonkatsu sauce: For serving, but you can also use a simple mix of ketchup and Worcestershire sauce if you’re in a pinch.
Substitution tips: Use almond flour or gluten-free flour blend instead of all-purpose for gluten-free option. Swap regular eggs with flax eggs (1 tablespoon ground flaxseed + 3 tablespoons water per egg) for vegan-friendly adaptation, but frying crispness may vary. For dairy-free, avoid butter and stick with neutral oil.
Equipment Needed
- Heavy skillet or frying pan: A 10-inch (25 cm) skillet works great for even heat distribution and frying.
- Meat mallet or rolling pin: To pound the chicken breasts evenly — if you don’t have one, a heavy-bottomed pan works fine.
- Shallow bowls or plates: For flour, beaten eggs, and panko breadcrumbs – makes the dredging process seamless.
- Tongs or slotted spatula: For flipping the chicken carefully without losing that crispy crust.
- Cooling rack: To rest the fried chicken and keep it crisp (optional but recommended).
If you’re on a budget, a basic nonstick skillet is fine for this recipe. Just watch your oil temperature carefully to avoid sogginess. Also, keeping a kitchen thermometer handy can help maintain the perfect frying heat around 350°F (175°C) for that golden crust.
Preparation Method
- Prep the chicken: Place chicken breasts between two sheets of plastic wrap or parchment paper. Use a meat mallet or rolling pin to pound them to an even thickness of about ½ inch (1.3 cm). This ensures they cook evenly and stay juicy. Season both sides with salt and pepper. (5 minutes)
- Set up dredging stations: In three shallow bowls, place the flour, beaten eggs, and panko breadcrumbs separately. The flour helps the egg stick, and the panko delivers the signature crispy texture. (2 minutes)
- Dredge the chicken: Coat each chicken breast lightly with flour, shaking off any excess. Then dip into the beaten eggs, making sure it’s fully coated. Finally, press into the panko breadcrumbs, covering thoroughly. For best results, press the panko in firmly, but don’t pack it too tight or it won’t crisp up properly. (5 minutes)
- Heat the oil: Pour vegetable oil into the skillet to a depth of about ¼ inch (6 mm). Heat over medium heat until it reaches around 350°F (175°C) or until a few breadcrumbs sizzle immediately when dropped in. (5 minutes)
- Fry the chicken: Carefully place the breaded chicken breasts into the hot oil. Fry for about 3-4 minutes on each side until golden brown and crispy. Don’t overcrowd the pan—work in batches if needed. Use tongs to flip gently, avoiding crumbs falling off. (8 minutes)
- Drain and rest: Transfer the fried chicken to a cooling rack set over a baking sheet or paper towels to drain excess oil and keep it crisp. Let rest for a few minutes to let the juices redistribute. (5 minutes)
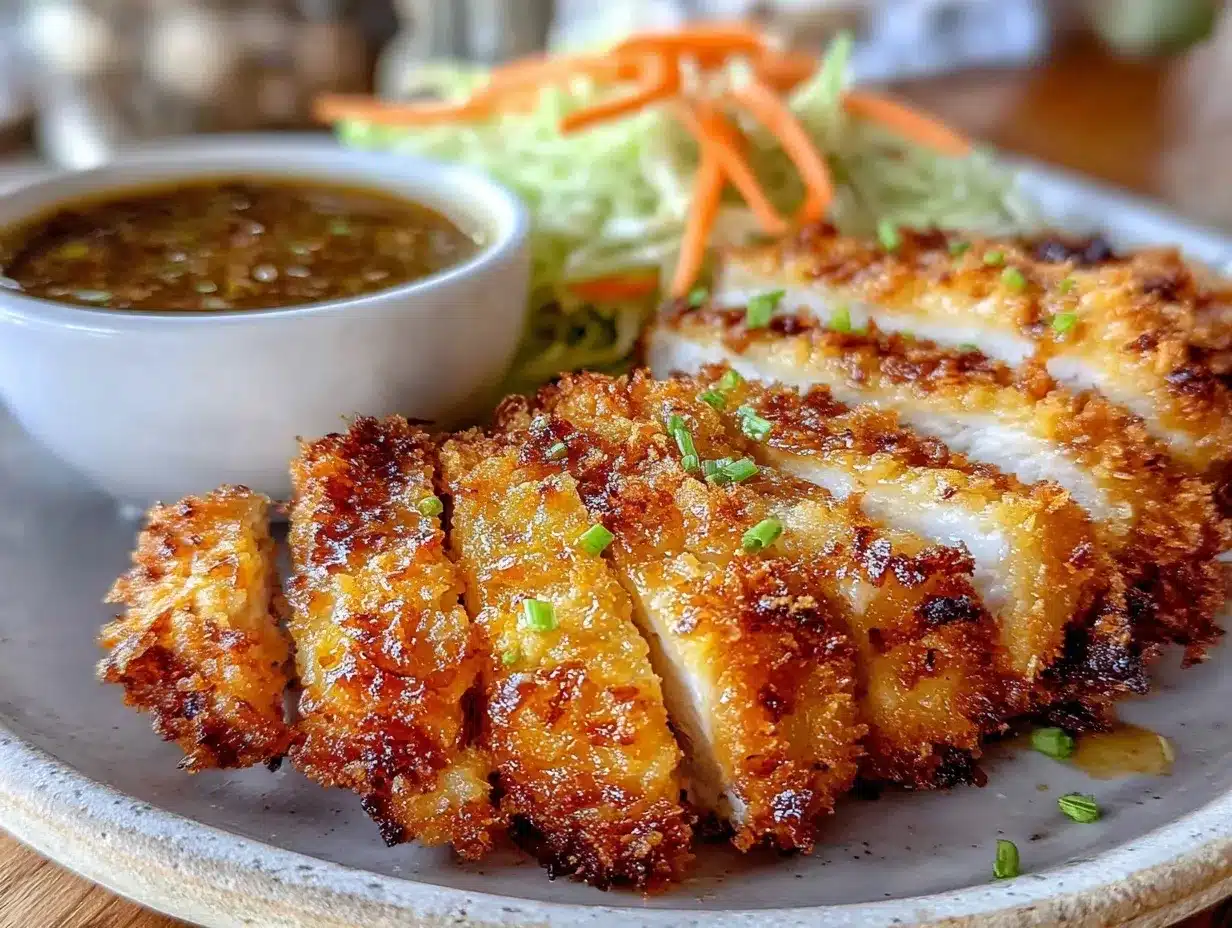
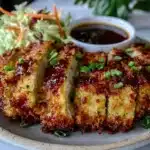
- Serve: Slice into strips and serve with tonkatsu sauce or your favorite dipping sauce. Perfect paired with steamed rice, shredded cabbage, or a simple salad. (1 minute)
Pro tip: If the chicken starts browning too fast, reduce the heat slightly. If it’s too slow and soggy, increase heat a bit. The smell will cue you in—it should smell nutty and inviting, not burnt.
Cooking Tips & Techniques
Getting that perfect crispy chicken katsu is all about controlling the oil temperature and prepping the chicken right. I learned the hard way that too low heat means soggy breading, while too high burns the crust before the chicken cooks through. Using panko breadcrumbs makes a huge difference—they crisp up way better than regular crumbs.
Another tip? Don’t skip pounding the chicken breasts to an even thickness. It not only helps with cooking evenly but makes the texture pleasantly tender. Also, press the panko firmly but not too hard or the crust will be dense instead of light and crunchy.
Multitasking helps here—while the chicken fries, prep your side dishes or sauces so everything comes together smoothly. And remember, resting the chicken on a wire rack instead of paper towels keeps the crust from steaming and getting soggy. I’ve tried both and trust me, the rack wins every time.
Variations & Adaptations
- Spicy Chicken Katsu: Mix a teaspoon of cayenne or chili powder into your panko for a kick of heat.
- Gluten-Free Option: Use almond flour or gluten-free panko breadcrumbs to keep the texture close to original without gluten.
- Baked Version: For a lighter take, bake the breaded chicken on a wire rack at 425°F (220°C) for about 20 minutes, flipping halfway through. It won’t be quite as crispy but still delicious.
- Seasonal Twists: Swap panko for crushed nuts like almonds or pistachios for a nutty crunch, or add sesame seeds to the breadcrumbs for an extra layer of flavor.
- Personal Favorite: I once added a splash of soy sauce and grated ginger to the egg wash, which gave a subtle umami boost that my family loved.
Serving & Storage Suggestions
This crispy chicken katsu is best served hot, right off the pan, with your favorite dipping sauce on the side. It pairs beautifully with steamed white rice, a crisp cabbage salad, or even a simple bowl of miso soup for a quick homemade Japanese-inspired meal. For drinks, a cold iced green tea or light lager complements the flavors nicely.
Store leftovers in an airtight container in the fridge for up to 3 days. To reheat, pop the chicken in a preheated oven at 375°F (190°C) for about 10 minutes to bring back that crunch—microwaving tends to make it soggy, so avoid if you can.
Flavors meld nicely if you prep the chicken a little ahead, but crispiness is definitely best fresh. If you want to meal prep, keep the breading and frying separate, and combine just before serving.
Nutritional Information & Benefits
This crispy chicken katsu recipe offers a satisfying protein boost thanks to the lean chicken breasts. Depending on oil absorption, a typical serving (one chicken breast) contains roughly 350-400 calories, with about 30 grams of protein. Using panko breadcrumbs keeps it lighter than traditional thick breading.
Chicken is a great source of B vitamins and minerals like phosphorus and selenium. Plus, cooking at home means you control salt and oil amounts—making this a healthier alternative to takeout fried chicken dishes. For gluten-free or low-carb diets, simple substitutions keep this recipe flexible and accessible.
Conclusion
In the end, this crispy chicken katsu recipe is worth trying because it’s quick, easy, and downright delicious—perfect for anyone who loves comfort food without the hassle. Feel free to customize the seasoning or cooking method to fit your taste and lifestyle. I love this recipe because it always brings smiles to the table, no matter the occasion. Now, I’d love to hear from you—drop a comment below with your own twists or questions, and don’t forget to share this with your fellow food lovers. Happy cooking and enjoy your crispy homemade meals!
FAQs About Crispy Chicken Katsu
How do I keep my chicken katsu crispy after frying?
Place the fried chicken on a wire rack instead of paper towels to drain excess oil and prevent sogginess. Reheat in the oven to restore crispiness rather than using a microwave.
Can I use chicken thighs instead of breasts?
Yes, boneless skinless thighs work well and stay juicy, though they may need slightly longer cooking time and can have a richer flavor.
What’s the best oil for frying chicken katsu?
Use neutral oils with high smoke points like vegetable, canola, or sunflower oil to get a nice crispy crust without burning.
Is it possible to bake chicken katsu instead of frying?
Absolutely! Bake on a wire rack at 425°F (220°C) for about 20 minutes, flipping halfway. It’s less oily but still tasty and crisp.
How do I make gluten-free chicken katsu?
Swap regular flour and panko breadcrumbs for gluten-free alternatives like almond flour and gluten-free panko. Just watch the frying time as it might vary slightly.
Pin This Recipe!
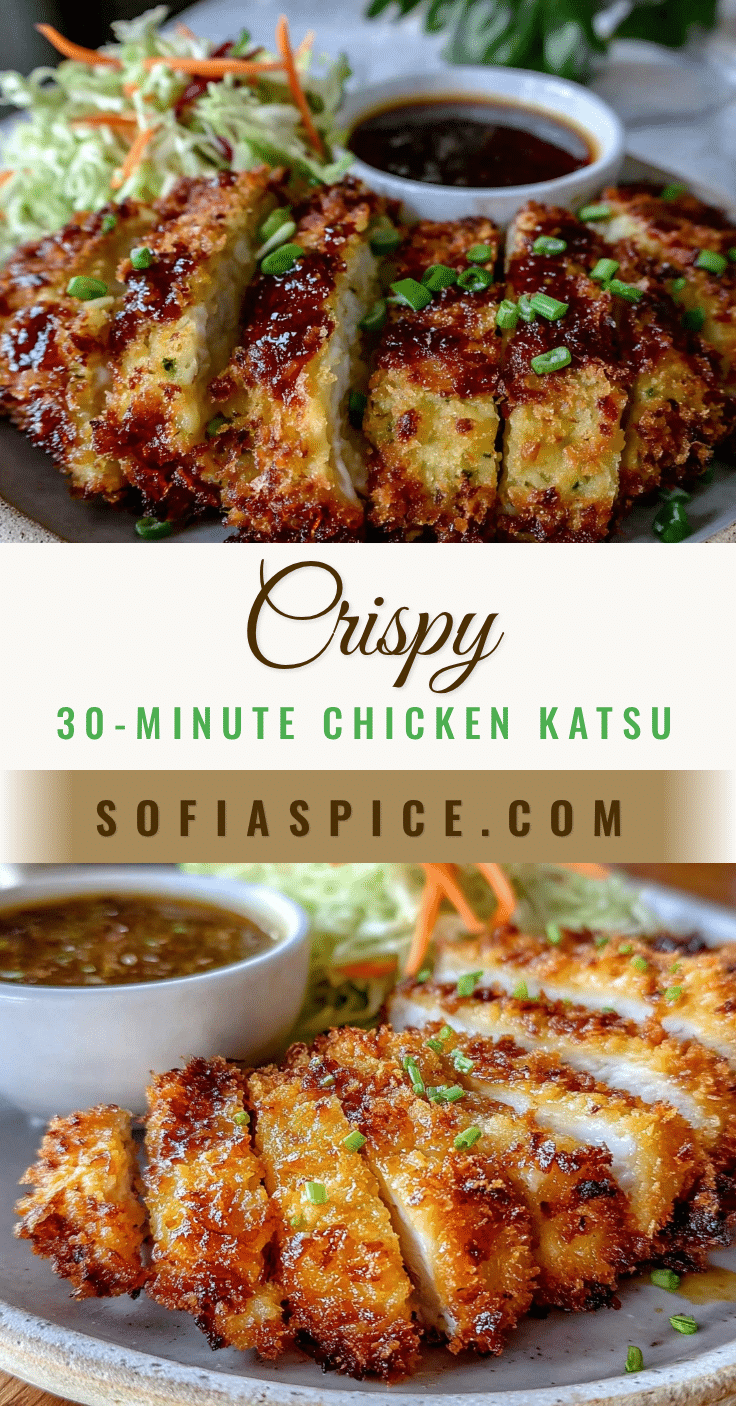
Crispy Chicken Katsu
A quick and easy homemade chicken katsu recipe featuring crispy panko breading and juicy chicken breasts, perfect for weeknights or gatherings.
- Prep Time: 12 minutes
- Cook Time: 13 minutes
- Total Time: 25 minutes
- Yield: 2 servings 1x
- Category: Main Course
- Cuisine: Japanese
Ingredients
- 2 large boneless, skinless chicken breasts (about 1 pound / 450 grams), pounded to even thickness
- Salt and pepper, to season
- ½ cup (60 grams) all-purpose flour
- 2 large eggs, beaten
- 1 cup (100 grams) panko breadcrumbs
- Vegetable oil for frying (about ¼ inch depth in pan)
- Optional: Tonkatsu sauce or a mix of ketchup and Worcestershire sauce for serving
Instructions
- Place chicken breasts between two sheets of plastic wrap or parchment paper. Pound to an even thickness of about ½ inch (1.3 cm). Season both sides with salt and pepper. (5 minutes)
- Set up three shallow bowls with flour, beaten eggs, and panko breadcrumbs separately. (2 minutes)
- Lightly coat each chicken breast with flour, shaking off excess. Dip into beaten eggs, then press into panko breadcrumbs, covering thoroughly but not packing too tight. (5 minutes)
- Pour vegetable oil into a skillet to about ¼ inch (6 mm) depth. Heat over medium heat until oil reaches about 350°F (175°C) or breadcrumbs sizzle immediately when dropped in. (5 minutes)
- Carefully place breaded chicken breasts into hot oil. Fry 3-4 minutes per side until golden brown and crispy. Avoid overcrowding; fry in batches if needed. Use tongs to flip gently. (8 minutes)
- Transfer fried chicken to a cooling rack over a baking sheet or paper towels to drain excess oil and keep crisp. Let rest for a few minutes. (5 minutes)
- Slice into strips and serve with tonkatsu sauce or preferred dipping sauce. (1 minute)
Notes
Maintain oil temperature around 350°F (175°C) to avoid soggy or burnt crust. Use a cooling rack to keep chicken crispy after frying. For gluten-free, substitute flour and panko with almond flour and gluten-free panko. Baking option: bake at 425°F (220°C) for 20 minutes, flipping halfway.
Nutrition
- Serving Size: 1 chicken breast
- Calories: 375
- Sugar: 1
- Sodium: 400
- Fat: 18
- Saturated Fat: 3
- Carbohydrates: 20
- Fiber: 1
- Protein: 30
Keywords: chicken katsu, crispy chicken, panko chicken, Japanese comfort food, quick chicken recipe, fried chicken, homemade katsu